Sharp MX-2300G Handleiding
Lees hieronder de 📖 handleiding in het Nederlandse voor Sharp MX-2300G (127 pagina's) in de categorie Printer. Deze handleiding was nuttig voor 76 personen en werd door 2 gebruikers gemiddeld met 4.5 sterren beoordeeld
Pagina 1/127
System Settings Guide
MX-3500N
MX-3501N
MX-4500N
MX-4501N
MX-2300G
MX-2300N
MX-2700G
MX-2700N
MODEL:

1
Table of Contents
About This Manual . . . . . . . . . . . . . . . . . . . . . . . . . . . 2
System Settings . . . . . . . . . . . . . . . . . . . . . . . . . . . . . 4
1SYSTEM SETTINGS (GENERAL)
Accessing the System Settings (General) . . . . . . . . 5
System Settings (General) List . . . . . . . . . . . . . . . . . 9
Total Count . . . . . . . . . . . . . . . . . . . . . . . . . . . . . . . . 15
Default Settings . . . . . . . . . . . . . . . . . . . . . . . . . . . . . 17
List Print (User) . . . . . . . . . . . . . . . . . . . . . . . . . . . . . 21
Paper Tray Settings . . . . . . . . . . . . . . . . . . . . . . . . . 25
Address Control . . . . . . . . . . . . . . . . . . . . . . . . . . . . 31
Fax Data Receive/Forward . . . . . . . . . . . . . . . . . . . . 45
Printer Condition Settings . . . . . . . . . . . . . . . . . . . . 47
Document Filing Control . . . . . . . . . . . . . . . . . . . . . 53
USB-Device Check . . . . . . . . . . . . . . . . . . . . . . . . . . 58
User Control . . . . . . . . . . . . . . . . . . . . . . . . . . . . . . . 59
2SYSTEM SETTINGS
(ADMINISTRATOR)
Accessing the System Settings (Administrator) . . 61
System Settings (Administrator) List . . . . . . . . . . . 65
User Control . . . . . . . . . . . . . . . . . . . . . . . . . . . . . . . 81
Energy Save. . . . . . . . . . . . . . . . . . . . . . . . . . . . . . . . 90
Operation Settings . . . . . . . . . . . . . . . . . . . . . . . . . . 91
Device Control. . . . . . . . . . . . . . . . . . . . . . . . . . . . . . 94
Copy Settings . . . . . . . . . . . . . . . . . . . . . . . . . . . . . . 97
Network Settings . . . . . . . . . . . . . . . . . . . . . . . . . . . 101
Printer Settings . . . . . . . . . . . . . . . . . . . . . . . . . . . . 102
Image Send Settings . . . . . . . . . . . . . . . . . . . . . . . . 105
Document Filing Settings . . . . . . . . . . . . . . . . . . . . 115
List Print (Administrator) . . . . . . . . . . . . . . . . . . . . 117
Security Settings. . . . . . . . . . . . . . . . . . . . . . . . . . . 118
Enable/Disable Settings . . . . . . . . . . . . . . . . . . . . . 119
Change Administrator Password . . . . . . . . . . . . . 123
Product Key . . . . . . . . . . . . . . . . . . . . . . . . . . . . . . . 124
Storing/Calling of System Settings . . . . . . . . . . . . 125

2
About This Manual
Please note
• Where this manual shows the "MX-2300/2700 series" or the "MX-3500/4500 series", the following models are indicated:
MX-2300/2700 series: MX-2300G, MX-2300N, MX-2700G, MX-2700N
MX-3500/4500 series: MX-3500N, MX-3501N, MX-4500N, MX-4501N
• This manual contains references to the fax function. However, please note that the fax function is not available in some
countries and regions.
• Considerable care has been taken in preparing this manual. If you have any comments or concerns about the manual, please
contact your dealer or nearest authorised service representative.
• This product has undergone strict quality control and inspection procedures. In the unlikely event that a defect or other problem
is discovered, please contact your dealer or nearest authorised service representative.
• Aside from instances provided for by law, SHARP is not responsible for failures occurring during the use of the product or its
options, or failures due to incorrect operation of the product and its opt s due ions, or other failures, or for any damage that occur
to use of the product.
Warning
• Reproduction, adaptation or translation of the contents of the manual without prior written permission is prohibited, except as
allowed under copyright laws.
• All information in this manual is subject to change without notice.
Illustrations and the operation panel and touch panel shown in this manual
The peripheral devices are generally optional, however, some models include certain peripheral devices as standard equipment.
The explanations in this manual assume that a right tray and stand/2 x 500 sheet paper drawer are installed on the MX-2700N
(equipped standard with an automatic document feeder).
To further explain certain functions and uses, some explanations assume that additional peripheral devices are installed.
Manuals Provided with the Machine
Printed manuals and manuals stored in PDF format on the machine's hard drive are provided with the machine. When
using the machine, read the appropriate manual for the feature you are using.
Printed manuals
The display screens, messages, and key names shown in the manual may differ from those on the actual machine
due to product improvements and modifications.
Manual name Contents
Safety Guide This manual contains instructions for using the machine safely and lists the specifications of the machine
and its peripheral devices.
Software Setup
Guide
This manual explains how to install the software and configure settings to use the machine as a printer or
scanner.
Quick Start Guide
This manual provides easy-to-understand explanations of all the functions of the machine in a single
volume.
Detailed explanations of each of the functions can be found in the manuals in PDF format.
Troubleshooting
This manual explains how to remove paper misfeeds and provides answers to frequently asked questions
regarding the operation of the machine in each mode. Refer to this manual when you have difficulty using
the machine.
Facsimile Quick
Reference Guide
This manual explains the basic procedures for using the fax function of the machine, and provides an
overview of the features of the fax function, troubleshooting procedures, and specifications.
For detailed information on using the fax function and the system settings for fax, see the "Facsimile
Guide" in PDF format.

3
Operation manuals in PDF format
The manuals in PDF format provide detailed explanations of the procedures for using the machine in each mode. To
view the PDF manuals, download them from the hard drive in the machine. The procedure for downloading the manuals
is explained in "How to download the manuals in PDF format" in the Quick Start Guide.
Icons used in the manuals
The icons in the manuals indicate the following types of information:
Manual name Contents
User's Guide This manual provides information, such as basic operation procedures, how to load paper, and machine
maintenance.
Copier Guide This manual provides detailed explanations of the procedures for using the copy function.
Printer Guide This manual provides detailed explanations of the procedures for using the printer function.
Facsimile Guide This manual provides detailed explanations of the procedures for using the fax function and the "System
Settings" that are related to fax.
Scanner Guide This manual provides detailed explanations of the procedures for using the scanner function and the
Internet fax function.
Document Filing
Guide
This manual provides detailed explanations of the procedures for using the document filing function. The
document filing function allows you to save the document data of a copy or fax job, or the data of a print
job, as a file on the machine's hard drive. The file can be called up as needed.
System Settings
Guide
(This manual)
This manual explains the "System Settings", which are used to configure a variety of parameters to suit
the aims and the needs of your workplace. Current settings can be displayed or printed out from the
"System Settings".
This alerts you to a situation where there is a risk of machine damage or failure.
This provides a supplemental explanation of a function or procedure.
This explains how to cancel or correct an operation.

4
System Settings
The system settings are used to configure a variety of parameters to suit the aims and the needs of your workplace. The
system settings are also used to display or print out the current settings and status of the machine. The system settings
allow you to make the machine easier to use.
The system settings consist of settings for use by general users, and settings that can only be configured by an
administrator of the machine. These two groups of settings are distinguished in this manual as follows.
System Settings (General) System Settings (Administrator) *Login Required
System settings that can be configured by general users
(including the administrator). For example, the following
settings can be configured.
• Date and time settings
• Paper tray settings (paper size and paper type)
• Storing destinations for the fax and scanner functions.
• Settings related to the printer function
• Storing, editing, and deleting folders for the document filing
function.
• Displaying the number of pages printed, scanned, and
faxed.
For more information, see "1. SYSTEM SETTINGS
(GENERAL)" (page 5).
System settings that can be configured by the administrator.
To configure these settings, login as an administrator is
required. For example, the following settings can be
configured.
• Storing users of the machine.
• Energy save settings
• Settings related to the operation panel
• Settings for peripheral devices installed on the machine.
• Settings related to the copy function
• Network connection settings
• Transmission/reception settings for faxes and scanned
images
• Advanced settings for the document filing function
For more information, see "2. SYSTEM SETTINGS
(ADMINISTRATOR)" (page 61).
Settings for general users
Settings for administrators
•Administrator password
To maintain security, the administrator of the machine should promptly change the password after the machine is
purchased. (For the factory default administrator password, see "TO THE ADMINISTRATOR OF THE MACHINE" in the
Safety Guide.) To change the password, see "Change Administrator Password" (page 123) in the system settings
(administrator).
*To ensure a high level of security, change the password at regular intervals.
• The above groupings of "General" and "Administrator" are used as a convenient means of clarifying the functions of the
settings. These groupings do not appear in the touch panel.
• For information on system settings for fax, see "11. SYSTEM SETTINGS FOR FAX" in the Facsimile Guide.
• The Web pages can also be used to configure the system settings. To configure the system settings from the Web pages,
click [System Settings] in the Web page menu.

5
This chapter describes the system settings that can be configured by general users of the machine.
Accessing the System Settings (General)
When User Authentication is not Enabled
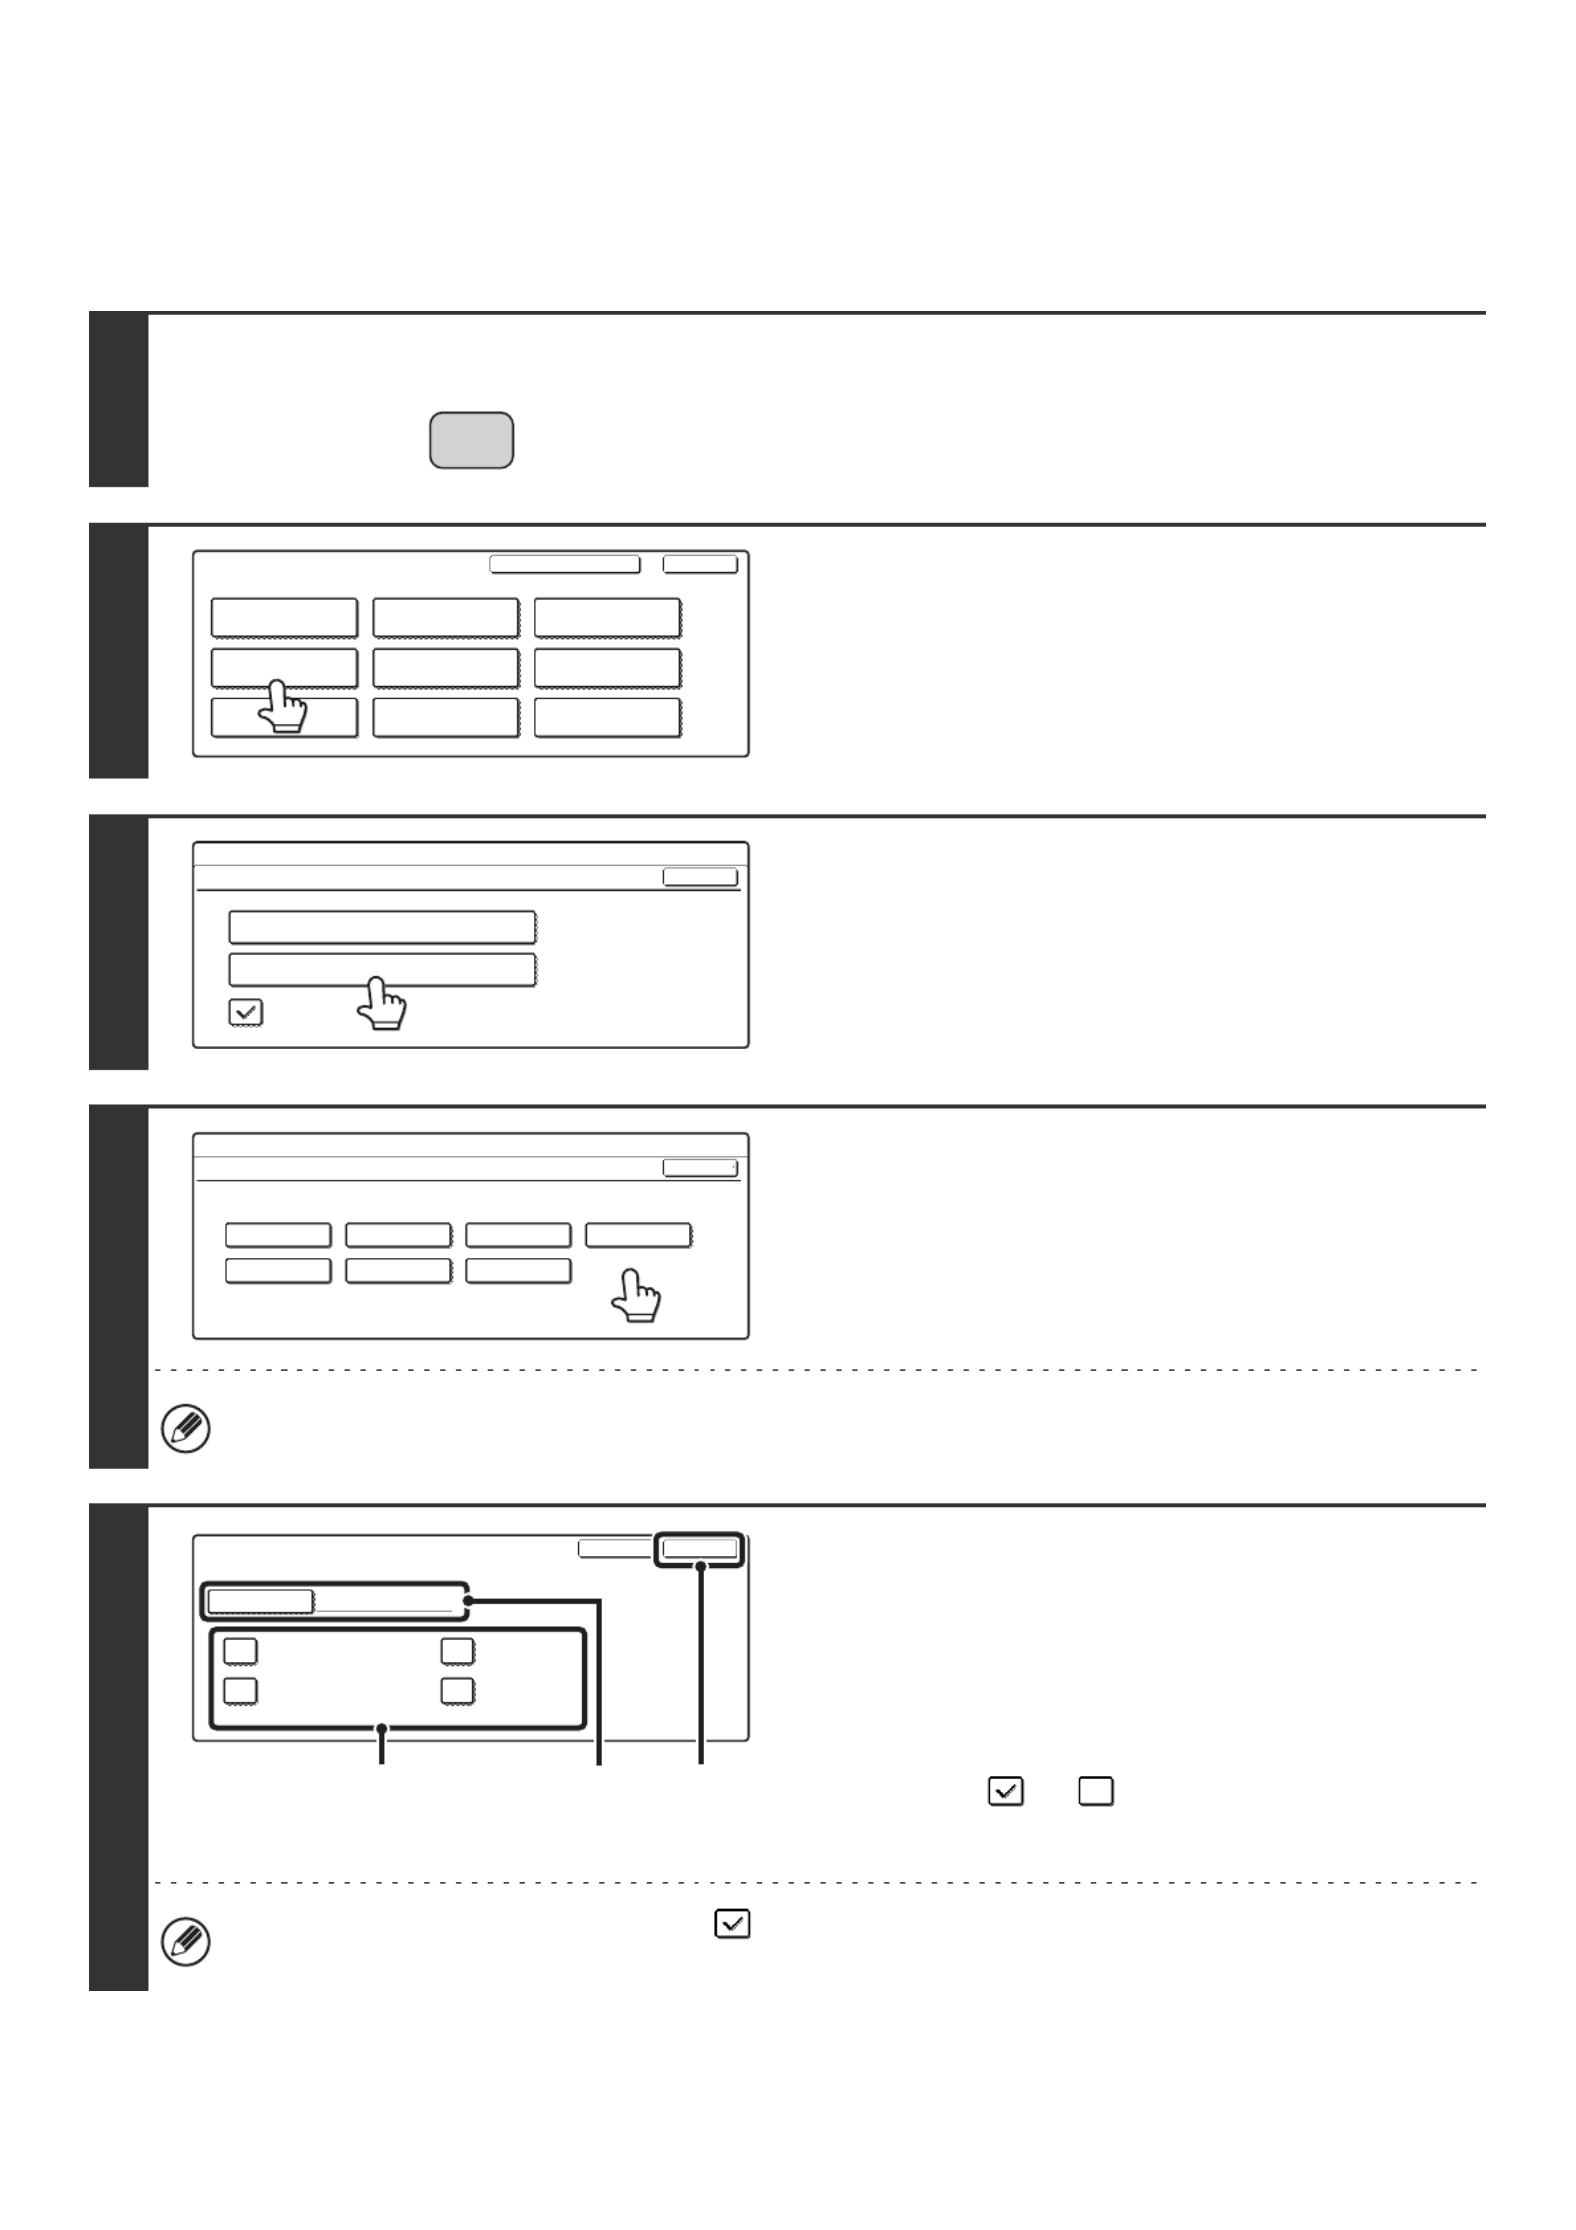
Make sure that the machine is in the standby state and then press the [SYSTEM SETTINGS] key on the operation
panel.
Operation panel
When the [SYSTEM SETTINGS] key is pressed, the following menu screen appears on the touch panel. Touch the item
in this screen that you wish to configure. For detailed explanations of each of the settings, see the following pages of this
chapter.
System settings screen (factory default state)
1
SYSTEM SETTINGS (GENERAL)
• To quit the system settings, touch the [Exit] key in the top right corner of the screen.
• User authentication is initially disabled (factory default setting).
DOCUMENT
FILING
IMAGE SEND
COPY
JOB STATUS
SYSTEM
SETTINGS
LOGOUT
[SYSTEM SETTINGS] key
PRINT
READY
DATA
LINE
DATA
System Settings ExitAdmin Password
List Print
(User)
Fax Data
Receive/Forward
USB-Device Check
Default Settings
Total Count
Paper Tray
Settings
Printer Condition
Settings
Address Control
Document Filing
Control
[Exit] keySetup Items

6
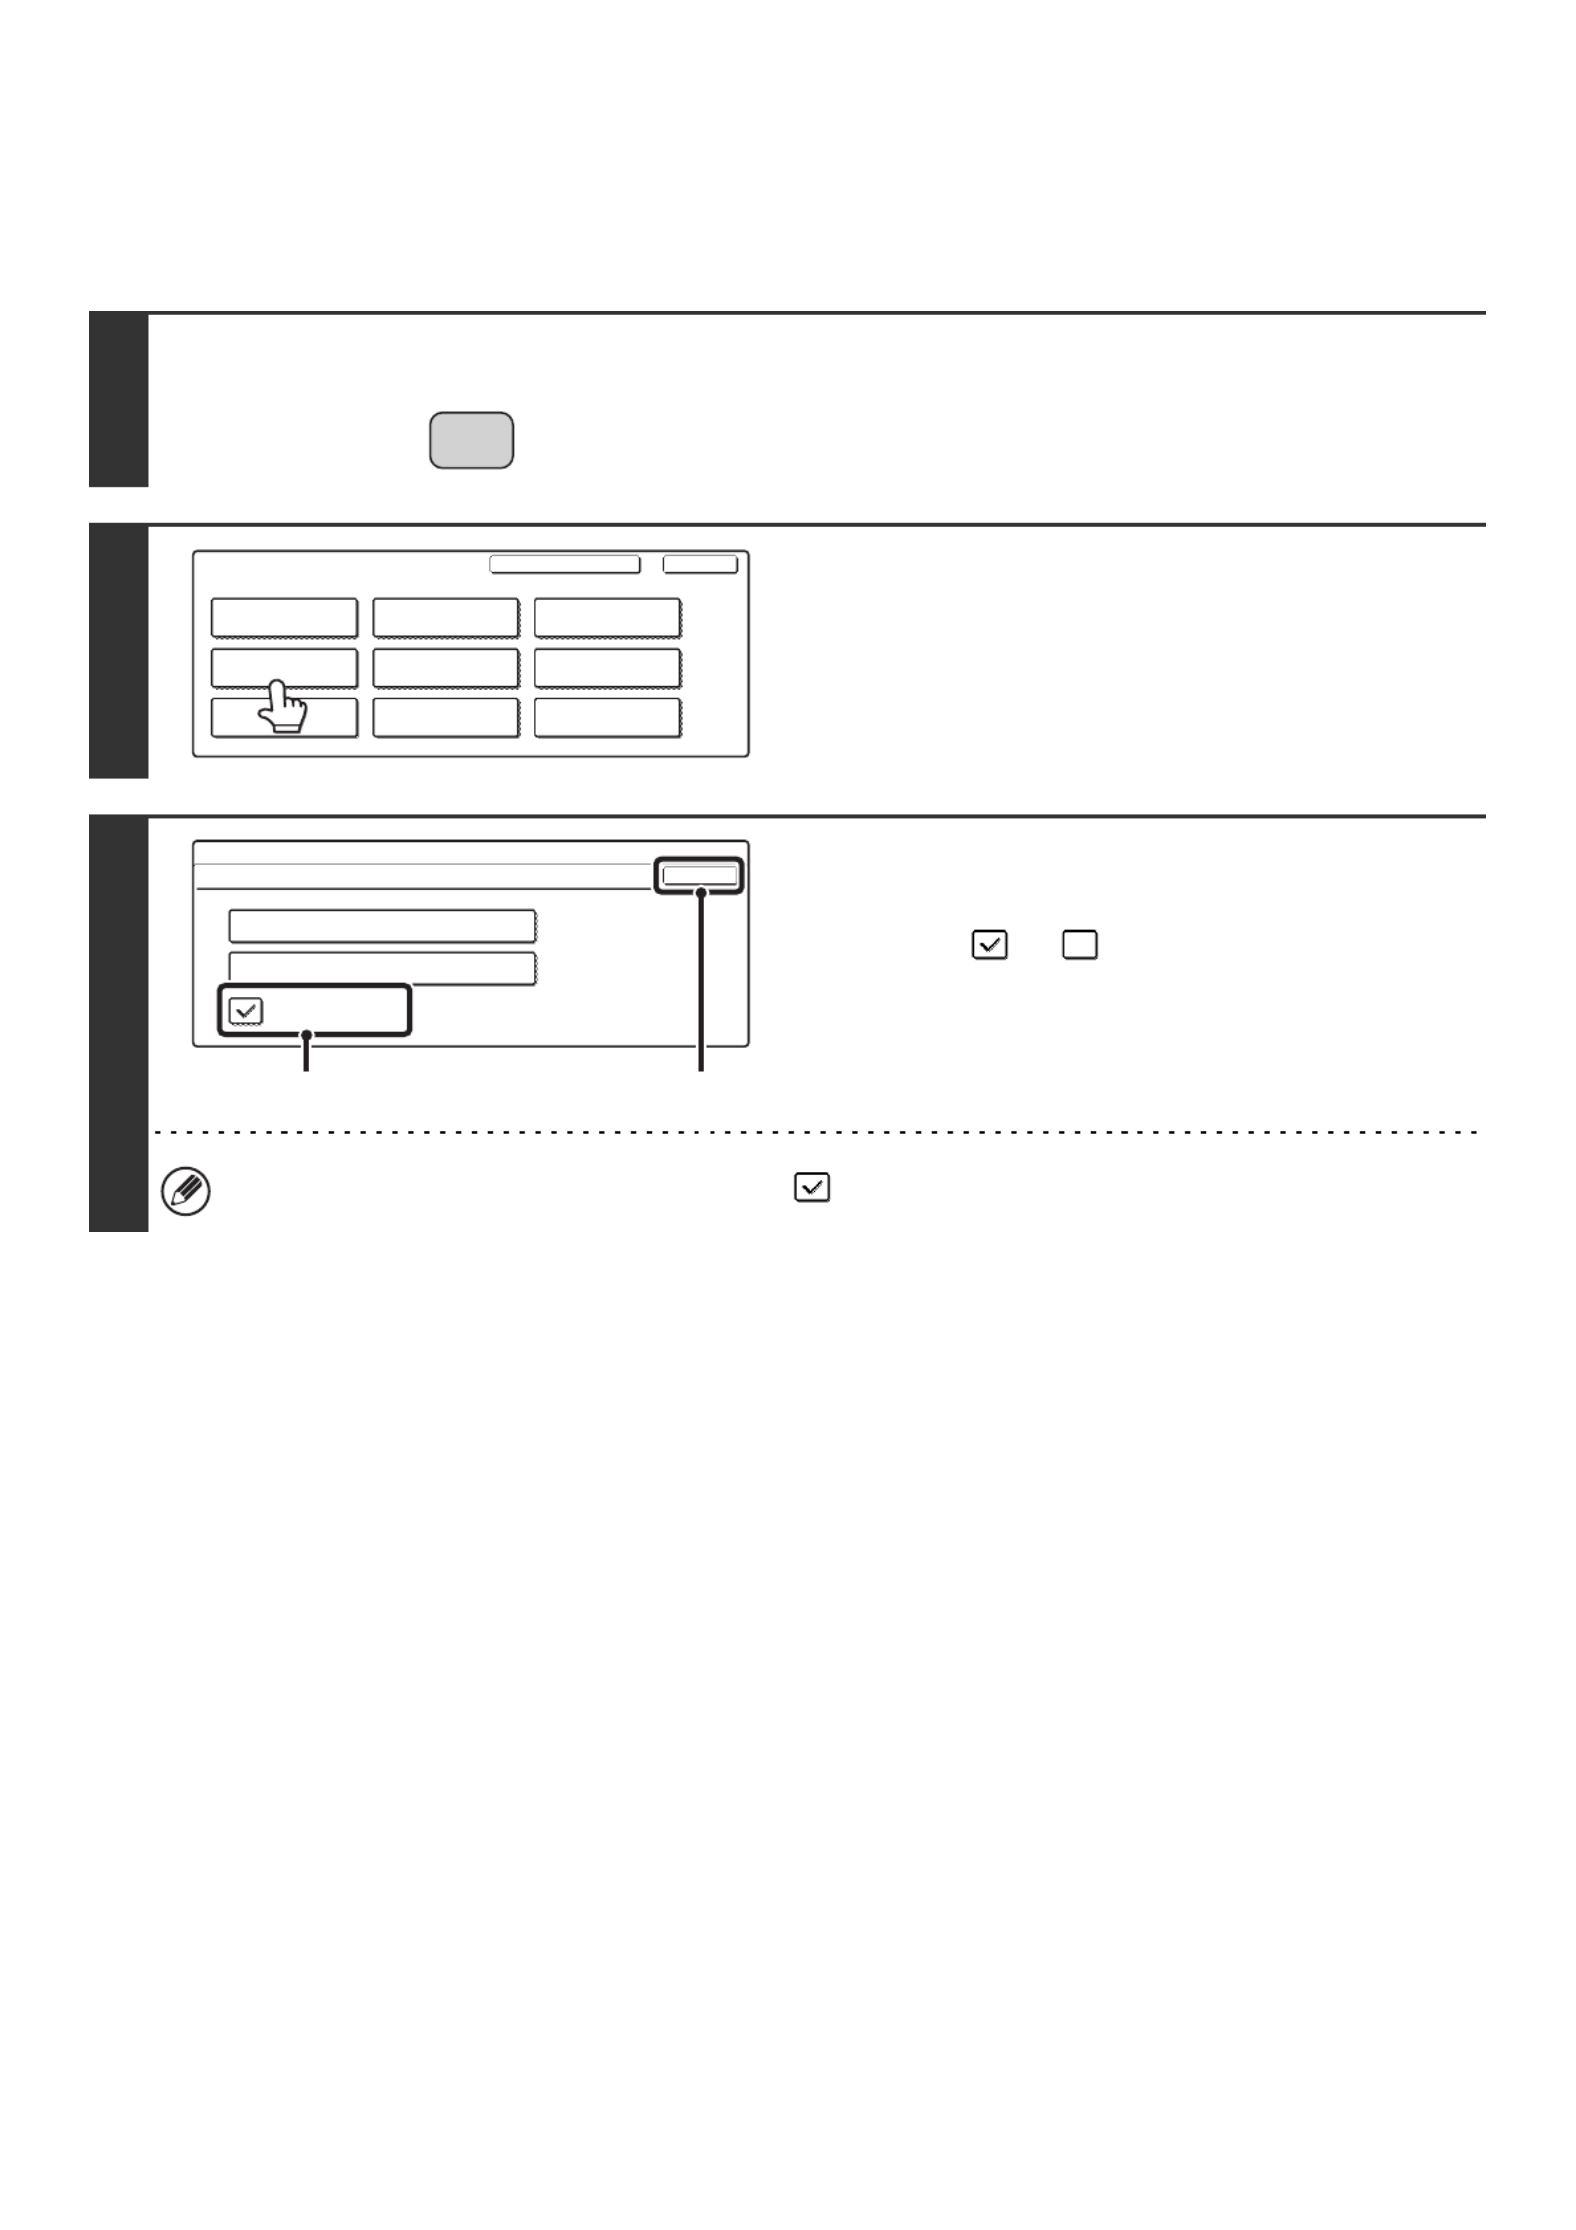
When User Authentication is Enabled
When "User Authentication Setting" (page 81) is enabled, login is required in the login screen before the machine can be
used.
The login screen varies depending on the settings configured in "Authentication Method Setting" (page 81). If one of the
following login screens appears, log in using the user information provided by the administrator of the machine. You can
then use the system settings.
Login name and password Login name, password and E-mail address
User number
Login by login name and password
When authentication is by login name/password/E-mail address, your E-mail address must also be entered in the
following procedure. Touch the [E-mail Address] key and enter your e-mail address, which is stored on the LDAP server,
in same way as you enter the password. When finished, touch the [OK] key. (If you select a user whose E-mail address
is stored in the machine, the e-mail address is automatically entered when the user is selected.)
Please enter your login name /
password.
User Authentication
Login Name
User Name
Password
Auth to: Server 1
OK
Please enter your login name /
E-mail address / password.
User Authentication
Login Name
E-mail Address
User Name
Password
Auth to:
OK
Server 1
Admin Login
Enter your user number.
OK
• Check with your administrator for the user information that is required to log in.
• When auto login is enabled, the login screen will not appear.
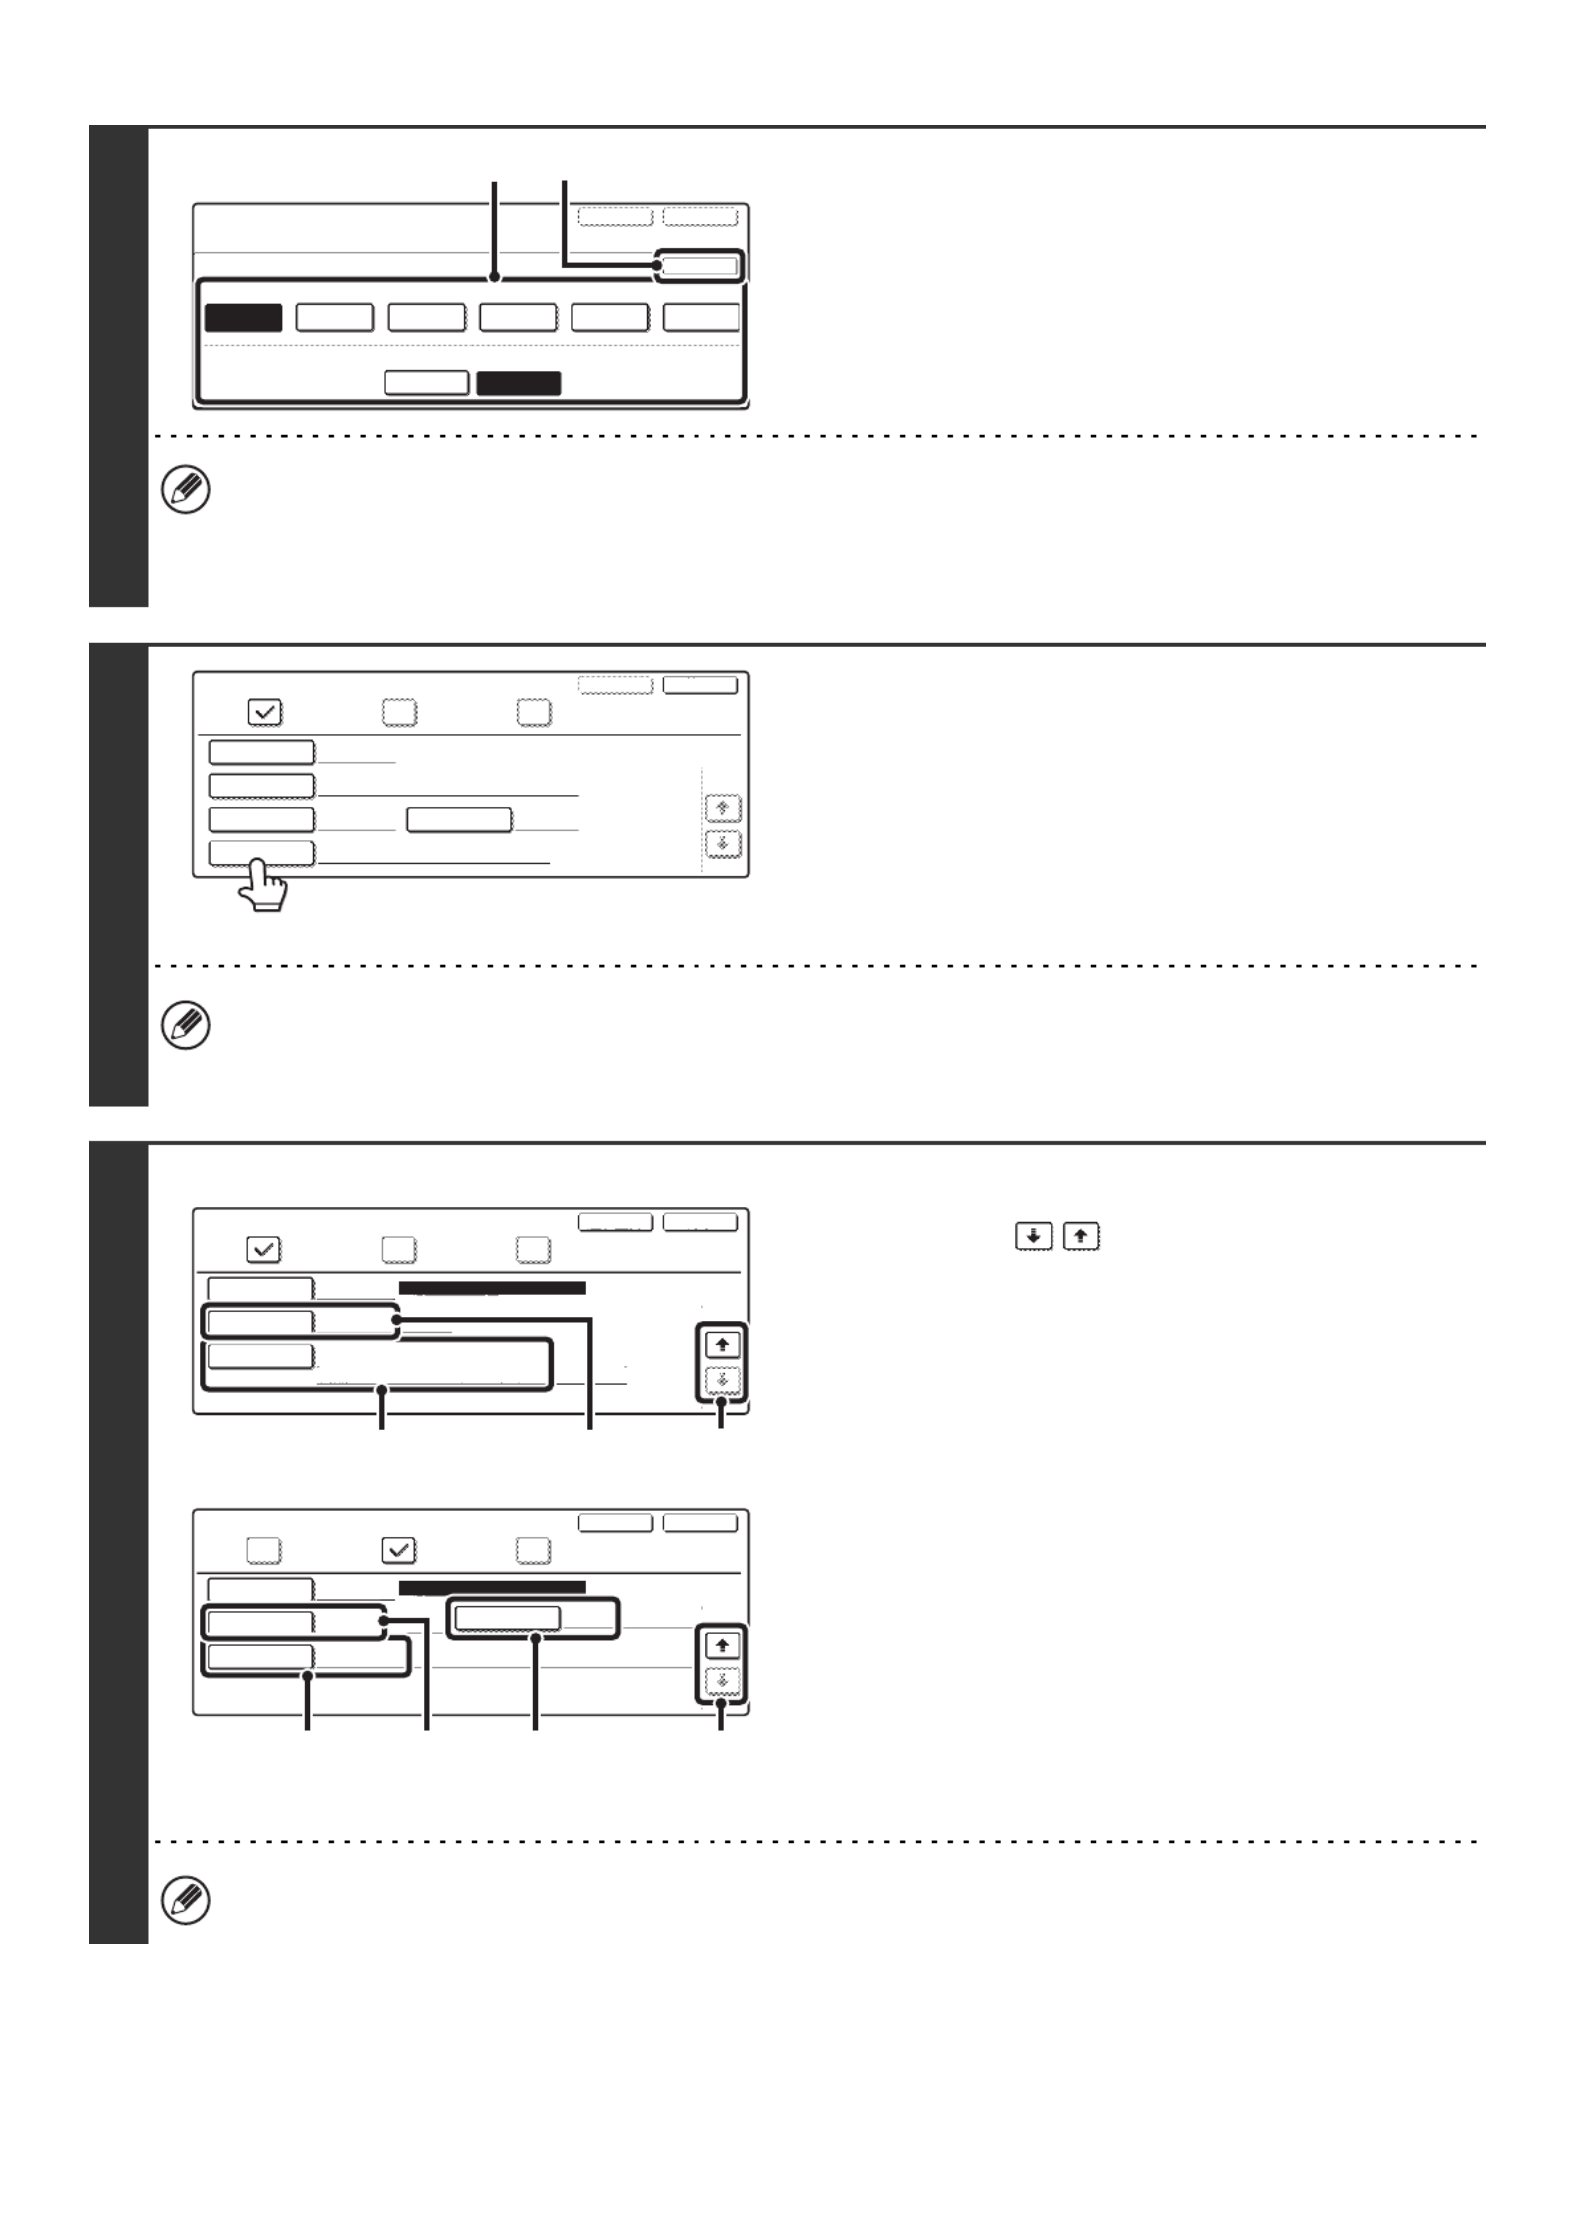
1
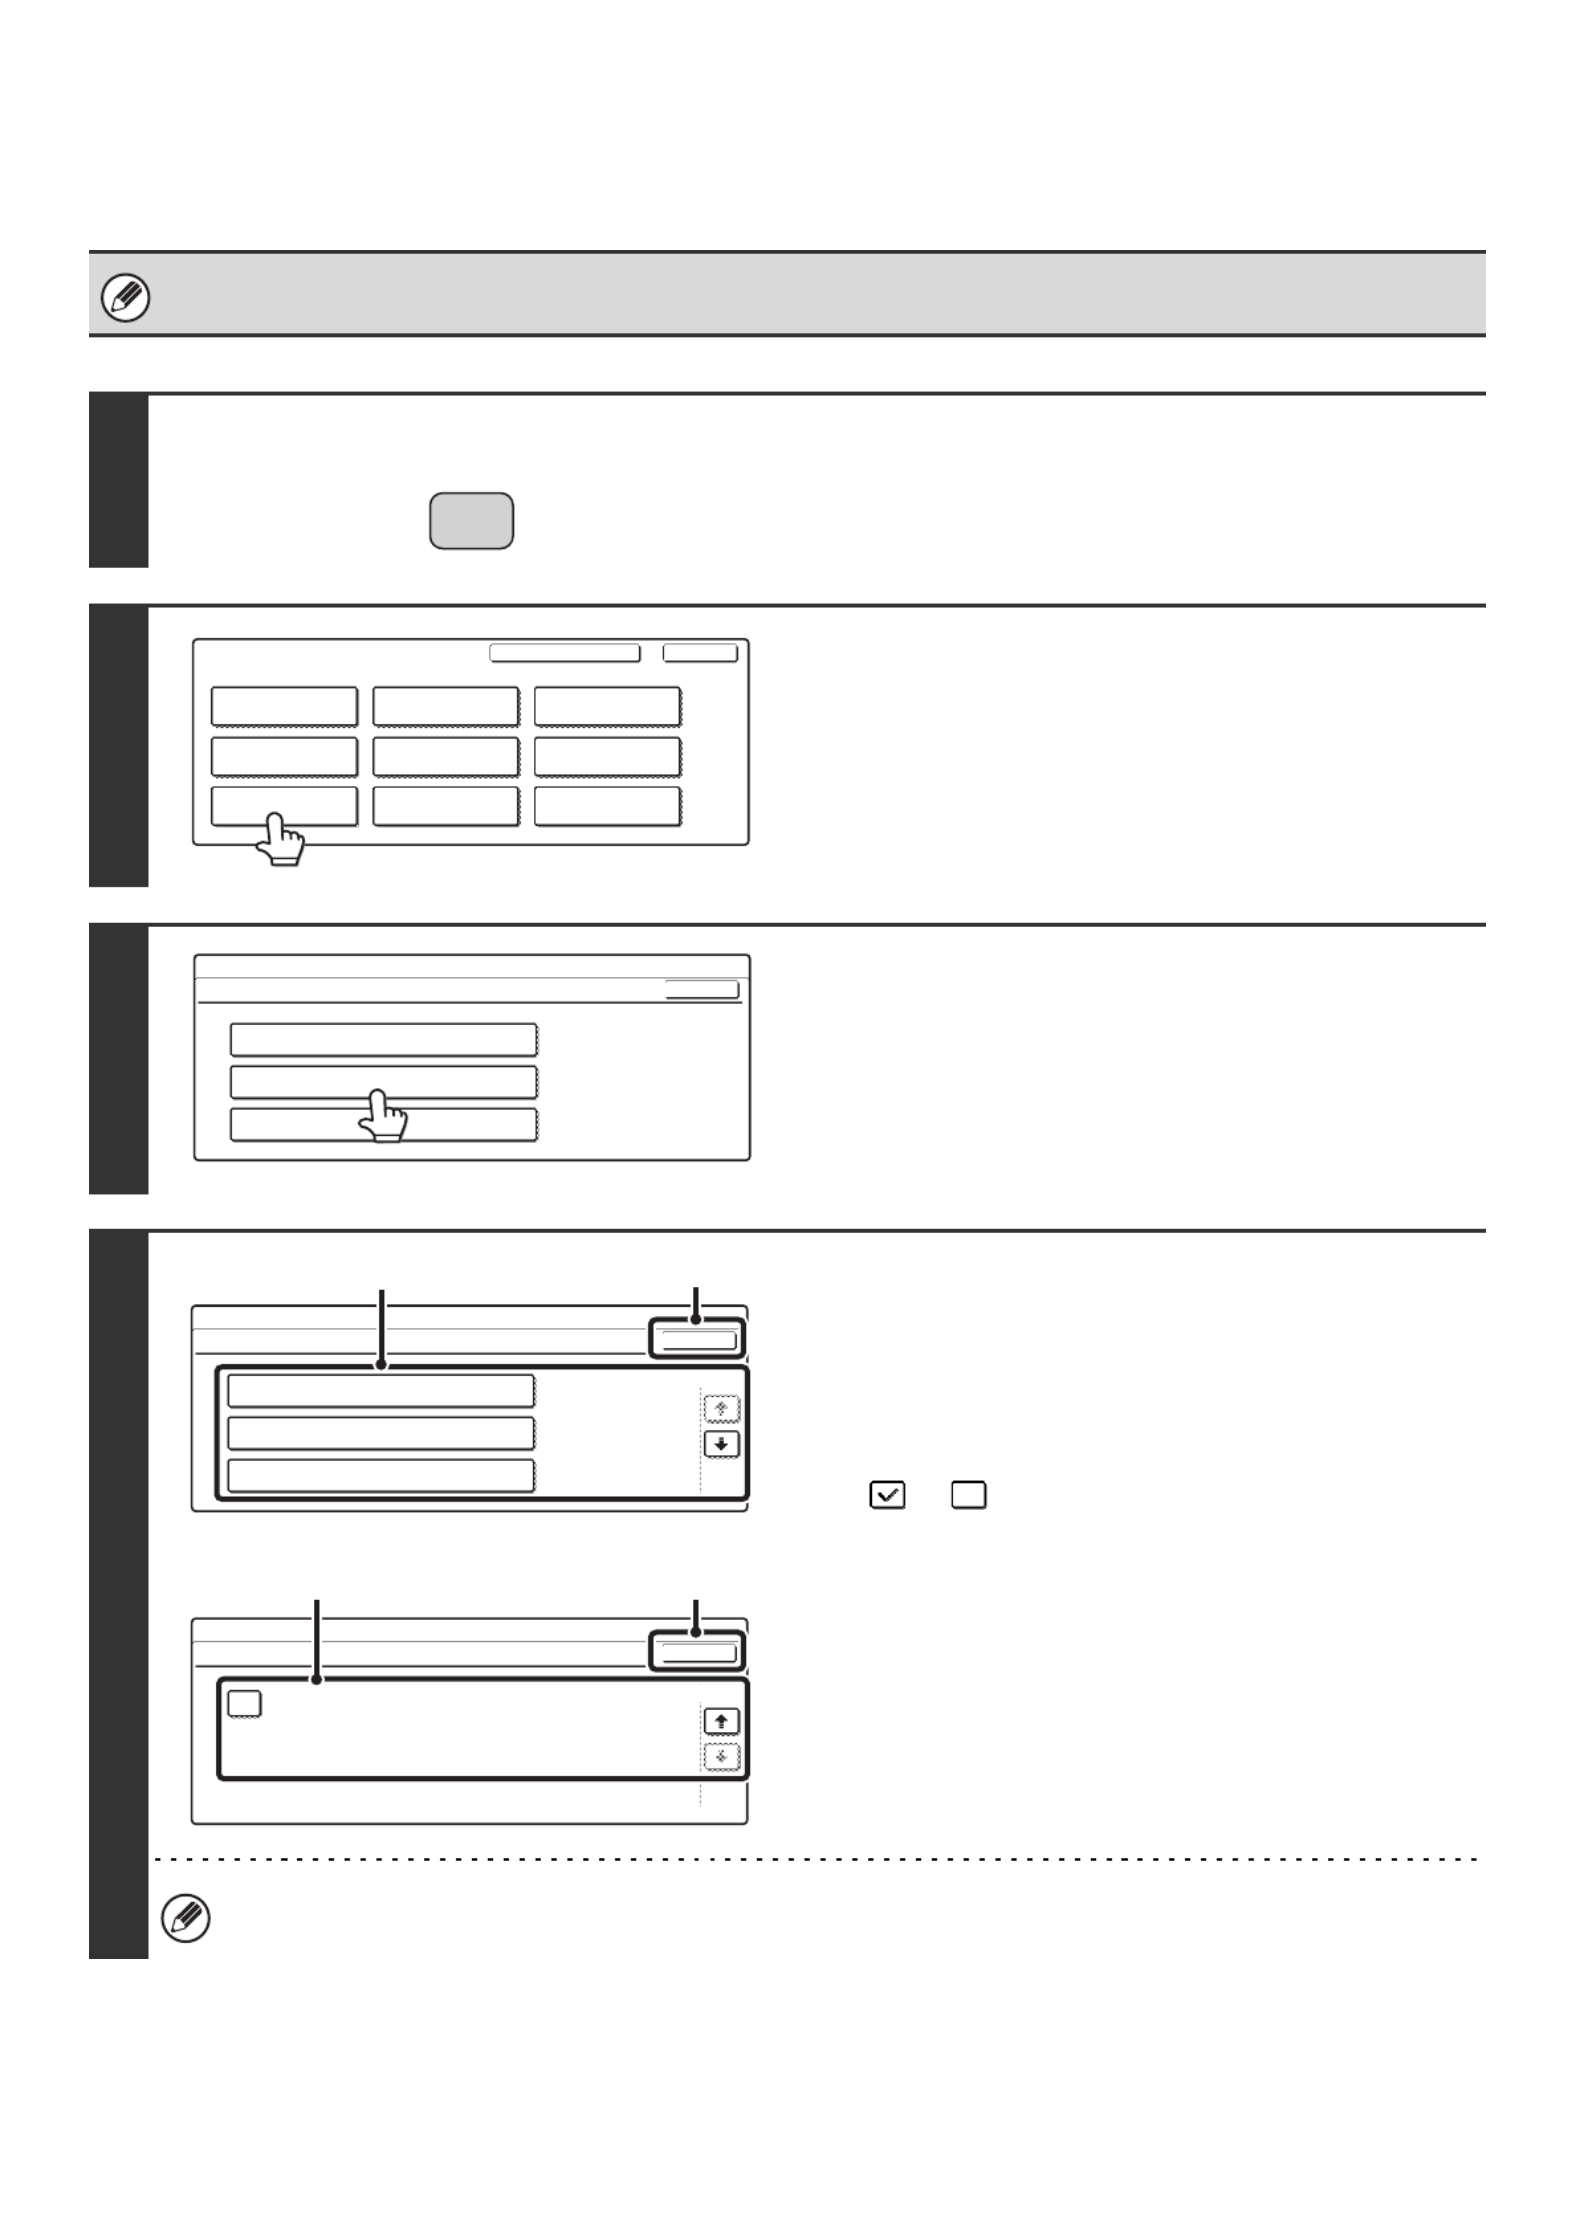
Touch the [Login Name] key.
You can touch the key and enter a user registration number (see "User Registration" (page 82)) with the
numeric keys to directly select the corresponding user.
Please enter your login name /
password.
User Authentication
Login Name
User Name
Password
Auth to:
OK
Server 1

7
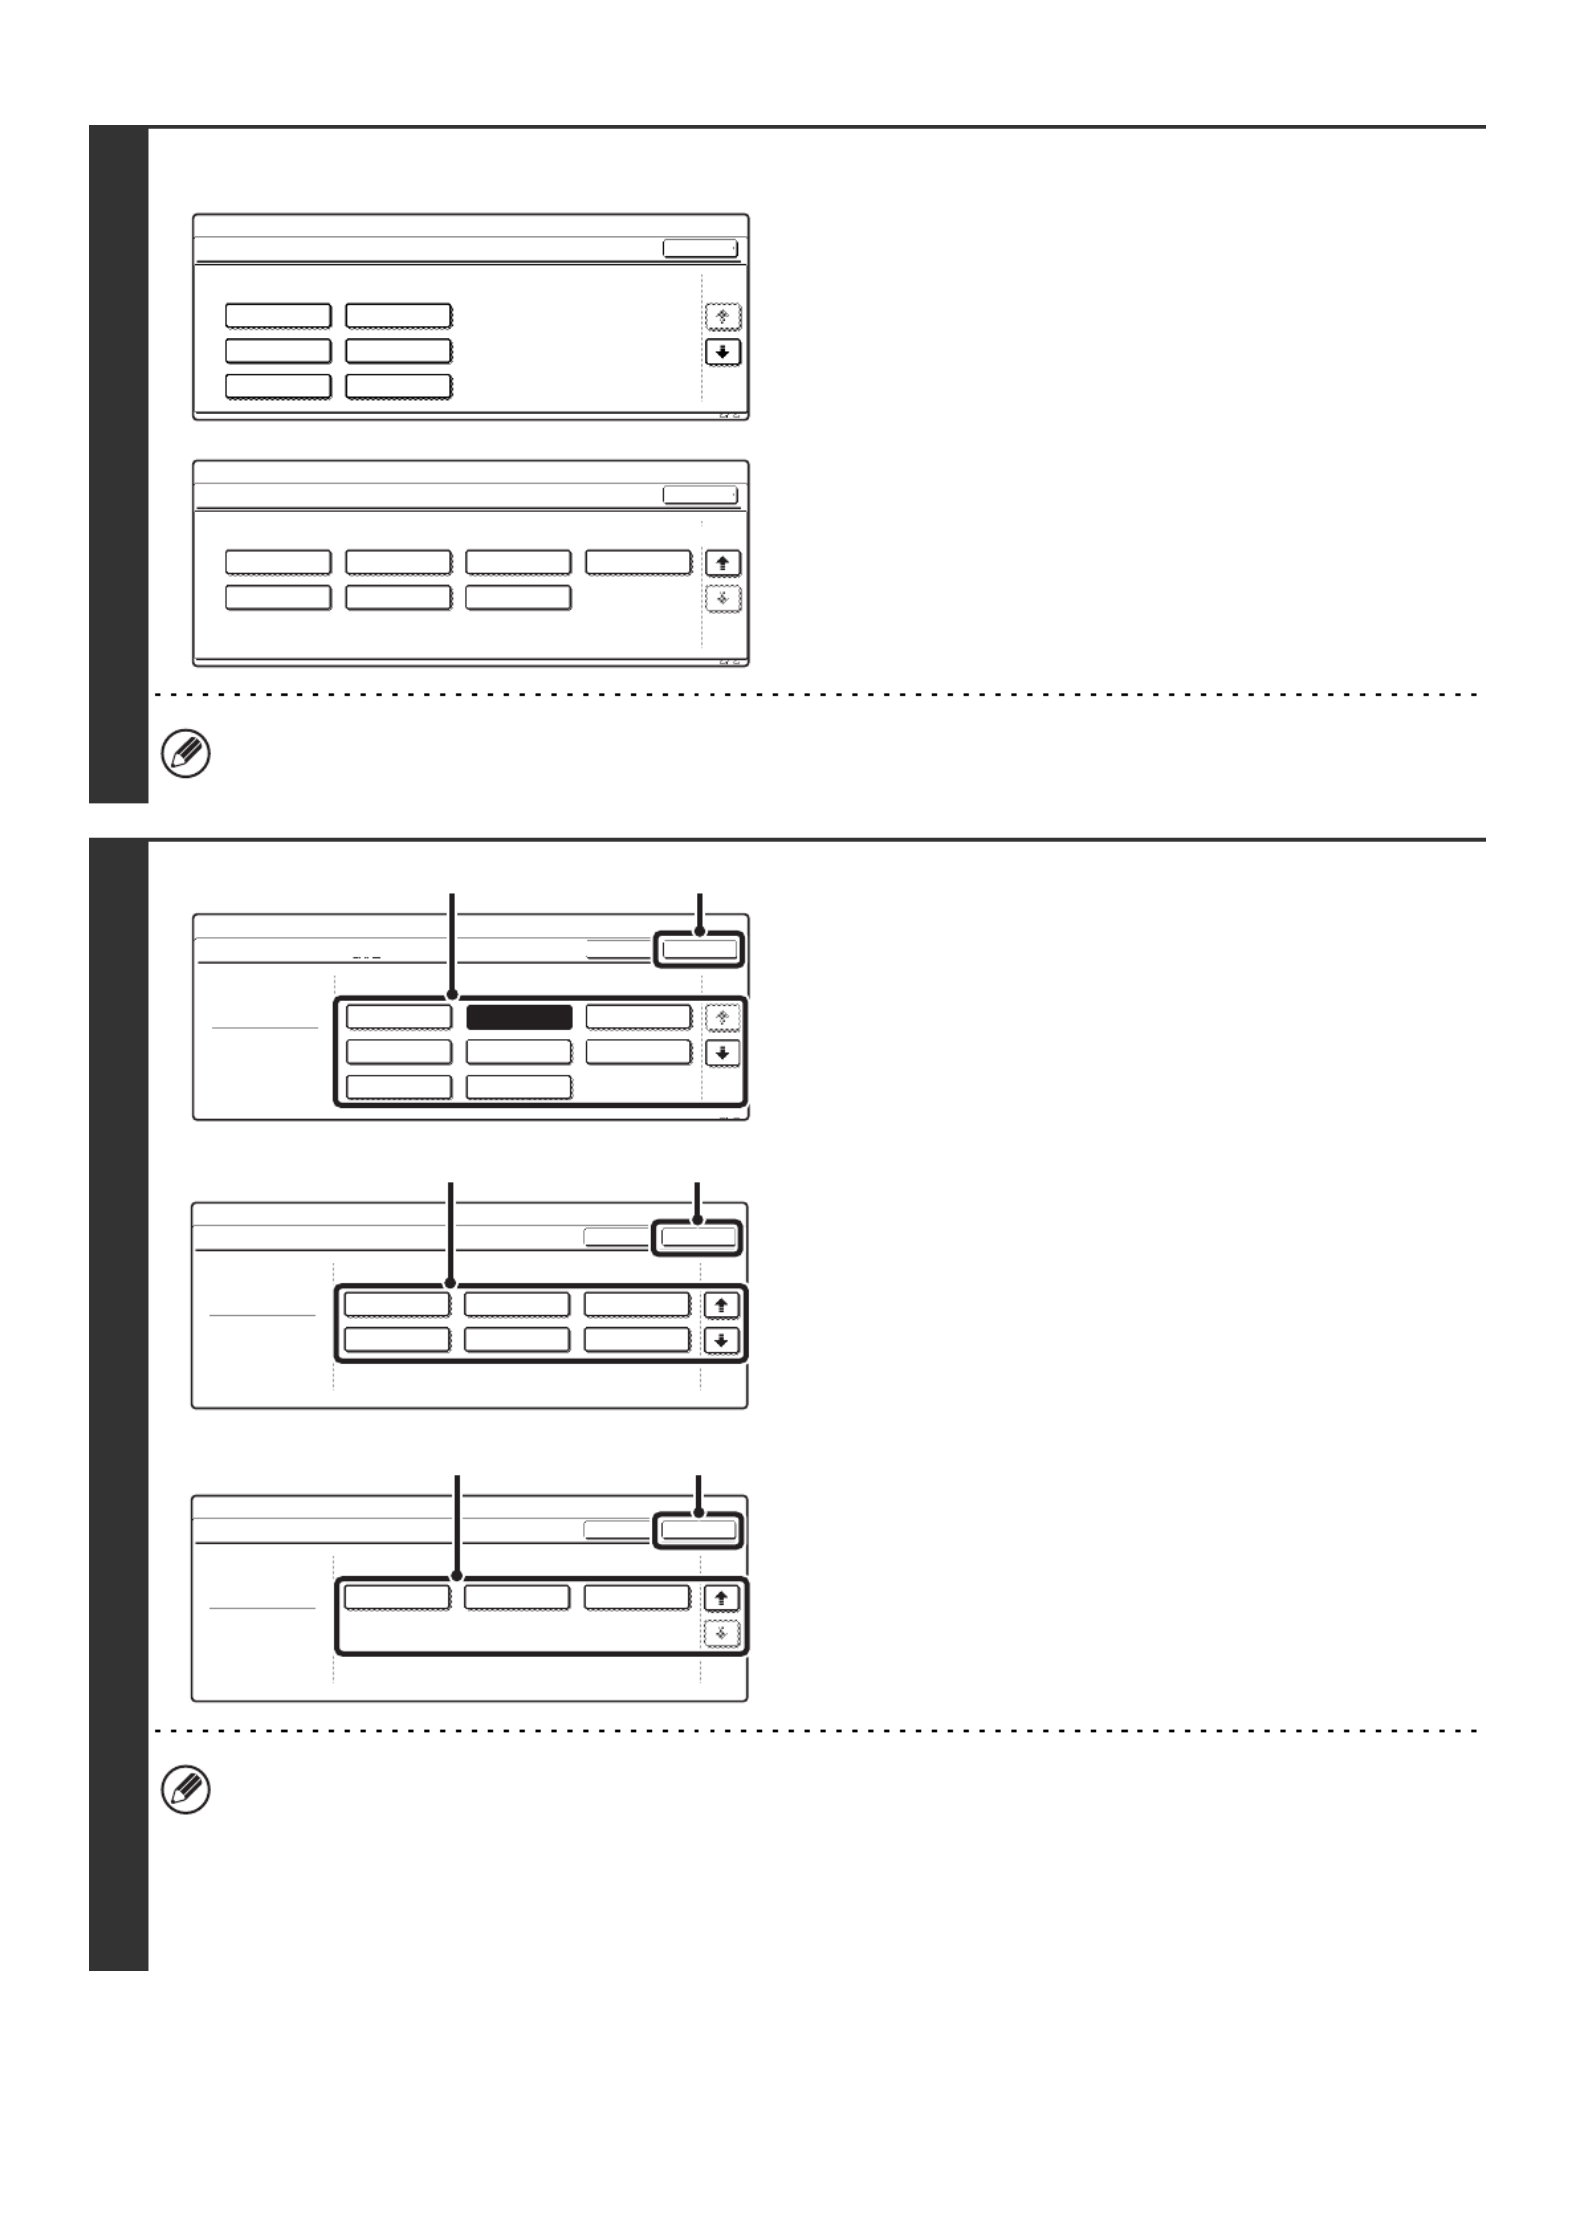
2
Select the user.
• You can touch the key and enter a user registration number (see "User Registration" (page 82)) with the
numeric keys to directly select the corresponding user.
• To specify a user not stored in the ma ouch the [Direct Entrchine directly using the LDAP server, t y] key, enter the
login name that is stored on the LDAP server, and touch the [OK] key. (When LDAP is enabled.)
3
Enter a password.
(1) Touch the [Password] key.
(2) Enter a password on the text entry screen
that will appear.
When logging in locally to the machine, enter your
password that was stored as explained in "User
Registration" (page 82).
If authentication is to the LDAP server, enter your
password that is stored on the LDAP server.
For the procedure for entering text, see "6. ENTERING
TEXT" in the User's Guide.
If a password has not been established, this step is not necessary.
Go to step 4.
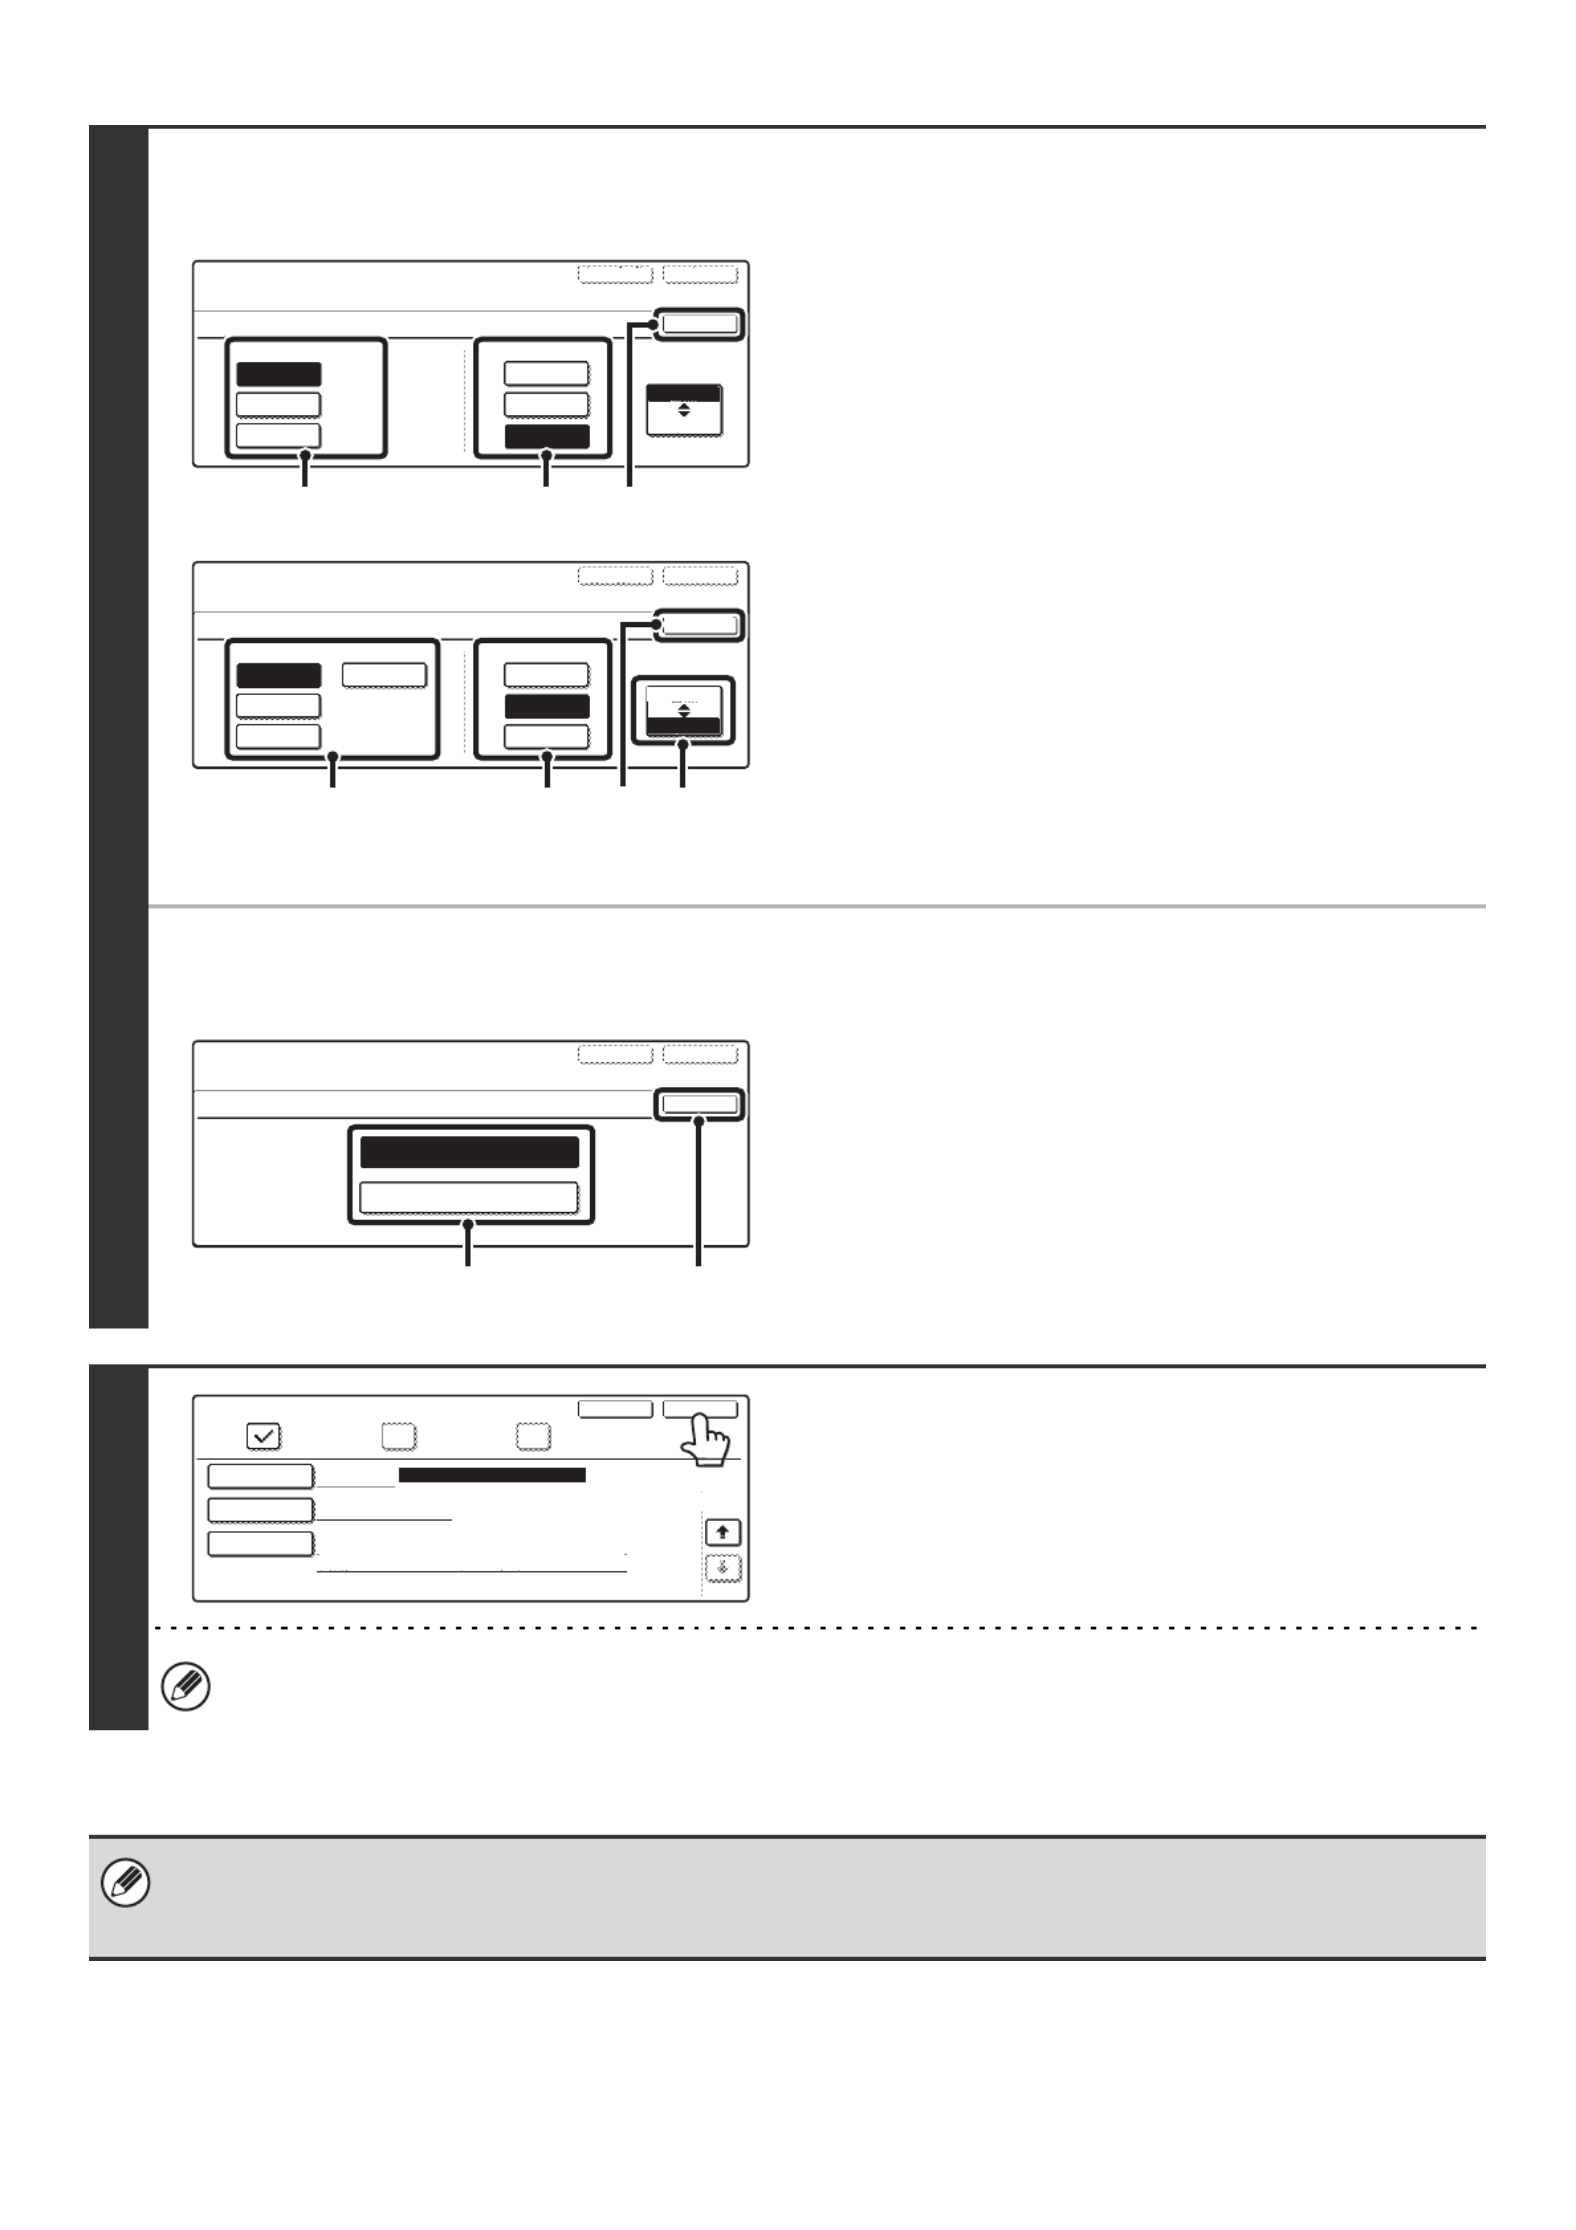
4
Touch the [OK] key.
• When a user is selected that is stored on the machine, [Auth to:] is entered. To enter your login name directly or
change the login destination, touch the [Auth to:] key. The following screen appears when the key is touched. Select
the desired key and touch the [OK] key.
• "Authenticate to" cannot be changed when an LDAP server has not been stored.
• Users for which the authentication destination is LDAP cannot select "Login Locally".
• This completes the login procedure. After login, the system settings can be used.
For the procedure following login, see "When User Authentication is not Enabled" (page 5).
Please select a user
to be logged in.
Admin Login
Direct Entry
ABC User
AAA AAA
CCC CCC
EEE EEE
GGG GGG
All Users ABCD EFGHI JKLMN OPQRST UVWXYZ
BBB BBB
DDD DDD
FFF FFF
HHH HHH
25
1
Back
Please enter your login name /
password.
User Authentication
Login Name
AAA AAA
Login Locally
User Name
Password
Auth to:
OK
Please enter your login name /
password.
User Authentication
Login Name
Login Locally
User Name
Password
Auth to:
OK
AAA AAA
Select the authentication system of registered user.
Authenticate to:
Login Locally
Server 2
Server 3
Server 1
OK
1/2
8
Login by user number
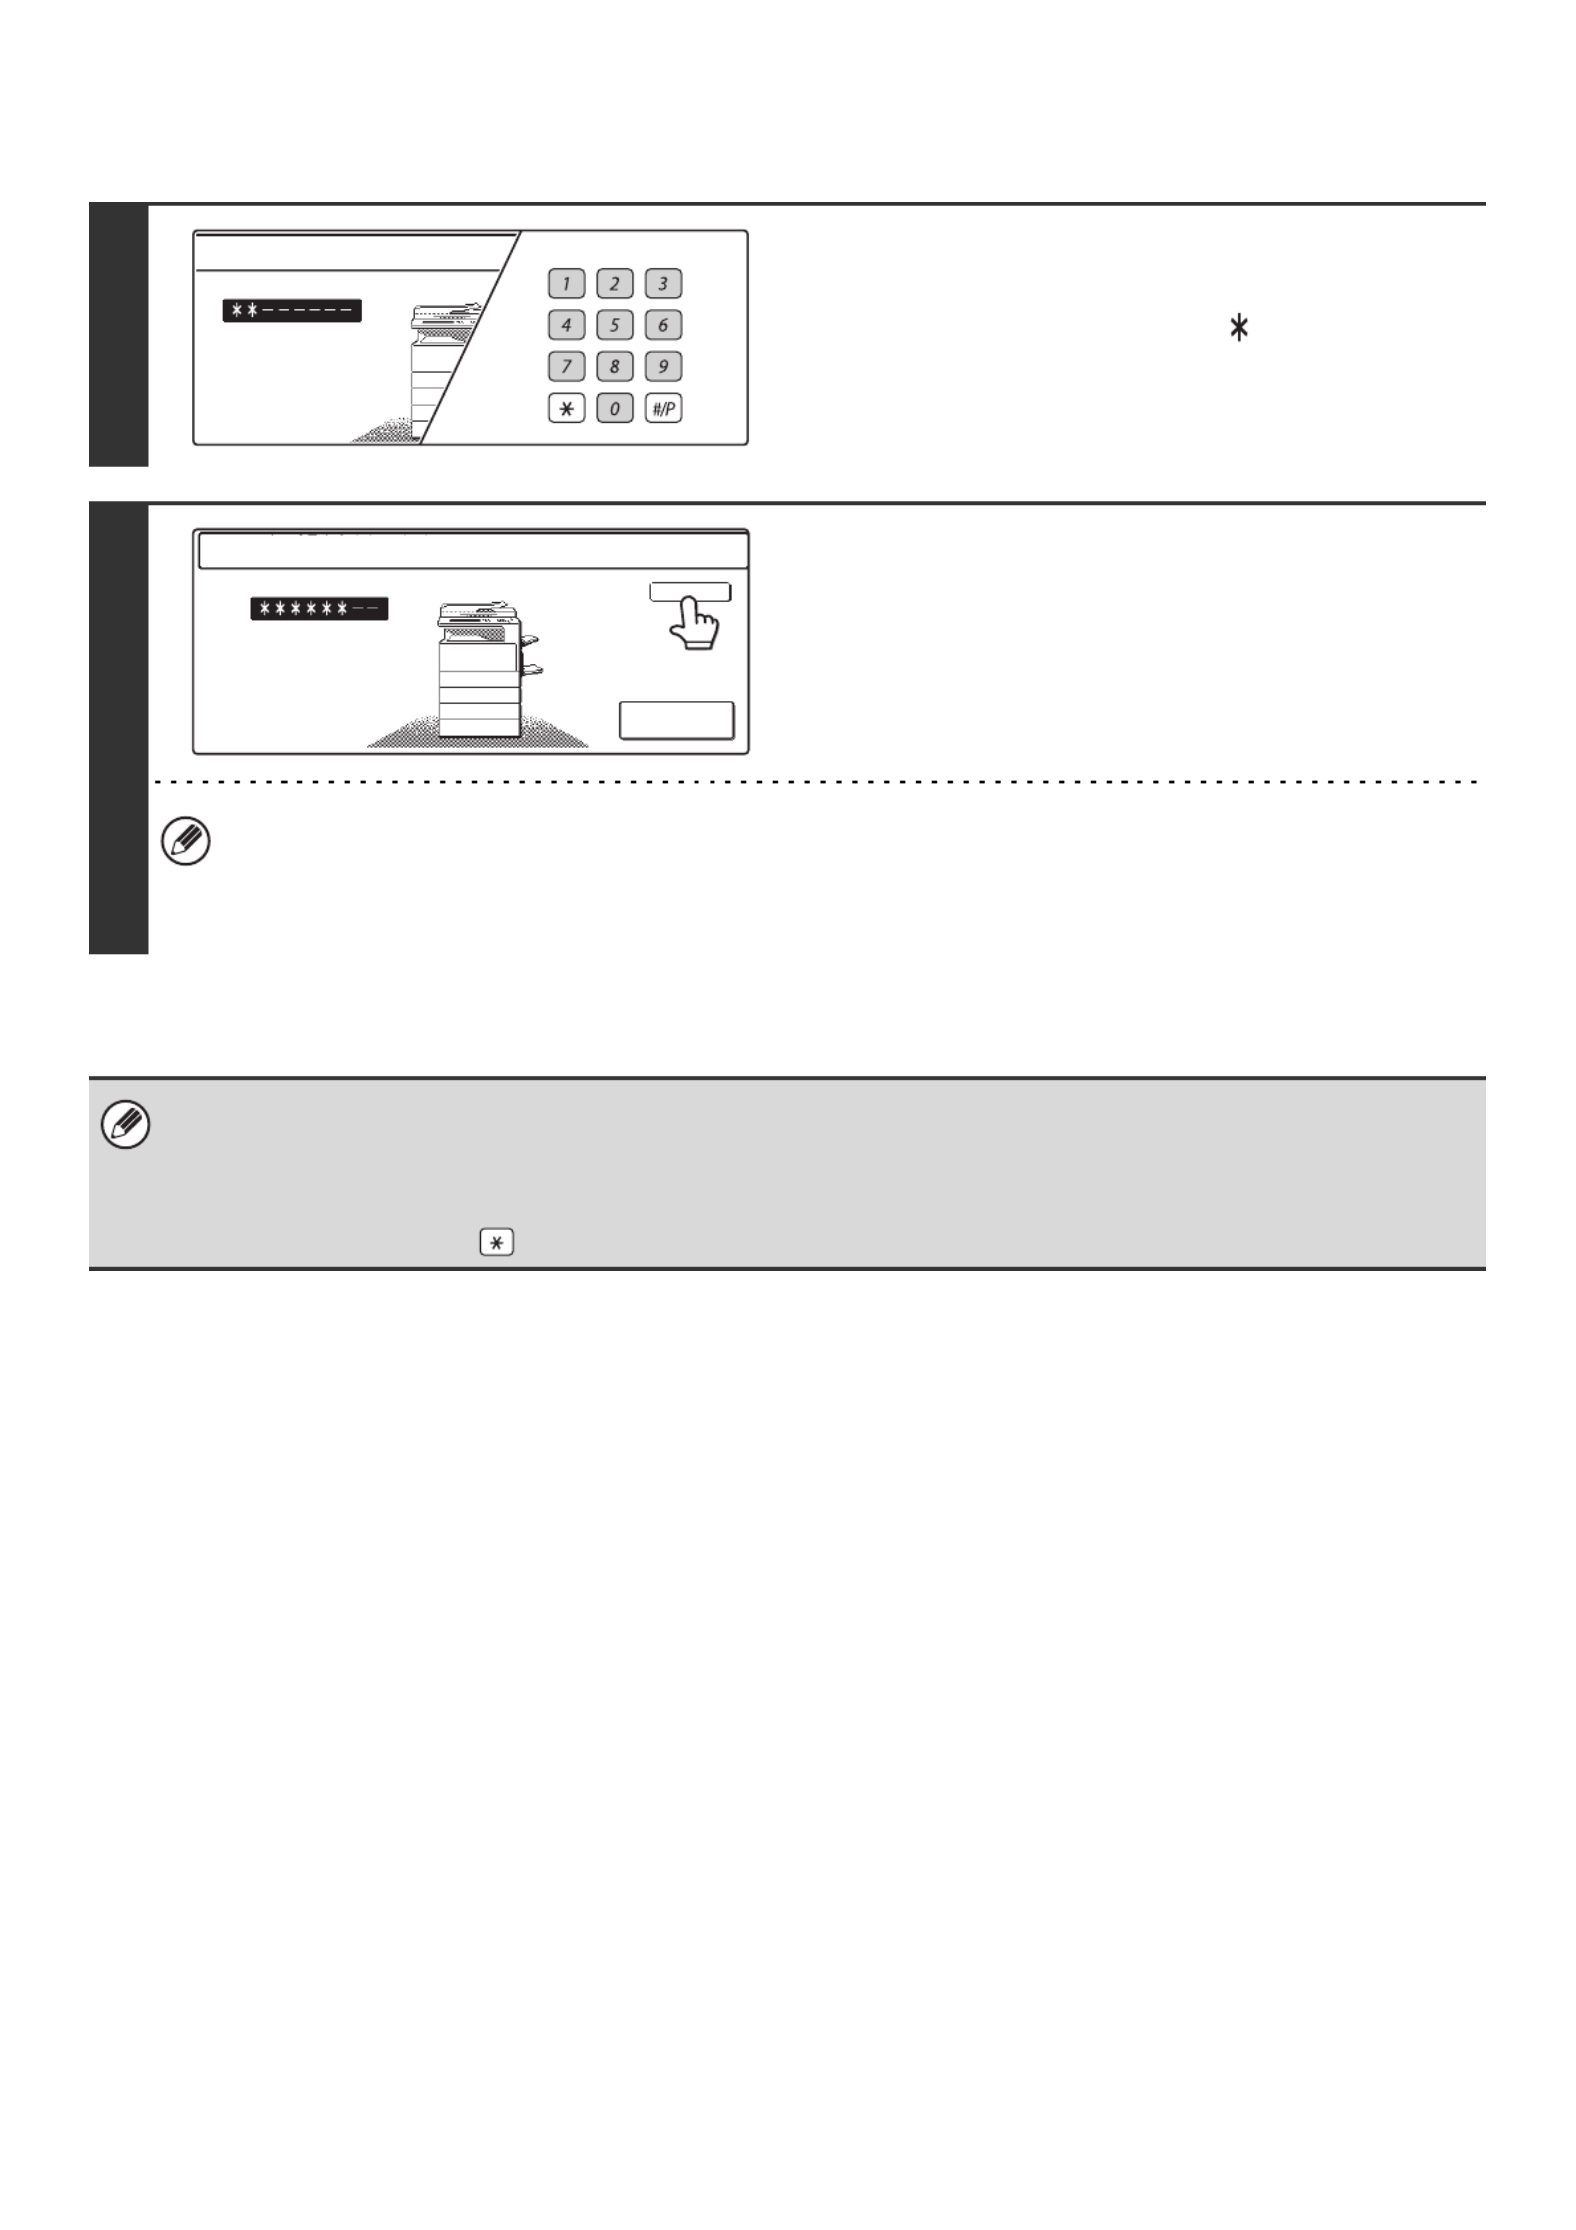
1
Enter your user number with the
numeric keys.
Each entered digit will be displayed as " ".
2
Touch the [OK] key.
• When a user number is set to a 8-digit number, this step is not necessary. (When an user number is entered, login
will take place automatically.)
• This completes the login procedure. After login, the system settings can be used.
For the procedure following login, see "When User Authentication is not Enabled" (page 5).
• To configure and store LDAP settings, click [Network Settings] and then [LDAP Settings] in the Web page menu.
(Administrator rights are required.)
• When Auto Clear activates, logout automatically takes place.
•To logout...
Press the [LOGOUT] key ( ). (Except when entering a fax number.)
Enter your user number.
Admin Login
Enter your user number.
OK

9
System Settings (General) List
When the system settings are accessed with general rights, the following items appear. The factory default settings for
each item are also shown. For items that can only be accessed with administrator rights, see "System Settings
(Administrator) List" (page 65).
Depending on the machine specifications and peripheral devices installed, it may not be possible to use some settings.
Item Factory default setting Page
■Total Count 15
●Job Count –15
●Device Count –16
■Default Settings 17
●Display Contrast (Set to the centre value) 17
●Clock
18XDate Format
Varies depending on country and region
XDaylight Saving Time Setting
●Keyboard Select Varies depending on country and region 20
■List Print (User) 21
●All Custom Setting List –21
●Printer Test Page
22
XPCL Symbol Set List*1–
XPCL Internal Font List*1–
XPCL Extended Font List*1–
XPS Font List*2–
XPS Extended Font List*2–
XNIC Page –
●Sending Address List*3
23
XIndividual List –
XGroup List –
XProgram List –
XMemory Box List –
XAll Sending Address List –
●Document Filing Folder List –24

10
■Paper Tray Settings 25
●Tray Settings
25
XTray 1 Plain, Auto-AB (Auto-Inch)
(A4 or 8-1/2" x 11" on the MX-2300/2700 Series)
XTray 2 Plain, Auto-AB (Auto-Inch)
(A3 or 11" x 17" on the MX-2300/2700 Series)
XTray 3
Varies depending on the machine configurationXTray 4
XTray 5
XBypass Tray Plain, Auto-AB (Auto-Inch)
●Paper Type Registration
29
XUser Type 1 –
XUser Type 2 –
XUser Type 3 –
XUser Type 4 –
XUser Type 5 –
XUser Type 6 –
XUser Type 7 –
●Auto Tray Switching Enable 30
■Address Control 31
●Direct Address / Program
31
XIndividual
E-mail*4
• Search Number –
• Name –
• Initial –
• Index –
• Address –
• Key Name –
• File Format –
Item Factory default setting Page
11
Internet Fax*5
31
• Search Number –
• Name –
• Initial –
• Index –
• Address –
• Key Name –
• Compression –
• I-Fax Report –
XGroup
35
Search Number –
Group Name –
Initial –
Index –
Address –
Key Name –
XProgram
39
Program Name –
Settings
• Address –
• Resolution –
• Exposure –
• Special Modes –
XAmend/Delete –41
●Custom Index
44
XUser 1 –
XUser 2 –
XUser 3 –
XUser 4 –
XUser 5 –
XUser 6 –
■Fax Data Receive/Forward 45
●Internet Fax Manual Reception*5–
45XReception Start –
XManual Reception Key in Initial Screen Enable
●Internet Fax Data Forward*5–46
Item Factory default setting Page

12
■Printer Condition Settings*147
●Printer Default Settings
47
XCopies 1
XOrientation Portrait
XDefault Paper Size A4 (8-1/2" x 11")
XDefault Output Tray*6Varies depending on the machine configuration
XDefault Paper Type Plain Paper
XLine Thickness 5
X2-Sided Print 1-Sided
XColour Mode B/W
XN-Up Print 1-Up
●PCL Settings*1
50
XPCL Symbol Set Setting 3. PC-8
XPCL Font Setting Internal Font, 0. Courier
XPCL Line Feed Code 0. CR=CR:LF=LF:FF=FF
XWide A4 Disable
●Postscript Settings*2
52
XPrint PS Errors Disable
■Document Filing Control 53
●Custom Folder Registration
53
XFolder Name –
XInitial –
XPassword –
XUser Name –
●Amend/Delete Custom Folder –56
■USB-Device Check –58
■User Control*759
●Amend User Information –59
Item Factory default setting Page

14
*1 When the printer expansion kit is installed on MX-2300G/2700G models.
*2 When the PS3 expansion kit is installed.
*3 When the facsimile expansion kit, the Internet fax expansion kit, or the network scanner expansion kit is installed on
MX-2300G/2700G models.
*4 When the network scanner expansion kit is installed on MX-2300G/2700G models.
*5 When the Internet fax expansion kit is installed.
*6 When a right tray is installed.
*7 When user authentication is enabled and a user without the authority to configure the system settings (administrator)
has logged in. (Excluding factory stored users.)
*8 When the facsimile expansion kit is installed.
*9 When a saddle stitch finisher or finisher is installed.
■Fax Data Receive/Forward
●Fax Receive Settings*8Auto Reception
XMultiple Set Print Disable
XStaple*9Disable
●Fax Data Forward*8–
Item Factory default setting

15
Total Count
Job Count
This displays or prints out the counts of all jobs.
The items displayed (or printed) will vary depending on the machine specifications and peripheral devices installed.
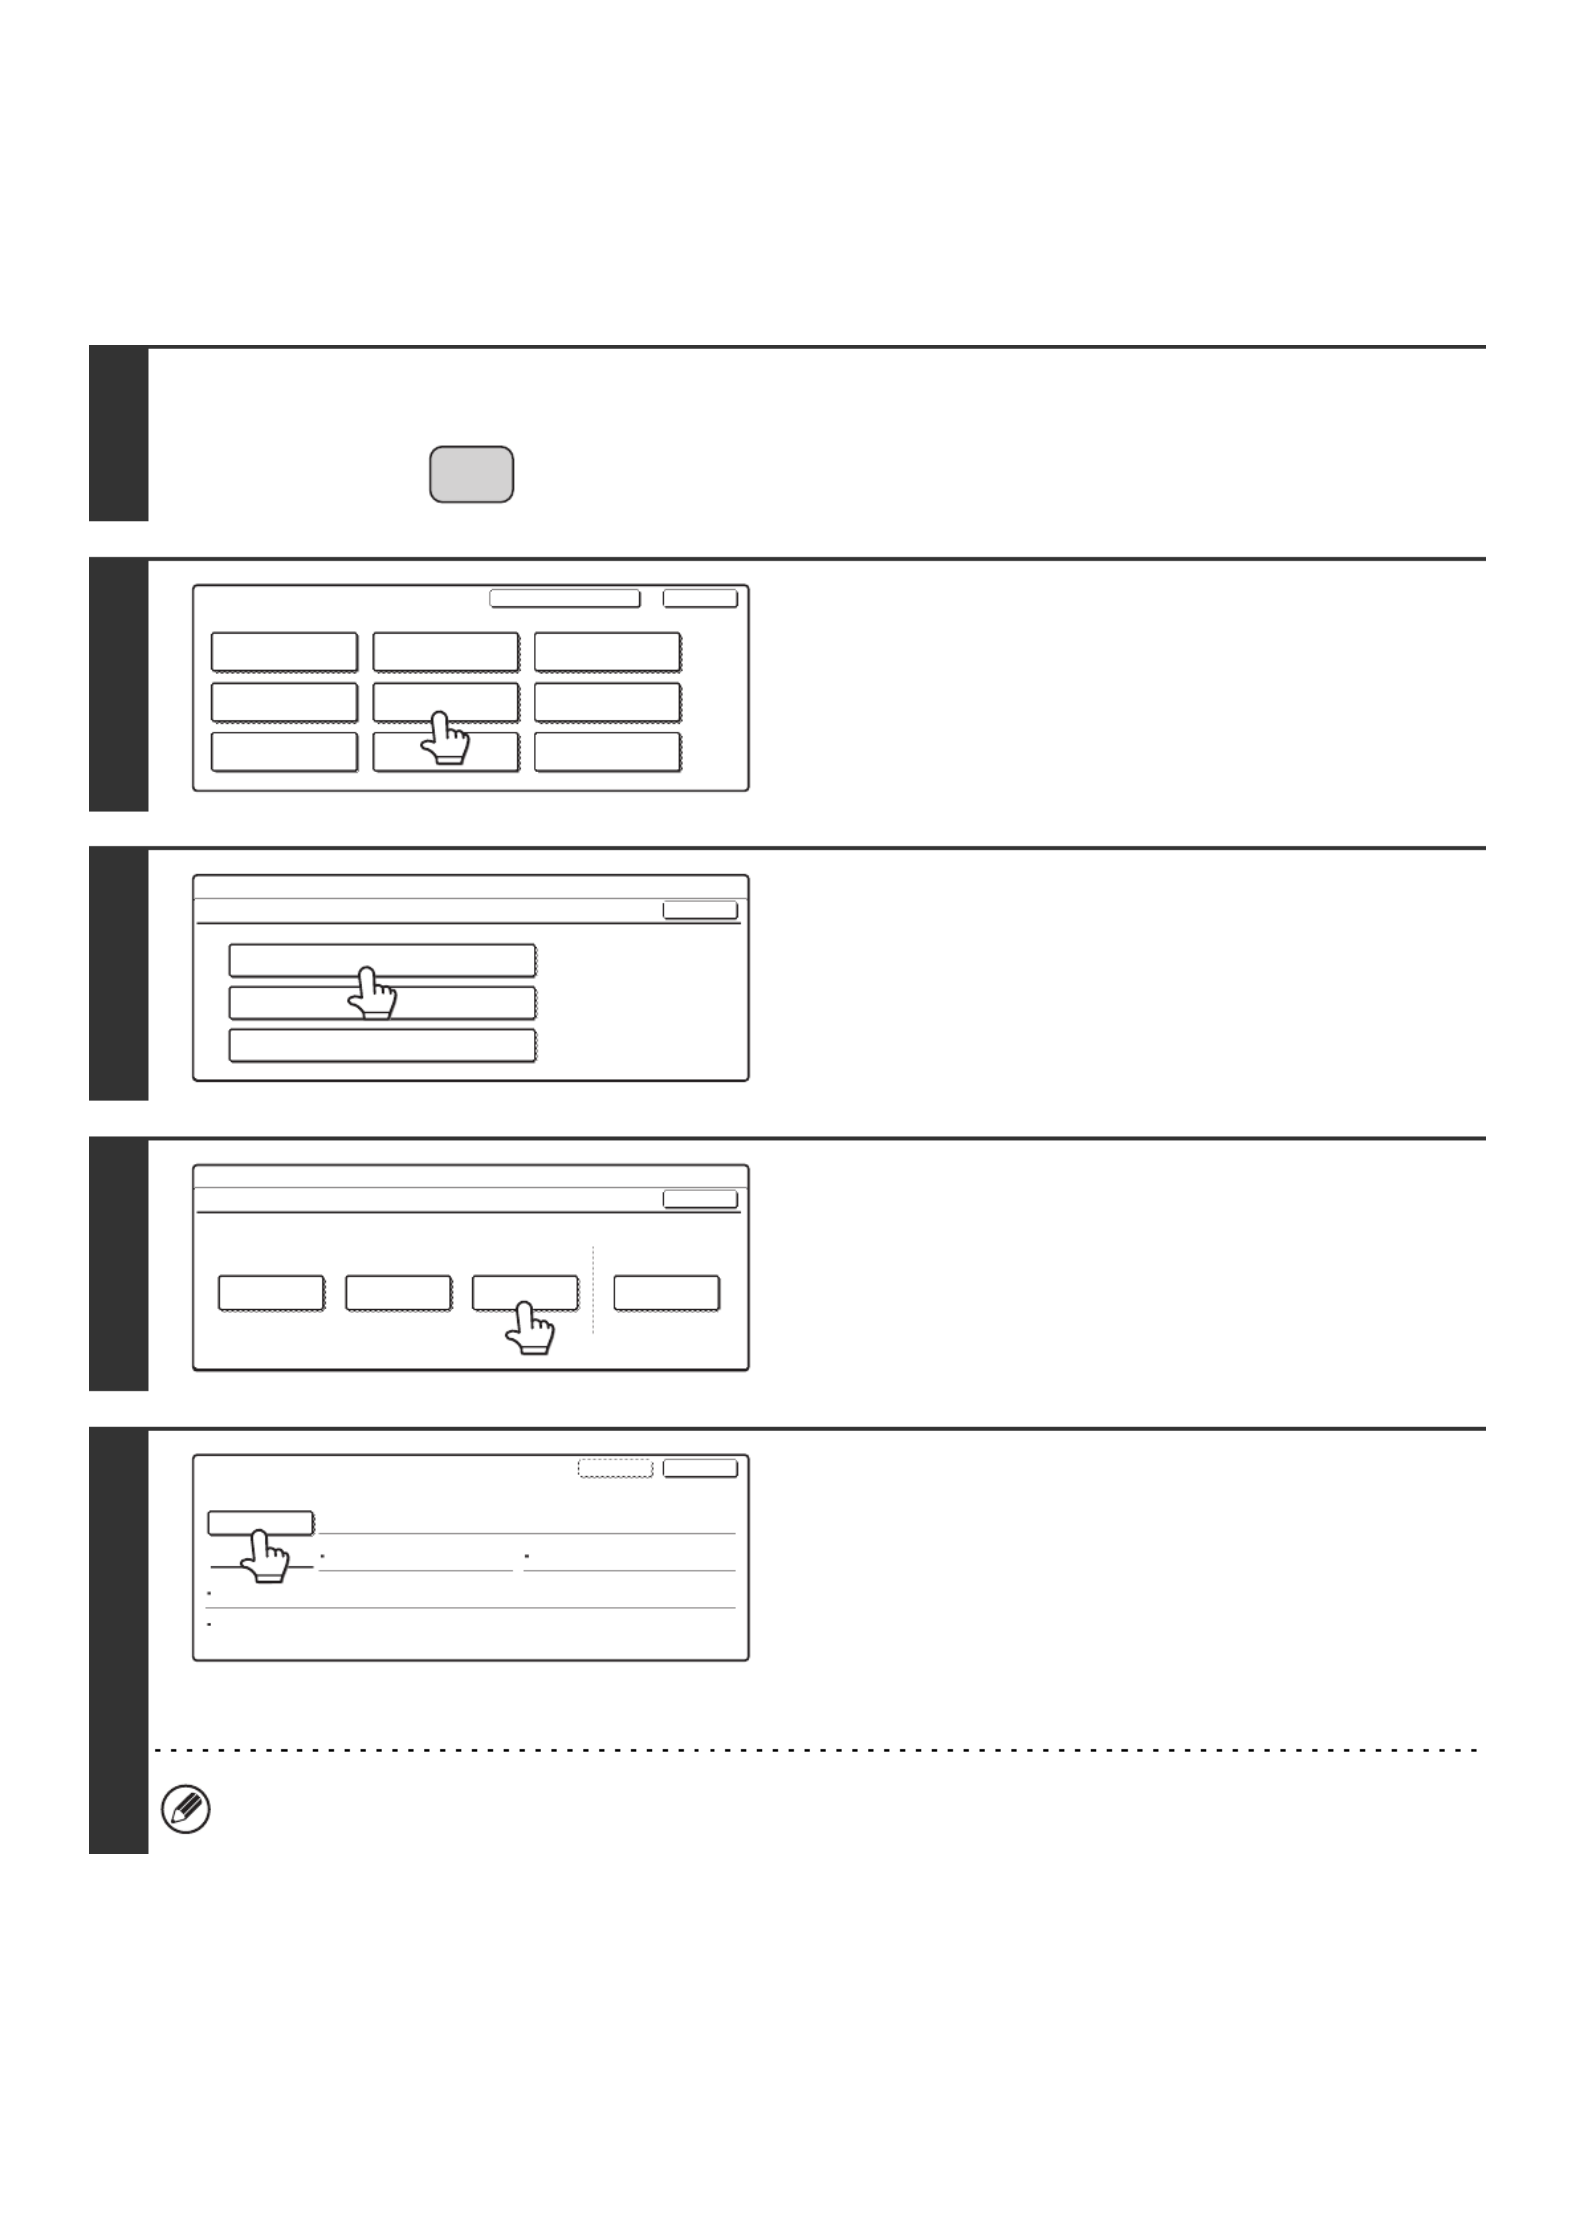
1
Press the [SYSTEM SETTINGS] key.
2
Touch the [Total Count] key.
3
Touch the [Job Count] key.
4
Check the job counts.
(1) If necessary, switch through the screens
with the keys to display the desired
item.
(2) To print the counts, touch the [Print] key.
A message screen appears and printing begins.
• A3 (11" x 17") size paper is counted as two sheets.
• Each sheet of paper used for automatic two-sided copying is counted as two pages (A3 (11" x 17") paper is counted
as four pages).
• An entered paper size of 384 mm (5-1/8") or larger is counted as two pages. (Four pages when two-sided copying is
used.)
• Pages printed directly from the machine such as list prints are included in the "Other Prints" count.
To cancel printing...
Touch the [Cancel] key in the message screen that appears after you touch the [Print] key.
SYSTEM
SETTINGS
System Settings ExitAdmin Password
List Print
(User)
Fax Data
Receive/Forward
USB-Device Check
Default SettingsTotal Count
Paper Tray
Settings
Printer Condition
Settings
Address Control
Document Filing
Control
System Settings
Total Count
Job Count Device Count
OK
System Settings
Job Count
Total Count
Copies
Prints
Other Prints
Fax Receive
OKPrint
1/3
B/W F. Colour
12,147,369
3,123,147
3,246,810
36,914,700
21,020,030
15,894,670
2 Colour
39,800
39,800
S. Colour
72,568
72,568
4,680,100
1,097,312
(2) (1)

16
Device Count
This is used to display or print the counts of the peripheral devices installed on the machine.
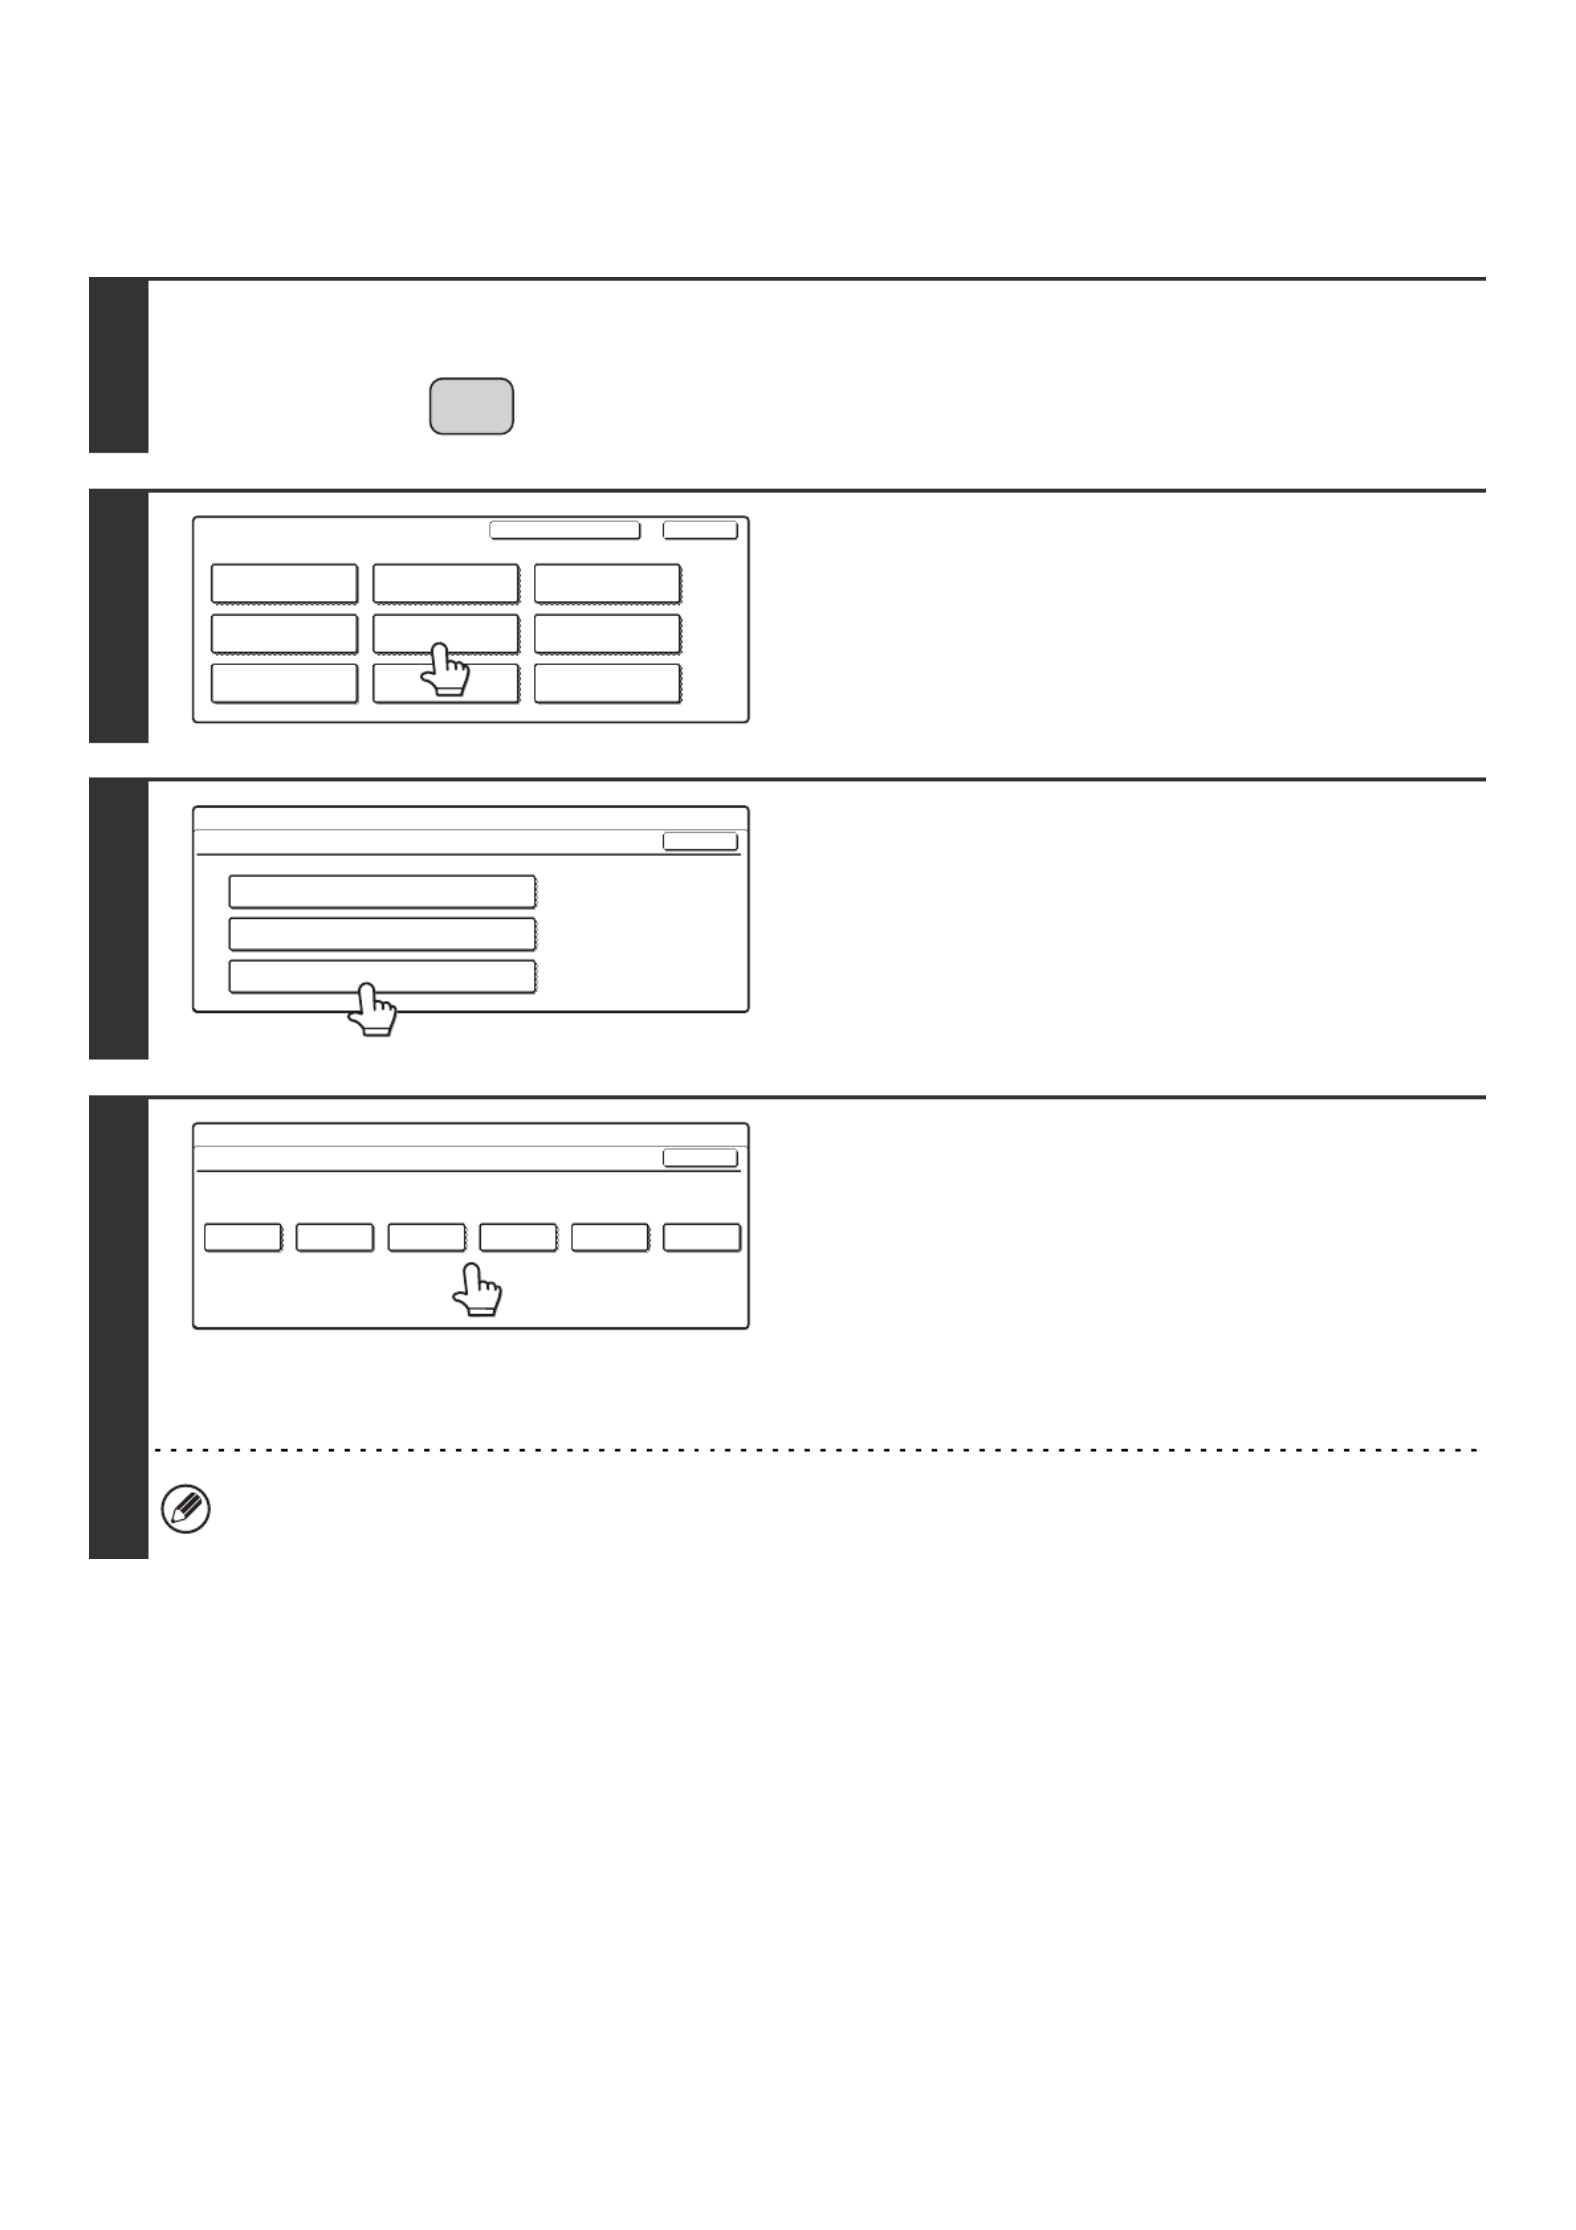
1
Press the [SYSTEM SETTINGS] key.
2
Touch the [Total Count] key.
3
Touch the [Device Count] key.
4
Check the device counts.
To print the counts, touch the [Print] key. A message screen
appears and printing begins.
•Document feeder (when an automatic document feeder is installed)
Each sheet is counted as two pages when two-sided scanning is performed.
•Stapler (when a finisher or saddle stitch finisher is installed)
Two-position stapling and pamphlet stapling are counted as "2".
To cancel printing...
Touch the [Cancel] key in the message screen that appears after you touch the [Print] key.
SYSTEM
SETTINGS
System Settings ExitAdmin Password
List Print
(User)
Fax Data
Receive/Forward
USB-Device Check
Default SettingsTotal Count
Paper Tray
Settings
Printer Condition
Settings
Address Control
Document Filing
Control
System Settings
Total Count
Job Count Device Count
OK
System Settings
Device Count
Document Feeder
Duplex
Stapler
:19,496,400
: 6,256,123
: 511,923
OKPrint

17
Default Settings
Display Contrast
Use this to adjust the display to make it easier to view.
1
Press the [SYSTEM SETTINGS] key.
2
Touch the [Default Settings] key.
3
Touch the [Display Contrast] key.
4
Adjust the brightness.
(1) Touch the [Lighter] key or the [Darker] key.
The [Lighter] key lightens the display and the [Darker] key
darkens the display.
(2) Touch the [OK] key.
SYSTEM
SETTINGS
System Settings Admin Password
Default SettingsTotal Count
Address Control
Exit
List Print
(User)
Fax Data
Receive/Forward
USB-Device Check
Paper Tray
Settings
Printer Condition
Settings
Document Filing
Control
System Settings
Default Settings OK
Display Contrast
Clock
Keyboard Select
System Settings
Display Contrast OK
Lighter Darker
ABCDE
ABCDE
ABCDE
ABCDE
(2)(1)

18
Clock
Use this to set the date and time in the machine's built-in clock.
1
Press the [SYSTEM SETTINGS] key.
2
Touch the [Default Settings] key.
3
Touch the [Clock] key.
4
Adjust the date and time.
(1) Touch the [Year], [Month], [Day], [Hour],
and/or [Minute] keys and use the
keys to set the current date and time.
(2) Touch the [OK] key.
• To change the format of the date, touch the [Date Format] key. The following screen will appear.
In the date format screen, select the order of the year, month, and day (DD/MM/YYYY), the separator character, the
position of the day, and 12-hour or 24-hour format.
Select each item and touch the [OK] key.
• If you want the clock to change automatically at the beginning and end of daylight saving time, select the [Daylight
Saving Time Setting] checkbox . For more information, see "Daylight saving time setting" (page 19).
If "Disabling of Clock Adjustment" (page 92) has been enabled in the system settings (administrator), the date and time
cannot be set.
SYSTEM
SETTINGS
System Settings Admin Password
Default SettingsTotal Count
Address Control
Exit
List Print
(User)
Fax Data
Receive/Forward
USB-Device Check
Paper Tray
Settings
Printer Condition
Settings
Document Filing
Control
System Settings
Default Settings OK
Display Contrast
Clock
Keyboard Select
System Settings
Clock Adjust OK
2005 08
MonthYear
01
Day
10
Hour
50
Minute
Date Format
Daylight Saving Time Setting
(2)(1)
System Settings
Date Format
YYYY/MM/DD
MM/DD/YYYY
DD/MM/YYYY
01/08/2005/Tue 10:51
OK
Day-Name
Position
First
Last
12-Hour
24-Hour
/

19
Daylight saving time setting
Area Standard time ➞ Daylight saving time Daylight saving time ➞ Standard time
North America, Canada First Sunday in April, 2:00 to 3:00 AM Last Sunday in October, 2:00 to 1:00 AM
Europe Last Sunday in March, 1:00 to 2:00 AM Last Sunday in October, 1:00 to 0:00 AM
Australia, New Zealand Last Sunday in October, 2:00 to 3:00 AM Last Sunday in March 3:00 to 2:00 AM
Other countries Select the [Daylight Saving Time Setting] checkbox so that a checkmark appears. The clock
setting is configured to normal time plus one hour. When the is selected, clock returns to
normal time.

20
Keyboard Select
The layout of the keyboard that appears in text entry screens can be changed.
1
Press the [SYSTEM SETTINGS] key.
2
Touch the [Default Settings] key.
3
Touch the [Keyboard Select] key.
4
Select the keyboard.
(1) Touch the desired display language.
(2) Touch the [OK] key.
The keyboards that appear and the factory default keyboard vary by country and region.
SYSTEM
SETTINGS
System Settings Admin Password
Default SettingsTotal Count
Address Control
Exit
List Print
(User)
Fax Data
Receive/Forward
USB-Device Check
Paper Tray
Settings
Printer Condition
Settings
Document Filing
Control
System Settings
Default Settings OK
Display Contrast
Keyboard Select
Clock
System Settings
Keyboard Select
English(US) English(UK)
French German
OK
(1) (2)

21
List Print (User)
A test page can be printed to check the machine settings.
All Custom Setting List
This list shows all custom settings, including the hardware status, software status, printer condition settings, system
settings, and total counts.
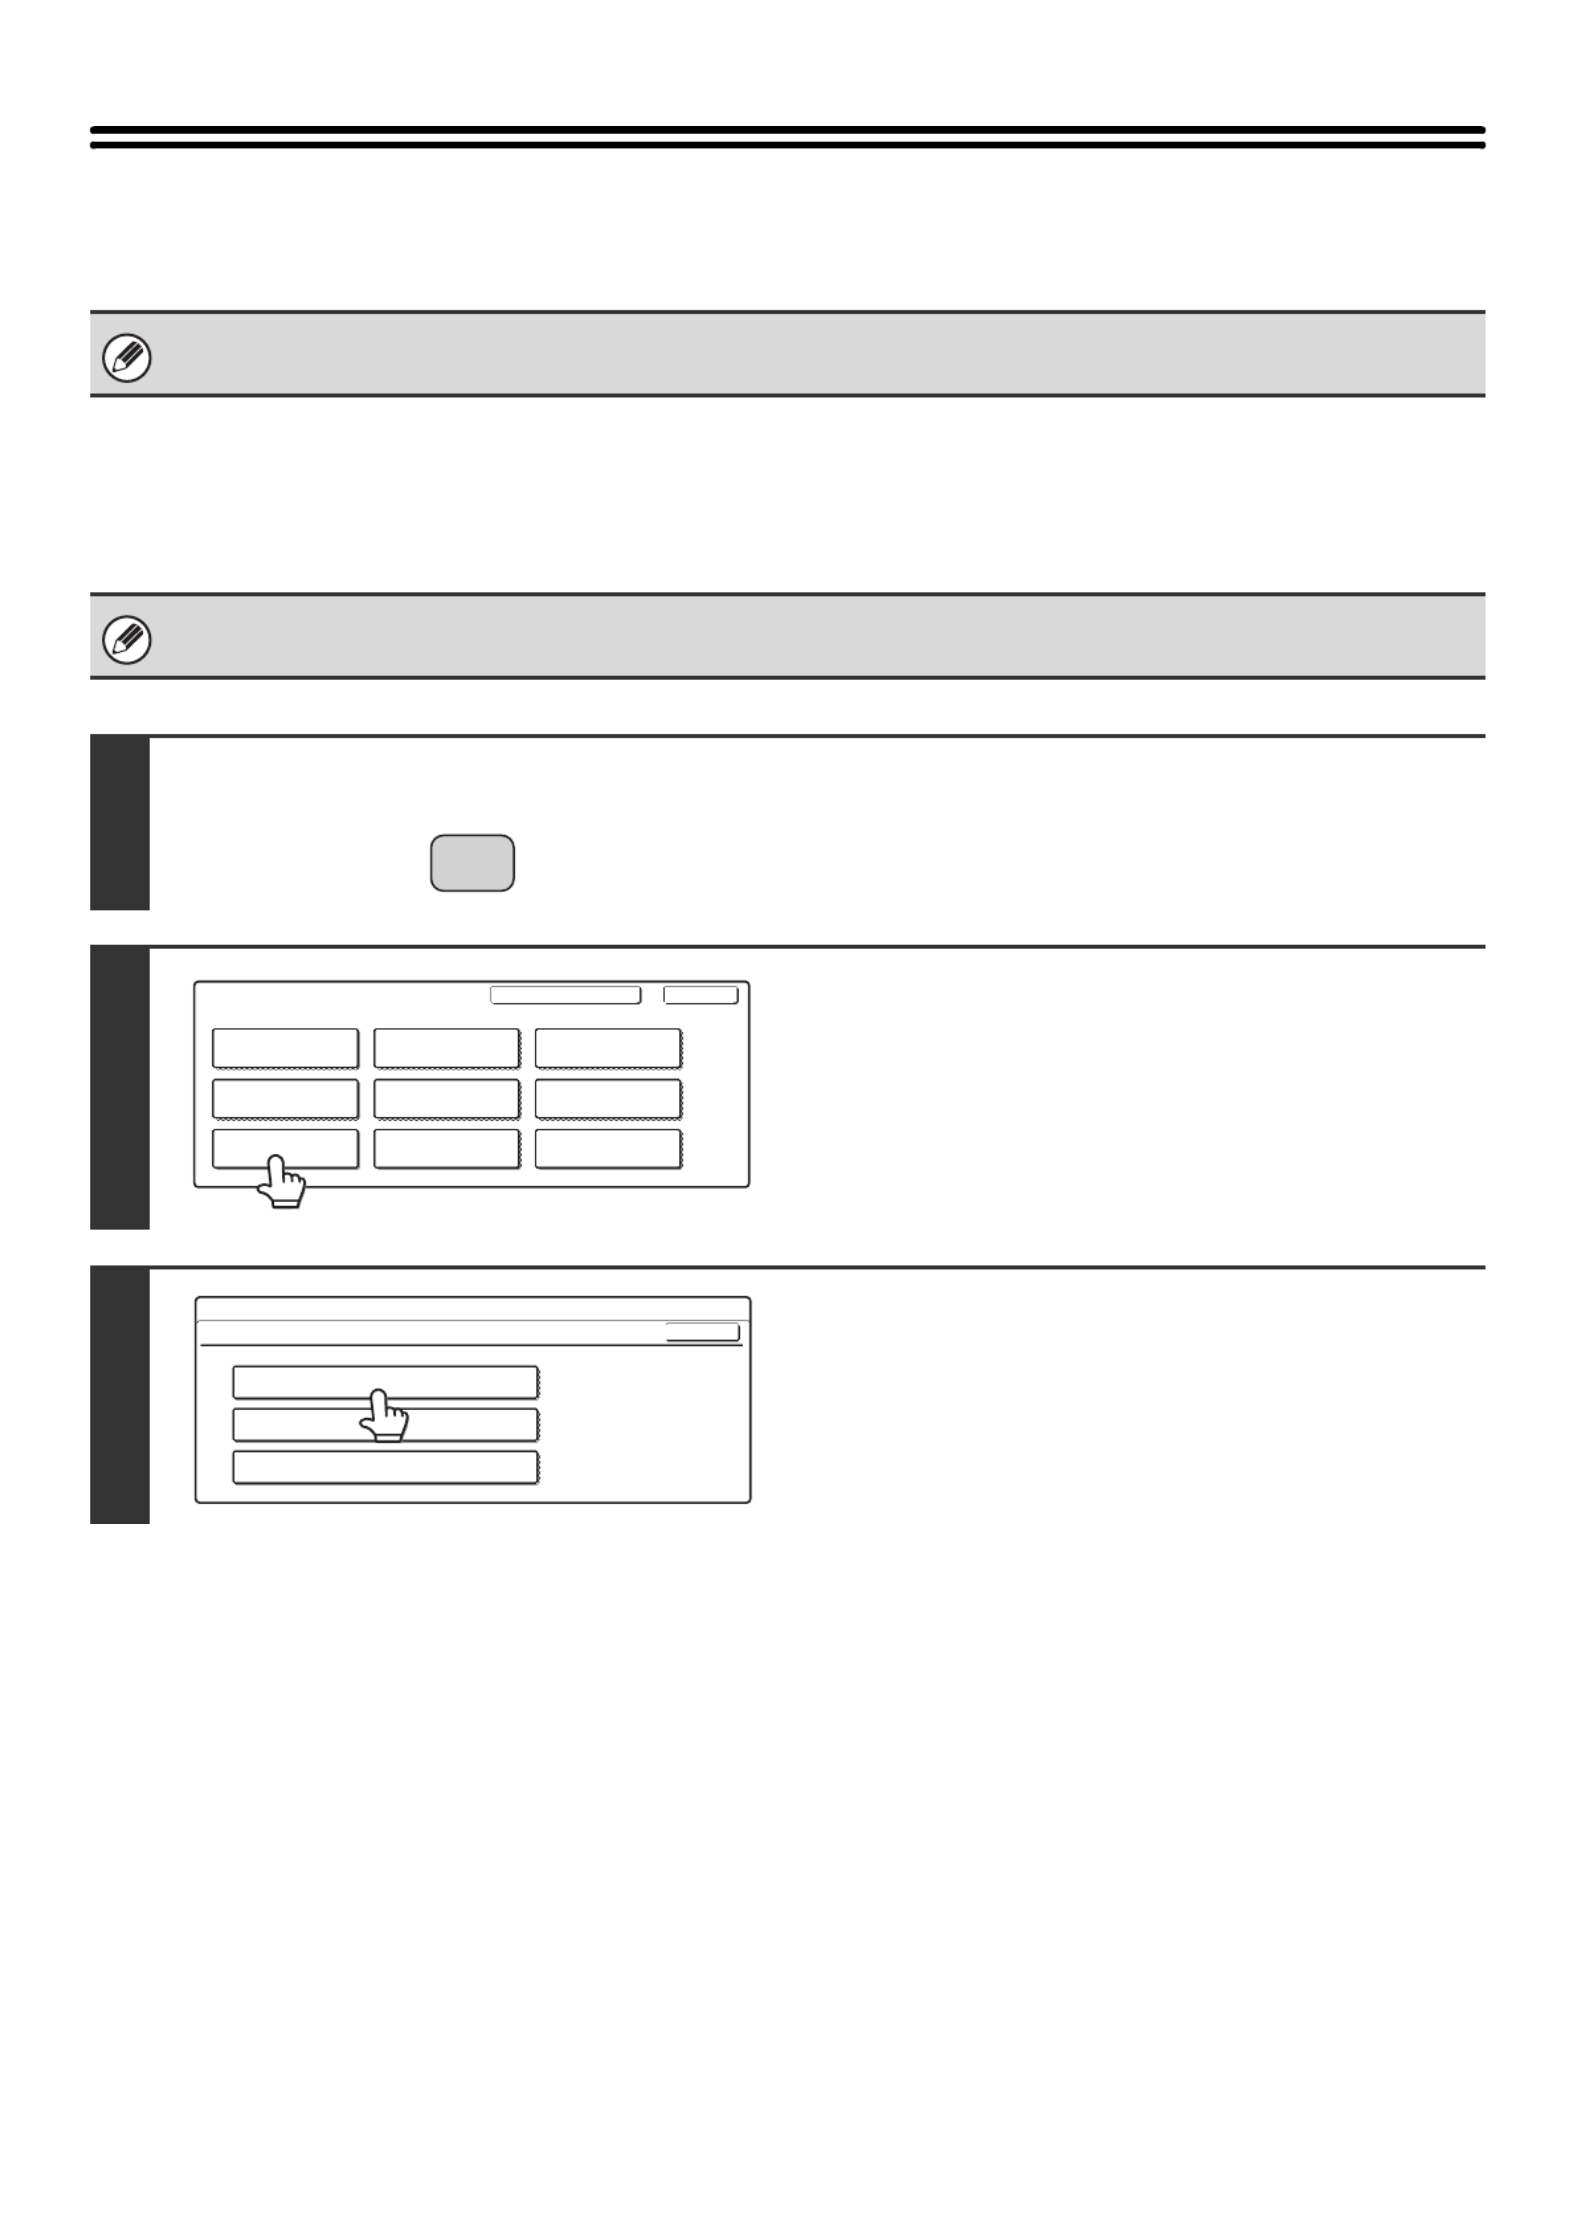
1
Press the [SYSTEM SETTINGS] key.
2
Touch the [List Print (User)] key.
3
Touch the [All Custom Setting List] key.
Printing begins.
SYSTEM
SETTINGS
System Settings Admin Password
Default SettingsTotal Count
Address Control
Exit
List Print
(User)
Fax Data
Receive/Forward
USB-Device Check
Paper Tray
Settings
Printer Condition
Settings
Document Filing
Control
System Settings
List Print (User) OK
All Custom Setting List
Printer Test Page
Sending Address List
1/2

22
Printer Test Page
This is used to print the PCL Symbol Set List, various font lists, and the NIC page (network interface settings, etc.).
1
Press the [SYSTEM SETTINGS] key.
2
Touch the [List Print (User)] key.
3
Touch the [Printer Test Page] key.
4
Touch the list that you wish to print.
Printing begins.
The items that appear will vary depending on the functions that have been added to the machine.
If "Prohibit Test Page Printing" (page 102) has been enabled in the system settings (administrator), it will not be possible to
print test pages.
SYSTEM
SETTINGS
System Settings Admin Password
Default SettingsTotal Count
Address Control
Exit
List Print
(User)
Fax Data
Receive/Forward
USB-Device Check
Paper Tray
Settings
Printer Condition
Settings
Document Filing
Control
System Settings
List Print (User) OK
All Custom Setting List
Printer Test Page
Sending Address List
1/2
System Settings
Printer Test Page OK
PS
Font List
PCL Symbol
Set List
PS Extended
Font List
PCL Internal
Font List
NIC Page
PCL Extended
Font List

23
Sending Address List
Use this to print the Individual List, the Group List, the Program List, the Memory Box List, and the All Sending Address
List.
Can be enabled on MX-2300G/2700G models when the facsimile expansion kit, the Internet fax expansion kit, or the network
scanner expansion kit is installed.
1
Press the [SYSTEM SETTINGS] key.
2
Touch the [List Print (User)] key.
3
Touch the [Sending Address List] key.
4
Touch the list that you wish to print.
A message screen appears and printing begins.
To cancel printing...
Touch the [Cancel] key in the message screen that appears after you touch one of the keys.
SYSTEM
SETTINGS
System Settings Admin Password
Default Settings
Total Count
Address Control
Exit
List Print
(User)
Fax Data
Receive/Forward
USB-Device Check
Paper Tray
Settings
Printer Condition
Settings
Document Filing
Control
System Settings
List Print (User) OK
All Custom Setting List
Printer Test Page
Sending Address List
1/2
System Settings
Sending Address List OK
Memory Box
List
Individual
List
All Sending
Address List
Group List Program List

24
Document Filing Folder List
This shows the folder names for document filing.
1
Press the [SYSTEM SETTINGS] key.
2
Touch the [List Print (User)] key.
3
Print the Document Filing Folder List.
(1) Touch the keys to switch through
the screens.
(2) Touch the [Document Filing Folder List]
key.
A message screen appears and printing begins.
To cancel printing...
Touch the [Cancel] key in the message screen that appears after you touch the [Document Filing Folder List] key.
SYSTEM
SETTINGS
System Settings Admin Password
Default SettingsTotal Count
Address Control
Exit
List Print
(User)
Fax Data
Receive/Forward
USB-Device Check
Paper Tray
Settings
Printer Condition
Settings
Document Filing
Control
System Settings
List Print (User) OK
Document Filing Folder List 2/2
(1)(2)

25
Paper Tray Settings
Tray Settings
This is used to specify the paper type, paper size, and functions used for each paper tray.
1
Press the [SYSTEM SETTINGS] key.
2
Touch the [Paper Tray Settings] key.
3
Touch the [Tray Settings] key.
4
Select the tray that you wish to
configure.
(1) If needed, use the keys to switch
through the trays.
(2) Touch the [Type/Size] key.
SYSTEM
SETTINGS
System Settings Admin Password
Default SettingsTotal Count
Address Control
Exit
List Print
(User)
Fax Data
Receive/Forward
USB-Device Check
Paper Tray
Settings
Printer Condition
Settings
Document Filing
Control
System Settings
Paper Tray Settings OK
Tray Settings
Paper Type Registration
Auto Tray Switching
System Settings
Paper Tray Settings
Type / Size
Tray 1 Fixed Paper Side
Disable Duplex
Disable Staple
Disable Punch
OK
1/6
Print Copy Fax I-Fax Doc.
Filing
Plain / A4
(1)(2)
26
5
Example: Tray 1 is selected Touch the desired paper type.
• The paper types that can be selected vary by paper tray. For more information, see "Tray settings" (page 28).
• To configure [User Type 1] to [User Type 7], see "Paper Type Registration" (page 29).
6
Select the paper size.
(1) Touch the desired paper size.
(2) Touch the [OK] key.
• The paper sizes that can be selected vary by paper tray and model. For more information, see "Tray settings" (page
28).
• When the bypass tray is selected, the paper sizes that can be selected vary depending on the paper type selected
in Step 5. For more information, see "Tray settings" (page 28).
• If you wish to manually specify a special paper size that is not in the list, see "Direct entry of the paper size" (page
27).
System Settings
Tray 1 Type/Size Setting
Select the paper type.
Plain Letter Head
Pre-Printed Pre-Punched
Recycled Colour
Cancel
1/2
1/2
System Settings
Select the paper type.
User Type 1 User Type 2
User Type 5 User Type 6 User Type 7
User Type 3 User Type 4
2/2
1/2
Tray 1 Type/Size Setting Cancel
System Settings
Type
Plain
Type OK
A3 A4RA4
A5R
B5R
B4
216x330(8 x13)
B5
1/3
2/2
Tray 1 Type/Size Setting
Size
1
/
2
(2)(1)
System Settings
Tray 1 Type/Size Setting
Type Size
Plain
Type OK
11x17
2/3
2/2
8 x11R
1
/
2
8 x14
1
/
2
7 p27-x10 R
1
/
4
8 x11
1
/
2
5 p27-x8 R
1
/
2
1
/
2 1
/
2
(2)(1)
System Settings
Type
Plain
Type OK
8K 16K 16KR
3/3
2/2
Tray 1 Type/Size Setting
Size
(2)(1)

27
Direct entry of the paper size
When the bypass tray is selected and a paper type other than transparency film or envelope is selected in step 4 of
"Tray Settings" (page 25), you can follow the steps below to enter the paper size.
7
Select print functions for the tray.
(1) Touch the checkboxes as desired so that
they show or .
(2) Touch the [OK] key.
• Normally all checkboxes are selected . If there is a function that you do not wish to use for the tray, remove the
checkmark .
• If the paper type setting is other than plain paper, recycled paper, coloured paper, or user type, the [Fax] and [I-Fax]
checkboxes cannot be selected.
• The [Fax] checkbox can only be selected when the facsimile expansion kit is installed.
• Tray properties such as "Fixed Paper Side" are automatically set when the paper type is selected. The paper tray
properties cannot be changed in this screen.
1
Touch the [Custom Size] key.
2
Enter the size.
(1) Enter the size.
• Touch the [X] key and enter the horizontal dimension
(X) of the paper with the keys.
• Touch the [Y] key and enter the vertical dimension (Y)
of the paper with the keys.
(2) Touch the [OK] key.
3
Touch the [OK] key.
If "Disabling of Tray Setting" (page 95) has been enabled in the system settings (administrator), the tray (except bypass tray)
settings cannot be configured.
System Settings
Paper Tray Settings
Tray 1 Fixed Paper Side
Disable Duplex
Disable Staple
Disable Punch
OK
1/6
Fax
Type / Size
Print Copy Doc.
Filing
Plain / A4
I-Fax
(2)(1)
System Settings
Type
Plain
Size
Type OK
8K
16K
16KR
2/2
Auto-Inch
Auto-AB
A3W,A3,A4,A4R,A5R,B4
B5,B5R,216x330(8 x13)
11x17,8 x11
1
2
1
2
12x18,11x17,8 x14
8 x11,8 x11R,5 p28-x8 R
7 p28-x10 R,A3,A4,B4,B5
1
2
1
4
1
2
1
2
1
2
1
2
1
2
Bypass Tray Type/Size Setting
Custom Size X420 Y297
System Settings
X
Y
Bypass Tray Type/Size Setting
Plain
Type
Type
Y
Y 297
X 420
OK
OK
Auto-Inch
Auto-AB
AB Inch
Custom Size
(148 432)
mm
(100 297)
mm
(2)(1)
System Settings
Type
Plain
Type OK
8K
16K
16KR
2/2
Auto-Inch
Auto-AB
A3W,A3,A4,A4R,A5R,B4
B5,B5R,216x330(8 x13)
11x17,8 x11
1
2
1
2
12x18,11x17,8 x14
8 x11,8 x11R,5 p28-x8 R
7 p28-x10 R,A3,A4,B4,B5
1
2
1
4
1
2
1
2
1
2
1
2
1
2
X200 Y260
Bypass Tray Type/Size Setting
Custom Size
Size

28
Tray settings
Paper Tray Paper Type Size
Tray 1, 2 • Plain
• Letter Head
• Pre-Printed
• Pre-Punched
• Recycled
• Colour
• User Type
MX-2300/2700 Series MX-3500/4500 Series
A3, A4, A4R, A5R, B4, B5, B5R
216 mm x 330 mm (8-1/2" x 13"),
11" x 17", 8-1/2" x 14",
8-1/2" x 11", 8-1/2" x 11"R,
7-1/4" x 10-1/2"R,
5-1/2" x 8-1/2"R,
8K, 16K, 16KR
• Auto-AB
A3, A4, A4R, B4, B5, B5R
216 mm x 330 mm
(8-1/2" x 13")
• Auto-Inch
11" x 17", 8-1/2" x 14",
8-1/2" x 11", 8-1/2" x 11"R,
7-1/4" x 10-1/2"R
• Manual
A5R, 5-1/2" x 8-1/2", 8K, 16K,
16KR
Tray 3, 4
(varies
depending
on the
peripheral
devices
installed)
Stand/1x500
sheet paper
drawer,
Stand/2x500
sheet paper
drawer
installed
• Auto-AB
A3, A4, A4R, B4, B5, B5R
216 mm x 330 mm
(8-1/2" x 13")
• Auto-Inch
11" x 17", 8-1/2" x 14",
8-1/2" x 11", 8-1/2" x 11"R,
7-1/4" x 10-1/2"R
• 8K, 16K, 16KR
• Auto-AB
A3, A4, A4R, B4, B5, B5R
216 mm x 330 mm
(8-1/2" x 13")
• Auto-Inch
11" x 17", 8-1/2" x 14",
8-1/2" x 11", 8-1/2" x 11"R,
7-1/4" x 10-1/2"R
• Manual
8K, 16K, 16KR
Tray 4, 5
(varies
depending
on the
peripheral
devices
installed)
Large
capacity tray
installed
A4, B5, 8-1/2" x 11" (paper size change must be performed by a service
technician)
Bypass tray • Plain
• Letter Head
• Pre-Printed
• Pre-Punched
• Recycled
• Colour
• Thin Paper
• Heavy Paper
• User Type
• Auto-AB
A3W, A3, A4, A4R, A5R, B4, B5, B5R, 11" x 17",
216 mm x 330 mm (8-1/2" x 13"), 8-1/2" x 11"
• Auto-Inch
12" x 18", 11" x 17", 8-1/2" x 14", 8-1/2" x 11", 8-1/2" x 11"R,
7-1/4" x 10-1/2"R, 5-1/2" x 8-1/2"R, A3, A4, B4, B5
• Manual
8K, 16K, 16KR
• Custom Size
• Labels • Auto-AB
A4, A4R, B5, B5R
• Auto-Inch
8-1/2" x 11", 8-1/2" x 11"R
• Custom Size
• Transparency • Auto-AB
A4, A4R
• Auto-Inch
8-1/2" x 11", 8-1/2" x 11"R
• Tab Paper • Auto-AB
A4
• Auto-Inch
8-1/2" x 11"
• Envelope Com-10, Monarch, DL, C5
29
Paper Type Registration
Configure a "User type" when the name of the paper type does not appear in the selections or when you wish to select
the tray properties yourself. Up to 7 user types can be stored.
1
Press the [SYSTEM SETTINGS] key.
2
Touch the [Paper Tray Settings] key.
3
Touch the [Paper Type Registration] key.
4
Touch the paper type that you wish to
edit.
The user types have been stored by factory default with the names "User Type 1" to "User Type 7".
5
Configure the paper type properties.
(1) To change the type name, touch the [Type
Name] key and change the name.
Clear the pre-entered name, and then enter the desired
name (maximum of 14 characters).
(2) Touch the checkboxes as desired so that
they are or .
(3) Touch the [Exit] key.
• To enable a property, select the checkbox .
• The settings that can be selected vary depending on the peripheral devices installed.
SYSTEM
SETTINGS
System Settings Admin Password
Default SettingsTotal Count
Address Control
Exit
List Print
(User)
Fax Data
Receive/Forward
USB-Device Check
Paper Tray
Settings
Printer Condition
Settings
Document Filing
Control
System Settings
Paper Tray Settings OK
Tray Settings
Paper Type Registration
Auto Tray Switching
System Settings
Paper Type Registration
Select the paper type to edit.
Cancel
User Type 1
User Type 5
User Type 2 User Type 3
User Type 7
User Type 4
User Type 6
Paper Type Registration
No.01
Type Name User Type 1
ExitCancel
Fixed Paper Side
Disable Staple
Disable Duplex
Disable Punch
(3)(1)(2)
30
Auto Tray Switching
When a tray runs out of paper during printing, this determines whether or not another tray with the same size/type of
paper is automatically selected and printing continues.
1
Press the [SYSTEM SETTINGS] key.
2
Touch the [Paper Tray Settings] key.
3
Enable or disable auto tray switching.
(1) Touch the [Auto Tray Switching] checkbox
so that or appears.
(2) Touch the [OK] key.
To enable Auto Tray Switching, select the checkbox .
SYSTEM
SETTINGS
System Settings Admin Password
Default SettingsTotal Count
Address Control
Exit
List Print
(User)
Fax Data
Receive/Forward
USB-Device Check
Paper Tray
Settings
Printer Condition
Settings
Document Filing
Control
System Settings
Paper Tray Settings OK
Tray Settings
Paper Type Registration
Auto Tray Switching
(2)(1)

31
Address Control
This is used to store, edit, and delete one-touch keys, group keys, program keys, and custom indexes.
Storing a One-touch Key (E-mail / Internet Fax)
An address for Scan to E-mail or Internet Fax can be stored to enable easy entry of the address.
To configure one-touch keys for fax and F-code memory boxes, see "11. SYSTEM SETTINGS FOR FAX" in the Facsimile
Guide.
1
Press the [SYSTEM SETTINGS] key.
2
Touch the [Address Control] key.
3
Touch the [Direct Address / Program]
key.
4
Touch the [Individual] key.
SYSTEM
SETTINGS
System Settings Admin Password
Default SettingsTotal Count
Address Control
Exit
List Print
(User)
Fax Data
Receive/Forward
USB-Device Check
Paper Tray
Settings
Printer Condition
Settings
Document Filing
Control
System Settings
Address Control OK
F-Code Memory Box
Custom Index
Direct Address / Program
System Settings
Direct Address / Program OK
Individual Group Program Amend/Delete
Store

32
5
Touch the [E-mail] key or the [Internet
Fax] key so that a checkmark appears
.
• The lowest number not yet used is automatically entered as the [Search Number]. If you wish to change the search
number, touch the [Search Number] key and enter a 3-digit number with the numeric keys. A search number that
has already been stored cannot be used.
• Checkboxes appear when the corresponding functions are enabled.
• The checkbox selection cannot be changed later.
6
Enter the destination name.
(1) Touch the [Name] key.
(2) Enter the destination name on the text entry
screen that will appear.
Enter up to 36 characters for the name.
For the procedure for entering text, see "6. ENTERING
TEXT" in the User's Guide.
7
Enter initials.
(1) Touch the [Initial] key.
(2) Enter initials on the text entry screen that
will appear.
Up to 10 characters can be entered.
For the procedure for entering text, see "6. ENTERING
TEXT" in the User's Guide.
The initials you enter here determine the position of the one-touch key in the ABC index.
8
Touch the [Index] key.
Direct Address / Individual
Search Number
Initial
Name
Fax No.
Next Exit
001
E-mail Internet Fax Fax
Index
1/2
Direct Address / Individual
Search Number
Initial
Name
Address
Next Exit
E-mail Internet Fax Fax
1/2
001
Index
Direct Address / Individual Next Exit
AAA AAA
E-mail Internet Fax Fax
Search Number
Initial
Name
Address
001
Index
1/2
Direct Address / Individual Next Exit
AAA AAA
A
E-mail Internet Fax Fax
Search Number
Initial
Name
Address
001
Index
1/2
33
9
Select the index.
(1) Touch the key of the desired index.
(2) Touch the [OK] key.
• One of the upper row of keys, [User 1] to [User 6] (the names can be changed) can be selected to have the address
appear in that index when the custom index display is selected instead of the ABC index display.
• The lower keys are for selecting whether or not to include the address in the [Frequent Use] index. It is convenient
to include frequently used addresses and groups in the [Frequent Use] index.
10
Enter the destination address.
(1) Touch the [Address] key.
(2) Enter the destination address on the text
entry screen that will appear.
Up to 64 characters can be entered.
For the procedure for entering text, see "6. ENTERING
TEXT" in the User's Guide.
• When the address is entered, "Registration is completed." will appear.
• Only the first 32 characters of the stored address will appear next to the [Address] key, regardless of how many
characters were stored.
11
E-mail
Internet Fax
Check the settings.
(1) Touch the keys to switch through
the screens.
(2) Check the key name.
If you need to change the name that appears in the key,
touch the [Key Name] key and enter the correct name
(maximum of 18 characters).
(3) Check the format and compression mode.
To change the settings, touch the [File Format] key or the
[Compression] key. (Go to step 12)
(A) If the address is an Internet fax address,
check the I-Fax Reception Report Request
setting.
Select whether or not you wish to receive a reception
report by e-mail after transmission is completed. To
change the setting, touch the [I-Fax Report] key and
select the desired setting.
The characters appearing next to the [Key Name] key will be displayed in the one-touch key. The first 18 characters of
the address name entered in step 6 initially appear.
Direct Address / Individual
Select the custom index where you register this address.
Do you register this address at the [Frequent Use], too?
No.001
Index OK
ExitNext
User 1 User 2 User 3
Yes No
User 4 User 5 User 6
(2)(1)
Direct Address / Individual Next Exit
AAA AAA
A
E-mail Internet Fax Fax
1/2
User 1
Search Number
Initial
Name
Address
001
Index
Direct Address / Individual
Key Name
Exit
2/2
AAA AAA
Next
File Format Colour/Grey : PDF/Medium
B/W : PDF/MMR(G4)
Registration is completed.Search Number 001
E-mail Internet Fax Fax
(1)(3) (2)
Direct Address / Individual
Key Name
I-Fax Report
Next
2/2
Compression MH (G3)
Off
Exit
AAA AAA
E-mail Internet Fax Fax
Search Number 001 Registration is completed.
(A) (3)(2) (1)
34
12
●To set the format
E-mail
Scanning in Mono 2
(1) Touch the desired file type key.
(2) Touch the desired compression mode key.
(3) Touch the [OK] key.
Scanning in colour/greyscale
(1) Change the mode to Colour/Greyscale
mode.
Colour/Greyscale mode is selected when the
[Colour/Grey] key is highlighted.
(2) Touch the desired file type key.
(3) Touch the desired compression ratio key.
(4) Touch the [OK] key.
●To set the compression mode
Internet Fax (1) Touch the desired compression mode key.
(2) Touch the [OK] key.
13
Touch the [Exit] key.
To store another one-touch key...
Touch the [Next] key and repeat the procedure from step 5.
• A total of 999 one-touch keys and group keys can be stored.
• It will not be possible to store destinations for a function if this has been prohibited using "Disable Registering Destination
from Operation Panel" (page 107) in the system settings (administrator).
Direct Address / Individual
File Type
No.001
File Format OK
ExitNext
PDF
Encrypt PDF
TIFF MMR(G4)
None
Compression Mode
MH(G3)
Colour/Grey
B/W
(3)(1) (2)
Direct Address / Individual
File Type
No.001
File Format OK
ExitNext
PDF
Encrypt PDF
TIFF
Medium
Low
High
B/W
JPEG
Compression Ratio
Colour/Grey
(4) (1)(2) (3)
ExitNext
Direct Address / Individual
No.001
Compression Mode
MMR(G4)
MH(G3)
(2)(1)
OK
Direct Address / Individual
Key Name
Exit
2/2
AAA AAA
Next
File Format Colour/Grey : PDF/Medium
B/W : PDF/MMR(G4)
Registration is completed.Search Number 001
E-mail Internet Fax Fax

35
Storing a Group Key
Multiple addresses can be stored as a group for a broadcast transmission.
1
Press the [SYSTEM SETTINGS] key.
2
Touch the [Address Control] key.
3
Touch the [Direct Address / Program]
key.
4
Touch the [Group] key.
5
Enter a name for the group.
(1) Touch the [Group Name] key.
(2) Enter a name for the group on the text entry
screen that will appear.
Enter up to 36 characters for the name.
For the procedure for entering text, see "6. ENTERING
TEXT" in the User's Guide.
The lowest number not yet used is automatically entered as the [Search Number]. If you wish to change the search
number, touch the [Search Number] key and enter a 3-digit number with the numeric keys. A search number that has
already been stored cannot be used.
SYSTEM
SETTINGS
System Settings Admin Password
Default SettingsTotal Count
Address Control
Exit
List Print
(User)
Fax Data
Receive/Forward
USB-Device Check
Paper Tray
Settings
Printer Condition
Settings
Document Filing
Control
System Settings
Address Control OK
F-Code Memory Box
Custom Index
Direct Address / Program
System Settings
Direct Address / Program OK
Individual Group Program Amend/Delete
Store
Direct Address / Group ExitNext
Search Number 001
Initial
Group Name
Key Name
Index Address

36
6
Enter initials.
(1) Touch the [Initial] key.
(2) Enter initials on the text entry screen that
will appear.
Up to 10 characters can be entered.
For the procedure for entering text, see "6. ENTERING
TEXT" in the User's Guide.
The initials you enter here determine the position of the one-touch key in the ABC index.
7
Touch the [Index] key.
8
Select the index.
(1) Touch the key of the desired index.
(2) Touch the [OK] key.
• One of the upper row of keys, [User 1] to [User 6] (the names can be changed) can be selected to have the group
appear in that index when the custom index display is selected instead of the ABC index display.
• The lower keys are for selecting whether or not to include the group in the [Frequent Use] index. It is convenient to
include frequently used addresses and groups in the [Frequent Use] index.
9
Touch the [Address] key.
Direct Address / Group
Search Number
Group Name
001
BBB BBB
Initial
Next Exit
Index Address
Key Name
Direct Address / Group
Search Number
Group Name
Initial
Next Exit
Address
Key Name
Index
001
B
BBB BBB
Direct Address / Group
Select the custom index where you register this address.
Do you register this address at the [Frequent Use], too?
No.001
Index OK
Next
Yes No
Exit
User 1 User 2 User 3 User 4 User 5 User 6
(2)(1)
Direct Address / Group
Search Number
Group Name
Initial
Next Exit
Index Address
Key Name
001
B
User 1
BBB BBB

37
10
Select the destination addresses.
(1) Touch the keys of the desired destinations.
The selected destinations are highlighted and stored in
the group key.
(2) Touch the [OK] key.
• Touch the [OK] key. "Registration is completed." will appear.
• Keys that cannot be stored as group keys are greyed out to prevent selection.
• To directly enter an address or check the selected addresses, see "Direct entry" (page 38) and "Checking
addresses" (page 38).
• Up to 500 addresses can be programmed.
If an incorrect address is selected...
Touch the address once again so that it is not highlighted. This removes it from the group being stored.
11
Check the key name.
If you need to change the name that appears in the key, touch
the [Key Name] key and enter the correct name (maximum of
18 characters).
The characters appearing next to the [Key Name] key will be displayed in the group key. Initially the first 18 characters
of the group name entered in step 5 appear.
12
Touch the [Exit] key.
To store another group...
Touch the [Next] key and repeat the procedure from step 5.
• A total of 999 one-touch keys and group keys can be stored.
• It will not be possible to store a group if this has been prohibited using "Disable Registering Destination from Operation
Panel" (page 107) in the system settings (administrator).
Direct Address / Group
Select address. OK
Direct Entry
Address Review
Sort Address
1/2
UVWXYZOPQRSTJKLMNEFGHIABCDFrequent Use
EEE EEE
CCC CCC
AAA AAA
FFF FFF
DDD DDD
BBB BBB
0
(2)(1)
Direct Address / Group
Search Number
Group Name
Initial
Next Exit
Index Address
Key Name
User 1 3 Addresses
B
BBB BBB
001
BBB BBB
Registration is completed.
Direct Address / Group
Search Number
Group Name
Initial
Next
Index Address
Key Name
3 Addresses
001 Registration is completed.
Exit
User 1
B
BBB BBB
BBB BBB

38
Direct entry
Checking addresses
• To enter an address that is not stored in a one-touch
key, touch the [Direct Entry] key, select the mode, and
enter the address.
• To check the addresses that have been selected,
touch the [Address Review] key in the address
selection screen. The selected addresses are
displayed.
• To deselect an address from the group, touch the
displayed address.
A message will appear to confirm the deletion. Touch
the [Yes] key.
If "Disable Direct Entry" (page 107) has been enabled in the system settings (administrator), it will not be possible to directly
enter an address.
Direct Address / Group
Select address. OK
Direct Entry
Address Review
Sort AddressUVWXYZOPQRSTJKLMNEFGHIABCD
CCC CCC
BBB BBB
AAA AAA
Fax
E-mail
Internet Fax
Frequent Use
Direct Address / Group
Select address to deselect.
Group Name :BBB BBB
AAA AAA BBB BBB
CCC CCC
001 002
003
1/1
OK
OK
39
Storing a Program
If you frequently use the same settings and/or functions to transmit to the same destination or destinations, the settings
and destinations can be stored in a program. This allows the settings and destinations to be selected by simply selecting
the program.
1
Press the [SYSTEM SETTINGS] key.
2
Touch the [Address Control] key.
3
Touch the [Direct Address / Program]
key.
4
Touch the [Program] key.
5
Enter a program name.
(1) Touch the [Program Name] key.
(2) Enter a program name on the text entry
screen that will appear.
Enter up to 18 characters for the name.
For the procedure for entering text, see "6. ENTERING
TEXT" in the User's Guide.
The program number that automatically appears is the lowest number from 1 to 48 that has not yet been programmed.
(This number cannot be selected from the numbers that have not been programmed.)
SYSTEM
SETTINGS
System Settings Admin Password
Default SettingsTotal Count
Address Control
Exit
List Print
(User)
Fax Data
Receive/Forward
USB-Device Check
Paper Tray
Settings
Printer Condition
Settings
Document Filing
Control
System Settings
Address Control OK
F-Code Memory Box
Custom Index
Direct Address / Program
System Settings
Direct Address / Program OK
Individual Group Program Amend/Delete
Store
Program
Program Name
Settings
Next Exit
Address Resolution
No.1
Exposure
Special
Modes

40
6
Touch the [Settings] key.
7
Select settings for the program.
(1) Touch the [Mode Switch] key to select the
mode that you wish to store in the program.
(2) Select the destinations and settings that
you wish to include in the program.
For information on the settings, see the Scanner Guide.
(3) Touch the [OK] key.
8
Touch the [Exit] key.
To store another program...
Touch the [Next] key and repeat the procedure from step 5.
• A timer setting cannot be included in a program.
• At least one one-touch key must be specified in a program or the program cannot be stored.
• Up to 48 programs can be stored.
Program
Program Name
Settings
Next Exit
Address
CCC CCC
Resolution
No.1
Exposure
Special
Modes
Special Modes
Address Review
Cancel OK
Address Book
Mode Switch
Image
Settings
Enter program you require.
Internet Fax
Scan Fax
(1)
Special Modes
Address Review
OK
Address Book
Scan
Mode Switch
Enter program you require. Cancel
Image
Settings
(3)
(2)
Program
Program Name
Settings
Next Exit
No.1 Registration is completed.
CCC CCC
Address
Erase
4 Addresses Resolution 200X200dpi
Exposure
Special
Modes
351 Text/Photo

42
6
Edit/Delete
Individual
Group
Program
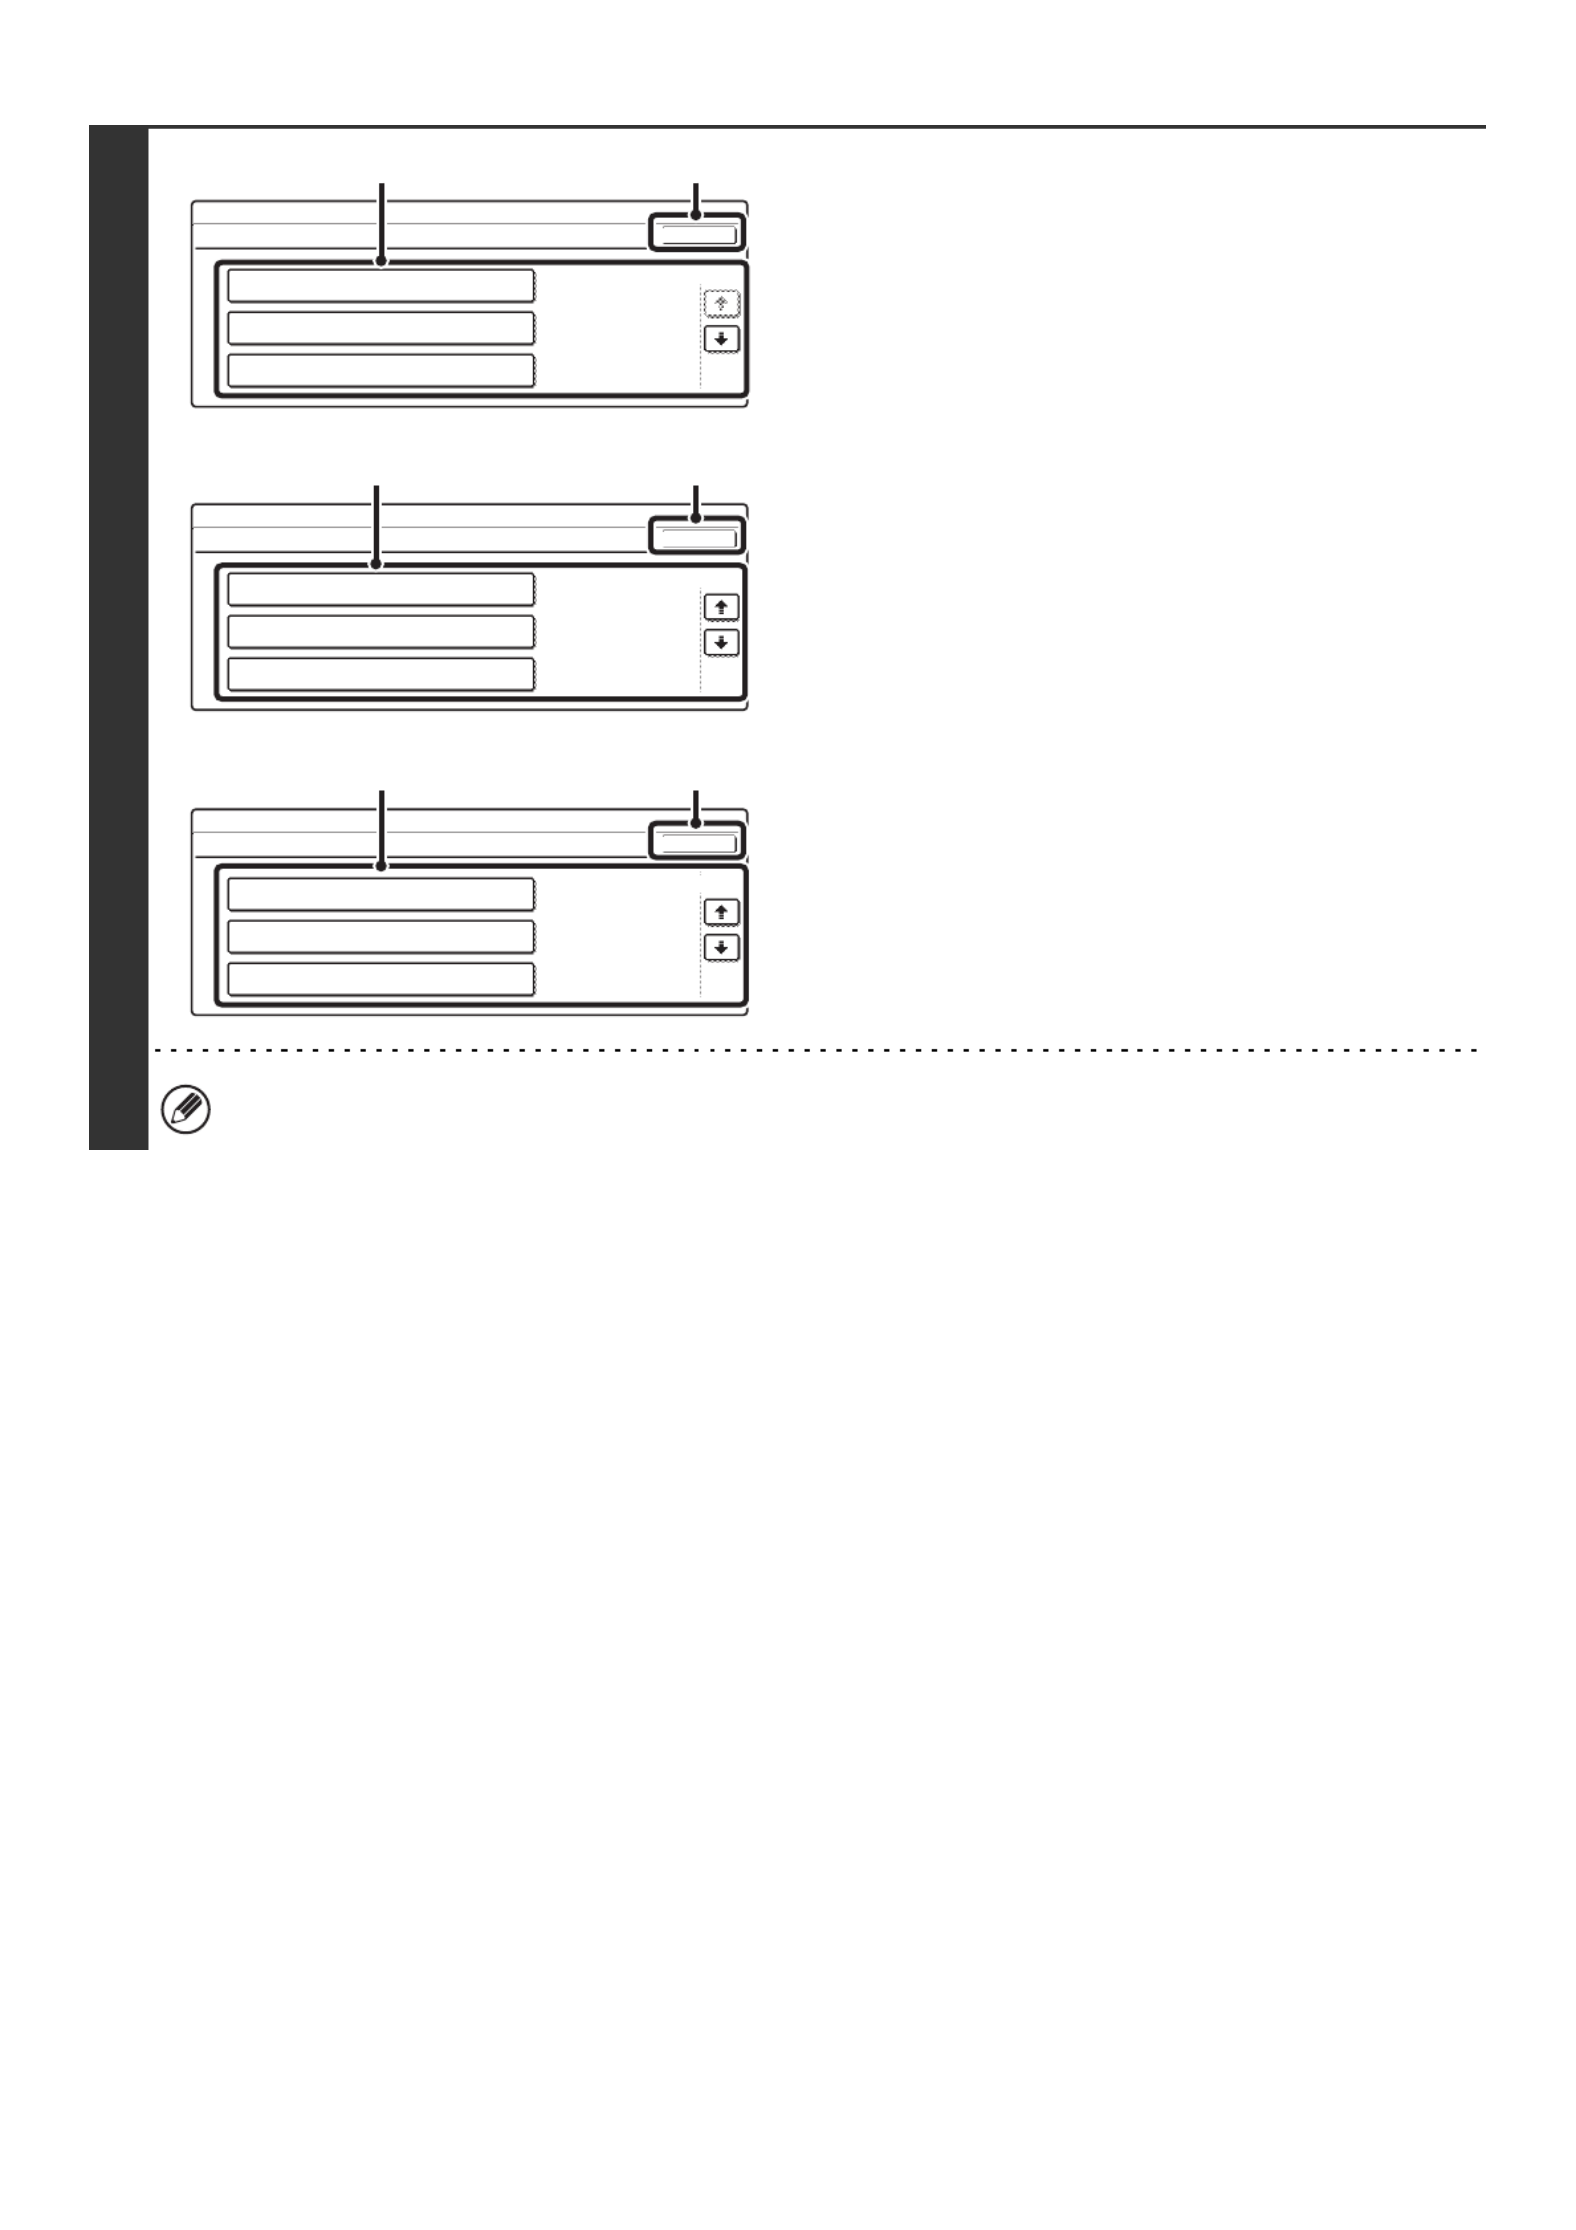
● Editing
(1) Touch the keys of the items that you wish to
edit.
Edit the items in the same way as you stored them.
For the procedure for entering text, see "6. ENTERING
TEXT" in the User's Guide.
(2) Touch the [Exit] key.
● Deleting
(1) Touch the [Delete] key.
(2) Touch the [Yes] key.
To cancel the deletion...
Touch the [No] key.
Direct Address / Amend/Delete
1/2
ExitDelete
Internet Fax
User 1
FaxE-mail
Search Number
Initial Index
Address
Name AAA AAA
A
abc@aaa.co.jp
001
(2)(1)
Search Number 001
Group Name
Initial
Index
Key Name
AddressUser 1
Delete Exit
BBB BBB
B
BBB BBB
3 Addresses
Direct Address / Amend/Delete
(2)(1)
ExitDelete
No.1
Program Name CCC CCC
Address 4 Addresses Resolution 200X200dpi
Text
Erase
Exposure
Settings
351
Direct Address / Amend/Delete
Special
Modes
(2)(1)
1/2
ExitDelete
Internet Fax
User 1
FaxE-Mail
Search Number
Initial Index
Address
Name AAA AAA
A
abc@aaa.co.jp
001
Direct Address / Amend/Delete
(1)
Delete the address?
No Yes
AAA AAA
(2)

43
If you cannot edit or delete an individual (one-touch) key or group key...
• If the individual key or group key that you are attempting to edit or delete is being used in a reserved transmission
(including a timer transmission) or a transmission in progress, wait until the transmission is finished or cancel the
transmission.
• If the individual or group key that you are attempting to edit or delete is included in a group key (in the case of an individual
key) or a program, delete the key from the group or program and then edit or delete the key.
• If your administrator has enabled "Default Address Setting" (on the machine) or "Inbound Routing Settings" (in the Web
pages), editing and deleting will not be possible. Remove the destinations that are preventing editing/deleting, and then
edit or delete the key.
44
Changing the Name of a Custom Index
You can change the name of a custom index used for individual and group keys.
1
Press the [SYSTEM SETTINGS] key.
2
Touch the [Address Control] key.
3
Touch the [Custom Index] key.
4
Change the index name.
(1) Touch the key of the desired index.
(2) Change the index name on the text entry
screen that will appear.
Clear the pre-entered name, and then enter the desired
name (maximum of 6 characters).
For the procedure for entering text, see "6. ENTERING
TEXT" in the User's Guide.
• The factory default names for the custom indexes are "User 1" to "User 6".
• To change another custom index, repeat this procedure.
SYSTEM
SETTINGS
System Settings Admin Password
Default SettingsTotal Count
Address Control
Exit
List Print
(User)
Fax Data
Receive/Forward
USB-Device Check
Paper Tray
Settings
Printer Condition
Settings
Document Filing
Control
System Settings
Address Control OK
F-Code Memory Box
Custom Index
Direct Address / Program
System Settings
Custom Index
Select the key to be custom named.
OK
User 2User 1 User 3 User 4 User 5 User 6

45
Fax Data Receive/Forward
Internet Fax Manual Reception
Follow the steps below to connect to your mail server (POP3 server) and check for received Internet faxes. If you have
received Internet faxes, the faxes will be retrieved and printed.
To use this setting, POP3 server settings must be configured. Configure these settings in the screen that appears when
[Application Settings] > [Internet Fax Settings] is selected in the Web page menu. (When the Internet fax expansion kit is
installed.)
1
Press the [SYSTEM SETTINGS] key.
2
Touch the [Fax Data Receive/Forward]
key.
3
Touch the [Internet Fax Manual
Reception] key.
4
Touch the [Reception Start] key.
If you have faxes, the faxes are retrieved.
When the [Manual Reception Key in Initial Screen] checkbox is selected , the [Manual RX] key appears in the
base screen of Internet fax mode.
SYSTEM
SETTINGS
System Settings Admin Password
Default Settings
Total Count
Address Control
Exit
List Print
(User)
Fax Data
Receive/Forward
USB-Device Check
Paper Tray
Settings
Printer Condition
Settings
Document Filing
Control
System Settings
Fax Data Receive/Forward OK
Fax Data Forward
Internet Fax Manual Reception
Fax Receive Settings 1/2
System Settings
Internet Fax Manual Reception
Manual Reception Key in Initial Screen
OK
Reception Start

46
Internet Fax Data Forward
When the machine cannot print because it is out of paper or out of toner, received faxes can be forwarded to another
Internet fax machine.
This procedure can be performed when the Internet fax expansion kit is installed.
1
Press the [SYSTEM SETTINGS] key.
2
Touch the [Fax Data Receive/Forward]
key.
3
Forward the received faxes.
(1) Touch the keys to switch through
the screens.
(2) Touch the [Internet Fax Data Forward] key.
(3) Touch the [Yes] key.
• Forwarding is not possible if no faxes were received or a forwarding machine is not programmed.
• If "Hold Setting for Received Data Print" (page 106) is enabled, you will be prompted to enter a password. Enter the
correct password with the numeric keys.
To cancel...
Touch the [No] key.
To cancel the forwarding...
Press the [JOB STATUS] key, and then cancel the forwarding job in the same way as a transmission job is cancelled.
• If forwarding was not successful because the transmission was cancelled or a communication error occurred, the faxes
that were to be forwarded will return to the print job queue and wait to be printed on the machine.
• If the initial pages of a fax were successfully printed, only those pages that were not printed will be forwarded.
• To program the address for data forwarding, see " " (page 113) in the system settings Set Address for Data Forwarding
(administrator).
SYSTEM
SETTINGS
System Settings Admin Password
Default SettingsTotal Count
Address Control
Exit
List Print
(User)
Fax Data
Receive/Forward
USB-Device Check
Paper Tray
Settings
Printer Condition
Settings
Document Filing
Control
System Settings
Fax Data Receive/Forward OK
Internet Fax Data Forward 2/2
(1)(2)
Transfer the received data to another
device?
No Yes
(3)
47
Printer Condition Settings
The printer condition settings are used to configure basic printer settings.
Printer Default Settings
The default settings are used to set advanced print conditions for printing in an environment where the print driver is not
used (such as printing from MS-DOS or from a computer that does not have the provided print driver installed).
Can be enabled on MX-2300G/2700G models when the printer expansion kit is installed.
When printing using the printer driver, the printer driver settings take precedence over the printer condition settings.
1
Press the [SYSTEM SETTINGS] key.
2
Touch the [Printer Condition Settings]
key.
3
Touch the [Printer Default Settings] key.
SYSTEM
SETTINGS
System Settings Admin Password
Default Settings
Total Count
Address Control
Exit
List Print
(User)
Fax Data
Receive/Forward
USB-Device Check
Paper Tray
Settings
Printer Condition
Settings Document Filing
Control
System Settings
Printer Condition Settings
Printer Default Settings
PCL Settings
PostScript Settings
OK
48
4
Configure the default printer settings.
(1) Touch the keys that you wish to configure.
When a key is touched, a setting screen appears.
Configure the settings.
(2) Touch the [OK] key.
For the settings, see "Settings" (page 49).
System Settings
Printer Default Settings
Copies
Orientation
1
Portrait
A4
Default Paper Size
OK
1/3
(2)(1)
System Settings
Printer Default Settings
Default Output Tray
Default Paper Type Plain
Centre Tray
OK
2/3
Line Thickness 5
(2)(1)
System Settings
Printer Default Settings
2-Sided Print
Colour Mode B/W
N-Up Print 1-Up
OK
3/3
1-Sided
(2)(1)
49
Settings
*1 When a right tray is installed.
*2 When a saddle stitch finisher or finisher is installed.
*3 This setting is used to adjust the line width of vector graphics (black and white printing only). Except for CAD and
other specialized uses, there is normally no need to change this setting. For more information on the values that can
be set, see the table below.
Values for the line thickness setting
* All lines are minimum line width.
Item Settings Factory default setting
Copies 1 - 999 sets 1
Orientation • Portrait
• Landscape
Portrait
Default Paper Size A3, B4, A4, B5, A5, 11" x 17", 8-1/2" x 14",
8-1/2" x 13", 8-1/2" x 11", 7-1/4" x 10-1/2",
5-1/2" x 8-1/2", 8K, 16K
A4 (8-1/2" x 11")
Default Output Tray*1• Centre Tray
• Finisher Tray*2
• Right Tray
Centre Tray
(Finisher Tray*2)
Default Paper Type Plain Paper, Letter Head, Pre-Printed,
Pre-Punched, Recycle Paper, Colour
Plain Paper
Line Thickness*30 - 9 5
2-Sided Print • 1-Sided
• 2-Sided (Book)
• 2-Sided (Tablet)
1-Sided
Colour Mode • Colour
• B/W
B/W
N-Up Print • 1-Up
• 2-Up
• 4-Up
1-Up
Settings 0 1 2 3 4 5 6 7 8 9
Percentage minimum
line width*
50% 75% 90% 95% 100% 105% 110% 125% 150%
50
PCL Settings
This is used to set the symbol sets, fonts, and line feed code used in PCL6 and PCL5c environment.
Can be enabled on MX-2300G/2700G models when the printer expansion kit is installed.
1
Press the [SYSTEM SETTINGS] key.
2
Touch the [Printer Condition Settings]
key.
3
Touch the [PCL Settings] key.
4
Configure the PCL settings.
(1) Touch the keys or checkboxes of the items
that you wish to configure.
When a key is touched, a setting screen appears.
Configure the settings.
For a checkbox setting, touch the checkbox to set it to
or as desired.
(2) Touch the [OK] key.
For the settings, see "Settings" (page 51).
SYSTEM
SETTINGS
System Settings Admin Password
Default Settings
Total Count
Address Control
Exit
List Print
(User)
Fax Data
Receive/Forward
USB-Device Check
Paper Tray
Settings
Printer Condition
Settings
Document Filing
Control
System Settings
Printer Condition Settings
Printer Default Settings
PCL Settings
PostScript Settings
OK
System Settings
PCL Settings
PCL Symbol Set Setting
PCL Font Setting Internal:0
0
PC-8
PCL Line Feed Code
OK
1/2
(1) (2)
System Settings
PCL Settings
Wide A4
OK
2/2
(1) (2)

51
Settings
Item Settings Factory default setting
PCL Symbol Set Setting
Specify the symbol set used for
printing.
Select from 35 items. 3. (PC-8)
PCL Font Setting
Use this to select the font used for
printing.
• Internal Font
• Extended Font
(List of internal fonts when extended fonts are not
installed.)
Internal Font
0. (Courier)
PCL Line Feed Code
This setting is used to select how
the printer responds when a line
feed command is received.
• 0.CR=CR; LF=LF; FF=FF
• 1.CR=CR+LF; LF=LF;FF=FF
• 2.CR=CR; LF=CR+LF; FF=CR+FF
• 3.CR=CR+LF; LF=CR+LF; FF=CR+FF
0. CR=CR; LF=LF; FF=FF
Wide A4
When this is enabled, 80 characters
per line can be printed on A4 size
paper using a 10-pitch font. (When
this setting is disabled, up to 78
characters can be printed.)
• (Enabled)
• (Disabled)
(Disabled)

52
Postscript Settings
When a PS (PostScript) error occurs during PostScript printing, this setting determines whether or not an error notice is
printed.
This procedure can be performed when the PS3 expansion kit is installed.
1
Press the [SYSTEM SETTINGS] key.
2
Touch the [Printer Condition Settings]
key.
3
Touch the [PostScript Settings] key.
4
Configure the PS settings.
(1) Touch the [Print PS Errors] checkbox so
that or appears.
(2) Touch the [OK] key.
To have PS error notices printed, select the checkbox .
SYSTEM
SETTINGS
System Settings Admin Password
Default Settings
Total Count
Address Control
Exit
List Print
(User)
Fax Data
Receive/Forward
USB-Device Check
Paper Tray
Settings
Printer Condition
Settings Document Filing
Control
System Settings
Printer Condition Settings
Printer Default Settings
PCL Settings
PostScript Settings
OK
System Settings
PostScript Settings
Print PS Errors
OK
(1) (2)

53
Document Filing Control
This is used to create, edit, and delete custom folders for document filing.
Custom Folder Registration
Follow these steps to create a custom folder.
1
Press the [SYSTEM SETTINGS] key.
2
Touch the [Document Filing Control]
key.
3
Touch the [Custom Folder Registration]
key.
4
Enter a folder name.
(1) Touch the [Folder Name] key.
(2) Enter a folder name on the text entry screen
that will appear.
Enter up to 28 characters.
For the procedure for entering text, see "6. ENTERING
TEXT" in the User's Guide.
• The "No." that automatically appears is the lowest number from 001 to 500 that has not yet been programmed. (This
number cannot be selected from the numbers that have not been programmed.)
• A name cannot be programmed if it is already being used for another folder.
SYSTEM
SETTINGS
System Settings Admin Password
Default SettingsTotal Count
Address Control
Exit
List Print
(User)
Fax Data
Receive/Forward
USB-Device Check
Paper Tray
Settings
Printer Condition
Settings
Document Filing
Control
System Settings
Document Filing Control
Custom Folder Registration
Amend/Delete Custom Folder
OK
Custom Folder Registration
Initial Password
User Name
Folder Name
ExitNext
No.001
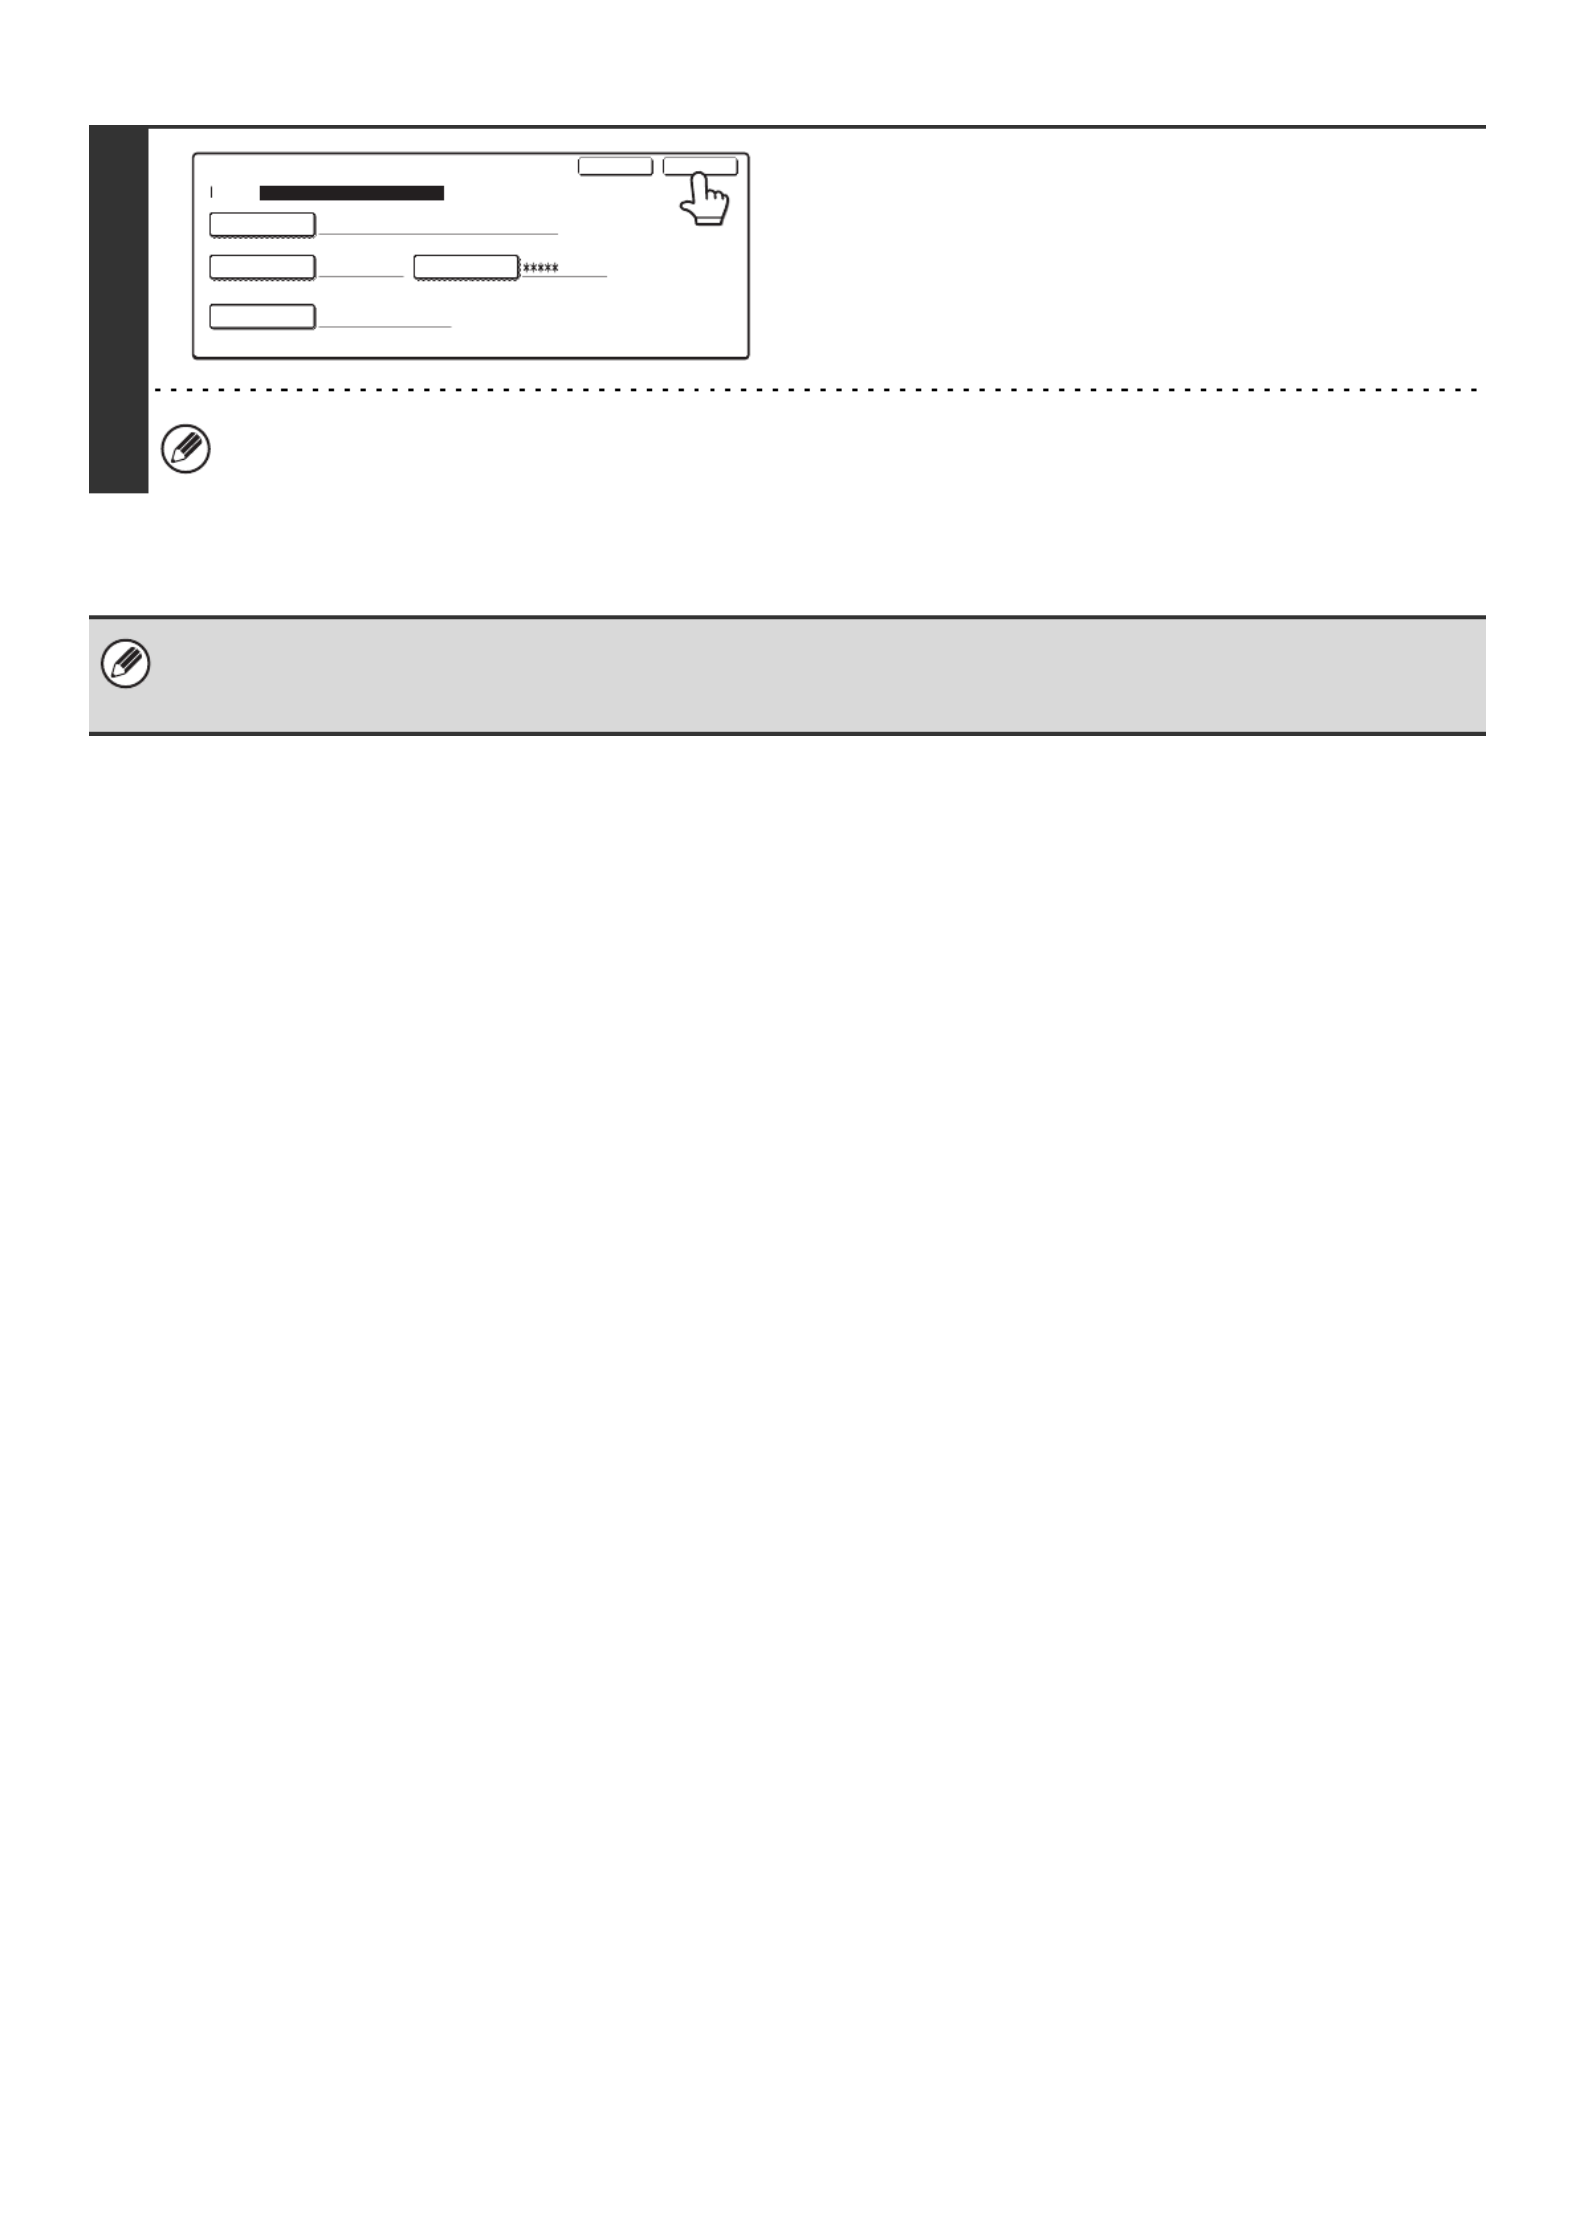
55
10
Touch the [Exit] key.
To create another folder...
Touch the [Next] key and repeat the procedure from step 4.
Up to 500 custom folders can be created.
When no further folders can be created, delete unneeded folders and then create a new folder. To delete a folder, see
"Amend/Delete Custom Folder" (page 56).
Custom Folder Registration
Folder Name
Initial
User Name
Password
Next Exit
No.001
User 1
Registration is completed.
U
BBB BBB

56
Amend/Delete Custom Folder
Follow the steps below to edit or delete a custom folder.
1
Press the [SYSTEM SETTINGS] key.
2
Touch the [Document Filing Control]
key.
3
Touch the [Amend/Delete Custom
Folder] key.
4
Touch the folder that you wish to edit or
delete.
• If a password has been set for the folder, the following password entry screen will appear. Enter the correct
password with the numeric keys and touch the [OK] key.
• If "Delete Folder" is enabled in "Administrator Authority Setting" (page 115) in the system settings (administrator),
the following screen will appear. When the [Admin] key is touched, a folder can be deleted with the administrator
password. (Cannot be edited.)
SYSTEM
SETTINGS
System Settings Admin Password
Default SettingsTotal Count
Address Control
Exit
List Print
(User)
Fax Data
Receive/Forward
USB-Device Check
Paper Tray
Settings
Printer Condition
Settings Document Filing
Control
System Settings
Document Filing Control
Custom Folder Registration
Amend/Delete Custom Folder
OK
1/2
Custom Folder / Amend/Delete
Select custom folder to Amend/delete.
User 1 User 2
User 3 User 4
User 5 User 6
User 7
All Folders ABCD EFGHI JKLMN OPQRST UVWXYZ
User 8
Exit
Enter password via the 10-key pad.
Cancel OK
Enter password via the 10-key pad.
CancelAdmin OK
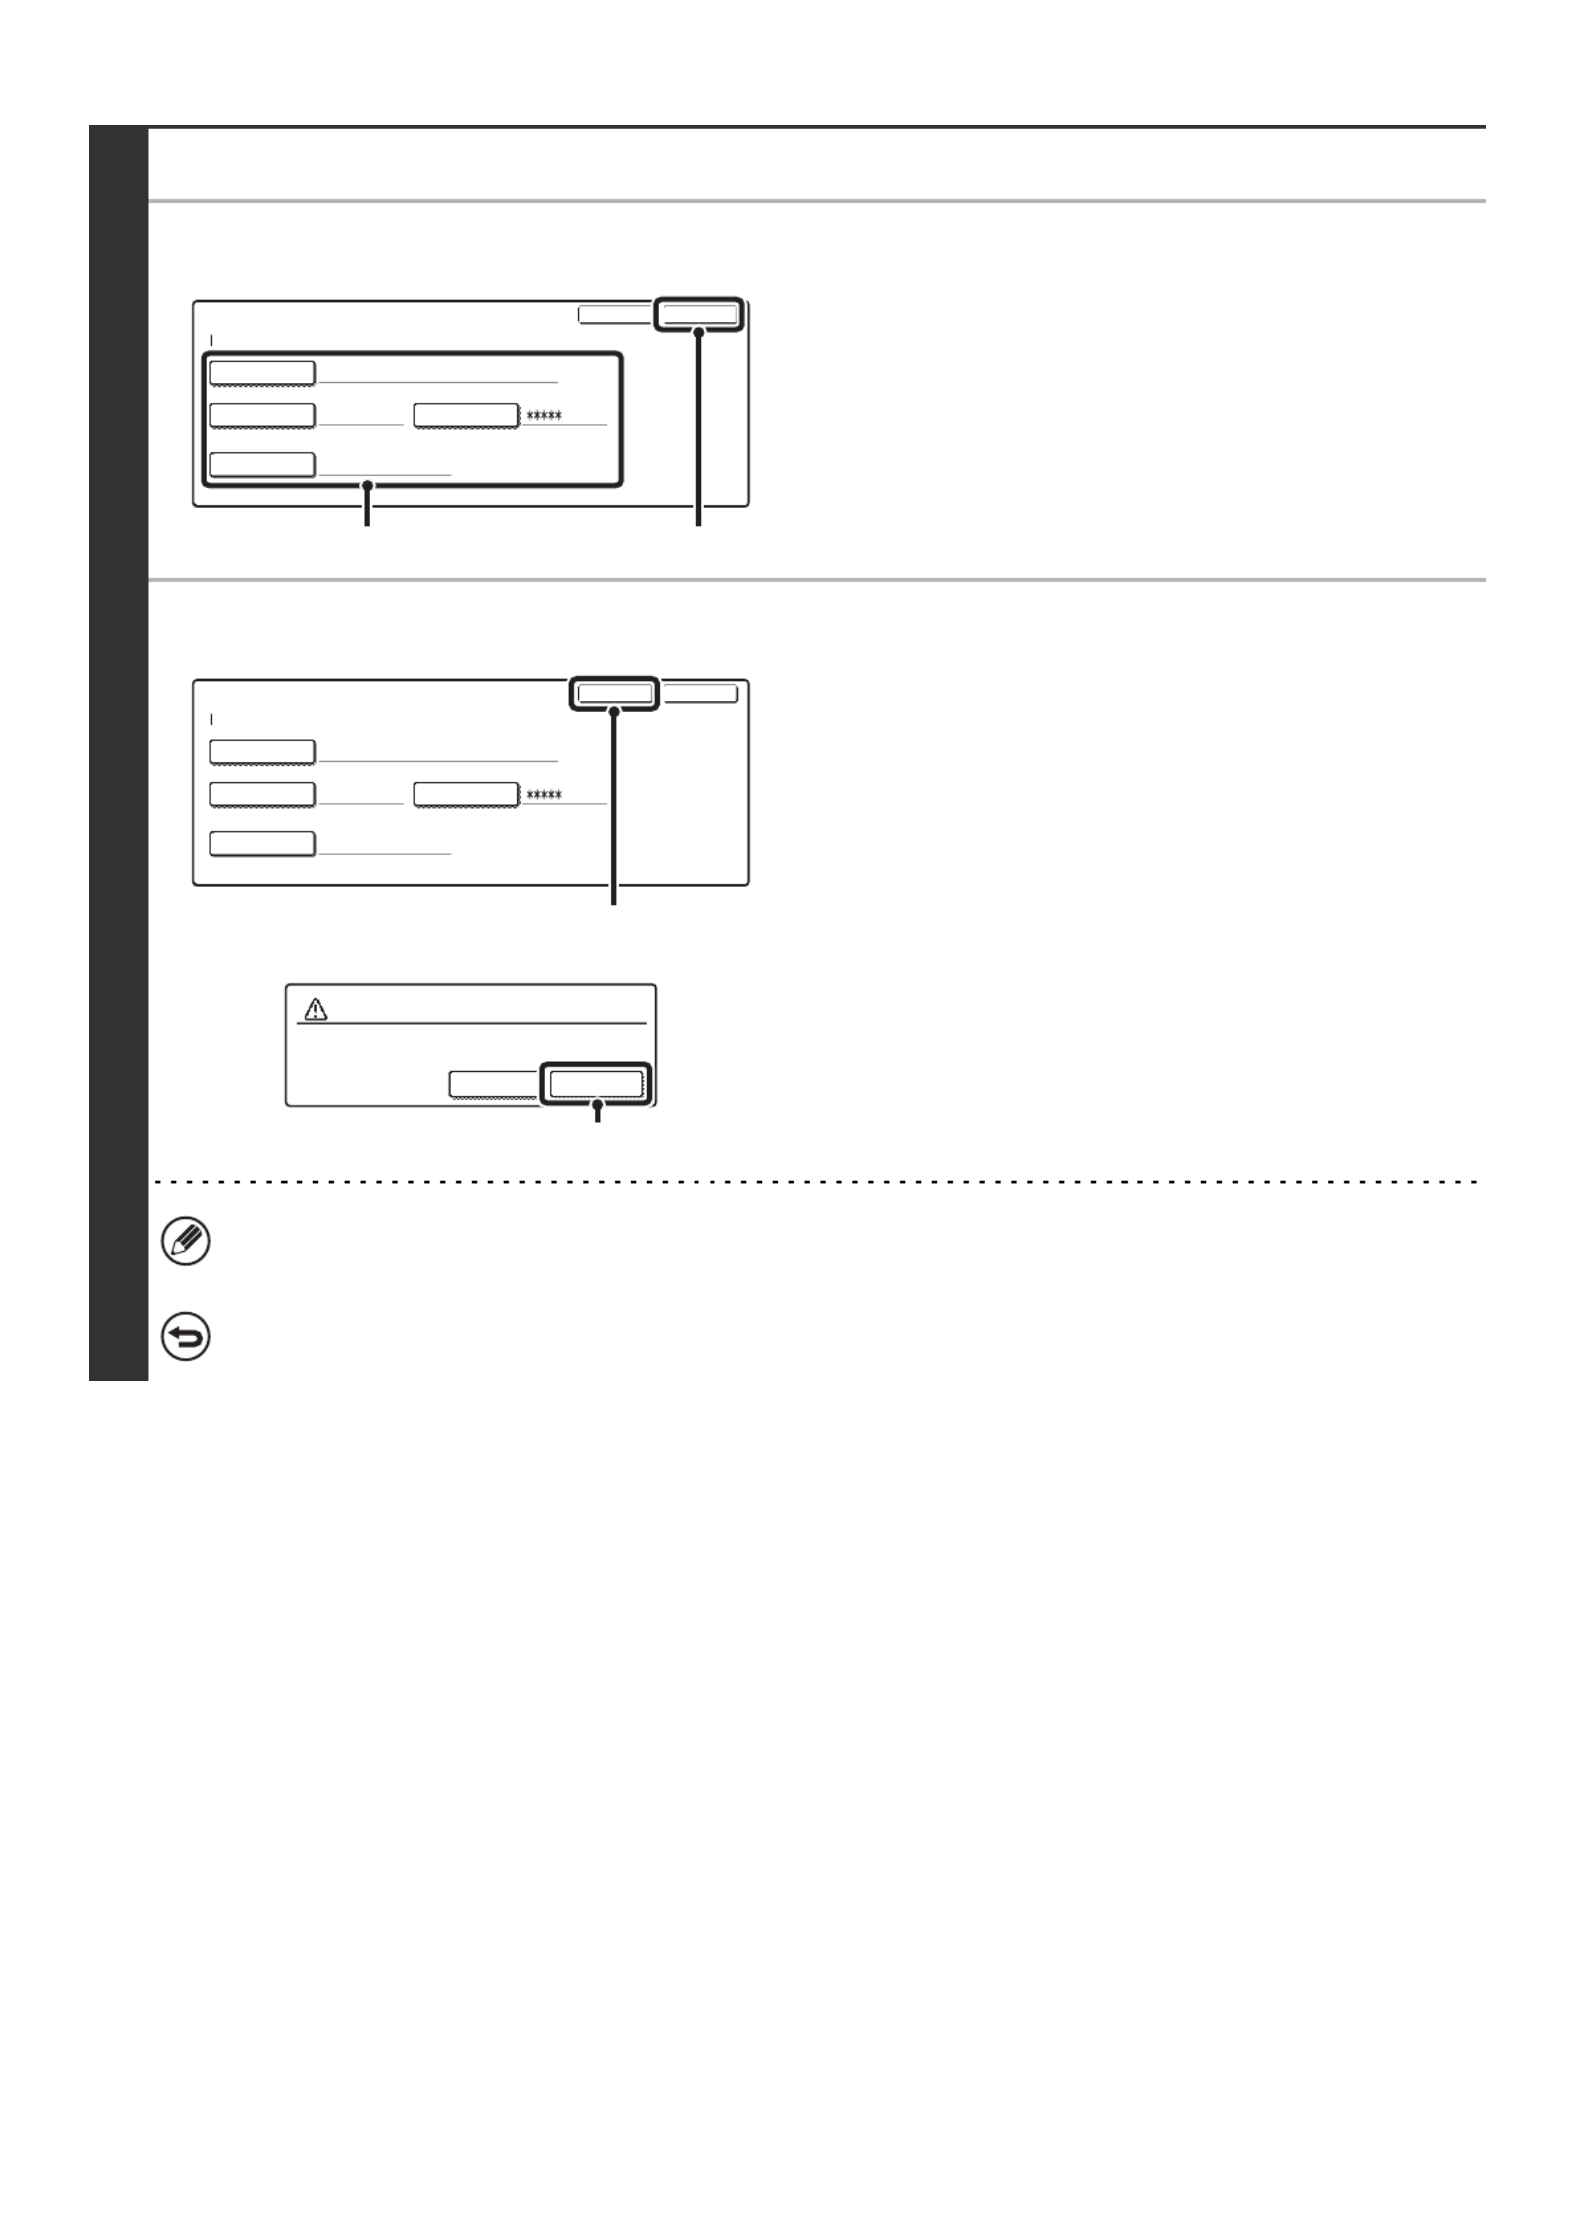
57
5
Edit/Delete
●Editing
(1) Touch the keys of the items that you wish to
edit.
Edit the items in the same way as you stored them.
For the procedure for entering text, see "6. ENTERING
TEXT" in the User's Guide.
(2) Touch the [Exit] key.
●Deleting
(1) Touch the [Delete] key.
(2) Touch the [Yes] key.
A folder that contains files cannot be deleted. Either move the files to a different folder or delete them before deleting
the folder.
To cancel the deletion...
Touch the [No] key.
Custom Folder / Amend/Delete
Initial Password
User Name BBB BBB
U
User 1Folder Name
ExitDelete
No.001
(1) (2)
Custom Folder / Amend/Delete
Initial Password
User Name BBB BBB
U
User 1Folder Name
ExitDelete
No.001
(1)
Delete the folder?
User 1
No Yes
(2)

59
User Control
Amend User Information
The information of the currently logged in user can be edited.
• This setting can only be configured when "User Authentication Setting" (page 81) is enabled.
• Depending on the user that logged in, use of the following settings may not be possible.
1
Press the [SYSTEM SETTINGS] key.
2
Select the [User Control].
(1) Touch the keys to switch through
the screens.
(2) Touch the [User Control] key.
3
Touch the [Amend User Information]
key.
SYSTEM
SETTINGS
System Settings Exit
User Control 2/3
Network Settings
Energy Save Operation Settings
Device Control
Printer Settings
Copy Settings
Image Send
Settings
Document Filing
Settings
(2) (1)
System Settings
User Control
Amend User Information
OK

60
Editable items
4
Modify user information.
(1) Touch the desired items and edit the
contents.
Edit the items in the same way as you stored them.
For the procedure for entering text, see "6. ENTERING
TEXT" in the User's Guide.
(2) Touch the [Exit] key.
For detailed explanations of each of the settings, see "Editable items".
User Information Settings
User Name Edit the name of the user (max. 32 characters). This user name is used for the key
name in the login screen, the document filing user name and the sender name.
(The user name must be unique.)
Initial Enter the initials (maximum of 10 characters). The initials determine where the
user name will appear in the user name list.
Index Select the desired custom index. The custom index names are shared with the
custom indexes of the address book.
Login Name This cannot be edited.
Password Enter the password used for user authentication by user name and password (1 to
32 characters). (The password can be omitted.)
E-mail Address This cannot be edited.
My Folder This cannot be edited.
Auth to: This cannot be edited.
Page Limit This cannot be edited.
Authority This cannot be edited.
Favourites Select the operation settings that are applied at login from the stored Favourite
Operation Groups.
Check with your administrator for the settings of the Favourite Operation Groups.
(User number)
* This appears only when user
authentication is controlled by user
number.
This cannot be edited.
Amend User Information
No.001
User Name AAA AAA
Initial A Index User 1
Login Name AAA AAA
Password
E-mail Address xxx@xx.xxx.com
Exit
1/2
(1) (2)
Amend User Information
No.001
My Folder Main Folder
Auth to: Login Locally
Page Limit Unlimited
UserAuthority
Favourites Following the System Settings
Exit
2/2
(1) (2)

61
This chapter explains the system settings that are configured by the administrator of the machine.
Accessing the System Settings
(Administrator)
To access the system settings (administrator), the administrator must follow the procedure below to log in.
When User Authentication is not Enabled
When "User Authentication Setting" (page 81) is not enabled, follow the procedure below to log in.
2
SYSTEM SETTINGS
(ADMINISTRATOR)
1
Press the [SYSTEM SETTINGS] key.
2
Touch the [Admin Password] key.
3
Log in.
(1) Touch the [Password] key and enter the
administrator password.
For the procedure for entering text, see "6. ENTERING
TEXT" in the User's Guide.
(2) Touch the[OK] key.
SYSTEM
SETTINGS
System Settings ExitAdmin Password
List Print
(User)
Fax Data
Receive/Forward
USB-Device Check
Default Settings
Total Count
Paper Tray
Settings
Printer Condition
Settings
Address Control
Document Filing
Control
System Settings
Administrator Password
Enter the administrator password.(From 5 to 32 characters)
Password
OKCancel
(1) (2)
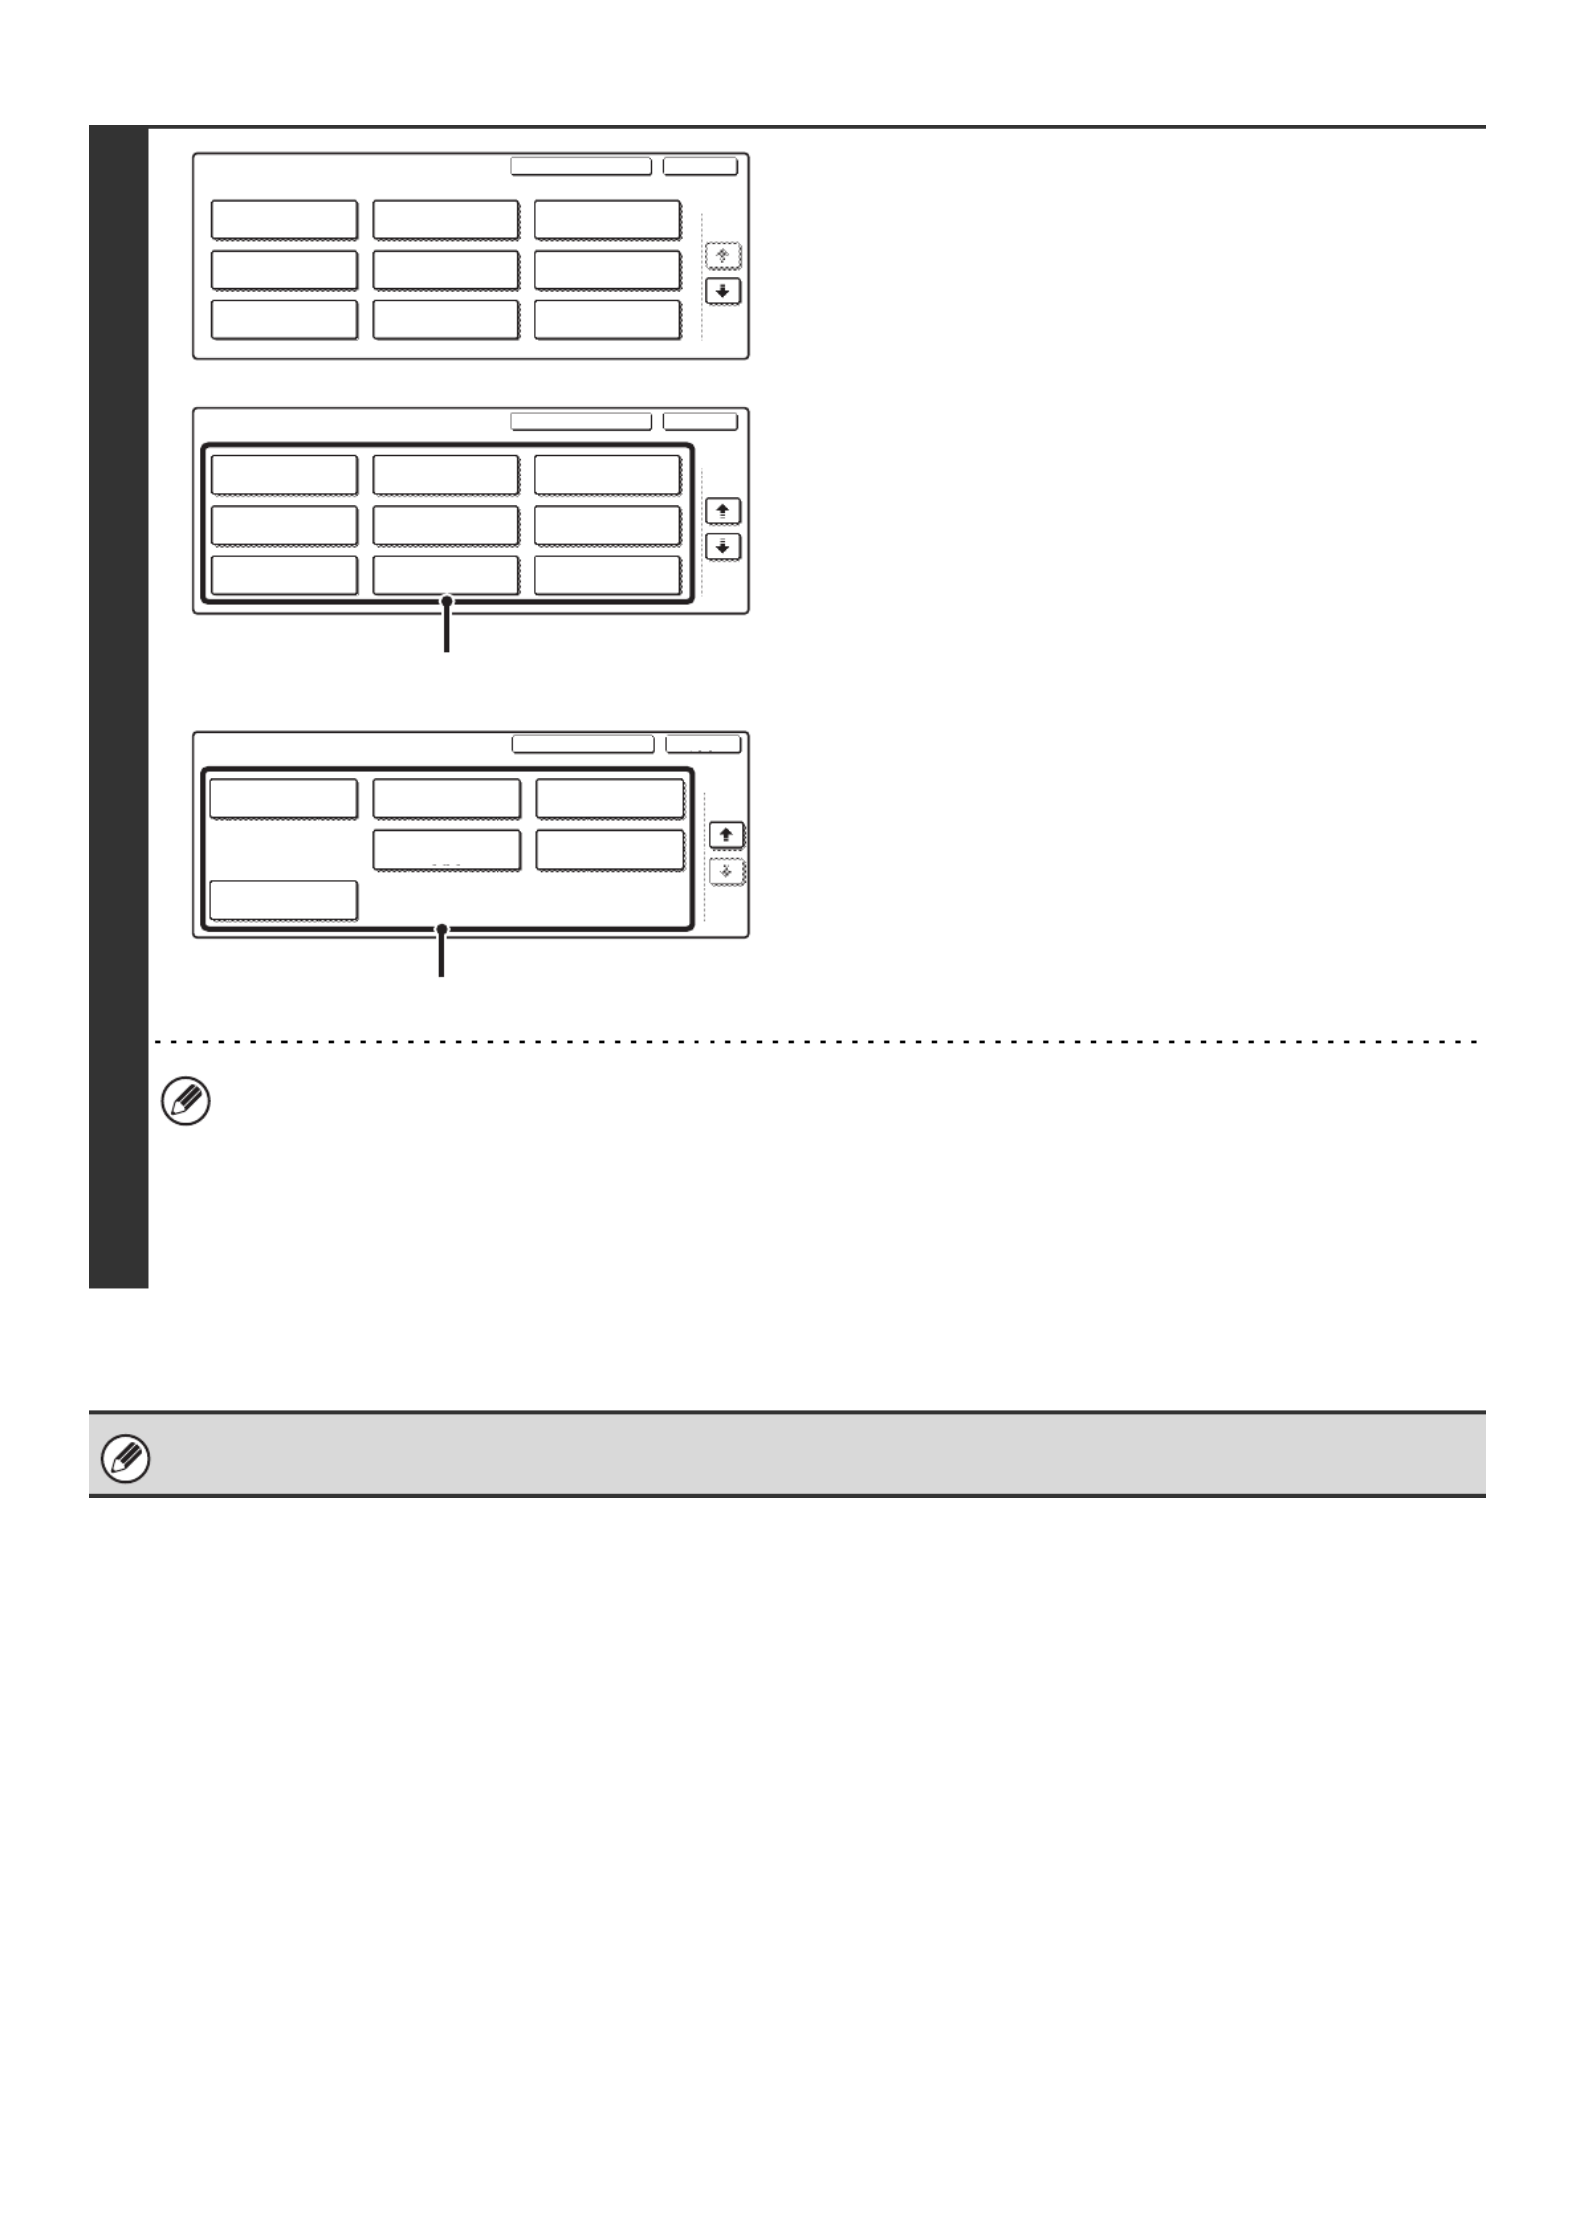
62
4
Configure the desired system settings.
Touch the items that you wish to configure and select the
desired settings.
• For detailed explanations of each of the settings, see the following pages of this chapter.
• Items marked (A) above are indicated as "System Settings (Administrator)" in this manual to distinguish them from
the general user system settings.
• If Auto Clear activates, logout will automatically take place.
•To logout...
Touch the [Logout] key in the top right corner of the screen or touch the [Exit] key to quit the system settings.
User authentication is initially disabled (factory default setting).
System Settings ExitLogout
Fax Data
Receive/Forward
USB-Device Check
Default SettingsTotal Count
Paper Tray
Settings
Printer Condition
Settings
Address Control
1/3
List Print
(User)
Document Filing
Control
System Settings ExitLogout
Operation Settings
Network Settings
2/3
Energy Save
User Control
Device Control
Printer Settings
Copy Settings
Image Send
Settings Document Filing
Settings
(A)
System Settings ExitLogout
Security Settings
Product Key
Storing/Calling
of System Settings
3/3
Enable/Disable
Settings
Change Admini-
strator Password
List Print
(Administrator)
(A)

63
When User Authentication is Enabled
When "User Authentication Setting" (page 81) is enabled, follow the procedure below to log in.
• For the procedure for enabling user authentication, see "User Control" (page 81).
• When auto login is enabled, the login screen will not appear.
1
●Login by login name and password (and
e-mail address*)
(1) Touch the [Login Name] key.
* If login name / password / e-mail address is selected for
the login method, [E-mail Address] will appear under
the [Login Name] key shown on the left.
(2) Touch the [Admin Login] key.
(3) Touch the [Password] key and enter the
administrator password.
For the procedure for entering text, see "6. ENTERING
TEXT" in the User's Guide.
(4) Touch the [OK] key and go to step 3.
●Login by user number
Touch the [Admin Login] key.
In addition to login in by touching the [Admin Login] key, the system settings (administrator) can also be accessed
when login is performed by selecting a user with administrator rights from the user list or by entering a user number
with administrator rights.
For these login procedures, see "When User Authentication is Enabled" (page 6).
Please enter your login name /
password.
User Authentication
Login Name
User Name
Password
Auth to:
OK
Server 1
(1)
Please select a user
to be logged in.
Admin Login
Direct Entry
ABC User
All Users ABCD EFGHI JKLMN OPQRST UVWXYZ
25
1
Back
AAA AAA
CCC CCC
EEE EEE
GGG GGG
BBB BBB
DDD DDD
FFF FFF
HHH HHH
(2)
Please enter your login name /
password.
User Authentication
Login Name
User Name
Password
Auth to:
OK
Login Locally
Administrator
(3) (4)
Admin Login
Enter your user number.
OK

64
2
Enter the administrator password.
(1) Touch the [Password] key and enter the
administrator password.
For the procedure for entering text, see "6. ENTERING
TEXT" in the User's Guide.
(2) Touch the [OK] key.
3
Press the [SYSTEM SETTINGS] key.
This step is not necessary if you are logging in after you pressed the [SYSTEM SETTINGS] key.
4
Configure the desired system settings.
Touch the items that you wish to configure and select the
desired settings.
• For detailed explanations of each of the settings, see the following pages of this chapter.
• Items marked (A) above are indicated as "System Settings (Administrator)" in this manual to distinguish them from
the general user system settings.
• If Auto Clear activates, logout will automatically take place.
•To logout...
Press the [LOGOUT] key ( ). (Except when entering a fax number.)
Enter the administrator password.
(From 5 to 32 characters)
Password
OKCancel
(1) (2)
SYSTEM
SETTINGS
System Settings Exit
Default SettingsTotal Count
Address Control
1/3
List Print
(User)
Fax Data
Receive/Forward
USB-Device Check
Document Filing
Control
Paper Tray
Settings
Printer Condition
Settings
System Settings Exit
Network Settings
Energy Save Operation SettingsUser Control
Device Control
Printer Settings
Copy Settings
2/3
Image Send
Settings
Document Filing
Settings
(A)
System Settings Exit
3/3
Security Settings
Product Key
Storing/Calling
of System Settings
Enable/Disable
Settings
Change Admini-
strator Password
List Print
(Administrator)
(A)

65
System Settings (Administrator) List
When the system settings are accessed with administrator rights, the following items appear. The factory default setting
for each item is also shown.
General items
Administrator items
Depending on the machine specifications and peripheral devices installed, it may not be possible to use some settings.
Item Factory default setting Page
■Total Count
For information on the system settings accessed
with general rights, see "System Settings
(General) List".
9
■Default Settings
■List Print (User)
■Paper Tray Settings
■Address Control
■Fax Data Receive/Forward
■Printer Condition Settings
■Document Filing Control
■USB-Device Check
Item Factory default setting Page
■User Control 81
●User Authentication Setting 81
XUser Authentication Disable 81
XAuthentication Method Setting Authenticate a User by Login Name and
Password 81
XDevice Account Mode Setting
81Device Account Mode Disable
User Selection –
●User Registration
82
XStore –
XAmend/Delete –
XDelete All Users –
●Pages Limit Group Registration –84

66
●Actions when the Limit of Pages for Output Jobs
Job is Stopped when the Limit of Pages is Reached
84
●Authority Group Registration –85
●Favourite Operation Group Registration –87
●User Count Display –88
●User Count Reset –88
●User Information Print
89
XAll User Information Print –
XUser List –
XList of Number of Pages Used –
XPage Limit Group List –
XAuthority Group List –
XFavourite Operation Group List –
●The Number of User Name Displayed Setting 889
●A Warning when Login Fails Disable 89
●Disable Printing by Invalid User Disable 89
●Default Network Authentication Server Setting –89
■Energy Save 90
●Toner Save in Printer Mode*
1
Disable 90
●Toner Save in Copy Mode*
2
Disable 90
●Auto Power Shut-Off Enable 90
●Auto Power Shut-Off Timer MX2300/2700 Series: 45 min.
MX3500N/3501N: 60 min.
MX4500N/4501N: 90 min.
90
●Preheat Mode Setting 15 min. 90
■Operation Settings 91
●Keys Touch Sound
91XKeys Touch Sound Middle
XKeys Touch Sound at Initial Point Disable
●Auto Clear Setting 60 sec.
91
XCancel Timer Disable
●Message Time Setting 6 sec. 91
●Display Language Setting English 91
●Disabling of Job Priority Operation Disable 91
●Disabling of Bypass Printing Disable 92
●Key Operation Setting 0.0 sec.
92
XDisable Auto Key Repeat Disable
Item Factory default setting Page
67
●Disabling of Clock Adjustment Disable 92
●Disabling of Covers/Inserts Mode*3Disable 92
●Customize Key Setting
92
XCopy
Customize 1 Special Modes
Customize 2 File
Customize 3 Quick File
XScan*4
Customize 1 Special Modes
Customize 2 File
Customize 3 Quick File
XInternet Fax*5
Customize 1 Special Modes
Customize 2 File
Customize 3 Quick File
XFax*6
Customize 1 Special Modes
Customize 2 File
Customize 3 Quick File
XUSB Memory Scan
Customize 1 Special Modes
Customize 2 Erase
Customize 3 Suppress BG
XData Entry
Customize 1 Special Modes
Customize 2 File
Customize 3 Quick File
■Device Control 94
●Original Size Detector Setting
94XOriginal Detection Size Combination Varies depending on country and region
XCancel Detection at Document Glass Disable
●Disabling of Document Feeder*3Disable 94
●Original Feeding Mode*3All Disabled 94
●Disabling of Duplex Disable 94
●Disabling of Large Capacity Cassette*7Disable 94
Item Factory default setting Page

68
●Disabling of Optional Paper Drawer*8Disable 95
●Disabling of Tray Setting Disable 95
●Disabling of Finisher*9Disable 95
●Disabling of Offset Disable 95
●Disabling of Stapler*9Disable 95
●Saddle Stitch Position Adjust*10 0.0 mm 95
●Disabling of Punch*11 Disable 95
●Disabling of Colour Mode*12 Disable 95
●Auto Paper Selection Setting Plain Paper 96
●Registration Adjustment
96
XAuto Adjustment –
●Optimization of the Hard Disk –96
●Tandem Connection Setting
96
XIP Address of Slave Machine 0.0.0.0
XPort Number 50001
XDisabling of Master Machine Mode Disable
XDisabling of Slave Machine Mode Disable
●Clear All Job Log Data –96
●Detect Standard in Auto Colour Mode 396
■Copy Settings 97
●Initial Status Settings
97
XColour Mode Full Colour
XPaper Tray Varies depending on the machine configuration
XExposure Type Auto
XCopy Ratio 100%
X2-Sided Copy 1-Side to 1-Side
XOutput –
●Exposure Adjustment
97
XColour
Document Glass 5
Document Feeder 5
XB/W
Document Glass 5
Document Feeder 5
●Rotation Copy Setting Enable 97
Item Factory default setting Page

69
●Add or Change Extra Preset Ratios
97XReduction –
XEnlargement –
●Setting a Maximum Number of Copies 999 97
●Initial Margin Shift Setting
98XSide-1
10 mm (1/2")
XSide-2
●Erase Width Adjustment
98XEdge
10 mm (1/2")
XCentre
●Card Shot Settings
98XOriginal Size X: 86 mm (3-3/8") Y: 54 mm (2-1/8")
XFit to Page Disable
●Automatic Saddle Stitch*10 Enable 98
●Initial Tab Copy Setting 10 mm (1/2") 98
●Disabling Deletion of Job Programs Disable 98
●Disabling of Bypass-Tray in Duplex Copy Disable 98
●Disabling of Auto Paper Selection Disable 98
●Auto Selection Setting of Tray that is Supplied the Paper Disable 99
●Initial Colour Balance Setting Factory Default State 99
●Auto Colour Calibration –99
●
B/W 600dpi x 600dpi Scanning Mode for Document Feeder
*3Disable 100
●B/W Quick Scan from Document Glass Enable 100
■Network Settings 101
●IP Address Setting DHCP 101
●Enable TCP/IP Enable 101
●Enable NetWare Enable 101
●Enable EtherTalk Enable 101
●Enable NetBEUI Enable 101
●Reset the NIC –101
●Ping Command –101
■Printer Settings 102
●Default Settings 102
XProhibit Notice Page Printing Enable 102
XProhibit Test Page Printing Disable 102
XA4/Letter Size Auto Change Varies depending on country and region. 102
Item Factory default setting Page

70
XPrint Density Level
102Colour 3
B/W 3
XBypass Tray Settings 102
Enable Detected Paper Size in Bypass Tray Disable 102
Enable Selected Paper Type in Bypass Tray Enable 102
Exclude Bypass-Tray from Auto Paper Select Disable 102
XJob Spool Queuing Enable 102
●Interface Settings 103
XHexadecimal Dump Mode*1Disable 103
XI/O Timeout 60 sec. 103
XEnable USB Port Enable 103
XUSB Port Emulation Switching*1PCL (Auto*13)103
XEnable Network Port Enable 103
XNetwork Port Emulation Switching*1PCL (Auto*13)103
XPort Switching Method Switch at End of Job 104
●Colour Adjustments 104
XAuto Colour Calibration –104
■Image Send Settings*14 105
●Operation Settings 105
XDefault Display Setting
105
Mode Scan*4 (Fax*6)
Hold settings for a while after scanning has been completed
Disable
Switch Automatically to Copy Mode Screen Disable
XInitial Resolution Setting
105
Apply the Resolution Set when Stored Disable
Scan*4200X200dpi
Internet Fax*5200X100dpi
Fax*6Standard
XDefault Exposure Settings
105
Exposure Auto
Original Image Type Text
Moiré Reduction Disable
XMust Input Next Address Key at Broadcast Setting Disable 106
XScan Complete Sound Setting Middle 106
XThe Number of File Name/Subject/Body Keys
Displayed Setting
6106
Item Factory default setting Page

71
XThe Number of Direct Address Keys Displayed Setting 6106
XDisable Switching of Display Order Disable 106
XHold Setting for Received Data Print
106Received Data Hold Disable
Password Setting –
XSettings to Disable the Registration of Destination 107
Disable Registering Destination from Operation Panel
107
• Group Disable
• E-mail Disable
• Internet Fax Disable
• Fax Disable
Disable Registering Destination on Web Page*15
107
• Group Disable
• E-mail Disable
• FTP Disable
• Desktop Disable
• Network Folder Disable
• Internet Fax Disable
• Fax Disable
Disable Registration Using Network Scanner
Tools*15
Disable 107
XSettings to Disable Transmission 107
Disable [Resend] on Fax/Image Send Mode Disable 107
Disable Selection from the Address Book
107
• E-mail Disable
• FTP Disable
• Desktop Disable
• Network Folder Disable
• Internet Fax Disable
• Fax Disable
Disable Direct Entry
107
• E-mail Disable
• Internet Fax Disable
• Fax Disable
Disable PC-I-Fax Transmission*5Disable 107
Disable PC-Fax Transmission*6Disable 107
Item Factory default setting Page

72
●Scan Settings*4108
XDefault Sender Set –108
XDefault Colour Mode Settings
108
Colour Mode Auto, Greyscale
B/W Mode Mono 2
Disable Change of B/W Setting in Auto Mode Disable
XInitial File Format Setting
108
B/W
• File Type PDF
• Compression Mode MMR (G4)
• Specified Pages per File Disable
Colour/Grey
• File Type PDF
• Compression Ratio Medium
• Specified Pages per File Disable
XCompression Mode at Broadcasting
108Black & White MH (G3)
Colour/Greyscale Medium
XMaximum Size of E-mail Attachments (E-mail) Unlimited 109
XMaximum Size of Data Attachments
(FTP/Desktop/Network Folder)
Disable 109
XDefault Address Setting Disable 109
XBcc Setting
109Enable Bcc Disable
Display Bcc Address on the Job Status Screen Disable
XDisable Scan Function
109PC Scan Disable
USB Memory Scan Disable
XPre-Setting Mail Signature Disable 109
●I-Fax Settings*5110
XI-Fax Default Settings 110
I-Fax Own Name and Address Set –110
Auto Wake Up Print Enable 110
I-Fax Speaker Volume Settings –
110• Receive Signal Middle
• Communication Error Signal Middle
Item Factory default setting Page

74
Fax Send (Incl. PC-Fax) Disable
115
Scan to HDD Enable
X Scan Send* 4
Copy Disable
Scan Send Enable
I-Fax Send (Incl. PC-I-Fax) Disable
Fax Send (Incl. PC-Fax) Disable
Scan to HDD Enable
X I-Fax Send* 5
Copy Disable
Scan Send Disable
I-Fax Send (Incl. PC-I-Fax) Enable
Fax Send (Incl. PC-Fax) Disable
Scan to HDD Disable
X Fax Send* 6
Copy Disable
Scan Send Disable
I-Fax Send (Incl. PC-I-Fax) Disable
Fax Send (Incl. PC-Fax) Enable
Scan to HDD Disable
●Administrator Authority Setting
115X Delete File Disable
X Delete Folder Disable
●Default Colour Mode Settings
115X Colour Auto
X B/W Mono 2
●Default Exposure Settings
116
X Exposure Auto
X Original Image Type Text
X Moiré Reduction Disable
●Initial Resolution Setting 600X600dpi 116
●Colour Data Compression Ratio Setting Medium 116
●Default Output Tray*16 Varies depending on the machine configuration 116
●Scan Complete Sound Setting Middle 116
Item Factory default setting Page

75
●Delete All Quick Files
116X Delete –
X
Delete quick files at power up. (Protected file excluded)
Enable
●Disable Stamp for Reprinting Disable 116
●Batch Print Settings
116X Selection of [All Users] is not allowed. Enable
X Selection of [User Unknown] is not allowed. Enable
■List Print (Administrator) 117
●Administrator Settings List
117
X Copy –
X Print –
X Image Send* 14 –
X Document Filing –
X Security –
X Common –
X All Administrator Settings List –
●Image Sending Activity Report*14
117
X Image Sending Activity Report (Scan) –
X Image Sending Activity Report (Internet Fax) –
X Image Sending Activity Report (Fax) –
●Anti Junk Fax Number List*6–117
●Anti Junk Mail/Domain Name List*5–117
●Inbound Routing List*17 –117
●Document Admin List*17 117
●Web Setting List*15 –117
●Metadata Set List*18 117
■Security Settings 118
●SSL Settings
118X HTTPS Disable
X IPP-SSL Disable
■Enable/Disable Settings 119
●User Control 119
XDisabling of Printing by Invalid User Disable 119
Item Factory default setting Page

76
●Operation Settings 119
XCancel Auto Clear Timer Disable 119
XDisabling of Job Priority Operation Disable 119
XDisabling of Bypass Printing Disable 119
XDisable Auto Key Repeat Disable 119
XDisabling of Clock Adjustment Disable 119
XDisabling of Covers/Inserts Mode Disable 119
●Device Control 119
XDisabling of Document Feeder*3Disable 119
XDisabling of Duplex Disable 119
XDisabling of Large Capacity Cassette*7Disable 119
XDisabling of Optional Paper Drawer*8Disable 119
XDisabling of Tray Setting Disable 120
XDisabling of Finisher*9Disable 120
XDisabling of Offset Disable 120
XDisabling of Stapler*9Disable 120
XDisabling of Punch*11 Disable 120
XDisabling of Colour Mode*12 Disable 120
XDisabling of Master Machine Mode Disable 120
XDisabling of Slave Machine Mode Disable 120
●Copy Settings 120
XDisable Copy in Different Size/Direction Disable 120
XDisabling Deletion of Job Programs Disable 120
XDisabling of Bypass-Tray in Duplex Copy Disable 120
XDisabling of Auto Paper Selection Disable 121
●Printer settings 121
XProhibit Notice Page Printing Enable 121
XProhibit Test Page Printing Disable 121
XExclude Bypass-Tray from Auto Paper Select Disable 121
●Image Send Settings 121
XDisable Switching of Display Order Disable 121
XDisable Scan Function
121PC Scan Disable
USB Memory Scan Disable
Item Factory default setting Page

77
XSettings to Disable the Registration of Destination 121
Disable Registering Destination from Operation Panel
121
• Group Disable
• E-mail Disable
• Internet Fax Disable
• Fax Disable
Disable Registering Destination on Web Page*15
121
• Group Disable
• E-mail Disable
• FTP Disable
• Desktop Disable
• Network Folder Disable
• Internet Fax Disable
• Fax Disable
Disable Registration Using Network Scanner
Tools*15
Disable 121
XSettings to Disable Transmission 122
Disable [Resend] on Fax/Image Send Mode Disable 122
Disable selection from the Address Book
122
• E-mail Disable
• FTP Disable
• Desktop Disable
• Network Folder Disable
• Internet Fax Disable
• Fax Disable
Disable Direct Entry
122
• E-mail Disable
• Internet Fax Disable
• Fax Disable
Disable PC-I-Fax Transmission*5Disable 122
Disable PC-Fax Transmission*6Disable 122
●Document Filing Settings 122
XDisable Stamp for Reprinting Disable 122
XBatch Print Settings
122Selection of [All Users] is not allowed. Enable
Selection of [User Unknown] is not allowed. Enable
Item Factory default setting Page
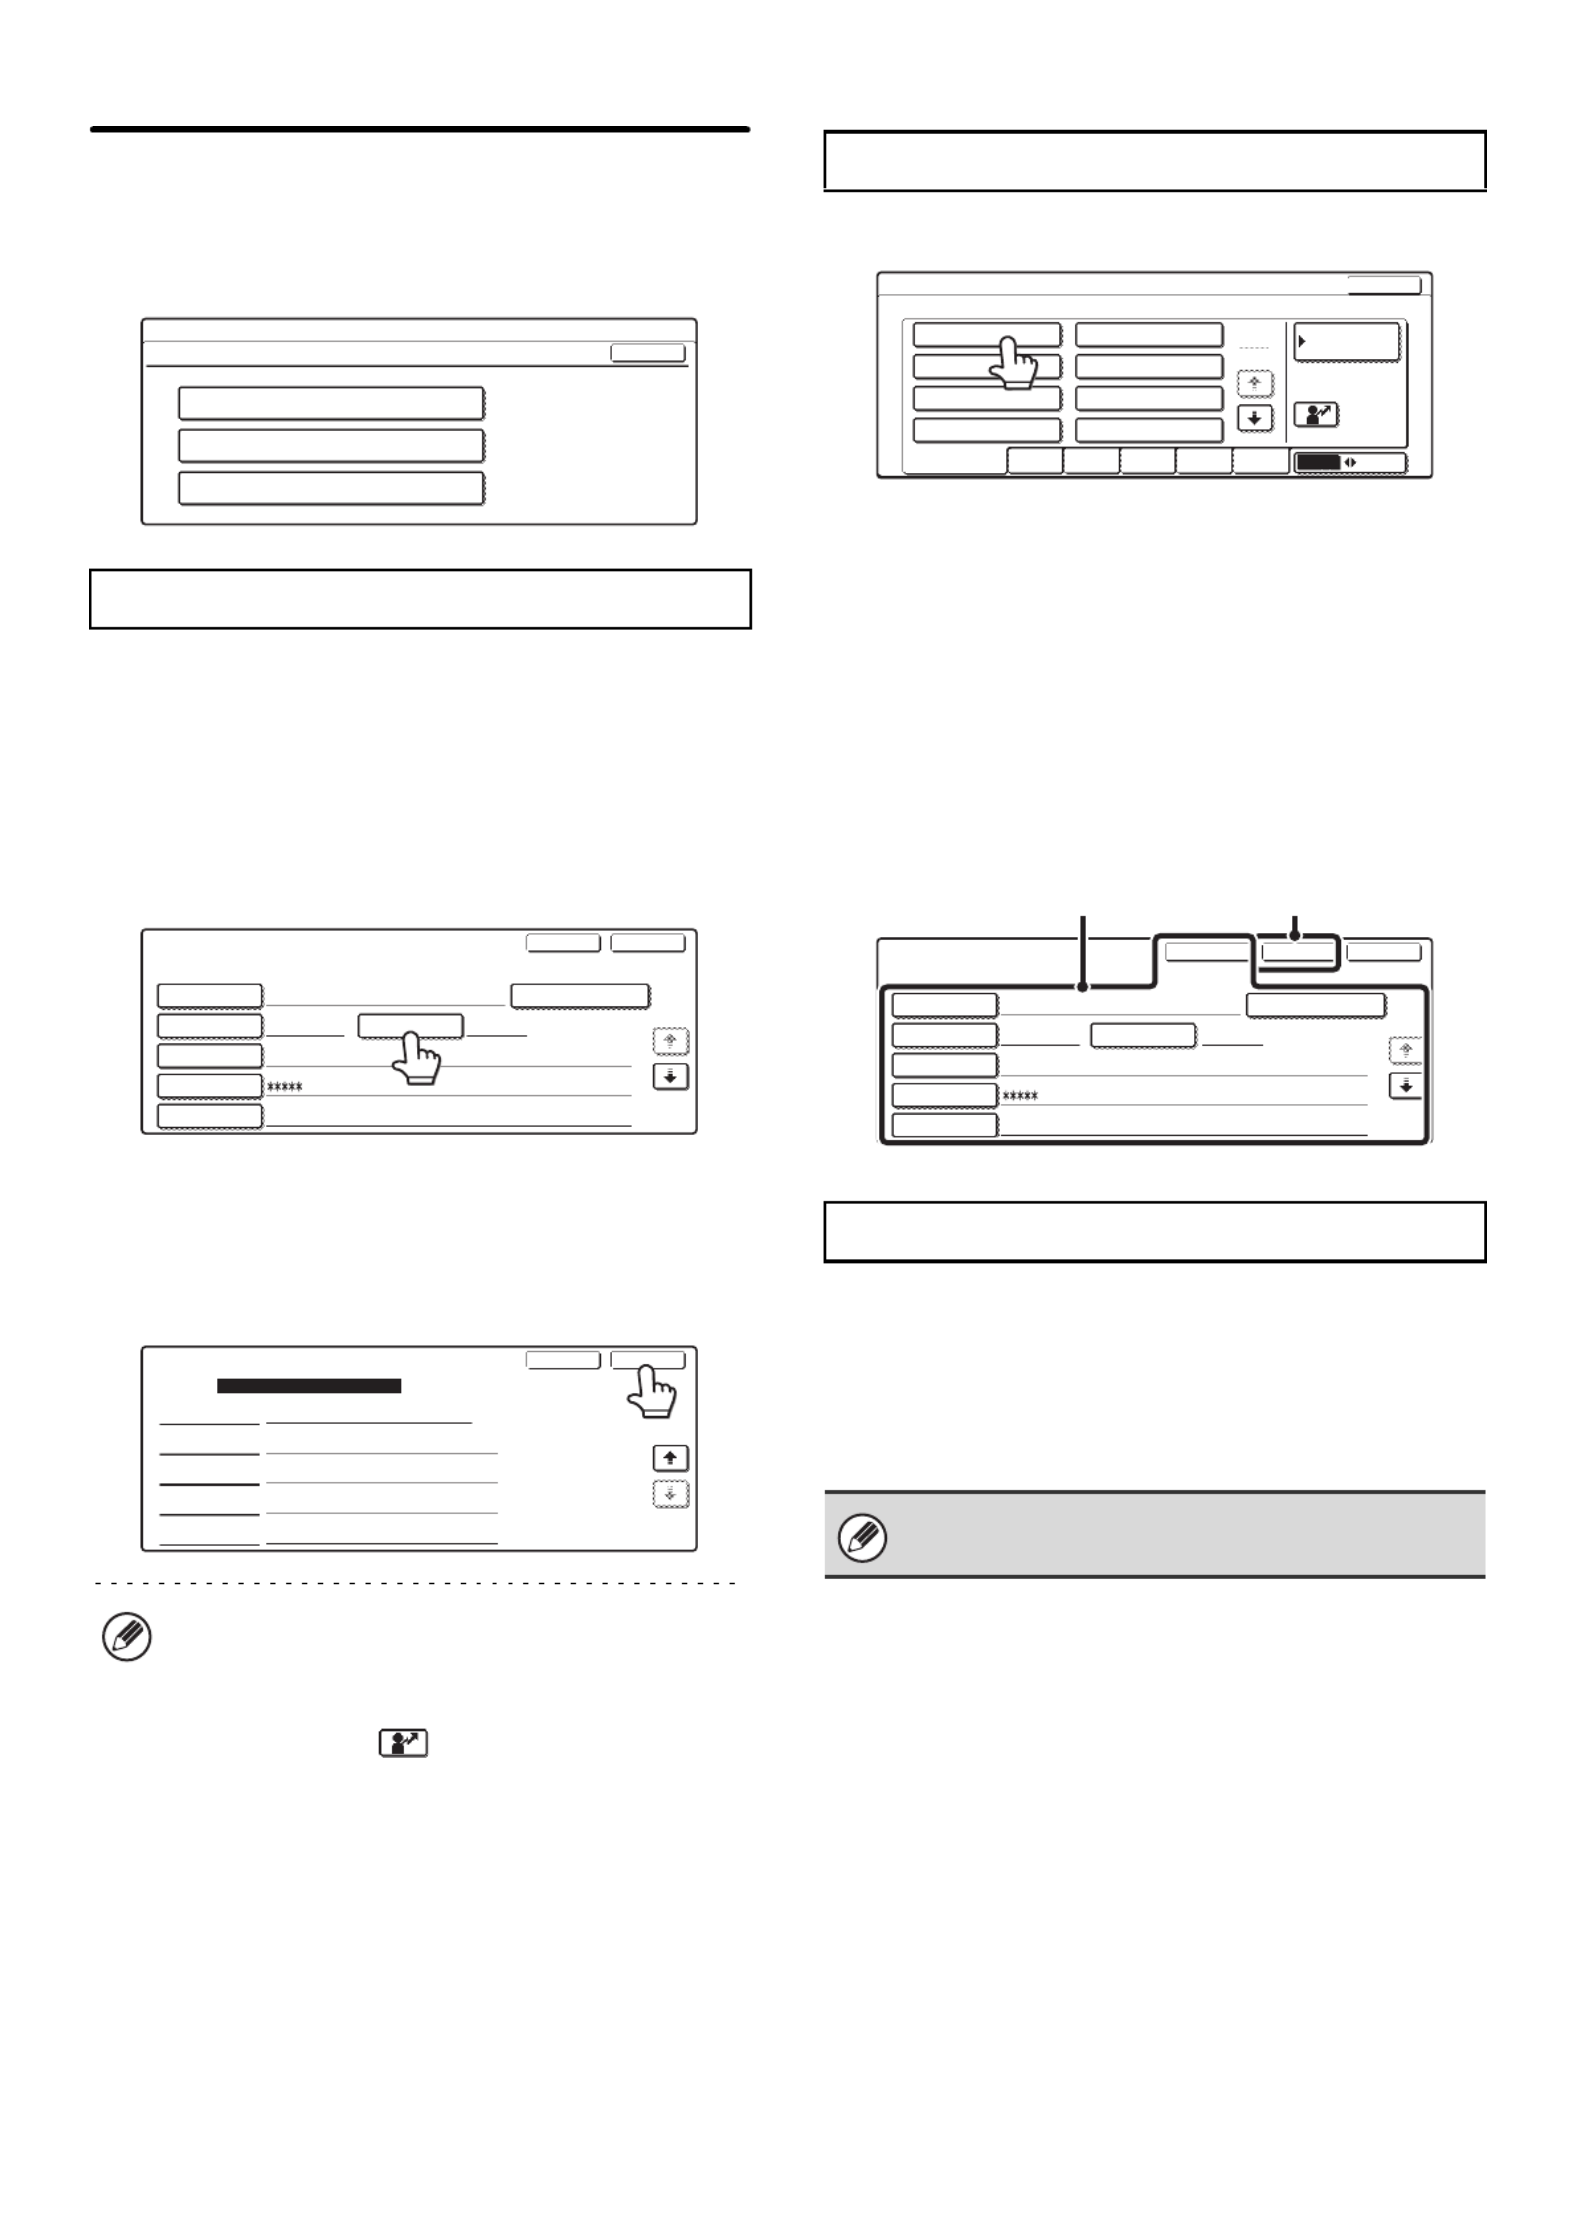
82
User Registration
This is used to store, edit, and delete users when user
authentication is enabled.
Touch one of the following keys:
The number of users that can be stored is as follows:
MX-2300/2700 Series: 200 users
MX-3500/4500 Series: 1000 users
*This does not include factory default users.
1Touch each key and enter the required
information.
For more information, see "Items stored" (page 83).
2Touch the [Register] key.
3Touch the [Exit] key.
To store another user, touch the [Next] key and repeat the
procedure from step 1.
1Select the user.
2Edit or Delete
To edit
(A) Touch the desired items and edit the items in the
same way as you stored them and then touch the
[Amend] key.
To delete
(B) Touch the [Delete] key.
A message will appear to confirm the deletion. Touch
the [Yes] key.
* Default users and the user that is specified as the auto
login user cannot be deleted.
All users can be deleted. This operation can only be
performed by an administrator.
Touch the [Delete All Users] key in the "User
Registration" screen. A confirmation screen will appear.
Touch the [Yes] key.
Store
The lowest number, 001 to 200, that has not yet
been programmed automatically appears in "No." in
the top left corner of the screen.
The number stored here is used when the user is
specified with the key. It is convenient to
memorize each user's number.
System Settings
User Registration
Store
Amend/Delete
Delete All Users
OK
User Registration
User Name AAA AAA
AAA AAA
xxx@xx.xxx.com
A User 1Initial Index
Login Name
Password
E-mail Address
ExitRegister
Applied to L/N
1/2
No.001 Registration is completed.
User Registration
My Folder Main Folder
Unlimited
User
Following the System Settings
Login LocallyAuth to:
Page Limit
Authority
Favourites
ExitNext
2/2
Amend/Delete
Delete All Users
When auto login is enabled, "Delete All Users" cannot
be used. The factory-stored users cannot be deleted.
User / Amend/Delete
Select user to amend/delete.
AAA AAA
CCC CCC
EEE EEE
GGG GGG
BBB BBB
DDD DDD
FFF FFF
HHH HHH
All Users ABCD EFGHI JKLMN OPQRST UVWXYZ ABC User
25
1
Exit
Default User
User / Amend/Delete
User Name AAA AAA
AAA AAA
xxx@xx.xxx.com
A User 1
Initial Index
Login Name
Password
E-mail Address
No.001
Exit
DeleteAmend
Applied to L/N
1/2
(B)(A)
Product specificaties
| Merk: | Sharp |
| Categorie: | Printer |
| Model: | MX-2300G |
Heb je hulp nodig?
Als je hulp nodig hebt met Sharp MX-2300G stel dan hieronder een vraag en andere gebruikers zullen je antwoorden
Handleiding Printer Sharp

28 Juni 2023
12 Juni 2023
10 Juni 2023
27 Mei 2023
10 Mei 2023
10 Mei 2023
10 Mei 2023
9 Mei 2023
8 Mei 2023
8 Mei 2023
Handleiding Printer
- Printer HP
- Printer Sony
- Printer Samsung
- Printer Xiaomi
- Printer Panasonic
- Printer Epson
- Printer LG
- Printer Huawei
- Printer Canon
- Printer Honeywell
- Printer Olympus
- Printer Toshiba
- Printer Xerox
- Printer Agfaphoto
- Printer AVM
- Printer Brother
- Printer Builder
- Printer D-Link
- Printer Dell
- Printer Digitus
- Printer Dymo
- Printer Epson 7620
- Printer Frama
- Printer Fujifilm
- Printer Fujitsu
- Printer Ibm
- Printer Intermec
- Printer Kern
- Printer Kodak
- Printer Kogan
- Printer Konica Minolta
- Printer Kyocera
- Printer Lenovo
- Printer Lexmark
- Printer Minolta
- Printer Mitsubishi
- Printer MSI
- Printer Nec
- Printer Paxar
- Printer Polaroid
- Printer Primera
- Printer Renkforce
- Printer Ricoh
- Printer Roland
- Printer Royal Sovereign
- Printer Sagem
- Printer Seiko
- Printer Star
- Printer Thomson
- Printer Tomy
- Printer Toshiba TEC
- Printer Triumph-Adler
- Printer Velleman
- Printer Zebra
- Printer Oce
- Printer Oki
- Printer Olivetti
- Printer Olympia
- Printer CSL
- Printer Argox
- Printer DTRONIC
- Printer Metapace
- Printer Citizen
- Printer Nilox
- Printer Approx
- Printer Ultimaker
- Printer Custom
- Printer Bixolon
- Printer Brady
- Printer GoDEX
- Printer Testo
- Printer EC Line
- Printer Sawgrass
- Printer Pantum
- Printer DNP
- Printer TSC
- Printer Equip
- Printer StarTech.com
- Printer Fichero
- Printer GG Image
- Printer Posiflex
- Printer ZKTeco
- Printer Star Micronics
- Printer Datamax-O'neil
- Printer Panduit
- Printer Dascom
- Printer HiTi
- Printer Vupoint Solutions
- Printer Elite Screens
- Printer Phoenix Contact
- Printer Videology
- Printer Colop
- Printer Raspberry Pi
- Printer Evolis
- Printer Unitech
- Printer Middle Atlantic
- Printer IDP
- Printer Fargo
- Printer Microboards
- Printer Mutoh
- Printer Tally Dascom
- Printer Nisca
Nieuwste handleidingen voor Printer

9 April 2025

8 April 2025
2 April 2025
2 April 2025
1 April 2025

1 April 2025

29 Maart 2025
29 Maart 2025

11 Maart 2025