Marantz DV7001 Handleiding
Marantz
DVD speler
DV7001
Lees hieronder de 📖 handleiding in het Nederlandse voor Marantz DV7001 (62 pagina's) in de categorie DVD speler. Deze handleiding was nuttig voor 86 personen en werd door 2 gebruikers gemiddeld met 4.5 sterren beoordeeld
Pagina 1/62

Model DV7001 User Guide
Super Audio CD/DVD Player
CLASS 1 LASER PRODUCT
LUOKAN 1 LASERLAITE
KLASS 1 LASERAPPARAT

2
CONGRATULATIONS ON YOUR PURCHASE OF THIS
FINE MARANTZ PRODUCT.
MARANTZ is on the leading edge of DVD research for
consumer products and this unit incorporates the latest
technological developments.
We are sure you will be fully satisfi ed with the DVD player.
Thank you for your support.
This product incorporates copyright protection technol-
ogy that is protected by methods claims of certain U.S.
patents and other intellectual property rights owned by
Macrovision Cor po ra tion and other rights owners.
Use of this copyright protection technology must be
au tho rized by Macrovision Cor po ra tion, and is in tend ed
for home and other limited viewing uses only unless oth-
er wise authorized by Macrovision Corporation.
Reverse en gi neer ing or disassembly is pro hib it ed.
Operating Environment
Operating environment temperature and humidity:
+5°C to +35°C (+41°F to +95°F); less than 85%RH
(cooling vents not blocked)
Do not install in the following locations
÷ Location exposed to direct sunlight or strong artifi cial
light
÷ Location exposed to high humidity, or poorly ven ti lat ed
lo ca tion
NOTE:
Changes or mod i fi ca tions not expressly approved by the
party responsible for compliance could void the user’s au-
thority to operate the equipment.
Please read through these operating instructions so you
will know how to operate your model properly. After you
have fi nished reading the instructions, put them away in
a safe place for future reference.
CAUTION
VISIBLE AND INVISIBLE LASER RADIATION WHEN OPEN AVOID
EXPOSURE TO BEAM (WARNING LOCATION: INSIDE ON LASER
COVERSHIELD)
CAUTION: TO REDUCE THE RISK OF ELECTRIC SHOCK,
DO NOT REMOVE COVER (OR BACK)
NO USER-SERVICEABLE PARTS INSIDE
REFER SERVICING TO QUALIFIED SERVICE PERSONNEL
The lightning flash with arrowhead symbol within
an equilateral triangle is intended to alert the user
to the presence of uninsulated "dangerous voltage"
within the product’s enclosure that may be of suffi-
cient magnitude to constitute a risk of electric shock
to persons.
CAUTION:
TO PREVENT ELECTRIC SHOCK, MATCH WIDE
BLADE OF PLUG TO WIDE SLOT, FULLY INSERT.
ATTENTION:
POUR ÉVITER LES CHOCS ÉLECTRIQUES,
INTRODUIRE LA LAME LA PLUS LARGE DE LA FICHE DANS
LA BORNE CORRESPON-DANTE DE LA PRISE ET POUSSER
JUSQU’AU FOND.
WARNING
TO REDUCE THE RISK OF FIRE OR ELECTRIC SHOCK,
DO NOT EXPOSE THIS APPLIANCE TO RAIN OR MOISTURE.
LASER SAFETY
This unit employs a laser. Only a qualified service person should remove
the cover or attempt to service this device, due to possible eye injury.
CAUTION :
CAUTION
RISK OF ELECTRIC SHOCK
DO NOT OPEN
The exclamation point within an equilateral triangle
is intended to alert the user to the presence of
important operating and maintenance (servicing)
instructions in the literature accompanying the
product.
USE OF CONTROLS OR ADJUSTMENTS OR
PERFORMANCE OF PROCEDURE OTHER THAN
THOSE SPECIFIED HEREIN MAY RESULT IN
HAZARDOUS RADIATION EXPOSURE.
Copy protection
Many DVD discs are encoded with copy pro tec tion. Because
of this, you should only connect your DVD player directly to
your TV, not to a VCR. Connecting to a VCR results in a dis-
torted picture from copy-protected DVD discs.

3
English
Important Safety Instructions
1) Read these instructions.
2) Keep these instructions.
3) Heed all warnings.
4) Follow all instructions.
5) Do not use this apparatus near water.
6) Clean only with dry cloth.
7) Do not block any ventilation openings, Install in
accordance with the manufacturer’s instructions.
8) Do not install near any heat sources such as radiators,
heat registers, stoves or other apparatus (including
amplifi ers) that produce heat.
9) Do not defeat the safety purpose of the polarized or
grounding-type plug. A polarized plug has two blades
with one wider than the other. A grounding type plug
has two blades and a third grounding prong. The wide
blade or the third prong are provided for your safety. If
the provided plug does not fi t into your outlet, consult an
electrician for replacement of the obsolete outlet.
10) Protect the power cord from being walked on or pinched
particularly at plugs, convenience
receptacles, and the point where
they exit from the apparatus.
11) Only use attachments/accessories
specifi ed by the manufacturer.
12) Use only with the cart, stand, tripod,
bracket, or table specifi ed by the
manufacturer, or sold with the apparatus. When a cart
is used, use caution when moving the cart/apparatus
combination to avoid injury from tip-over.
13) Unplug this apparatus during lightning storms or when
unused for long periods of time.
14) Refer all servicing to qualifi ed service personnel.
Servicing is required when the apparatus has been
damaged in any way, such as power-supply cord or
plug is damaged, liquid has been spilled or objects
have fallen into the apparatus, the apparatus has been
exposed to rain or moisture, does not operate normally,
or has been dropped.
Additional Safety Information!
• This product should not be placed in a built-in installation
such as a bookcase or rack unless proper ventilation is
provided or the manufacturer’s instructions have been
adhered to.
• Apparatus shall not be exposed to dripping or splashing
and that no objects fi lled with liquids, such as vases,
shall be placed on the apparatus.
• When the switch is in the OFF position, the apparatus
isn’t completely switched-off from the MAINS.

5
English
Table Of Contents
1 Before You Start
Features.......................................................................................6
What’s in the box......................................................................7
Putting the batteries in the remote control........................7
Using the remote control .......................................................7
Discs compatible with this player .........................................8
DVD-Video regions...................................................................9
General information.................................................................9
MP3 compatibility information .............................................9
WMA compatibility information............................................9
JPEG compatibility information .............................................9
DivX compatibility information .............................................9
2 Connecting Up
Easy setup................................................................................10
Home theater video connections .......................................11
Home theater audio connections.......................................12
3 Controls & Displays
Front panel...............................................................................13
Remote control .......................................................................14
4 Getting Started
Playing discs ............................................................................16
Basic playback controls.........................................................16
Resuming playback from the last stopped point.............16
Navigating DVD disc menus.................................................17
Navigating Video CD PBC menus.......................................17
5 Playing Discs
Introduction.............................................................................18
Preview function......................................................................18
Fast Forward/Fast Reversed................................................. 20
Still Frame/Slow Play/Frame Advance Playback...............21
Using the page....................................................................... 22
Using the Repeat Play .......................................................... 22
Looping a section of a disc ................................................. 23
Using the Random (SHUFFLE) Play................................... 23
Switching Camera Angles..................................................... 24
Switching the Subtitle Language ....................................... 24
Switching the Audio Language ......................................... 25
Switching the audio channel............................................... 25
Switching Super Audio CD Playback layer....................... 25
Switching Super Audio CD Playback area........................ 25
Using the Zoom Function.................................................... 25
Play back Information........................................................... 26
Playing an MP3/DivX/JPEG/Windows Media™
Audio disc ............................................................................... 29
Playing a JPEG image fi le (slide show).............................. 30
Playing MP3/WMA music and JPEG pictures
simultaneously.........................................................................31
Playing a DivX disc................................................................ 32
Using the Setup Menu ......................................................... 33
6 DVD Setup Menu
Using the FL menu................................................................. 34
Setting up the GENERAL SETUP page.............................. 36
Setting up the AUDIO SETUP page.................................. 39
Setting up the VIDEO SETUP page................................... 44
Setting up the PREFERENCE page..................................... 50
7 Additional Information
Language Codes .................................................................... 54
Handling discs........................................................................ 55
Storing discs........................................................................... 55
Discs to avoid......................................................................... 55
Cleaning the pickup lens...................................................... 55
Problems with condensation............................................... 55
Hints on installation.............................................................. 56
Moving the player.................................................................. 56
Precautions on using the power cord............................... 56
Tr oubleshooting..................................................................... 57
Specifi cations .........................................................................60

Before You Start1
6
Features
An HDCP-compatible HDMI*
1
terminal is provided for fully digital
transmission that ensures the very
highest picture and digital sound
quality.
This unit comes with a High-Defi nition
Multimedia Interface (HDMI) jack; an
extended DVI interface for next-generation
televisions. This interface allows transfers
of uncompressed digital video and digital
audio (audio streams such as Dolby Digital
and DTS as well as linear PCM) with a
single connector. HDMI standard Ver. 1.1
compatibility means the unit can also
transfer DVD-Audio multi-channel audio
over HDMI.
End-to-end full-digital transfers with all
digital processing allow the enjoyment
of realistic video without any image
degradation caused by AD/DA conversions.
And the unit can up-convert 480p video
signals to 720p, 1080i, and 1080p video
output signals using the scaling function
and the HDMI jack (see pages 11, 47).
High quality 12-bit/216 MHz Video
D/A converter*
2
The unit uses a Video D/A converter that
per forms D/A conversion of all video
signals in 12-bits and can perform 8x over-
sampling to let you enjoy beautiful video
possible with DVD. Furthermore, NSV
technology sup press es noise during DA
conversion.
DCDi *
3
DCDi (Directional Correction
Deinterlacing) computes and tracks the
angle of the screen edge to fi ll in the
missing pixels on the TV screen. DCDi
signifi cantly optimizes the image quality,
especially during slow motion playback.
This function is available only for
progressive scan output.
High quality 24-bit/192 kHz DAC
The high specifi cation 24-bit/192 kHz DAC
delivers dynamic, smooth and expansive
analog sound from CDs and DVDs.
Superlative audio performance with
Super Audio CD, DVD-Audio, Dolby*
4
Digital and DTS*
5
software
Logos:
The DV7001 delivers breathtaking sound
quality with Super Audio CD, DVD-Audio,
Dolby Digital and DTS discs.
DivX *
6
You can enjoy DivX® fi les which are
recorded on DVD±R/RW or CD-R/RW.
Plays DivX5.2, DivX4, DivX3 and DivX
VOD Video content (see pages 29, 32).
• This player supports Quarter Pixel.
• This player supports GMC.
MP3 and WMA*
7
compatibility
This player is compatible with CD-R, CD-
RW and CD-ROM discs that contain MP3
and WMA audio tracks (see pages 29, 31 ).
JPEG compatibility
This player is compatible with CD-R, CD-
RW and CD-ROM discs that contain JPEG
data (see pages 29, 30, 31).
*1 HDMI, the HDMI logo and High-Defi nition
Multimedia Interface are trademarks or registered
trademarks of HDMI Licensing LLC.
*2 “NSV” is a registered trademark of Analog Device
Co. Ltd.
*3 “DCDi” is a registered trademark of Faroudja, a
division of Genesis Microchip, Inc.
*4 Manufactured under license from Dolby
Lab o ra to ries. “Dolby” “Pro Logic” and the
double-D symbol are trademarks of Dolby
Lab o ra to ries.
*5 “DTS” and “DTS Digital Surround” are registered
trade marks of DTS, Inc.
*6 “DivX”, and “DivX Ultra” Certifi ed, and associated
logos are trademarks of DivX, Inc. and are used
under license.
*7 Windows Media and the Windows logo are
trademarks, or registered trademarks of Microsoft
Corporation in the United States and/or other
countries.
1Before You Start
7
English
What’s in the box
Thank you for buying this MARANTZ
prod uct. Please confi rm that the following
accessories are in the box when you open
it.
• Remote control
• AAA/R03 dry cell batteries x2
• Audio/Video cable (yellow/red/white)
• System control cable
• Power cable
• User Guide (this manual)
• Warranty card
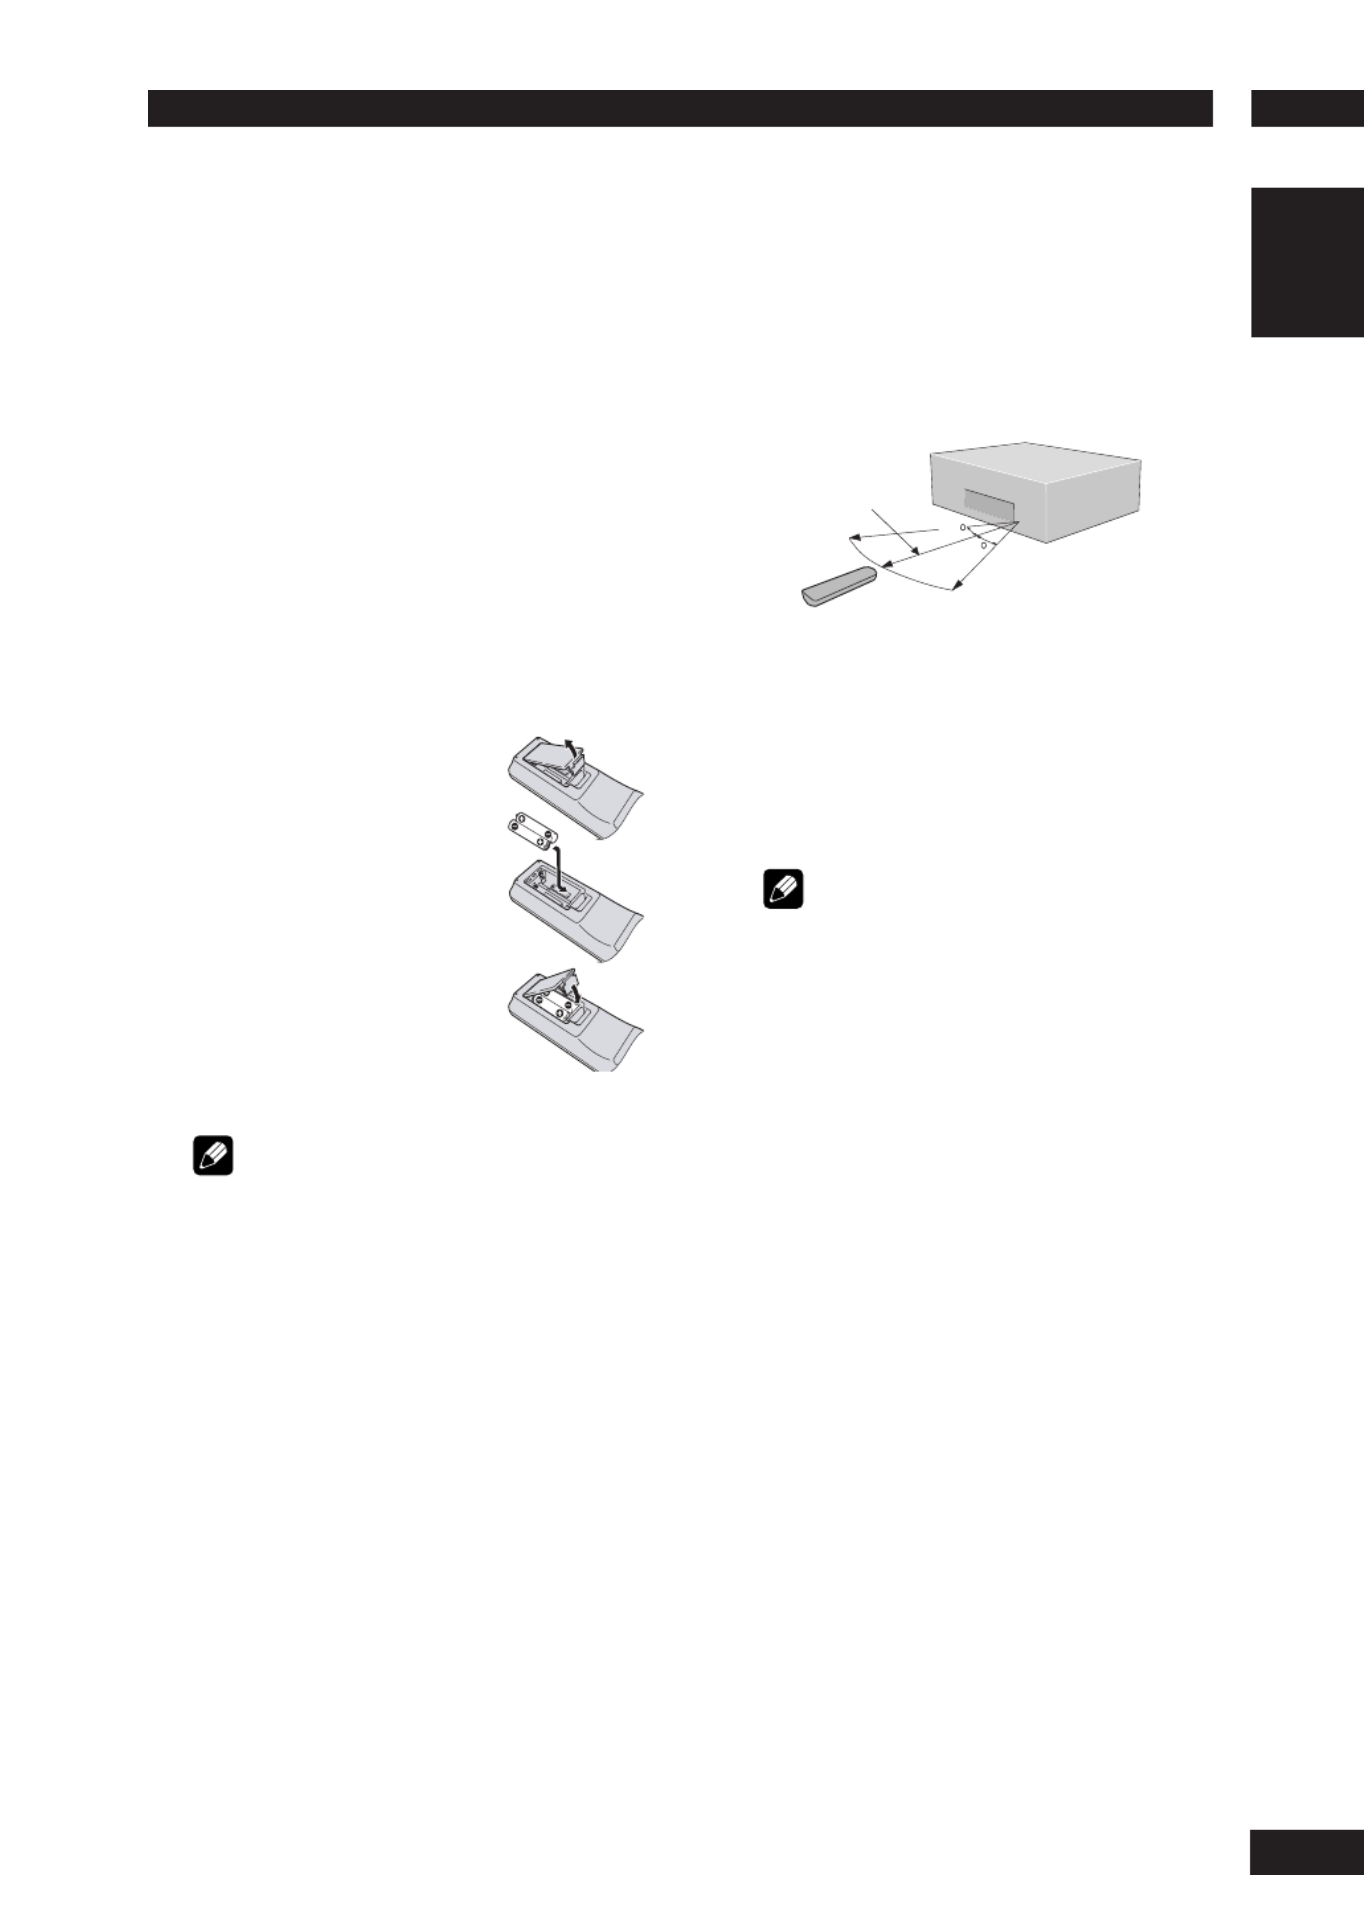
Putting the batteries in the remote
control
1 Open the battery
compartment cover on
the back of the re mote
control.
2 Insert two AAA/R03
bat ter ies into the battery
compartment following
the indications (ª, ·)
inside the compartment.
3 Close the cover.
Note
Incorrect use of batteries can result in hazards such
as leakage and bursting. Please ob serve the following:
• Don’t mix new and old batteries together.
• Don’t use different kinds of battery together.
Although they may look similar, different batteries
may have different voltages.
• Make sure that the plus and minus ends of each
battery match the indications in the battery
compartment.
• Remove batteries from equipment that isn’t going
to be used for a month or more.
When disposing of used batteries, please comply
with governmental regulations or environmental
bylaws that apply in your country or area.
Using the remote control
Keep in mind the following when using the
remote control:
• Make sure that there are no obstacles between
the remote control and the remote sensor on the
unit.
• Use within the operating range and angle, as
shown.
• Remote operation may become unreliable if
strong sunlight or fl uorescent light is shining on
the unit’s remote sensor.
• Remote controllers for different devices can
interfere with each other. Avoid using remotes for
other equipment located close to this unit.
• Re place the batteries when you no tice a fall off in
the operating range of the remote control.
Note
• When using this player independently, set the
REMOTE CONTROL switch on the rear panel to
INT. (INTERNAL) page 10(see ).
3030
5m (16 feet)

Before You Start1
8
Discs compatible with this player
Any disc that displays one of the following
logos should play in this player. Other
formats, including DVD-RAM, DVD-ROM,
CD-ROM (except those that contain MP3/
DivX/WMA/JPEG fi les) and Photo CD will
not play.
DVD-Video compatibility:
• Logos:
• Single-sided or double-sided discs
• Single layer or dual layer discs
• Dolby Digital, DTS, MPEG or Linear PCM digital
audio
• MPEG-2 digital video
Discs are generally divided into one or more titles.
Titles may be further subdivided into chapters.
DVD-Audio compatibility:
• Logos:
• Single sided discs
• Single layer or dual layer discs
• Linear or packed PCM digital audio
• Some discs may contain MPEG-2 video, and
Dolby Digital, DTS or MPEG digital audio
Discs are generally divided into one or more groups.
Groups may be further subdivided into tracks.
DVD-R compatibility:
This unit can play DVD-R discs. Please note the
fol low ing points when using these discs:
• Logo:
• This unit can play DVD-R discs recorded as DVD-
Video format.
DVD-RW compatibility:
This unit can play DVD-RW discs. Please note the
fol low ing points when using these discs:
• Logo:
• This unit can play DVD-RW discs recorded as
DVD-Video format, and DVD-VR format.
• DVD-RW discs that were recorded with copy-
once only permission can be played.
DVD+R/+RW compatibility:
• Logo:
• This unit can play DVD+R/+RW discs. Please
note the followings points when using these
discs.
Super Audio CD compatibility:
• Logo:
• Single layer, dual layer or Hybrid layer
• 12cm (5in.) or 8cm (3in.) discs
• Digital audio (DSD)
Super Audio CDs are divided into tracks.
Audio CD compatibility:
• Logos:
• 12cm (5in.) or 8cm (3in.) discs
• Linear PCM digital audio
• Audio CD, CD-R* and CD-RW* formats
CDs are divided into tracks.
*This unit can play CD-R and CD-RW discs recorded
in Audio CD or Video CD format, or with MP3 audio
fi les or Windows Media audio fi les or picture fi les or
DivX fi les.
*Some copy-controlled CDs may not conform to
offi cial CD standards. They are special discs and may
not play on the DV7001.
*The DV7001 does not support the non-DVD side
of a Dual Disc.
Video CD compatibility:
• Logo:
• 12cm (5in.) or 8cm (3in.) discs
• MPEG-1 digital audio
• MPEG-1 digital video
Video CDs are divided into tracks.
Super VCD compatibility:
• Logo:
• 12cm (5in.) or 8cm (3in.) discs
• MPEG-1 digital audio
• MPEG-2 digital video
Super VCDs are divided into tracks.

1Before You Start
9
English
DVD-Video regions
All DVD-Video discs carry a region mark
on the case somewhere that indicates
which region(s) of the world the disc is
com pat i ble with. Your DVD player also has
a region mark, which you can fi nd on the
rear panel. Discs from incompatible regions
will not play in this player. Discs marked
ALL will play in any player.
General information
• This player can recognize in total about 650 fi les
per folders and 300 folder per disc for MP3/
DivX/WMA.
• When writing MP3/WMA/JPEG/DivX fi les to CD-
R/RW discs, always be sure to set the writing
format to ISO 9660 Level 1.
• For MP3 and WMA fi les recorded in Variable Bit
Rate (VBR), the unit may not display the actual
elapsed time.
MP3 compatibility information
• Files should be MPEG1 Audio Layer 3 format.
The sampling rate is 8 kHz to 48 kHz, but it is
depends on the bit rate. Incompatible fi les will
not play.
• Audio encoded at 128 kbps should sound close
to regular audio CD quality. Although this player
will play 32 kbps to 320 kbps, but it is depends
on the sampling rate.
• This player is compatible with ID3 ver.1.1 Tag.
But the information display on the display on the
Front panel and TV screen is only ID3 ver. 1.0
Tag.
• Maximum 30 characters can be displayed on the
display on the Front panel and TV screen.
• This player cannot play DVD-R/RW discs with
recorded MP3 music data.
• This player only plays tracks that are named
containing the fi le extension “.mp3” or “.MP3”.
• This player is not compatible with multi-session
discs. If you try and play a multi-session disc,
only the fi rst session will be played.
WMA compatibility information
• The sampling rate is 44.1 kHz (bit rate: 64
kbps-192 kbps) and 48 kHz (bit rate: 128
kbps-192 kbps).
• This player only plays tracks that are named with
the fi le extension “.wma” or “.WMA”.
• This player can not play the disc contents
protected by Windows Media Digital Right
Management (DRM).
JPEG compatibility information
• While this player is designed to be able to
handle image data recorded in JPEG format,
no assurances are given that the player will be
able to display image data recorded in all JPEG
formats.
• This player can not display progressive JPEG
images.
• This player can not display HD JPEG images.
• Always be sure to specify a fi le extension of “.JPG”
or “JPEG” for JPEG fi les. The fi le will not be able
to be displayed if a fi le extension other than “.JPG”
or “JPEG” is specifi ed or if no fi le extension is
assigned to the fi le. (Note that this means that
JPEG fi les created on a Macintosh will not be able
to be displayed as is.)
• Depending on the fi le size and compression
ratio, some JPEG pictures cannot be displayed
correctly.
DivX compatibility information
• A fi le with an extension of “.avi” or “.divx” is called
a DivX fi le.
• Maximum 30 characters can be displayed on the
display on the Front panel and TV screen.
• Maximum 4 Gbyte of fi le size can be displayed.
• File should be MPEG1 Audio Layer 3 format and
MPEG2 format.
Caution!
• DVD±R/RW and CD-R/RW discs recorded using
a per son al computer or a DVD or CD recorder
may not play if the disc is damaged or dirty, or if
there is dirt or condensation on the player’s lens.
• If you record a disc using a personal computer,
even if it is recorded in a compatible format,
there are cases in which it may not play because
of the settings of the application software used
to create the disc. (Check with the software
publisher for more detailed in for ma tion.)
• There may be times when it is impossible
to replay a CD-R/RW disc because of the
characteristics of the disc being used or because
of dirt or scratches on the disc.
• Unfi nalized DVD-R/RW discs cannot be played.
• Unfi nalized CD-R/RW discs cannot be played.
• For more information on using DVD-R/RW and
CD-R/RW discs, see “Handling discs” on page
55.
• Never try to replay anything other than a music
CD (CDA format) or a CD-R/RW on which MP3
and/or JPEG fi les have been stored. Depending
on the type of fi le, there may be times when
doing so will result in problems or erroneous
operation.

Connecting Up2
10
Connecting audio/video cables
Be sure to insert each
plug fully for the best
con nec tion. The plugs
and jacks are color-cod ed
to make con nec tion
easier.
Connecting system control cables
By connecting this DVD player to another
Marantz audio component using a supplied
system control cable, you can remotely
operate the components as a single system.
• When con nect ing to a com po nent with a
remote sensor, be sure to connect the REMOTE
CON TROL IN jack of this DVD player to
the REMOTE CON TROL OUT jack of the
com po nent with the remote sensor.
• When connecting to component which is
not equipped with a remote sensor, be sure
to connect the com po nent to the REMOTE
CONTROL OUT jack of this DVD player.
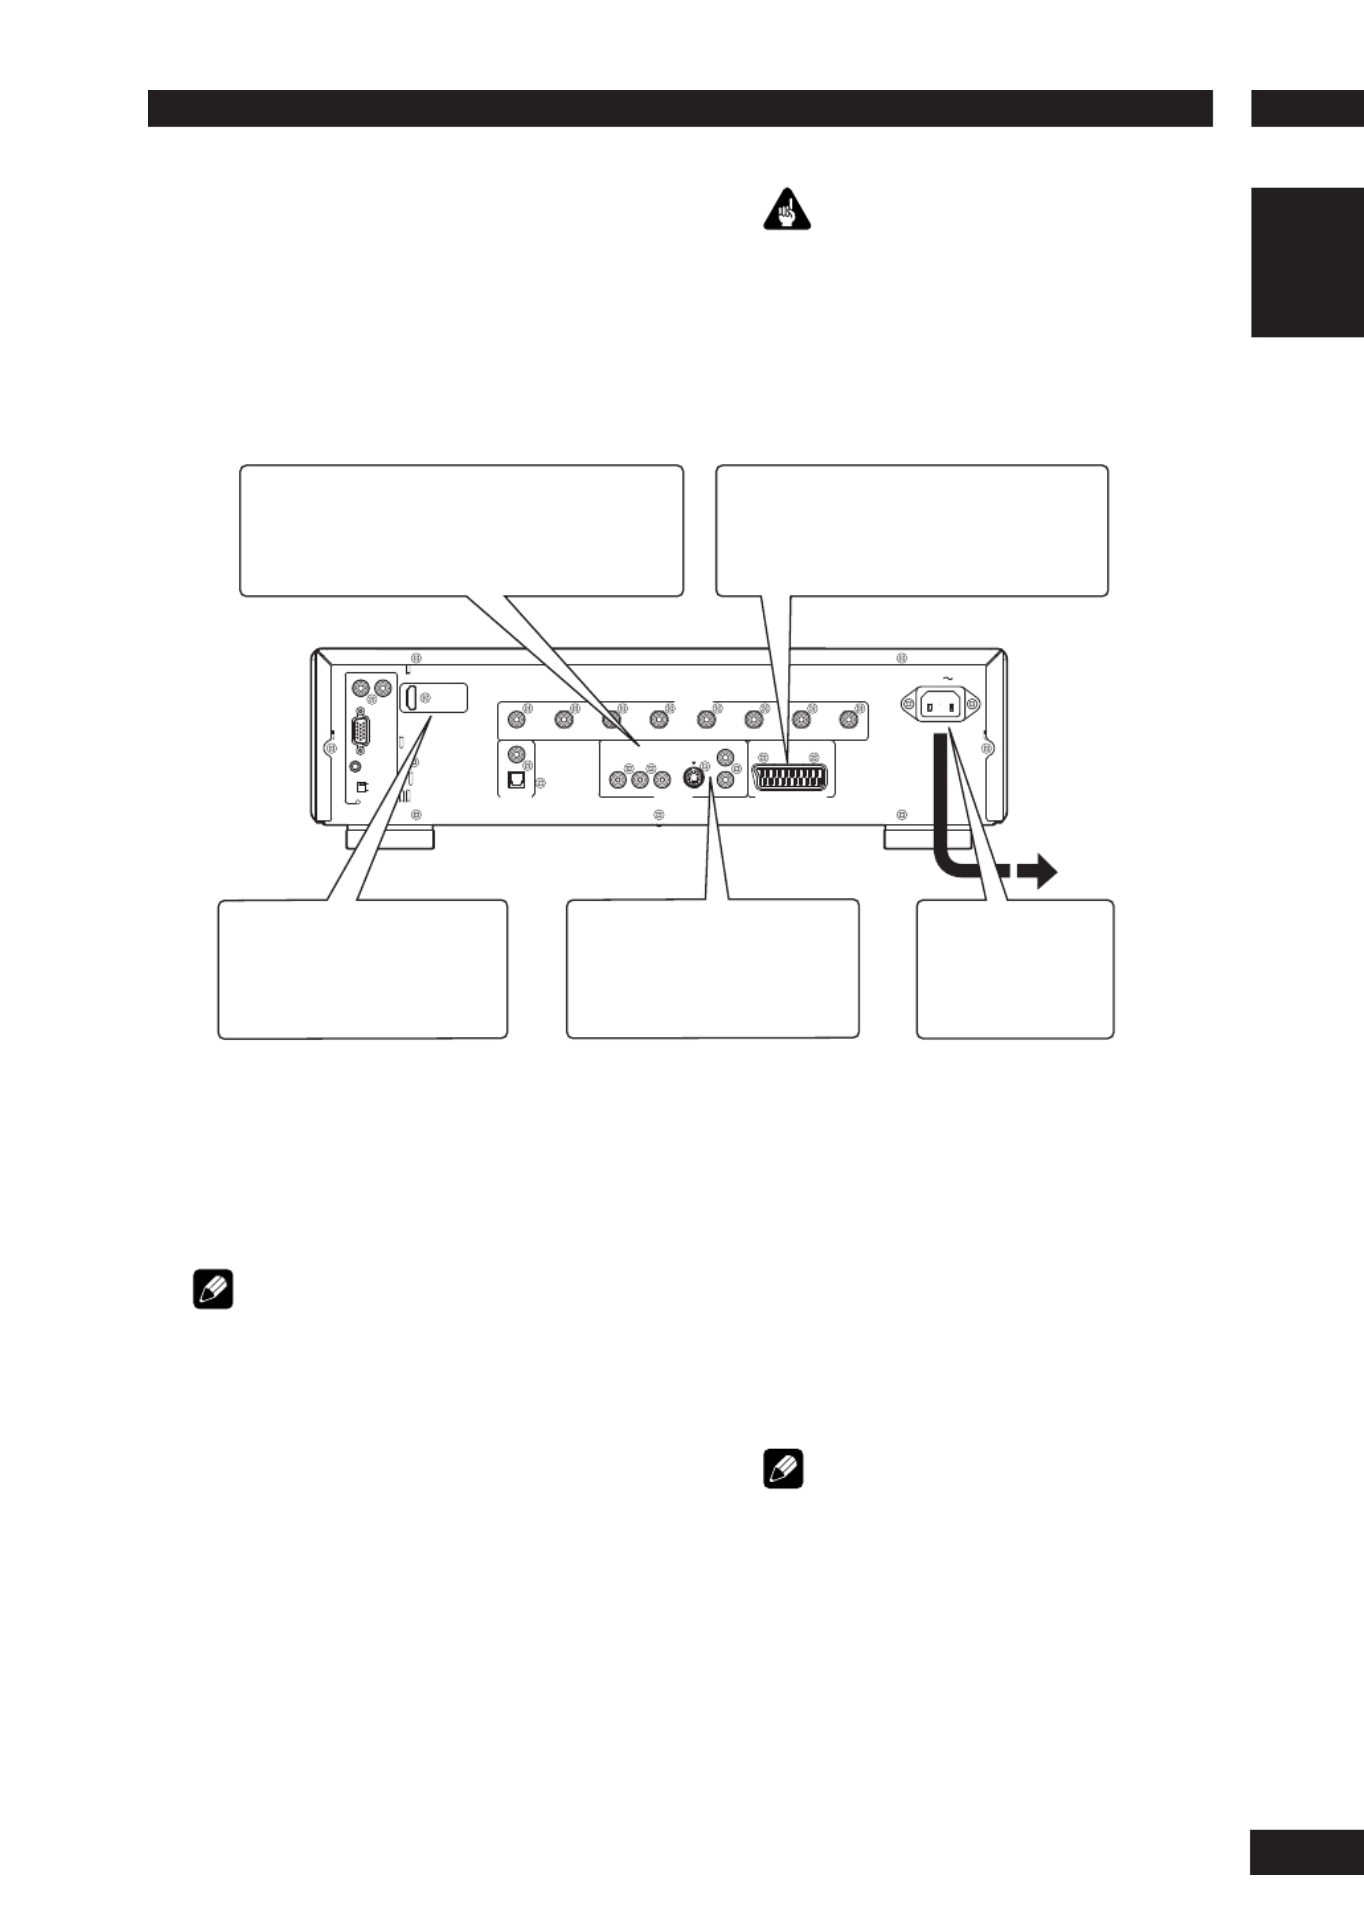
Easy setup
This easy setup is the minimum set of
connections you need to start watching
DVD-Video discs. Both sound and picture
are fed directly to your TV using the
sup plied audio/video cables. For other
possible con nec tions, see pages 11 and 12 .
Important
• Before making or changing any rear panel
connections, make sure that all components are
switched off and unplugged from the wall outlet.
• While a connected component is turned on,
do not unplug the power cord of this DVD
player from the wall outlet. The speaker may be
damaged.
Note
• When connecting to a standard TV, select
4:3 LETTER BOX 4:3 PAN SCAN or in the TV
Aspect setting (see ).page 45
• Connect the video output of the player directly
to your TV. Because the player is de signed
to support an Analog Protection System copy
protection there are cases when proper playback
will not be possible if the player is connected to
the TV through a VCR and images are recorded
and played on the VCR.
• The player’s video output and S1 output are not
be progressive.
• Remote switch
When using this DVD player independently, set
this switch to INT. (INTERNAL). When using this
DVD player in a system with a Marantz receiver
equipped with a remote sensor, set the switch to
EXT. (EXTERNAL). Change the switch setting
using a pen with a sharp tip etc.
• Flasher Input
This is used when controlling components
from different rooms with a keypad or other
input device. Set the remote switch to EXT.
(EX TER NAL) when using a fl asher input.
A/V EUROCO NNECTO R
INT .
EXT.
REMOT E
CO NTRO L
OUT IN
RS- 232C
HDMI
Ve r 1.1
FLASHER I N
AC IN
LRLR
CENTER
SUB WOOF ER
SURR.LSURR.R
MIXED
2CH
CO AX.
OP T.
FRONT
AUDIO O UT
Y
/P
C
B B
C
R
/P
R
CO MPO NENT
S1
1
VIDEO
2
VIDEO OUT
DIGIT AL
OUT
21
3
EXT.
INT.
Connect to a composite video
input on your TV using the
supplied Audio/Video cable.
Plug into a standard
AC wall outlet.
Connect to a pair of stereo audio
inputs on your TV using the
sup plied Audio/Video cable. You
can connect a subwoofer to the
SUBWOOFER Jack.
RS-232C terminal/
FLASHER IN
Control terminal for use by
custom installers.
See Note:
Remote Switch
2Connecting Up
11
English
A/V EUROCO NNECTO R
INT .
EXT.
REMOT E
CO NTRO L
OUT IN
RS- 232C
HDMI
Ve r 1.1
FLASHER IN
AC IN
LRLR
CENTER
SUB WOOF ER
SURR.LSURR.R
MIXED
2CH
CO AX.
OP T.
FRONT
AUDIO O UT
Y
/P
C
B B C
R
/P
R
CO MPO NENT
S1
1
VIDEO
2
VIDEO OUT
DIGIT AL
OUT
1
4
32
Home theater video con nec tions
This player outputs video in a number
of different ways. Choose the one most
suit able for your system using the guide
below.
Connecting SCART (for Europe only)
and S-Video cables
SCART and S-Video cables will only plug in
one way, so make sure the plug is correctly
lined up with the jack before inserting. Be
sure to fully insert for a good con nec tion.
Note
• The A/V EURO CONNECTOR can output
com pos ite or RGB component video. If you
connect just one TV, use the A/V EURO
CONNECTOR. You can select the type of video
output by changing the setting in COMPONENT
the DVD Setup Menu page 49 ( ).
S-Video or composite video?
S-Video should give a better picture, so if
you have an S-Video input, use it. S-Video
cables are available from any good audio/
visual dealer.
Connecting HDMI cables
With an HDMI cable, both uncompressed
video data and digital audio data (e.g.,
LPCM or bit stream data such as Dolby
Digital, DTS, MPEG data or DVD Audio
Multi channel) can be trans mit ted with just
a single connector.
By transmitting DVD image data directly as
digital data without it being fi rst converted
into analog format, it becomes possible to
provide the very fi nest in image quality (see
pages 6, 41, 42, 47).
Note
• The HDMI output of this unit can be con nect ed
to a DVI jack on a TV or other device using a
conversion adapter. In this case, it is necessary
to use a TV or display with an HDCP-com pat i ble
DVI input.
• There may be no image output if con nect ed to
a TV or display that is not com pat i ble with the
above format.
• Refer to the instruction manual of the TV or
display to be connected to this unit for detailed
information regarding the HDMI terminal.
• When connecting a progressive input TV with the
component output of the player, select in ON
the Progressive setting (see page 45).
If your TV has a component video input, we
rec om mend using it to connect directly to the
COM PO NENT VIDEO OUT of this player. Use
the standard 3-jack component video output.
If a component input is not
available to you, connect this
player to your TV or AV receiver
using either the or VIDEO S1
jacks.
Plug into a standard
AC wall outlet.
If your TV and projector have
a HDMI terminal for Video and
Audio Input, we recommend
using it to connect directly to
the HDMI out of this player.
If your TV has a SCART input, we
rec om mend using it to connect directly
to the A/V EURO CONNECTOR on
this player. (for Europe only)
Important
• Before making or changing any rear panel
connections, make sure that all components are
switched off and unplugged from the wall outlet.
• While a connected component is turned on,
do not unplug the power cord of this DVD
player from the wall outlet. The speaker may be
dam aged.

Connecting Up2
12
A/V EUROC ONNECT O R
INT .
EXT.
REMOT E
CO NTROL
OUT IN
RS-232C
HDMI
Ve r 1.1
FLASHER I N
AC IN
LRLR
CENT ER
SUB WOO FER
SURR.LSURR.R
MIXED
2CH
CO AX.
OPT .
FRONT
AUDIO O UT
Y
/P
C
B B
C
R
/P
R
CO MPONE NT
S1
1
VIDE O
2
VIDE O O UT
DIGIT AL
OUT
2
4
3
1
COAX
Connecting analog audio cables
Be sure to fully insert each plug for the
best con nec tion. The plugs and jacks are
color-coded to make con nec tion easier.
Connecting coaxial cables
Use an interconnector with a pin-type
(also called RCA
or phono) plug on
each end to connect
up digital coaxial-
type jacks. Make
sure that the plug is
pushed fully home.
Connecting optical cables
Optical intercon-
nects only plug in
one way, so make
sure the plug is
correctly lined up
with the jack before
in sert ion. When
in sert ing the plug,
Home theater audio connections
This player outputs multi-channel audio
in digital form. Check the manual for your
amplifi er/receiver to see what equipment it
is com pat i ble with (especially which digital
formats such as Dolby Digital, DTS, etc. It
can decode).
Important
• Before making or changing any rear panel
connections, make sure that all com po nents are
switched off and unplugged from the wall outlet.
• While a connected component is turned on,
do not unplug the power cord of this DVD
player from the wall outlet. The speaker may be
damaged.
If your amplifi er has stereo inputs
only, connect them here. You
can connect a subwoofer to the
SUBWOOFER Jack.
Connect to the coaxial or
optical input of your amplifi er
if it has digital inputs.
Plug into a standard
AC wall outlet.
the pro tec tive shutter will open and you
should hear it click into po si tion when fully
in sert ed. Be careful that you do not force
the plug, because this could result in dam-
age to the protective shutter, the cable, or
the unit itself.
Note
• If you listen to mul ti chan nel DVD-Audio through
one of the digital outputs, it will be downmixed
to stereo. Also, high sampling rate DVD-Audio
(192 kHz or 176.4 kHz) will be downsampled
to 96 kHz, 88.2 kHz, 48 kHz or 44.1 kHz,
depending on the disc. Multi channel and high
sampling rate DVD-Audio are only available
through the analog outputs.
• All DVD-Audio and all Super Audio CD audio are
output only through the analog outputs. (see
page 40)
OPT
If your amplifi er has 5.1 channel analog
inputs, connect them here. Connect to the
L (left)/R (right), SURR.L/.R (SURROUND
L/R), CENTER and SUB WOOFER inputs
of your amplifi er.

3Controls & Displays
13
English
Front panel
1 STANDBY indicator
• Lights when the unit is in standby.
2 Disc tray
• Place the disc here.
3 3 (PLAY)
• Begins playing the disc play.
4 7 (STOP)
• Stops playing the disc play.
5 8 (PAUSE)
• Pauses playing the disc play.
6 POWER ON/OFF
• Press to turn the power on, and press it again to
turn the power off.
7 AUDIO EX indicator
• Lights when the AUDIO EX is activated using the
AUDIO EX button on the remote control.
• The sound quality of analog audio output is
improved by turning off analog video signal
output and the front panel display.
• It is applied to CDDA, Super Audio CD, DVD
Audio and DTS CD in Play mode.
8 Display
• Operation indications are displayed here.
9 HDMI indicator
• When the connected device is HDMI/DVI
compatible, the light fl ashes red.
10 AUDIO EX
• Press to turn AUDIO EX off and on.
• HDMI video output cannot be switched off.
11 HDMI page 47 –
• The HDMI on/off state toggles when pressed
for three seconds or more. When on, the HDMI
indicator is lit.
• Pressing this button while HDMI is enabled
displays the current resolution. Pressing this
button again while the resolution is dis played
allows you to select the resolution in the
se quence below:
480p Æ 576p Æ 720p Æ 10 80i Æ 10 80p Æ
480p
12 0 (OPEN/CLOSE)
• Press to open and close the disc tray.
13 4/1
• Press to skip reverse title/group, chapter, or track.
You can also press and hold this button for Fast
R sed.ever
14 ¡/¢
• Press to skip forward title/group, chapter, or
track. You can also press and hold this button for
Fast Forward.
ST ANDBY
PAUSE
HDMIAUDIO EX.
HD MIAUD IO EX.
OPEN/CLO SE
ST OPPLAY
POWE R
ON/OFF
SUPER AU DIO CD/DVD PLAY ER DV7001
GRP GRP
T IT LE
kHz
96
CHP ALL
A- B
PRO G
T OT AL S UB
PCM
AWS
MPEQ
BT ST M
MP3
MAPAUDIO
COND
DOWN MIX
VCD
SACD
V-PART
T HX
SRS T S
PRG SV E
DO LBY D
LF E
CR
L
S
LS R S
O OF F
V O
FF
101T EXT
1
2 3 4 5 6 7 8 9 1211 1413 1615 1817 2019
kHz
192
PM M
ST EREO MU LTI
6
4 5
2
1
8
3
97 0 =~!-

Controls & Displays3
14
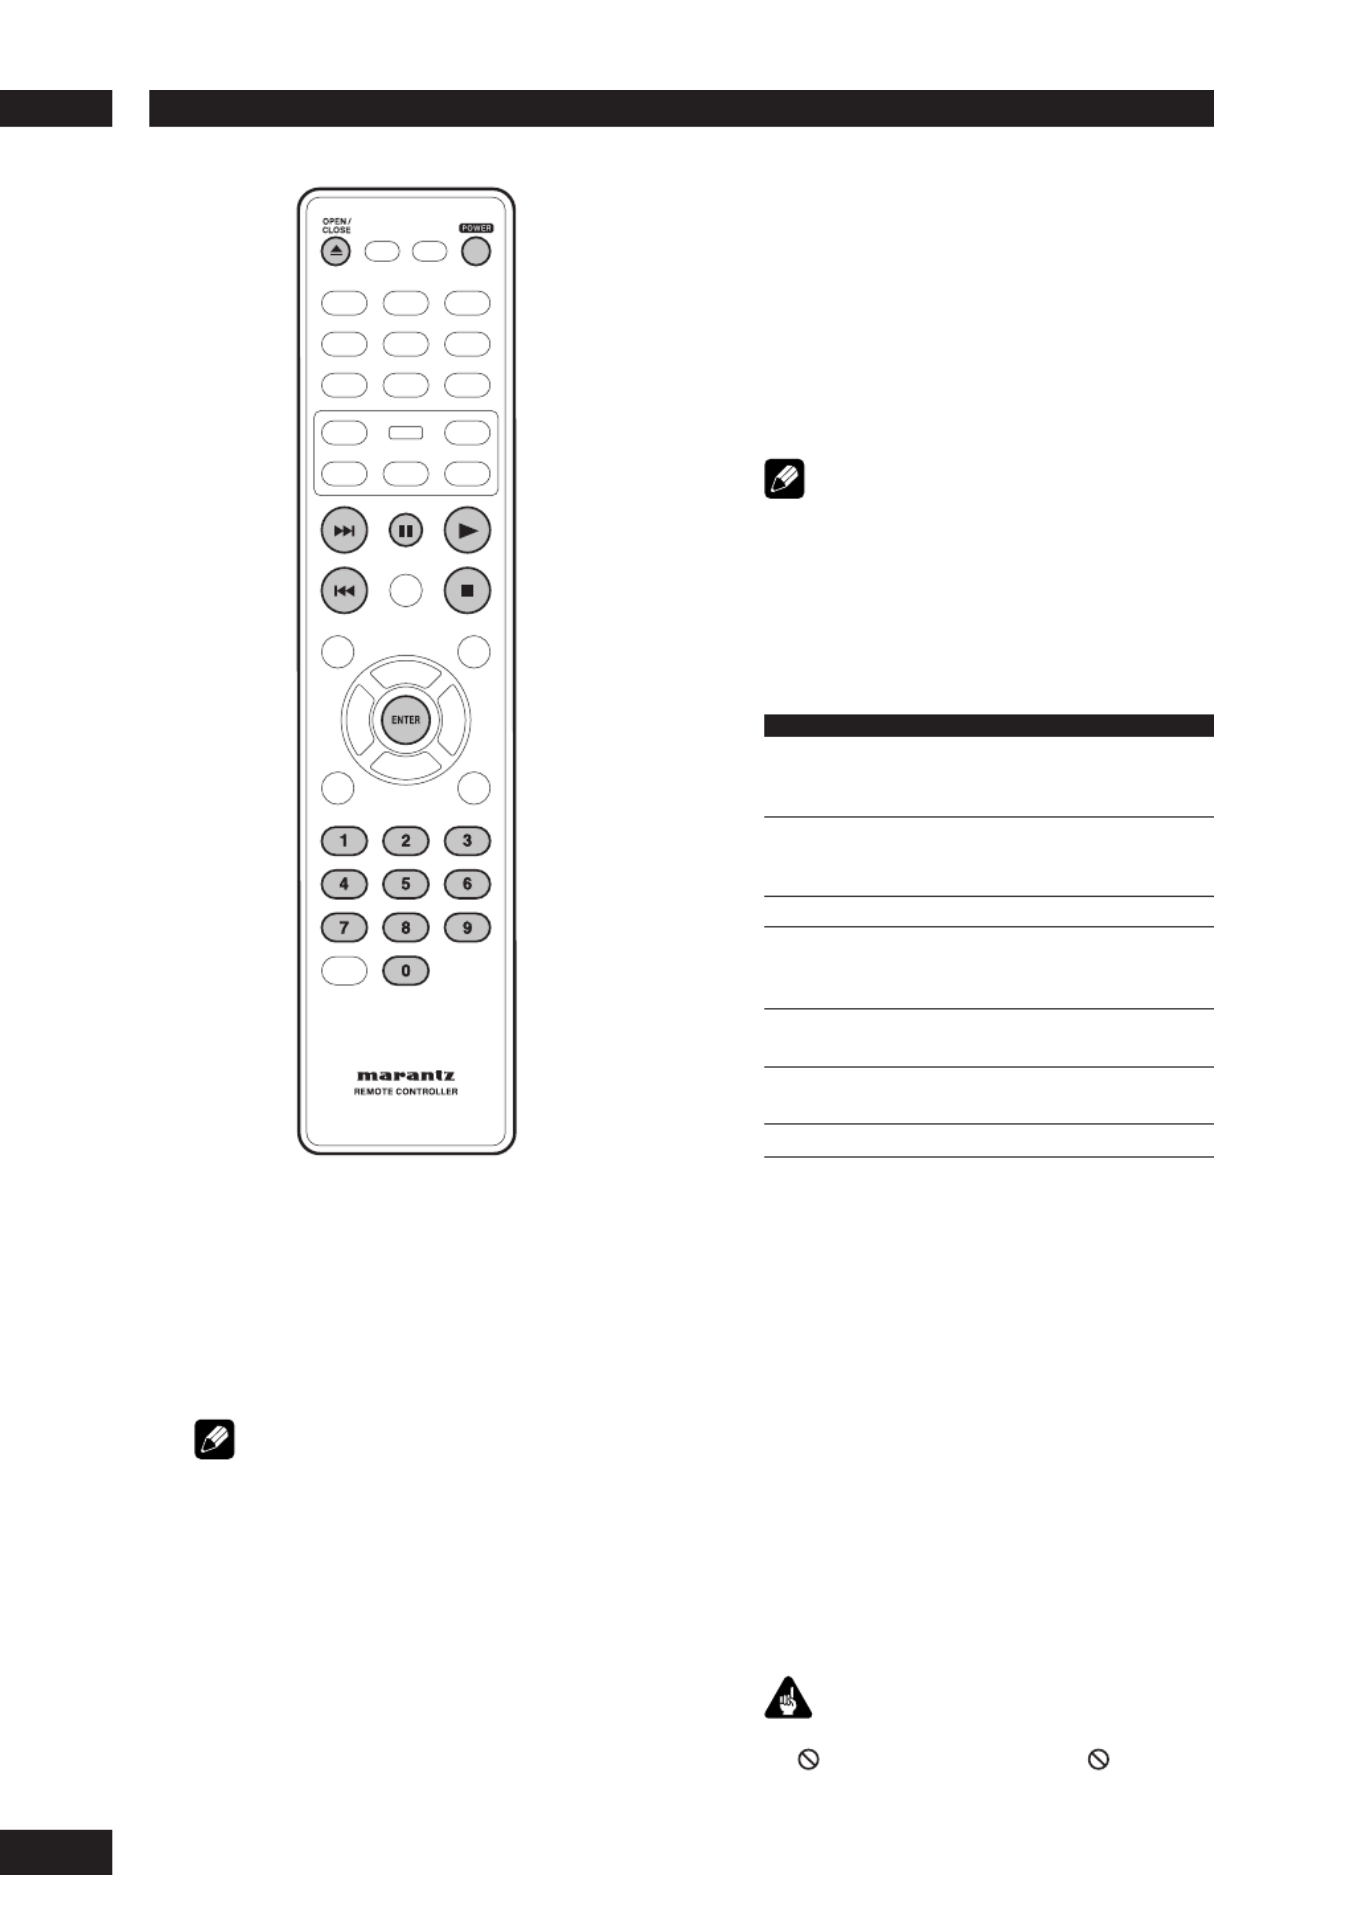
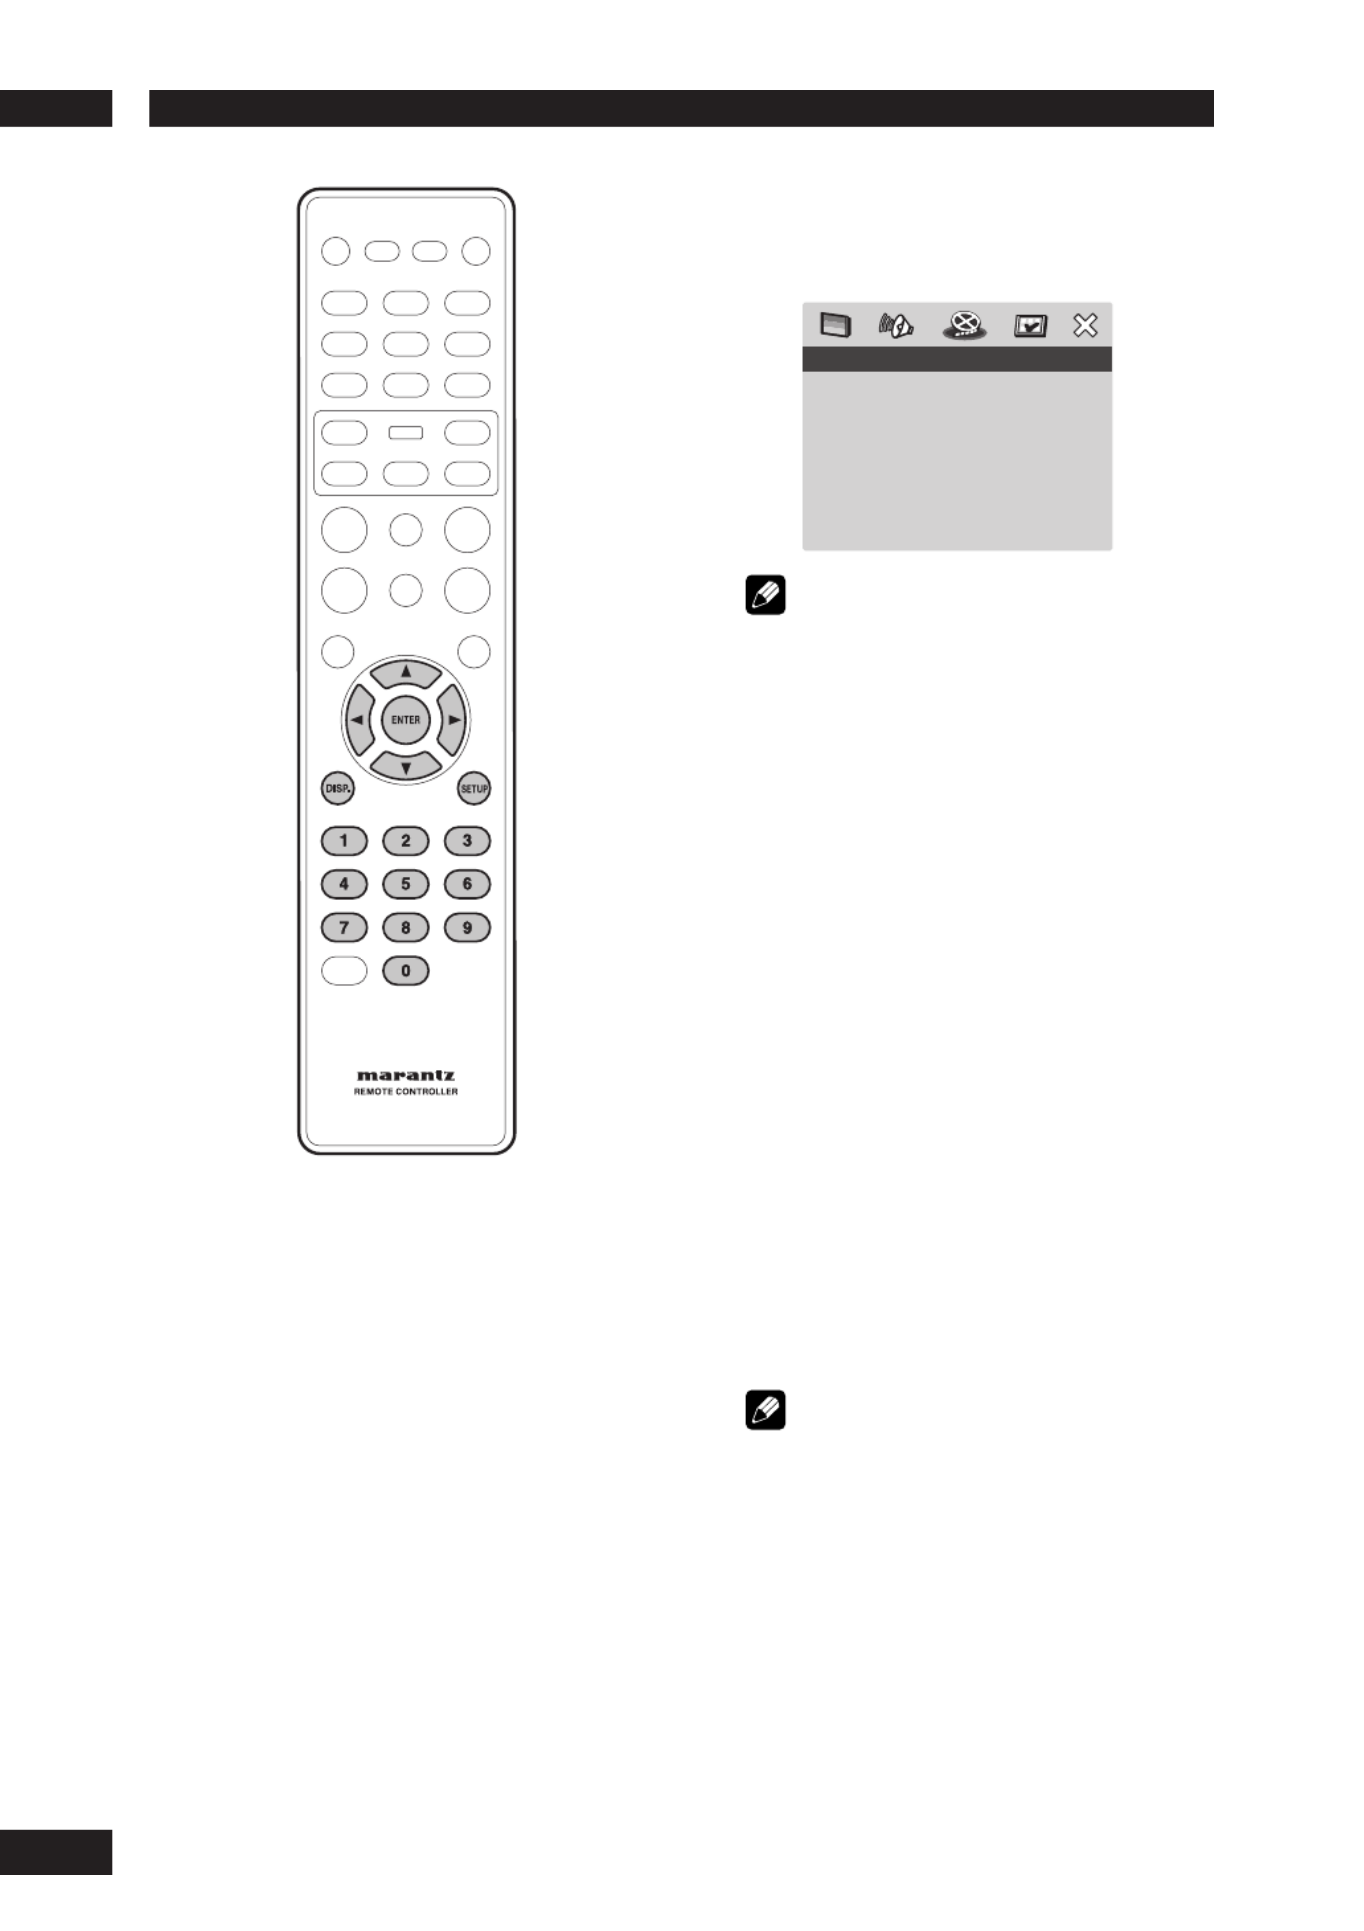
Remote control
1 AUDIO EX – Press to turn AUDIO EX off
and on
• The sound quality of analog audio output is
improved by turning off analog video signal
output and the front panel display.
• HDMI video output cannot be switched off.
2 OPEN/CLOSE – Disc tray open/close –
page 16
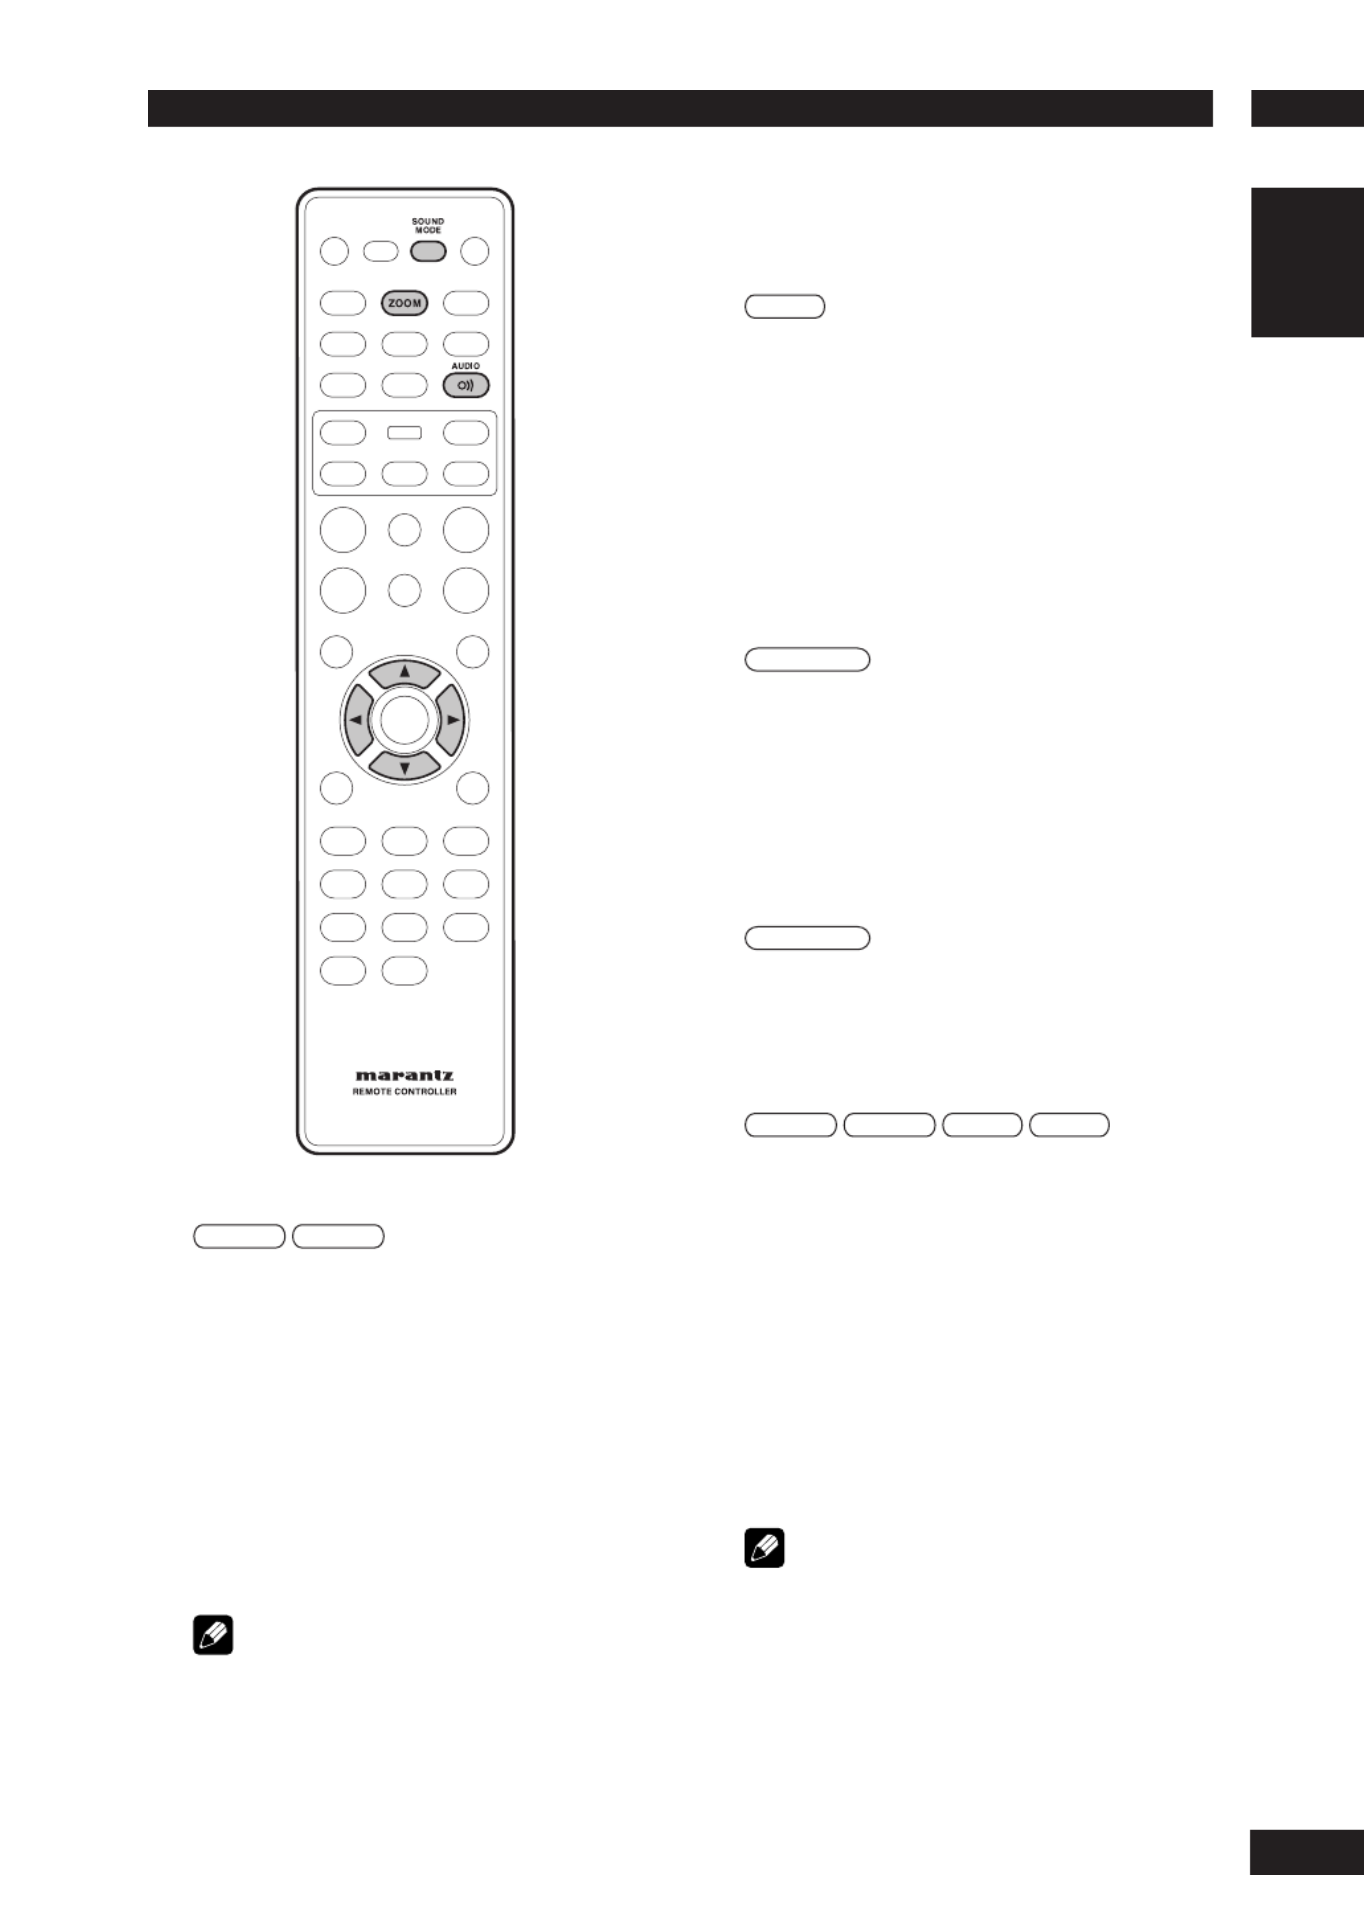
3 ZOOM pages 25, 30 –
4 HDMI page 47 –
• The HDMI on/off state toggles when pressed
for three seconds or more. When on, the HDMI
indicator is lit.
• Pressing this button while HDMI is enabled
displays the current resolution. Pressing this
button again while the resolution is dis played
allows you to select the resolution in the
se quence below:
480p Æ 576p Æ 720p Æ 1080i Æ 10 80p Æ
480p
1
2
3
4
5
6
7
8
~
-
=
0
9
_
#
$
%
^
&
*
(
)
@
!
™
¡
+
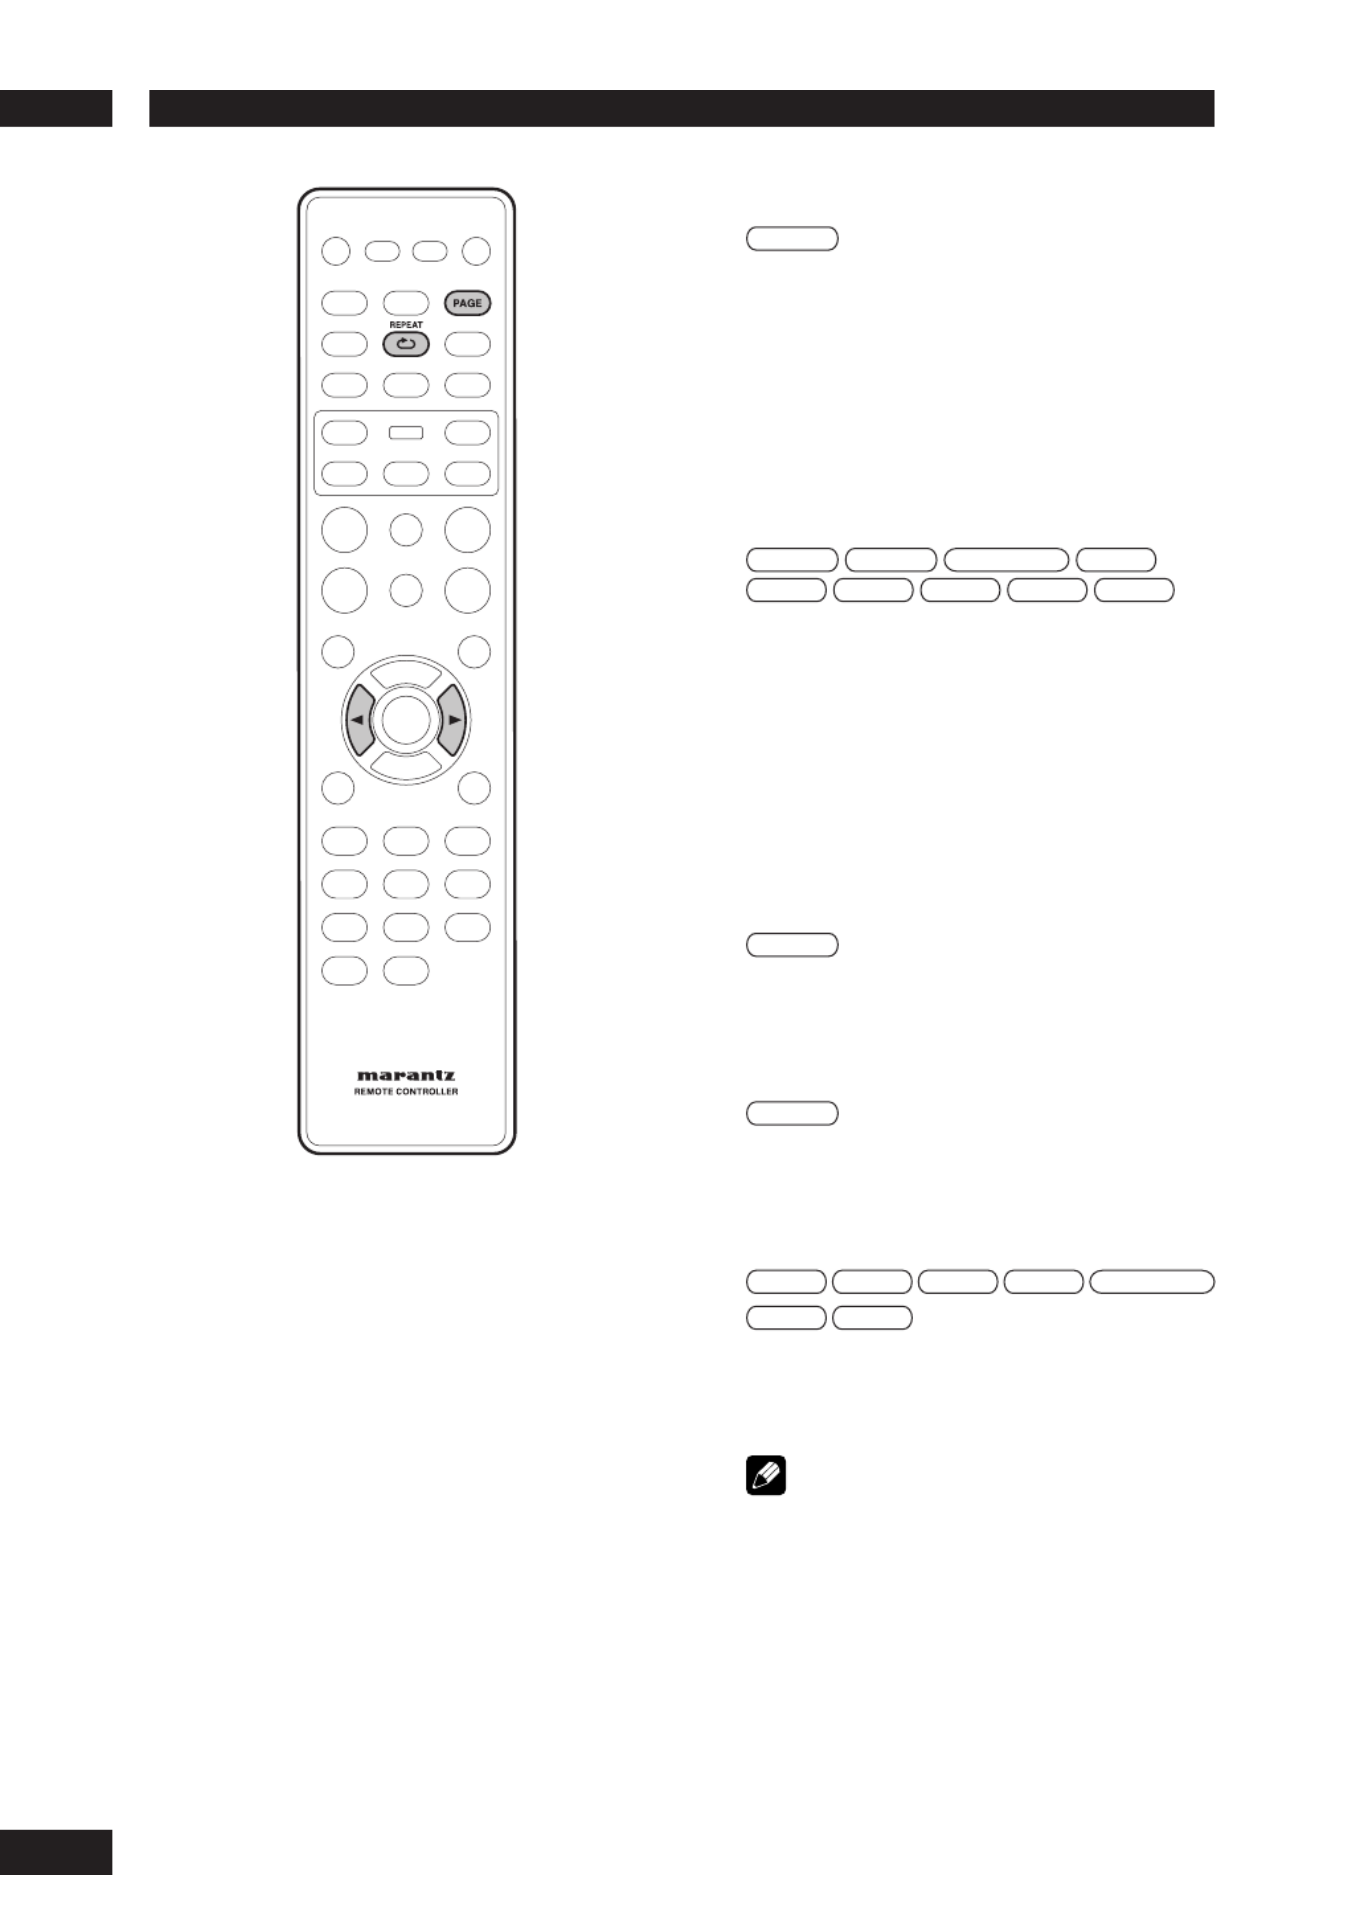
5 REPEAT pages 22, 29 –
A–B page 23 –
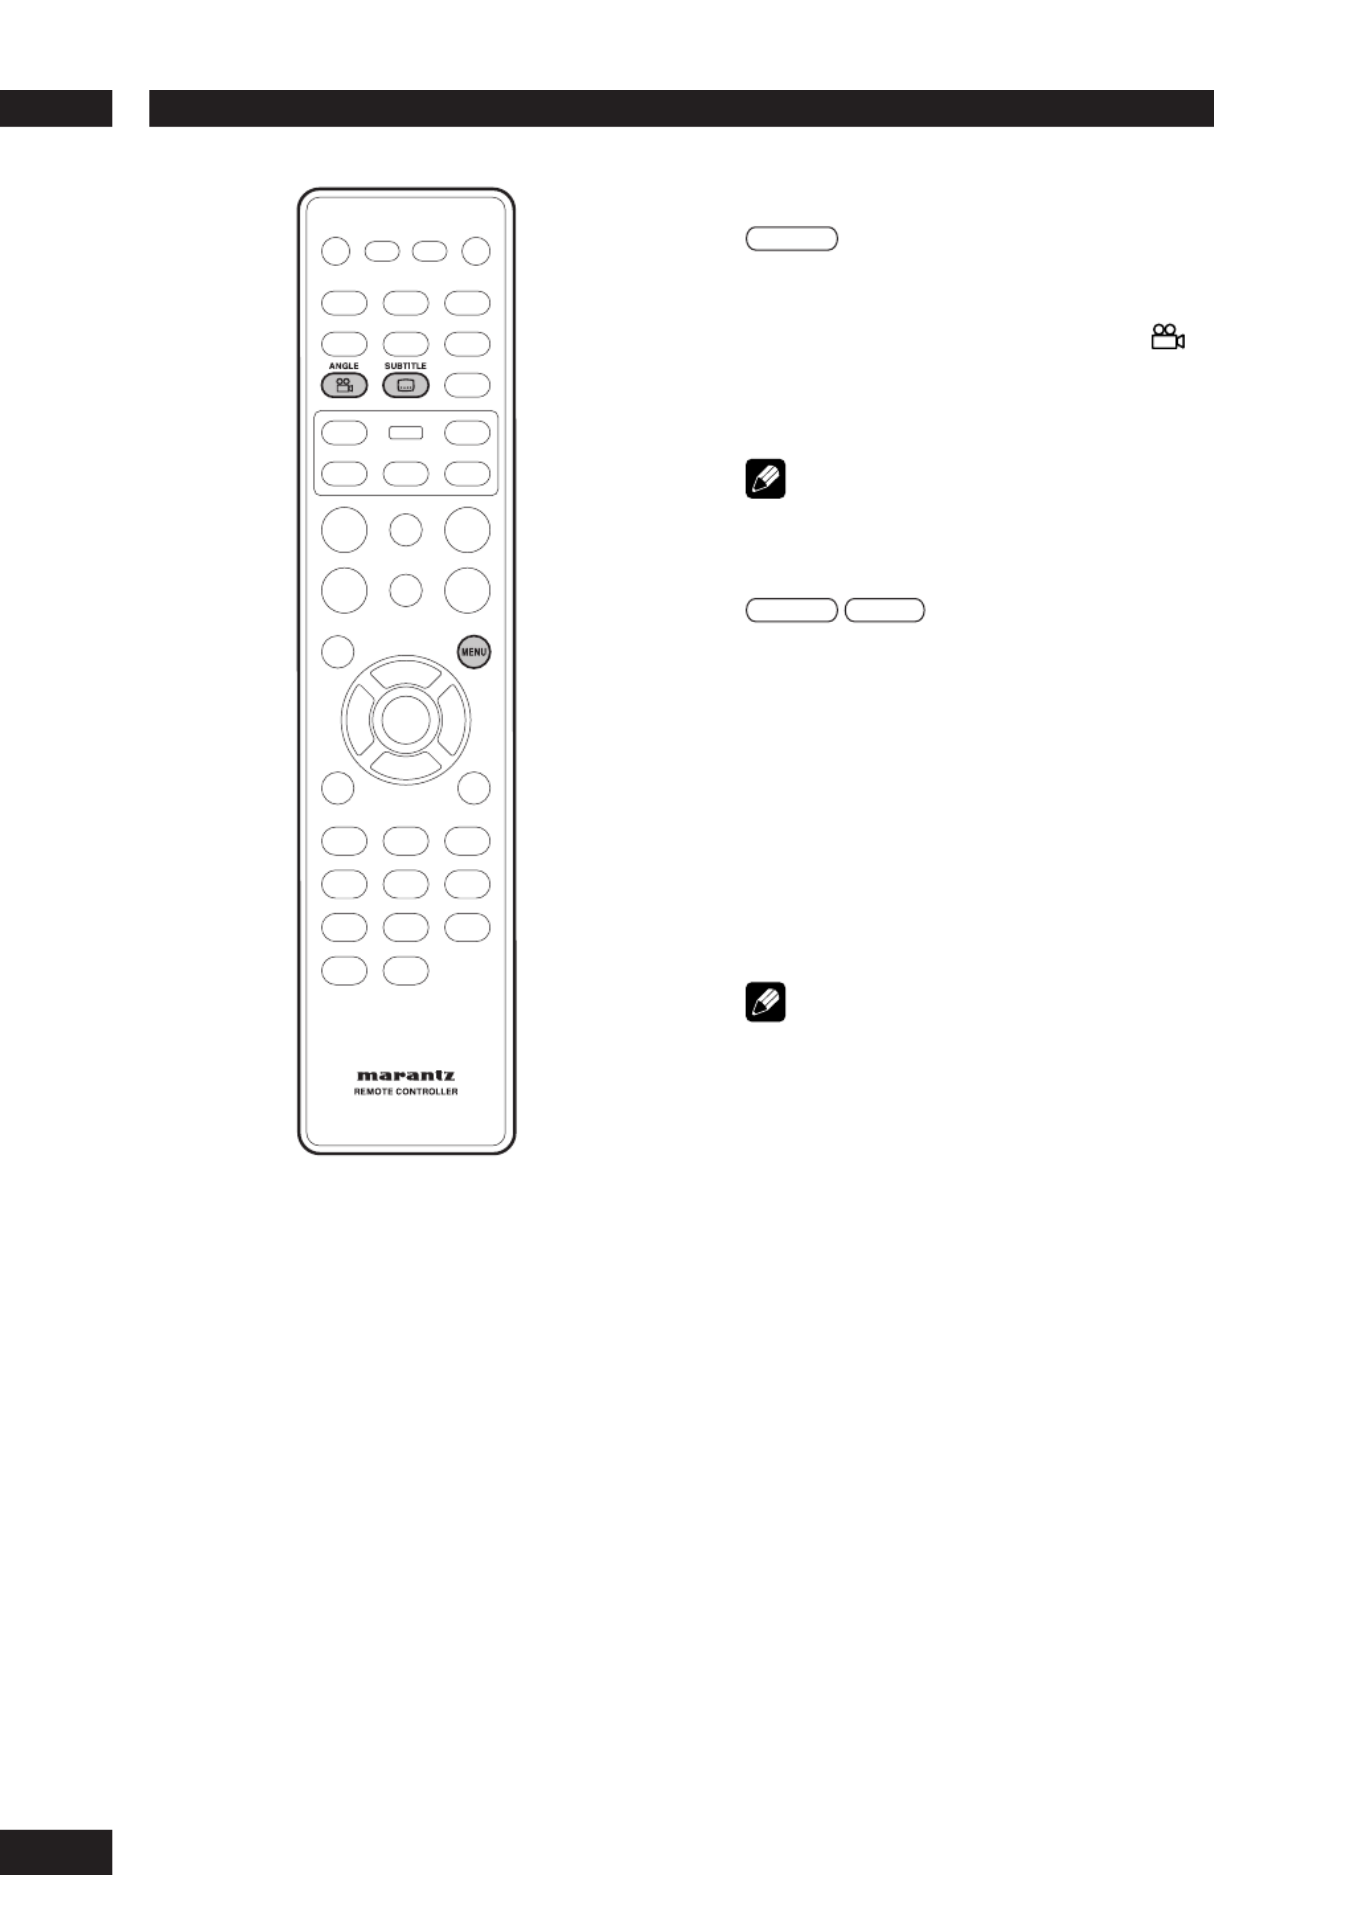
6 ANGLE pages 24, 30 –
7 INPUT (%/fi) button – These buttons
can switch between devices compatible with
MARANTZ receivers. Refer to the receiver
instruction manual for further details.
•
Applicable models: PM-11S1, PM-15S1,
PM6001, PM7001, PM8001, SR9600.
(These models may not be handled depending on
the area.)
Non-applicable models: MARANTZ Amplifi ers
and receivers which had released before 2006,
including PM-14, PM-17 and PM4001 except
above models.
8 4 (PREV.)/¢ – Skip – (NEXT) pages
16, 17, 19, 20, 29, 30, 52
•
Allows you to search forward/backward through a
disc. Use to skip the title, chapter or track.
• Press and hold (4) for Fast Reversed.
• Press and hold (¢) for Fast Forward.
9 SCAN pages 18, 19 –
10 TOP MENU (TOP-M)/RETURN page 17 –
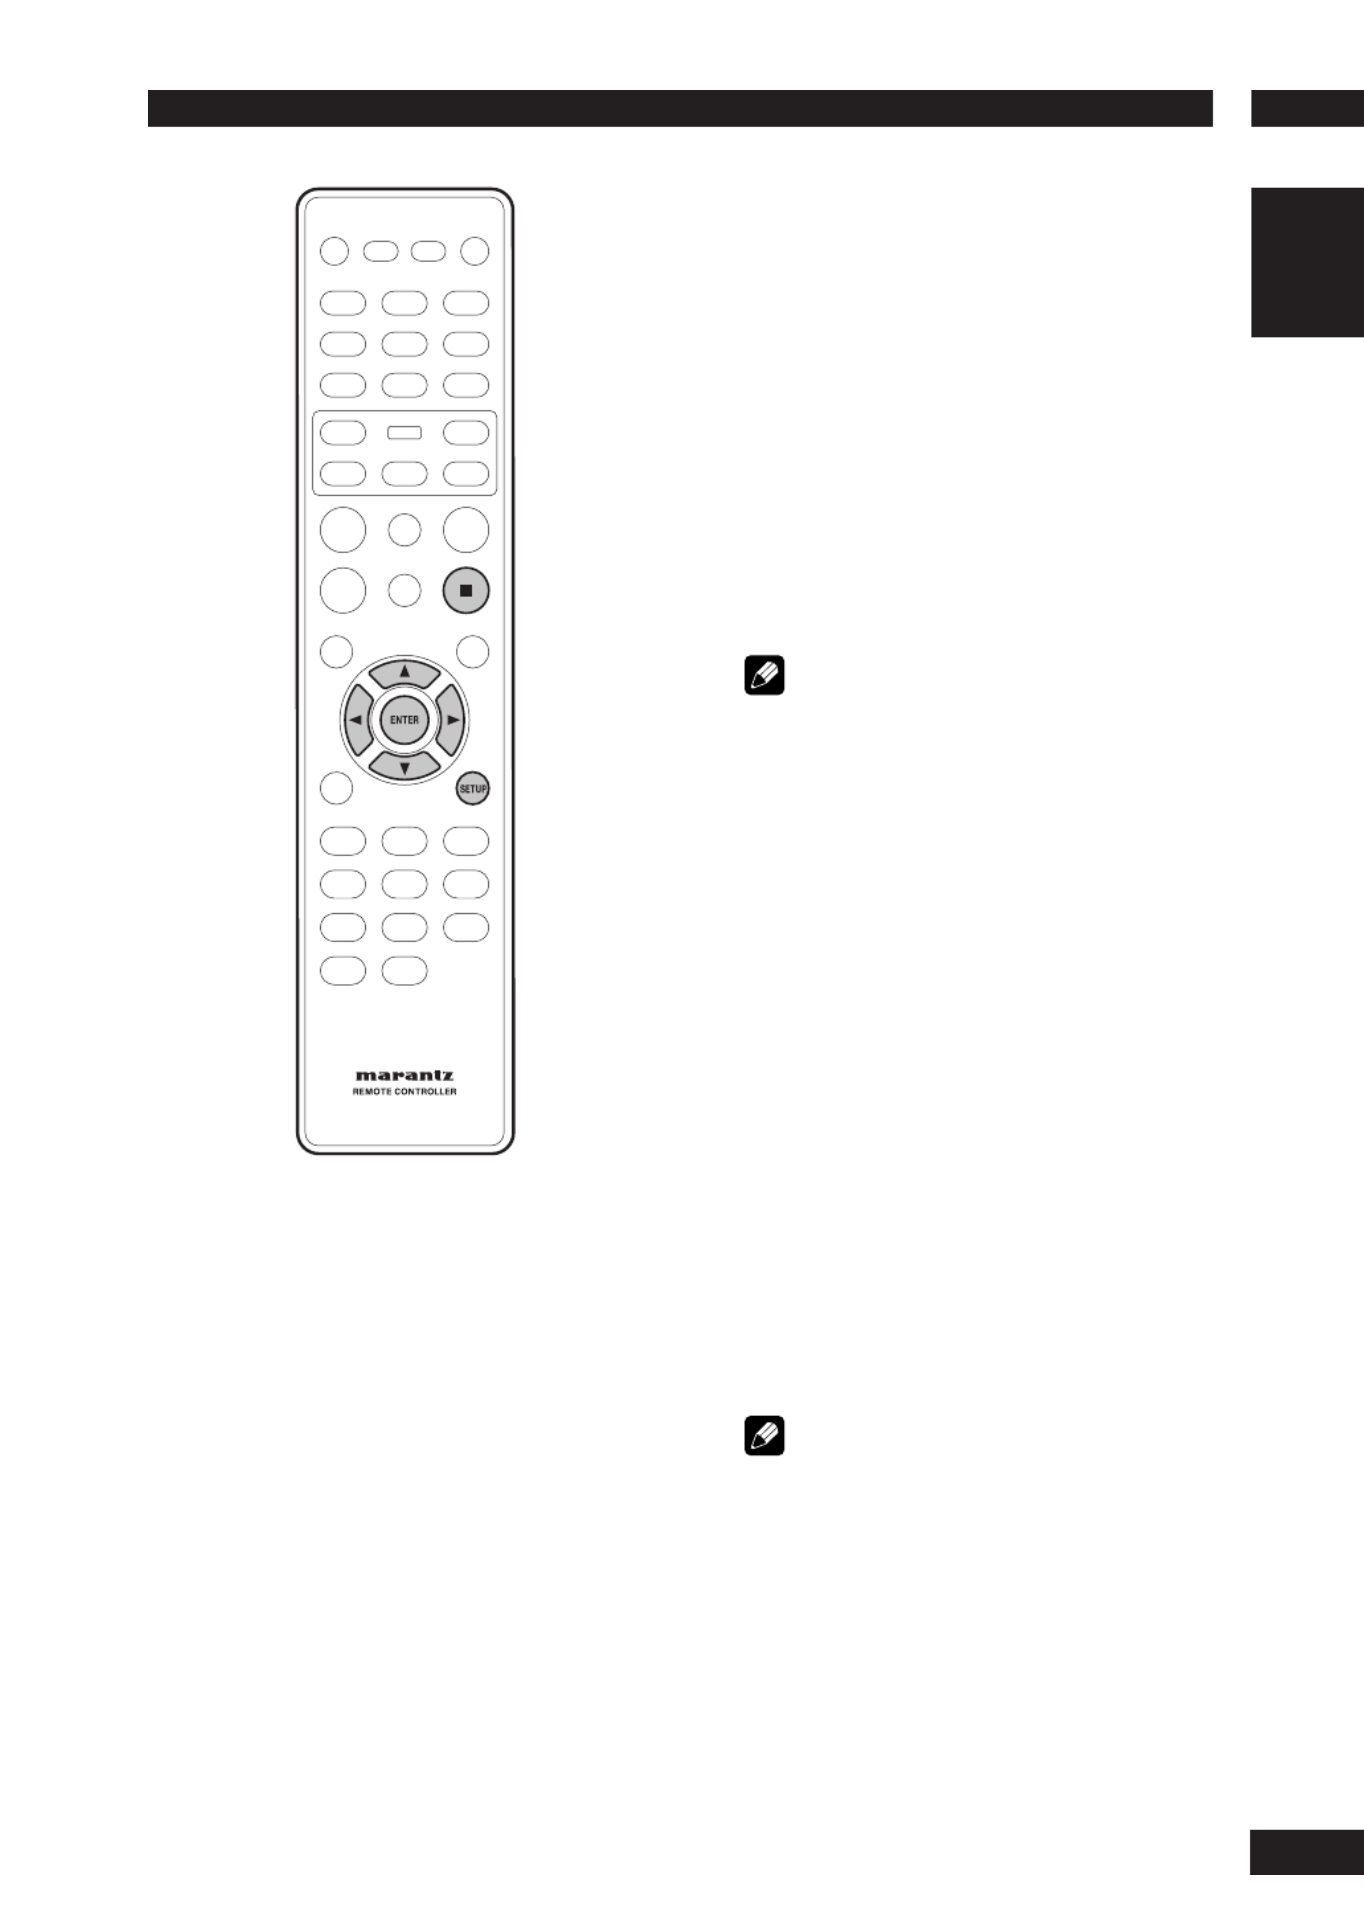
11 Cursor (2/3/5
/∞) / ENTER button
12 DISPLAY (DISP.) page 26 –
13 DISC SKIP – It is not used on this set.
14 POWER – Switches the player on or into
standby – page 16
15 SOUND MODE– Selects Audio out mode
and change the Super Audio CD Play back
area – pages 25, 39
16 PAGE – Turns the pages of DVD-Audio still
pictures – page 22
17 RANDOM page 23 –
18 AUDIO – Changes the Hybrid Super Audio
CD Play back layer – page 25
19 SUBTITLE pages 24, 32 –
20 VOLUME (5/∞) button –
These buttons
can adjust the volume of devices compatible
with MARANTZ receivers. Refer to the
receiver instruction manual for further details.
21 MUTE button – This button can activate
the mute function of devices compatible with
MARANTZ
receivers. Refer to the receiver
instructions for further details.
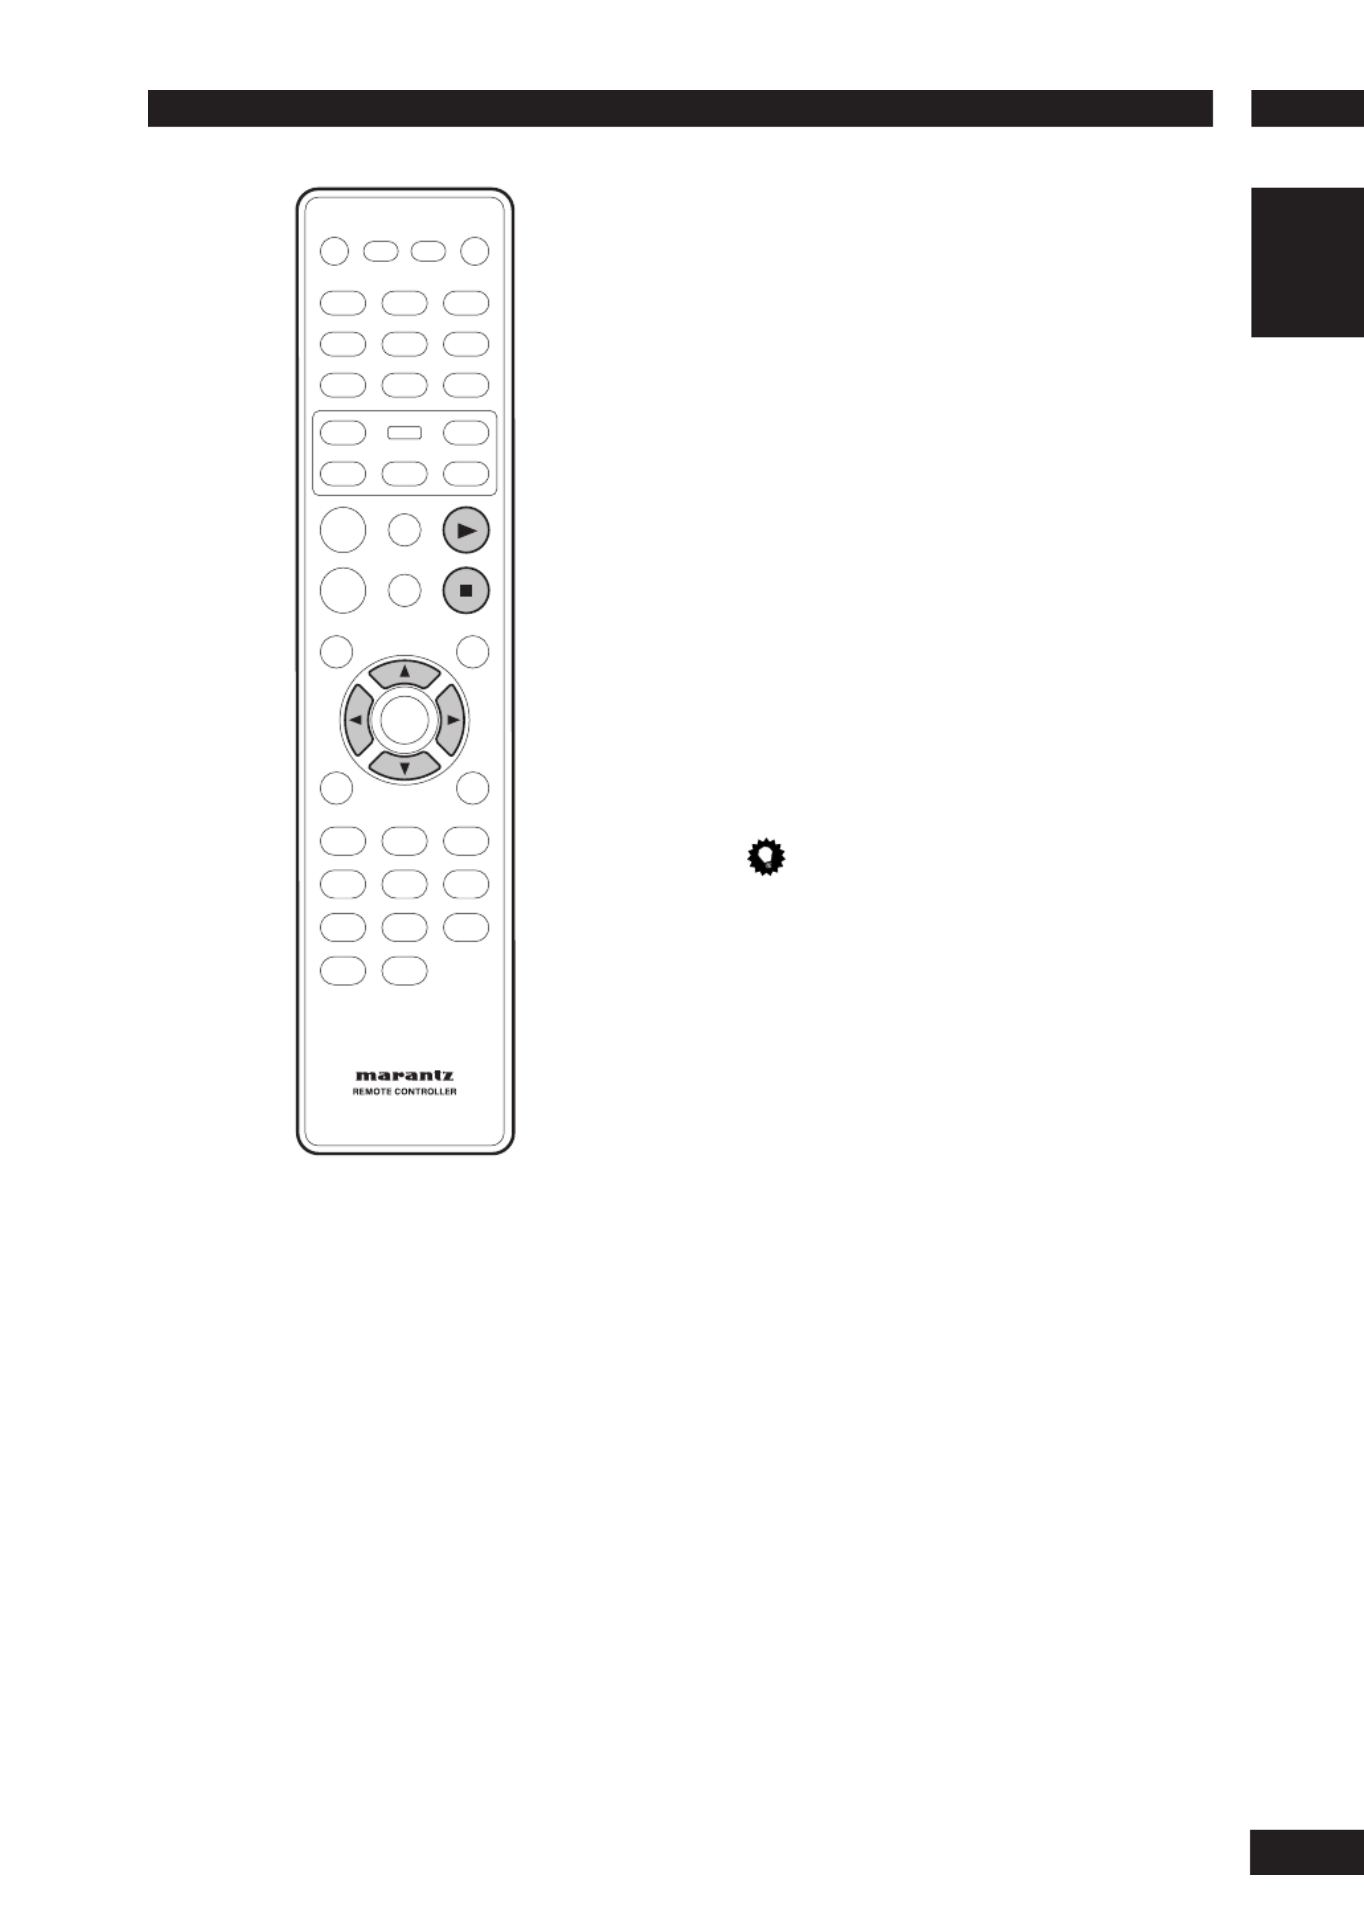
22 3 (PLAY) pages 16, 20, 21, 29, 31, 32 –
23 8 (PAUSE) pages 16, 21 –
24 7 (STOP) pages 16, 30, 31, 33, 50 –
25 MENU pages 17, 19, 24 –
26 SETUP pages 33, 36, 39, 44, 50 –
27 Number buttons
Getting Started4
16
Playing discs
The basic playback controls for playing
discs are cov ered here. Further func tions
are detailed in the next chapter.
Note
•
Throughout this manual, the term “DVD” means
DVD-Video, and DVD±R/RW. If a function is specifi c
to a par tic u lar kind of DVD disc, it is specifi ed.
1 Switch the player on.
If you are playing a DVD or Video CD, also turn on
your TV and make sure that it is set to the correct
video input.
2 Press OPEN/CLOSE to open the disc tray.
3 Load a disc.
Load a disc with the label side facing up, using the
disc tray guide to align the disc (if you’re loading
a double-sided DVD disc, load it with the side you
want to play face down).
4
Press 3 (PLAY) to start playback.
If you are playing a DVD or Video CD, a menu may
appear (see page 17).
Note
•
For one-sided, two-layer discs containing movies, etc.,
there may be a short image stoppage at the point
where the layers change. This is not a malfunction.
•
Depending on the DVD or VIDEO CD, some
operations may be different or restricted.
Basic playback controls
Button What it does
3 Starts playback.
In title menu, it functions as the Enter
key.
8
Pauses a disc that’s playing.
Each time the button is pressed, a new
frame will appear.
7 Stops playback.
4 •
Skips to the start of the current track or
chapter, then to previous tracks/chapters.
•
Press and hold for Fast Reversed.
¢ •
Skips to the next track or chapter.
•
Press and hold for Fast Forward.
Numbers
Playback starts from the selected track/
chapter number.
ENTER Select the current menu option.
Resuming playback from the last
stopped point
This DVD system is able to resume disc
playback from its last stopped point (only
possible for the last 10 discs that were
recorded without a menu).
1 Load one of the last 10 discs played.
2 While “LOADING” appears on the display
panel, press PLAY 3 to start playback from
the last stop point.
To cancel the resume mode
• Press
7
twice.
Important
While using the DVD playback controls, you may see
the mark displayed on-screen. The mark means
that the operation is not allowed by the player and
disc.

4Getting Started
17
English
Navigating DVD disc menus
Many DVD discs contain menus. Sometimes
these are displayed automatically when you
start playback; others only appear when you
press or .MENU TOP-M
Note
• Some DVD-Audio discs feature a “Bonus Group”. To
access this group you have to input a password that
you can fi nd on the disc’s packaging (see page 36).
Button What it does
TOP-M Displays the “top menu” of a DVD disc. This
varies with the disc.
MENU Displays a DVD disc menu—this varies with
the disc and may be the same as the “top
menu”.
RETURN Returns to the previously displayed menu
screen.
Cursor Moves the cursor around the screen.
(2/3/5/∞)
ENTER Selects the current menu option.
Numbers Selects a numbered menu option
(some discs only).
Navigating Video CD PBC menus
Some Video CDs have menus from which you
can choose what you want to watch. These
are called PBC (Playback control) menus.
Press the to turn the PBC function on MENU
or off.
Note
• Some discs don’t allow PBC menus.
Button What it does
RETURN Displays the PBC menu.
Numbers Selects a numbered menu option.
ENTER Selects the current menu option.
4 Displays the previous menu page
(if there is one).
¢ Displays the next menu page
(if there is one).

Playing Discs5
18
Introduction
• Many of the functions covered in this
chapter apply to DVD discs, Video CDs
and CDs, although the exact operation
of some varies slightly with the kind of
disc loaded.
• When playing DVD discs, if the
icon
appears on-screen when you try to use
a particular function, either the player
or the disc doesn’t allow the use of that
function.
• When playing Video CDs, some of the
functions are not available in PBC mode.
If you want to use them, press the
MENU to turn the PBC function off (see
page 17).
Preview function
DVD
Video-CD
SVCD
CD
1 Press SCAN.
SVCD VCD
SELECT DIGEST TYPE
TRACK DIGEST
DISC INTERVAL
TRACK INTERVAL
DVD-Video
SELECT DIGEST TYPE
TITLE DIGEST
CHAPTER DIGEST
TITLE INTERVAL
CHAPTER INTERVAL
DVD-Audio
SELECT DIGEST TYPE
GROUP DIGEST
TRACK DIGEST
GROUP INTERVAL
TRACK INTERVAL
2 Use the 5/∞ keys to select one of the
following options and press ENTER.
This option is only available during playback mode.
• TRACK/TITLE/CHAPTER/GROUP DIGEST
– View six different TRACK/TITLE/CHAPTER/
GROUP on one screen each time. This allows you
to have a quick glance at all the TRACK/TITLE/
CHAPTER/GROUP on the disc.
• DISC/TITLE/GROUP INTERVAL – View the
whole disc in six thumbnail pictures. It divides
a disc into six portions at regular intervals and
displays them on one screen.
• TRACK/CHAPTER INTERVAL – View the
content of a single TRACK/CHAPTER in six
thumbnail pictures. It divides a single TRACK/
CHAPTER into six portions at regular intervals
and displays them on one screen.
• Use (2/3
/5/∞) to select a track or
use the numeric buttons to enter the
selected track number.

5Playing Discs
19
English
• To go to the previous or next page, press
4/¢.
• Press ENTER on the selected thumbnail
picture to start playback from there.
• To return to the main menu, select MENU
on the screen and press .ENTER
3 To exit the preview menu, select EXIT on
the screen and press ENTER.
For CD
• At stop mode, press on the remote SCAN
control. Each track will be played for a few
seconds.
Note
• You can select “Track Interval” only during playback
with PBC off.
• Some discs don’t allow the Scan mode.

Playing Discs5
20
Fast Forward/Fast Reverse
DVD
Super Audio CD
Video-CD
CD
MP3
DivX
WMA
The video images on DVD and VCD can be
viewed as a Fast Forward and Fast Reverse
with no sound.
In case of CD, the sound can be listened as a
Fast Forward and Fast Reverse with sound.
Viewing in Fast Forward/Fast Reversed
Press and hold ¢ (NEXT) during play.
• Fast Forward is engaged.
• During Fast Forward, the speed of play
back can be adjusted from p20-x2 speed to
x32 speed in 5 steps using ¢ ( ).NEXT
Press and hold 4 (PREV) during play.
• Fast Reverse is engaged.
• During Fast Reverse, the speed of play
back can be adjusted from p20-x2 speed to
x32 speed in 5 steps using 4 ( ).PREV
To return to normal play back press 3 (PLAY)
to normal play back.
Note
• The sound is muted during fast forward/reverse
scanning of DVD/VCD/Super Audio CD.

5Playing Discs
21
English
Still Frame/Slow Play/Frame Advance
Playback
DVD-Video
Video-CD
The video images on DVD and Video CD
can be viewed as a still frame, played back
at slow speeds and even advanced frame by
frame (Forward only).
Viewing a Paused Picture
Press 8 (PAUSE).
Viewing slow playback
With this function, DVDs can be viewed in both forward
and reverse direction. Video CD can only be moved in
the forward direction.
Press ∞ (down) during play.
• Slow playback is engaged.
• During slow playback, the speed of playback can be
adjusted from 1/2 normal playback speed to 1/16
normal playback
speed in 4 steps
using ∞ .(down)
Press 5 (up) during play.
• Slow playback in the reverse direction is engaged.
• During slow playback, the speed of playback can be
adjusted from 1/2 normal playback speed to 1/16
normal playback
speed in 4 steps
using 5 .(up)
To return to normal playback
When the picture is paused or during slow playback,
pressing 3 (PLAY) restores normal playback operation.
Step Motion playback: Viewing one
frame at a time
With this function, DVDs and Video CDs can only be
moved in the forward direction.
Press 8 (PAUSE).
Each time the button is pressed, a new frame will
appear.
To return to normal playback
When viewing Step Motion playback, pressing 3 (PLAY)
restores normal playback operation.
Note
• There is no sound picture playback is paused or
during slow playback, or when advancing one frame
at a time.
• Pausing picture, slow play, or Step Motion playback
may not be possible with certain titles. In this case,
the mark is displayed.
• A short sound may be noticeable when switching to
slow playback.
• When you press the 8 (PAUSE) button during slow
playback, it may advance a few frames past the
frame where you want it to stop.
1/2 1/4 1/8 1/16
1/2 1/4 1/8 1/16
Playing Discs5
22
Using the page
DVD-Audio
Some DVD-Audio discs contain
information pages for photo galleries,
artist biographies, lyrics, etc.
Press the button on the remote PAGE
control during Playback. You may select the
image you want by moving the cursor button
(2/3).
Using the Repeat Play
DVD-Video
DVD-Audio
Super Audio CD
Video-CD
CD
MP3
JPEG
DivX
WMA
You can set the player to repeat individual
tracks on CDs or Video CDs, chapters or
titles on DVD discs, or the whole disc. It’s
also possible to loop a section of a disc.
You can’t use any repeat mode or looped
play with a Video CD playing in PBC mode.
Press REPEAT during playback to select a
repeat mode.
Each press switches the repeat mode:
DVD-Video
• CHAPTER REPEAT
• TITLE REPEAT
• DISC REPEAT
• OFF
DVD-Audio
• TRACK REPEAT
• GROUP REPEAT
• DISC REPEAT
• OFF
Video-CD
CD
MP3
WMA
Super Audio CD
JPEG
DivX
• TRACK REPEAT
• DISC REPEAT
• OFF
Note
• Some discs don’t allow the Repeat function.
• Any existing RANDOM or Repeat A-B mode will be
cancelled and Repeat mode will be activated.
Playing Discs5
24
Switching Camera Angles
DVD-Video
Some DVD-Video discs feature scenes shot
from two or more angles. Check the disc box
for details: it should be marked with a
icon if it contains camera-angle scenes.
• To switch the camera angle, press ANGLE.
Note
• Depending on the disc, this feature may not work.
Switching the Subtitle Language
DVD-Video
DivX
Many DVD-Video discs or DivX discs have
subtitles in one or more languages. The
disc box will usually tell you which subtitle
languages are available. You can switch the
subtitle language at anytime during playback.
• To display/switch the subtitle language,
press SUBTITLE repeatedly.
The current subtitle language is shown on-screen.
• To set subtitle preferences, see page 50.
Note
• In some cases, a subtitle can not be turned off even
if you select “OFF”.
• Some discs allow you to change subtitles only via
the disc menu. In that case, press the button MENU
and change the settings.
5Playing Discs
25
English
Switching the Audio Language
DVD-Video
DVD-Audio
When playing a DVD-Video disc recorded
with dialog in two or more languages, you
can switch the audio language at anytime
during playback.
• To display/switch the audio language, press
AUDIO repeatedly.
The current audio language is shown on-screen.
• To set audio language preferences, see page
50.
Note
• Depending on the disc, there are cases in which the
audio language cannot be switched during play. In
this case, make changes using the DVD menu.
• It may take a few seconds till a selected Audio
Language is audible.
Switching the audio channel
Depending on the disc, this feature may not
work.
Video-CD
On Video CDs you can switch between
stereo, just the left channel, just the right
channel or Mixed Mono.
• To switch the audio channel, press AUDIO
repeatedly.
The current playback channel(s) are indicated on-
screen.
Switching Super Audio CD Playback
layer
Super Audio CD
• On a hybrid disc (with Super Audio CD and CD layers),
the player will always start playing the Super Audio CD
layer.
• To switch between the Super Audio CD layer and the
CD player, press while playback is stopped.AUDIO
Switching Super Audio CD Playback
area
Super Audio CD
• To Switch between the Super Audio CD multi-channel
and Super Audio CD stereo areas by pressing SOUND
MODE.
Using the Zoom Function
DVD-Video
DVD-Audio
Video-CD
JPEG
1 During play or pause mode, press the
ZOOM button on the remote control to
zoom in x2, x3, x4, x1/2, x1/3, x1/4,
Normal in order for DVD-Video or VCD and
100%, 125%, 150%, 200%, Normal in
order for JPEG.
2 Use the cursor buttons (5/∞/2/3) to
select the part of the screen you want to
zoom in on.
Note
• Zoom play cannot be used on some discs.
• Zoom will not operate properly for some scenes.
• Zooming may cause image deterioration or shaking.

Playing Discs5
26
Play back Information
This DVD system can display the disc
playback information (for example, title
or chapter number, elapsed playing time,
audio/subtitle language) and a number of
operations can be done without interrupting
disc playback.
DVD-Video
Video-CD
1 During playback, press DISP.
• A list of available disc information appears
on the TV.
DVD
MENU
TITLE
TITLE
TITLE
TITLE
TITLE TITLE
01/07
CHAPTER 01/30
AUDIO 2CH ENG
SUBTITLE OFF
BITRATE 00 TITLE ELAPSED 0:00:23
Video-CD
SVCD
MENU
TRACK
TRACK
TRACK
TRACK
TRACK TRACK
01/01
DISC TIME 1:01:14
TRACK TIME 1:01:14
REPEAT OFF
BITRATE 75 TOTAL ELAPSED 0:00:20
Title/Chapter/Track selection
DVD-Video
Video-CD
1 Press 5/∞ to highlight “Title” / “Chapter”
or “Track”, then press ENTER to access.
2 Use the numeric keypad (0-9) to enter a
valid number (e.g. 04/05).
Audio/Subtitle
DVD-Video
1 Press 5/∞ to highlight “Audio” or
“Subtitle”, then press ENTER to access.
The Audio or Subtitle menu appears on the TV.
2 Press 5/∞ to select one language, then
press ENTER to confi rm.
The current audio or subtitle language will be changed
to the selected language.

5Playing Discs
29
English
Playing an MP3/DivX/JPEG/
Windows Media™ Audio disc
This DVD system can playback most of the
MP3, JPEG and Windows Media™ Audio fi les
recorded on a CD-R/RW disc or commercial
CD.
1 Insert a disc.
• The disc reading time may exceed 30
seconds due to the complexity of the
directory fi le confi guration.
• The disc menu appears on the TV.
• Playback will start automatically. If not,
press 3 (PLAY).
Previous
MP3_MUSIC_1
MP3_MUSIC_2
MP3_MUSIC_3
00:00 00:00
001/014
MP3_files
2 If the disc main menu contains various
folders, use the 5/∞ keys to select a
desired folder and press ENTER to open
the folder.
3 Use the 5
/∞ keys to select a track/fi le and
press ENTER to start playback.
• Playback will start from the selected fi le
and continue through to the end of the
folder.
During playback, you can;
• Press 4/¢ to playback another
track/fi le in the current folder.
• To select another folder from the current
disc, press
5 to return to the root menu.
Use the 5/∞ keys to make your selection
and press to confi rm.ENTER
• Press REPEAT repeatedly to access
various play modes.
• OFF
• TRACK REPEAT: One fi le will be played
repeatedly.
• DISC REPEAT: All fi les in one folder will be
played repeatedly.
Tip
• To skip the folders menu when you load a MP3/
JPEG disc, set the MP3/JPEG NAV setting in the
Preference Setup Page to WITHOUT MENU.
Note
• Some discs cannot be played on this player due to
the confi guration and characteristics of the disc,
or due to the condition of recording and authoring
software that was used.

Playing Discs5
30
Playing a JPEG image fi le (slide show)
• Insert a Picture disc (Kodak Picture CD,
JPEG).
For a Kodak disc, the slide show will begin
automatically.
For a JPEG disc, the picture menu will appear on the
TV. Press PLAY 3 to start the slide-show playback.
Note
Some discs don't allow the Picture menu.
Preview function
1 During playback, press 7.
• 12 thumbnail pictures will be displayed on
the TV.
2 Press 4/¢ to display the other pictures
on the previous/next page.
3 Use the 2/3/5/∞ keys to highlight one
of the pictures and press ENTER to start
playback.
4 Press the MENU to return to Picture CD
menu.
Zoom picture
1 During playback, press ZOOM repeatedly
to select a different zoom factor.
2 Use the 2/3/5/∞ keys to pan through the
zoomed image.
Tip
• This feature is not applicable for DivX discs.
• Zoom play cannot be used on some discs.
Rotating/fl ipping the picture
• During playback, use the 2/3/5/∞ keys
to rotate/fl ip the picture on the TV.
5: Flip the picture vertically
∞: Flip the picture horizontally
2: Rotate the picture counter-clockwise
3: Rotate the picture clockwise
Note
• Rotate and Flip operations are not supported on
DVD-Audio disc.
Scan Effect
• Press repeatedly to choose a scan effect.ANGLE
• Various scan effects appear in the top left corner of
the TV screen.
Note
Supported fi le format:
• The fi le extension has to be “*.JPG” and not “*.JPEG”.
• It can only display DCF-standard still pictures
or JPEG pictures e.g. TIFF. It cannot play back
moving pictures, Motion JPEG and other formats,
or pictures in formats other than JPEG, or pictures
associated with sound.
• It may require longer time for the DVD system to
display the disc content on the TV due to the large
number of songs/pictures compiled into one disc.
5Playing Discs
31
English
Playing MP3/WMA music and JPEG
pictures simultaneously
You can create a musical slide show if the
disc contains both the MP3/WMA music and
JPEG picture fi les.
1 Insert an MP3/WMA disc that contains
music and pictures.
2 Select an MP3/WMA track in the menu and
press PLAY 3 to start playback.
3 During MP3/WMA music playback, use the
2/3/5/∞ keys to select a picture folder
from the disc menu and press PLAY 3.
• The picture fi les will be played back
through to the end of the folder.
4 To stop simultaneous playback, press
STOP 7.
Tip
• It is normal to experience an occasional “skip” while
listening to your MP3 disc.
• It is normal to experience an occasional pixelation
during MP3/DivX playback due to poor clarity of
digital contents during internet downloading.
• Only the fi rst session of a multi-session CD will be
played back.

Playing Discs5
32
Playing a DivX disc
This DVD system supports the playback of
DivX movies which you can copy from your
computer onto a CD-R/RW, DVD±R/±RW
disc (see for more information).page 9
1 Insert a DivX disc.
2 Press PLAY 3 to start playback.
During playback, you can;
• If multilingual subtitles are embedded on
the DivX disc, you can press SUBTITLE
to change the subtitle language while
playing.
Tip
• Subtitle fi les with the following fi le name extensions
(.srt, .smi, .sub, .ssa, .ass) are supported but do not
appear on the fi le navigation menu.
• The subtitle fi le name has to be the same as the fi le
name of the movie.
• The subtitle can only be displayed up to an average
of 42 characters.
• The time search feature is not available during DivX
movie playback.
DivX compatibility information
• Support for DivX 3.11, 4.x, 5.x.
• Q-pel accurate motion compensation.
• Global Motion Compensation (GMC) Playback.
5Playing Discs
33
English
Using the Setup Menu
Before using the player, you should specify
the settings to be used in accordance with
the conditions under which the player is to
be used.
Note that once changed, the settings will be
saved and remain the same even after the
power has been turned off until the settings
are changed again.
The Setup menu gives you access to all the
player’s settings. Press to display/SETUP
leave the menu and the cursor and ENTER
buttons on the remote control to navigate
and select options.
Note
• The language options shown in the on-screen
display illustrations on the following pages may not
correspond to those available in your country or
region.
1 Press the SETUP button on the remote
control. Select a tab using the cursor
buttons (2/3).
~ Setup of the GENERAL optionsGENERAL SETUP:
Ÿ AUDIO SETUP: Setup of the audio options
! Setup of the display and HDMI VIDEO SETUP:
Video options
⁄ PREFERENCE: Setup of the language, parental, and
several other options.
2 Use the cursor buttons (5/∞) on the
remote control to access the different
features.
3 Press the ENTER button as many times as
necessary to select the desired option.
To make the setup screen disappear after
setting up, press the button again.SETUP
Note
• Depending on the disc, some Setup Menu
selections may not work.
• Some settings can not be selected during
playback and RESUME mode of DVD-Video.
In that case, press the 7 (STOP) button once or
twice to stop playback completely.

DVD Setup Menu6
34
Using the FL menu
The FL menu has been designed to set
"REMOTE CODE".
It can be set during stand by mode.
If a Disc had been loaded, press Power
button on the Remote Control to stand by
mode.
Selecting the FL menu
1 Press SET UP for longer than 2 sec.
2 Stand by LED is disappeared and "REMOTE
CODE" is displayed in the FL display.
REMOTE_CODE
• If press , current status is displayed.ENTER
DVD_1
3 Use the cursor buttons (5/∞) to select the
type of REMOTE CODE you want to set as
follows.
4 Press ENTER you want to set.
• Press for longer than 2 sec to close the FL SET UP
menu and then go back to standby mode.
Note
• The DVD player support two remote control codes:
DVD 1 and DVD 2.
• Set the remote control code of the Remote Control
to the same setting. (page 15)
DVD 1
DVD 2
DVD Setup Menu6
36
Setting up the GENERAL SETUP page
1 Press the SETUP button.
2 Select GENERAL SETUP PAGE using the
cursor buttons (2/3), then press the
ENTER button.
3 Use the cursor buttons (5/∞) to select the
desired item, then press the cursor (3) or
ENTER button.
GENERAL SETUP PAGE
OSD LANGUAGE
PLAYER MODE
DIVX(R) VOD CODE
DISC LOCK
DISPLAY DIM
PROGRAM
SCREEN SAVER
SLEEP
AUTO STANDBY
Note
• Press 2 to go back to the previous menu item.
Press SETUP to exit the menu.
OSD LANGUAGE
The language options are different
depending on your country or region, and
may not match the illustrations shown in the
user manual.
• Default setting: ENGLISH
The OSD (On-Screen Display) language for
this DVD system will remain as you have set
it, regardless of the changes made to the
DVD disc language.
Selects the preferred language for the DVD
system on-screen display menu.
PLAYER MODE
• Default setting: DVD AUDIO
• DVD Audio
Should be selected when the player is to be used as
a DVD audio player.
• DVD Video
Should be selected when the player is to be used as
a DVD video player.
Note
• Some DVD-Audio discs contain bonus groups that
are accessible by a four-digit password. In this case,
consult the disc jacket and other packaging for
information.
~ During play, press DISPLAY twice.
• The group and track list is displayed on the TV
screen.
Ÿ Press 2/3 to select a bonus group, then press
ENTER.
! Enter a four-digit password using the numeric
keypad (0-9), then press ENTER.
⁄ Set will start to playback the bonus group.

6DVD Setup Menu
37
English
DivX(R) VOD CODE
MARANTZ provides you with the DivX® VOD
(Video On Demand) registration code that
allows you to rent and purchase videos using
the DivX® VOD service. Press 3 to see the
registration code and press to exit.ENTER
Use the registration code to purchase or
rent the videos from the DivX® VOD service
at www.divx.com/vod. Follow the instructions
and copy the video from your computer onto
a CD-R/RW disc for playback on this DVD
system.
Note
• Any video the downloaded from DivX® VOD can
only be played back on this DVD system. For more
information, visit us at www.divx.com/vod.
• The time search function is not available during
DivX movie playback.
DISC LOCK
• Default setting: UNLOCK
Not all discs are rated or coded by the disc
maker. You can prevent a specifi c disc from
playing by locking the disc. Up to 40 discs
can be locked.
• LOCK – Selects this to block the playback
of the current disc. Subsequent access to
a locked disc requires a six-digit password.
The default password is “111111”.
• UNLOCK – All discs can be played.
DISPLAY DIM
• Default setting: 100%
Selects the brightness of the DVD system
display panel.
• 100% – Full brightness.
• 70% – Medium brightness.
• 40% – Dimmest display.
PROGRAM
DVD-Video
DVD-Audio
Video-CD
CD
You can play the contents of the disc in the
order you want by programming the playing
order of the tracks. You can store up to 20
tracks.
6 TT: CH:
7 TT: CH:
8 TT: CH:
9 TT: CH:
10 TT: CH:
PROGRAM TT(07)/CH(- -)
NEXT
1 TT: CH:
2 TT: CH:
3 TT: CH:
4 TT: CH:
5 TT: CH:
1 Use the numeric keypad (0-9) to enter a
valid track/chapter number.
2 Use the 2/3/5/∞
keys to move the cursor
to the next position.
• If there are more than ten total
programme tracks, select on the NEXT
screen (or press ¢ on the remote
control) and press to access the ENTER
next programming page.
3 remove the track/chapter from the To
programming menu, select the track/
chapter and press ENTER.
4 Once complete, select START on the screen
and press ENTER to start playback.
• Playback will start from the selected track
under the programmed sequence.
5 To exit the programme menu, select EXIT in
the menu and press ENTER.
Note
• On Super Audio CD discs, you can program tracks
on the CD layer.
• When playing back to program, previous RANDOM
and repeat modes are all cancelled.
• When in VCD 2.0 mode (PBC ON mode), this
function does not work.
• DVD-VR can not be programmed.
• DVD-Audio Bonus Group/Tracks can not be
programmed.

DVD Setup Menu6
38
SCREEN SAVER
• Default setting: ON
The screen saver prevents damage to the TV
screen by avoiding exposure to a static image
for too long.
• ON – Switches to TV screen saver mode
when playback has been stopped or
paused for more than 15 minutes.
• OFF – Turns off the screen saver function.
SLEEP
• Default setting: OFF
This feature automatically sets the DVD
player in standby mode after the period you
set has elapsed.
You can select from 15, 30, 45, and 60
minutes. Select OFF to cancel the sleep timer
function.
Press to confi rm your selection.ENTER
AUTO STANDBY
• Default setting: ON
If ON is selected, the standby mode is
automatically selected to save power if the
player is left in the Stop mode for about 30
minutes.

DVD Setup Menu6
40
About source audio output
When the source output mode has been switched among 2CH, Virtual Surround and 5.1 CH
mode setting using the Audio Out setting, audio output for each source will be as shown in the
following table.
Audio Contents Audio Out Setting Mixed 2ch output 5.1CH output Digital output
DVD
Dolby Digital
(2CH)
2 CH 2ch L/R 2ch L/R PCM (Digital out is PCM)
Bitstream (Digital out is All)
Virtual Surround 2ch L/R 2ch+Vsurround
5.1 CH 2ch L/R Dolby Pro Logic II
Dolby Digital
(Multi CH)
2 CH Mixed 2ch (L0/R0) Mixed 2ch (L0/R0) PCM Mixed 2CH
(Digital out is set to PCM)
Bitstream (Digital out is set to All)
Virtual Surround Mixed 2ch (Lt/Rt) Mixed 2ch+Vsurround
5.1 CH Mixed 2ch (Lt/Rt) Multi CH
LPCM
(2CH)
2 CH 2ch L/R 2ch L/R PCM 2ch 44.1/48KHz
(88.2/96KHz if LPCM OUT is set
to 96KHz.)
Virtual Surround 2ch L/R 2ch+Vsurround
5.1 CH 2ch L/R Dolby Pro Logic II
DTS, DVD-
Video/Audio
(2CH), CD
2 CH 2ch L/R 2ch L/R PCM (Digital out is PCM)
Bitstream (Digital out is All)
Virtual Surround 2ch L/R 2ch+Vsurround
5.1 CH 2ch L/R 2ch L/R
DTS,
DVD-Audio
(Multi)
2 CH Mixed 2ch (L0/R0) Mixed 2ch (L0/R0) PCM Mixed 2CH
(Digital out is set to PCM)
Bitstream (Digital out is set to All)
Virtual Surround Mixed 2ch (Lt/Rt) Mixed 2ch+Vsurround
5.1 CH Mixed 2ch (Lt/Rt) Multi CH
MPEG
(MULTI)
2 CH Mixed 2ch (L0/R0) Mixed 2ch (L0/R0) PCM (Digital out is PCM)
Bitstream (Digital out is All)
Virtual Surround Mixed 2ch (Lt/Rt) Mixed 2ch+Vsurround
5.1 CH Mixed 2ch (Lt/Rt) Multi CH
DVD-Audio
(2CH)
2 CH 2ch L/R 2ch L/R
PCM 2CH
(see page 42)
Virtual Surround 2ch L/R 2ch L/R
5.1 CH 2ch L/R 2ch L/R
DVD-Audio
(Multi)
2 CH 2ch (Lf/Rf) 2ch (Lf/Rf)
PCM 2ch (Lf/Rf)
(see page 42)
Virtual Surround 2ch (Lf/Rf) 2ch (Lf/Rf)+Vsurround
5.1 CH 2ch (Lf/Rf) Multi CH
CD
2 CH 2ch L/R 2ch L/R
PCM 2ch 44.1KHz
Virtual Surround 2ch L/R 2ch+Vsurround
5.1 CH 2ch L/R Dolby Pro Logic II
Super
Audio
CD
2ch
2 CH 2ch L/R 2ch L/R OFF
Virtual Surround --- --- OFF
5.1 CH --- --- OFF
Multi
2 CH --- --- OFF
Virtual Surround --- --- OFF
5.1 CH Mixed 2ch (Lt/Rt) Multi CH OFF
Video CD
S-Video CD 2ch
2 CH 2ch L/R 2ch L/R PCM 2ch 44.1KHz
Virtual Surround 2ch+Vsurround 2ch+Vsurround PCM 2ch 44.1KHz + Vsurround
5.1 CH Mixed 2ch Dolby Pro Logic II PCM 2ch 44.1KHz
MP3/DivX,WMA
2 CH 2ch L/R 2ch L/R
PCM 2CH
Virtual Surround 2ch L/R 2ch+Vsurround
5.1 CH 2ch L/R Dolby Pro Logic II
Note
• No Dolby Pro Logic II is allowed on DTS, DVD-Audio and Super Audio CD audio track.
• LFE (Subwoofer) will always carry the LFE channel.

6DVD Setup Menu
41
English
DIGITAL OUT
• Default setting: ALL
Set the Digital output according to your
optional audio equipment connection.
• OFF – Turn off the digital output.
• ALL – If you have connected your DIGITAL
AUDIO OUT to a multi-channel decoder/
receiver.
• PCM ONLY – Only if your receiver is not
capable of decoding multi-channel audio.
Note
• If HDMI is activated, DIGITAL OUT is muted. HDMI
audio out is related to the “DIGITAL OUT” setting.
If set the “ALL” is set, HDMI Audio out is follows the
EDID. If set the “PCM” is set, HDMI Audio out is
always PCM.
• If you set to “ALL” with a non-DTS compatible
amplifi er, noise will be output when you play a DTS
disc.
• Some DVD-Audio discs prohibit digital audio out
due to copy protection.
• No digital audio is output when playing Super
Audio CD.
LPCM OUT
• Default setting: 48kHz
If you connect the DVD Player to a PCM
compatible receiver via digital terminals,
coaxial or optical, you may need to adjust
“LPCM Output”. Discs are recorded at
a certain sampling rate. The higher the
sampling rate, the better the sound quality.
• 48kHz – Playback a disc recorded at the
sampling rate of 48 kHz. A 96 kHz (if
available on disc) PCM data stream will be
converted to 48 kHz.
• 96kHz – Playback a disc recorded at the
sampling rate of 96 kHz. If the 96 kHz
disc is copy-protected, the digital output
will automatically be converted to a
sampling rate of 48 kHz.
Note
• High sampling rate DVD-Audio discs (192 kHz or
17 6.4 kHz) always output audio that has been
down sampled to 96 kHz or 88.2 kHz through the
digital outputs, when LPCM OUT is set to 96 kHz.
HDMI AUDIO OUT
• Default setting: AUTO
• AUTO – In this mode, when discs
recorded in Dolby Digital, DTS, or MPEG
are played, the respective bit stream signal
is output. When DVD-Video/DVD-Audio
discs with multi-channel audio are played,
the multi-channel signal is output. When
discs recorded in 2-channel PCM or other
2-channel format are played, the audio
is output as 2-channel PCM. The output
formats are limited by the capabilities of
the connected component. For example,
if the disc is recorded in Dolby Digital
but the connected component does not
support Dolby Digital, the audio is output
as multi-channel PCM. If the con nect ed
component does not support multi-
channel PCM either, the audio is output
as 2-channel PCM.
• Multi PCM – In this mode, when discs
recorded in Dolby Digital, DTS, MPEG,
or DVD-Video/DVD-Audio are played,
a multi-channel signal is output. When
discs recorded in 2-channel PCM or other
2-channel format are played, the audio
is output as 2-channel PCM. The output
formats are limited by the ca pa bil i ties of
the connected component. For example,
if the disc is recorded in Dolby Digital
but the connected component does not
support Dolby Digital, the audio is output
as 2-channel PCM.
• 2ch PCM – In this mode, audio is output
as 2-channel PCM for all discs. Select this
mode when the unit is connected to a TV
or projector.
• Off – Audio signals are not output from
the HDMI jack.
Note
• When audio signals are being output by HDMI-
compatible components, digital output signals are
muted.
• If HDMI is activated, DIGITAL OUT is muted. HDMI
audio out is related to the “DIGITAL OUT” setting.
If set to “ALL”, HDMI Audio out is follows the EDID.
If set to “PCM”, HDMI Audio out is always PCM.
• Audio is not output when the player is connected
to a device with an HDCP-compatible DVI jack.
• Audio signals are not output from DVD-Audio
discs with CPPM copyright protection when using
components that do not support HDMI standard
Ver. 1.1.
• Multi-channel and stereo audio is not output from
Super Audio CDs.

DVD Setup Menu6
44
Setting up the VIDEO SETUP page
1 Press the SETUP button.
2 Select VIDEO SETUP PAGE using the cursor
buttons (2/3), then press the ENTER
button.
3 Use the cursor buttons (5/∞) to select the
desired item, then press the cursor (3) or
ENTER button.
VIDEO SETUP PAGE
TV SYSTEM
TV ASPECT
PROGRESSIVE
PICTURE SETTING
HDMI SETUP
COMPONENT
BLACK LEVEL
CLOSED CAPTION
Note
• Press 2 to go back to the previous menu item.
Press SETUP to exit the menu.
TV SYSTEM
• Default setting: NTSC (USA model)
PAL (Europe model)
The colour system of the DVD system,
DVD and TV should match: only then will it
be possible to play a DVD on this system.
Before changing the TV system, determine
the colour system of your TV.
• PAL – Select this if the connected TV has
the PAL colour system. It will change the
video signal of an NTSC disc and output
it to PAL format.
• NTSC – Select this if the connected
TV has the NTSC colour system. It will
change the video signal of a PAL disc and
output it to NTSC format.
• MULTI – Select this if the connected TV
is compatible with both NTSC and PAL
(multi-system). The output format will be
in accordance with the video signal of the
disc.
Select one of the options and press ENTER
to confi rm.
• Follow the instructions shown on the TV
to confi rm the selection (if any).
• If a blank/distorted TV screen appears,
wait for 15 seconds for the auto recovery.

6DVD Setup Menu
45
English
CANCELOK
CHANGING PAL TO NTSC
1.ENSURE THAT YOUR TV SYSTEM SUPPORTS
NTSC STANDARD.
2.IF THERE IS A DISTORTED PICTURE
DISPLAYED ON THE TV.WAIT IS SECONDS
FOR AUTO RECOVER
Video output format when progressive is
"ON".
Disc
Format
TV
system
Output Format
YCbCr Video/S-Video
NTSC PAL PAL Progressive NTSC
NTSC NTSC Progressive NTSC
MULTI NTSC Progressive NTSC
PAL PAL PAL Progressive PAL
NTSC NTSC Progressive PAL
MULTI PAL Progressive PAL
If progressive is "OFF", Video Output Format
follow the TV SYSTEM with Interlace.
To change the TV system manually:
~ Press OPEN CLOSE 0 to open the disc tray
without HDMI connected.
Ÿ Press 3 (RIGHT) on the remote control.
! Press AUDIO on the remote control to change
the TV system setting.
PAL Æ NTSC
NTSC Æ PAL
TV ASPECT
• Default setting: 16:9 WIDE
Set the aspect ratio of the DVD system
according to the TV type you have
connected. The format you select must be
available on the disc. If it is not, the setting
for TV display will not affect the picture
during playback.
• 4:3 PAN SCAN – Select this if you have
a conventional
TV and want both
sides of the picture
to be trimmed or
formatted to fi t your
TV.
• 4:3 LETTER BOX – Select this if you have
a conventional TV. In this
case, a wide picture with
black bands on the upper
and lower portions of
the TV will be displayed.
• 16:9 WIDE – Select this if you have a
wide-screen TV.
Select one of the options and press ENTER
to confi rm.
Note
• Some discs will not allow you to change the aspect
ratio.
PROGRESSIVE
• Default setting: OFF
Progressive scanning displays twice the
number of frames per second as interlaced
scanning (ordinary normal TV system).
With nearly double the number of lines,
progressive scanning offers higher picture
resolution and quality.
Before you start...
Ensure that you have connected this DVD
system to a progressive scan TV using the
YCbCr connection (see page 11 “Home
theater video connections”).
• ON – Turns on progressive scan mode.
The instruction menu appears on the TV.
CANCEL
OK
ACTIVATING PROGRESSIVE SCAN:
1. ENSURE YOUR TV HAS PROGRESSIVE SCAN.
2. CONNECT USING YPBPR (GBR) VIDEO CABLE.
3. IF THERE IS A DISTORTED PICTURE, WAIT
15 SECONDS FOR AUTO RECOVERY.
~ Press 2 to highlight “OK” in the menu and press
ENTER to confi rm.
The picture on your TV will remain distorted in
this state until you turn on the progressive scan
mode on your TV.
Ÿ Turn on your TV's progressive scan mode
(refer to the user manual for your TV.)
The following menu appears on the TV.
CANCEL
OK
CONFIRM AGAIN TO USE PROGRESSIVE
SCAN. IF PICTURE IS GOOD,
PRESS OK BUTTON ON REMOTE.

DVD Setup Menu6
46
! Press 2 to highlight OK in the menu and press
ENTER to confi rm.
The set-up is complete now and you can start to
enjoy the high quality picture.
• OFF – Disables the progressive scan
mode.
To deactivate Progressive manually:
~ Press OPEN CLOSE 0 to open the disc tray
without HDMI connected.
Ÿ Press 2 (LEFT) on the remote control. Press
AUDIO on the remote control.
The DVD background screen appears on the TV.
Tip
• There are some progressive scan TVs and high-
defi nition TVs that are not fully compatible with
this unit, resulting in an unnatural picture when
playing back a DVD Video disc in the progressive
scan mode. In this case, turn off the progressive
scan feature on both the DVD system and your TV.
PICTURE SETTING
• Default setting: STANDARD
This DVD system provides three predefi ned
sets of picture colour settings and one
personal setting which you can defi ne
yourself.
• STANDARD – Original colour setting.
• BRIGHT – Vibrant colour setting.
• SOFT – Warm colour setting.
• PERSONAL – Selects this to personalize
the picture colour setting. Use the 2/3
keys to select to the setting that best
suits your personal preference and press
ENTER to confi rm. For an average setting,
select .0
• BRIGHTNESS – Increase the value to
brighten the picture or vice versa.
• SHARPNESS – Increase the value to
sharpen the picture or vice versa.
• CONTRAST – Increase the value to
sharpen the picture or vice versa.
• TINT – Increase the value to darken
the picture or vice versa.
• COLOR – Increase the value to
enhance the color in your picture or
vice versa.
ADV PICTURE
This player allows you to fi ne-tune the
following video parameters.
We recommend setting the aspect ratio on
your TV if the function is available.
DCDi
• Default setting: ON
DCDi (Directional Correction Deinterlacing)
computes and tracks the angle of the screen
edge to fi ll in missing pixels on the TV
screen. DCDi will optimize the image quality
signifi cantly, especially during slow motion
playback. This function is available only for
progressive scan output.
• OFF – Select to deactivate this function.
• ON – Select to activate this function.
GAMMA
Enables you to non-linearly adjust the intensity
of the picture. A positive value enables you to
bring out low level detail in dark scenes, while
a negative value emphasizes contrast. This
function is not available when using an HDMI
compatible component.
-7 to +7
CHROMA DELAY
The chroma (color) and luminance (brightness)
signals are not synchronized. The Chroma
Delay setting allows you to adjust the advance
delay of the chroma signal to yield a perfectly
clear picture. This function is not available
when using an HDMI-compatible component.
-3 to +3
PSCAN FORMAT
• Default setting: OFF
Set the aspect ratio of the projected images on
the screen. This function is only available for
progressive scan and HDMI video output.
• SUPER WIDE – Select this to display a
4:3 picture disc on a wide-screen TV with
non-linear stretching (the centre position
of the screen is stretched less than the
side).
• 16:9 SQUEEZE – Select this to display
a 4:3 picture disc on a widescreen TV
without stretching. Black bars will be
shown on the both sides of the TV screen.
• OFF – No aspect ratio adjustment is
made when this option is selected.

6DVD Setup Menu
47
English
HDMI VIDEO
• Default setting: AUTO
Selects a suitable video resolution depending on the capability of the connected TV/device to
enhance the HDMI video output.
• 480P – Progressive output in 480 lines for NTSC TV
• 576P – Progressive output in 576 lines for PAL TV
• 720P – Progressive output upscaled to 720 lines
• 1080 i – Interlaced output upscaled to 1080 lines
• 1080 P – Progressive output upscaled to 1080 lines
• AUTO – The video output will automatically follow the display’s supported resolution
Note
• If no display appears on the TV due to an unsupported resolution, use the composite video cable to connect the
DVD system and your TV. Turn on your TV to the correct input channel for the composite video and adjust the
resolution setting to 480P/576P.
• The resolution can also be set with the HDMI button on the front panel.
• Pressing the HDMI button for three seconds or more toggle the HDMI on/off state (see pages 13, 14).
• In general, the larger the number, the higher the resolution.
• When the resolution is changed, the image may be corrupted or the output may take longer than normal.
• 720P/1080i/1080P only supports 60 Hz Video signal.
• When 480P/576P has been selected, multi-channel PCM at sampling frequency of 96 kHz cannot be output if the
connected TV, projector, etc. is not compatible with WCLOCK. The multi-channel PCM is converted to 48 kHz/2ch
before being output.

DVD Setup Menu6
48
Setup Examples
Disc
Format TV Aspect
Video
S-Video
YCbCr
(Progressive:OFF)
PSCAN FORMAT YCbCr
(Progressive:ON)
HDMI output
Sink EDID
4:3 16:9
16:9
16:9 Wide
OFF
16:9 SQUEEZE
SUPERWIDE
4:3 LB Dont' care
4:3 PS*1Dont' care
4:3 PS*2Dont' care
4:3
16:9 Wide
OFF
16:9 SQUEEZE
SUPERWIDE
4:3 LB Dont' care
4:3 PS Dont' care
*1: When actual video output is Pan-scan. ("TV Aspect" is 4:3panscan and disc permits Pan-scan.)
*2: When actual video output is Letterbox. ("TV Aspect" is 4:3panscan but disc does NOT permit Pan-scan.)
Video Out format when HDMI is activated
HDMI Video
Output
YCbCr Output Video/S-Video output
Progressive ON Progressive OFF
480P 480P (NTSC progressive)
Follow the Disc Source with Interlace.
(ex: NTSC disc play: NTSC interlace)
576P 576P (PAL progressive)
720P
1080i
1080P
No Video

6DVD Setup Menu
49
English
DYNAMIC PICTURE
Produces more dynamic picture by increasing
the picture contrast and the color intensity.
This function is available only for progressive
scan output.
0 to 5
DVI OUTPUT RANGE
• Default setting: STANDARD
When connecting the DVI unit, black may
rise to the surface depending on the display.
• ENHANCED – Image data values between
0 (black) and 255 (white)
• STANDARD – Image data values between
16 (black) and 235 (white)
COMPONENT
(Euro model only)
• Default setting: RGB
This setting allows you to toggle the output
of the video signal between RGB (on the A/V
EURO CONNECTOR) and YCbCr (on the
component).
• YCbCr – Select this for YCbCr Pr
connection on component Video out.
• RGB – Select this for the A/V EURO
CONNECTOR.
To change the COMPONENT out manually:
~ Press OPEN CLOSE 0 to open the disc tray
without HDMI connection.
Ÿ Press 3 (RIGHT) on the remote control.
! Press ANGLE on the remote control to change
the COMPONENT out.
Note
• When the player is set to YCbCr, some TV may not
properly synchronize with the player on the A/V
EURO connector.
BLACK LEVEL
• Default setting: 7.5 IRE (USA model)
0 IRE (European model)
If you set the TV type to NTSC, set the Black
level shift to 7.5 IRE. This will improve the
color contrast during playback. The black
level setting has no effect if the TV type is
set to PAL.
• 7.5 IRE – Select this to enhance the black
level.
• 0 IRE – Select this for the standard black
level setting.
CLOSED CAPTION (USA Model only)
• Default setting: OFF
Closed captions are data hidden in the video
signals of specifi c discs, and are invisible
without the use of a special decoder. The
difference between subtitles and captions
is that subtitles are intended for hearing
persons and captions are for the hearing
impaired. Subtitles rarely show all of
the audio. For example, captions show
sound effects (e.g., “phone ringing” and
“footsteps”), while subtitles do not. Before
you select this function, please ensure that
the disc contains closed caption information
and your TV set also supports this function.
• ON – Select this to enable the closed
caption function.
• OFF – Select this to disable the closed
caption function.
Product specificaties
| Merk: | Marantz |
| Categorie: | DVD speler |
| Model: | DV7001 |
Heb je hulp nodig?
Als je hulp nodig hebt met Marantz DV7001 stel dan hieronder een vraag en andere gebruikers zullen je antwoorden
Handleiding DVD speler Marantz

20 November 2022
20 November 2022
20 November 2022
20 November 2022
20 November 2022
20 November 2022
21 November 2022
20 April 2023
12 Maart 2023
7 Maart 2023
Handleiding DVD speler
- DVD speler Braun
- DVD speler Philips
- DVD speler Sony
- DVD speler Samsung
- DVD speler Panasonic
- DVD speler LG
- DVD speler Asus
- DVD speler AEG
- DVD speler Daewoo
- DVD speler Grundig
- DVD speler JVC
- DVD speler JBL
- DVD speler Kenwood
- DVD speler Medion
- DVD speler Onkyo
- DVD speler Pioneer
- DVD speler Toshiba
- DVD speler Xiron
- DVD speler Yamaha
- DVD speler Aiptek
- DVD speler Airis
- DVD speler Aitro
- DVD speler Aiwa
- DVD speler Akai
- DVD speler Alpine
- DVD speler Apex
- DVD speler Apple
- DVD speler Arcam
- DVD speler Aristona
- DVD speler Audica
- DVD speler Audiosonic
- DVD speler Audiovox
- DVD speler Autovision
- DVD speler Belson
- DVD speler Blaupunkt
- DVD speler Bluetech
- DVD speler BMW
- DVD speler Boss
- DVD speler Denon
- DVD speler Denver
- DVD speler Difrnce
- DVD speler Dual
- DVD speler Durabase
- DVD speler Elta
- DVD speler Eltax
- DVD speler Eminent
- DVD speler Emtec
- DVD speler Energy Sistem
- DVD speler Ferguson
- DVD speler Funai
- DVD speler Gembird
- DVD speler GPX
- DVD speler Harman Kardon
- DVD speler Hitachi
- DVD speler Hiteker
- DVD speler Hyundai
- DVD speler Koda
- DVD speler Laser
- DVD speler Lenco
- DVD speler Lexibook
- DVD speler Linksys
- DVD speler Loewe
- DVD speler Logik
- DVD speler Magnavox
- DVD speler Magnum
- DVD speler Manta
- DVD speler Marquant
- DVD speler Micromaxx
- DVD speler Mitsubishi
- DVD speler Mpman
- DVD speler Muse
- DVD speler Mustek
- DVD speler Mx Onda
- DVD speler NAD
- DVD speler Nextbase
- DVD speler Nikkei
- DVD speler Philco
- DVD speler Proline
- DVD speler Provision
- DVD speler Qmedia
- DVD speler RCA
- DVD speler Reflexion
- DVD speler Rotel
- DVD speler Salora
- DVD speler Sanyo
- DVD speler Schaub Lorenz
- DVD speler Scott
- DVD speler Sencor
- DVD speler Sevic
- DVD speler Sharp
- DVD speler Sherwood
- DVD speler Silvercrest
- DVD speler Sogo
- DVD speler Soundmaster
- DVD speler Soundstream
- DVD speler Sunstech
- DVD speler Sylvania
- DVD speler Targa
- DVD speler Tascam
- DVD speler Technics
- DVD speler Terris
- DVD speler Tesco
- DVD speler Tesco-Technika
- DVD speler Thomson
- DVD speler Transcend
- DVD speler Tristar
- DVD speler Vestel
- DVD speler Vieta
- DVD speler Voxx
- DVD speler Woxter
- DVD speler Xoro
- DVD speler Yakumo
- DVD speler Zenec
- DVD speler Jensen
- DVD speler JGC
- DVD speler Odys
- DVD speler OK
- DVD speler Opera
- DVD speler Oppo
- DVD speler Cambridge
- DVD speler Naxa
- DVD speler Proscan
- DVD speler Bush
- DVD speler Nevir
- DVD speler Alba
- DVD speler Majestic
- DVD speler Trevi
- DVD speler Lenoxx
- DVD speler Coby
- DVD speler Supermicro
- DVD speler DataVideo
- DVD speler EKO
- DVD speler Planet Audio
- DVD speler Best Buy
- DVD speler Aconatic
Nieuwste handleidingen voor DVD speler
10 Maart 2025
10 Maart 2025
10 Maart 2025
10 Maart 2025
28 Januari 2025
7 Januari 2025
7 Januari 2025
7 Januari 2025
7 December 2024

6 December 2024