Kodak EasyShare CD22 Handleiding
Kodak
Fotocamera
EasyShare CD22
Lees hieronder de 📖 handleiding in het Nederlandse voor Kodak EasyShare CD22 (58 pagina's) in de categorie Fotocamera. Deze handleiding was nuttig voor 30 personen en werd door 2 gebruikers gemiddeld met 4.5 sterren beoordeeld
Pagina 1/58

KODAK EASYSHARE CD22
Digital Camera
Extended user guide
www.kodak.com
For interactive tutorials:
www.kodak.com/go/howto
For help with your camera:
www.kodak.com/go/cd22support

Eastman Kodak Company
Rochester, New York 14650
© Eastman Kodak Company, 2010
All screen images are simulated.
Kodak, EasyShare, Max, and Pulse are trademarks of Eastman Kodak Company.
4H7160_en

Product features
www.kodak.com/go/support i
Front view
IMPORTANT:
Your camera offers a built-in Help system. See page 35.
LensBeeper
Flash
Self-timer/
Video light
Microphone

ii www.kodak.com/go/support
Product features
Back view
IMPORTANT:
Your camera offers a built-in Help system. See page 35.
OK,
Wide Angle/
Telephoto
(Digital zoom)
Battery compartment
SD/SDHC Card slot
Tripod socket
LCD
Share
Power
Mode
Flash
Shutter
Info
Strap post
Delete
USB port
A/V Out
Review
Menu

www.kodak.com/go/support iii
Table of contents 1
1 Setting up your camera .........................................................................1
Attaching the strap .......................................................................................1
Loading the AA batteries...............................................................................1
Turning on the camera ..................................................................................2
Setting the language and date/time...............................................................2
Storing pictures on an optional SD or SDHC Card...........................................3
2 Taking pictures/videos ...........................................................................4
Taking pictures..............................................................................................4
Taking a video ..............................................................................................4
Understanding the picture-taking icons..........................................................6
Know when your batteries need attention......................................................6
Using the digital zoom ..................................................................................6
Using the flash..............................................................................................7
Using different modes ...................................................................................8
Using shortcuts ...........................................................................................10
Using the self-timer.....................................................................................11
3 Sharing pictures/videos .......................................................................12
Sharing through social networks..................................................................12
Tagging pictures/videos with keywords........................................................14
Marking pictures/videos for emailing ...........................................................15
4 Reviewing and editing .........................................................................16
Reviewing pictures/videos ...........................................................................16
Deleting pictures/videos ..............................................................................16
Viewing pictures/videos in different ways.....................................................18
A smarter way to find and enjoy your pictures..............................................19
Understanding the review icons...................................................................20
Creating a slide show..................................................................................21
Displaying pictures/videos on a television.....................................................22
Using the menu button in review.................................................................23

iv www.kodak.com/go/support
Table of contents
Cropping pictures........................................................................................23
Editing videos .............................................................................................24
Selecting multiple pictures/videos ................................................................26
Copying pictures/videos...............................................................................26
5 Doing more with your camera .............................................................27
Using the menu button to change settings...................................................27
Using the Setup menu.................................................................................29
6 Transferring, printing pictures .............................................................31
Printing pictures..........................................................................................32
Marking your pictures for print ....................................................................34
7 Troubleshooting ..................................................................................35
Getting help from your camera....................................................................35
Troubleshooting..........................................................................................36
Getting help on the Web.............................................................................39
8 Appendix .............................................................................................40
Camera specifications .................................................................................40
Care and maintenance ................................................................................42
Upgrading your software and firmware........................................................42
Storage capacities.......................................................................................42
Important safety instructions .......................................................................43
Battery replacement, battery life..................................................................44
Limited warranty .........................................................................................44
Regulatory compliance ................................................................................46

www.kodak.com/go/support 1
1Setting up your camera
Attaching the strap
Loading the AA batteries
Purchase extra batteries for your special event www.kodak.com/go/cd22accessories

2 www.kodak.com/go/support
Setting up your camera
Turning on the camera
Setting the language and date/time
NOTE: To change language in the future, use the Setup Menu (see page 29).
to change current field.
for previous/next field.
OK to accept.
At the prompt, press OK.
to change.
OK to accept.
Language:
Date/Time:

Setting up your camera
www.kodak.com/go/support 3
Storing pictures on an optional SD or SDHC Card
Your camera has internal memory. We recommend purchasing an SD or SDHC Card to
conveniently store more pictures/videos.
CAUTION:
A card can only be inserted one way; forcing it may cause
damage. Inserting or removing a card while the camera is on may
damage the pictures, the card, or the camera.
Purchase accessories www.kodak.com/go/cd22accessories
1Turn off the camera.
2Insert a card until
it clicks.
3Turn on the camera.

4 www.kodak.com/go/support
2Taking pictures/videos
Taking pictures
1 The camera turns on in Auto mode.
(If it’s in a different mode, press the Mode
button, then until the LCD displays
Auto , then press OK.)
2 Compose the picture.
3 Press the Shutter button all the way down.
Taking a video
1Press the Mode button, then until
the LCD displays Video , then press OK.
2 Press the Shutter button all the way down, then
release it. To stop recording, press and release the
Shutter button again.
To review and work with videos, see page 16.
Mode
Mode

Taking pictures/videos
www.kodak.com/go/support 5
Reviewing the picture/video just taken
After you take a picture/video, the LCD briefly displays the picture or the first frame of
a video.
NOTE: Audio is captured during video recording. Audio can be heard when the video is played on a
computer or when the camera is connected to a TV (see page 22).
To review pictures/videos anytime, see page 16.
Delete the current picture/video
OK Play/pause a video
While a picture/video is displayed,
you may:

6 www.kodak.com/go/support
Taking pictures/videos
Understanding the picture-taking icons
Know when your batteries need attention
The battery level icon appears when the battery requires your attention. (If you’re
viewing shortcuts, the battery level is always displayed. See page 10.)
Using the digital zoom
1 Use the LCD to frame your subject.
2 To zoom in, press Telephoto (T).
To zoom out, press Wide Angle (W).
The zoom slider shows the zoom level on the LCD.
3 Take the picture.
NOTE: You may notice decreased image quality when using digital
zoom.
Purchase extra batteries for your special event www.kodak.com/go/cd22accessories
Battery level
Capture mode Pictures/time remaining
Zoom slider
Keyword tag
Self timer
Flash mode
Exposure compensation

Taking pictures/videos
www.kodak.com/go/support 7
Using the flash
Press the Flash button repeatedly until the LCD displays the desired flash mode.
Flash modes Flash fires
Auto When the lighting conditions require it.
Fill (Flash On) Every time you take a picture, regardless of the lighting
conditions. Use when the subject is in shadow or is “backlit”
(when the light is behind the subject).
NOTE: Not available in Auto mode.
Red-eye
Reduction
Preflash A preflash fires, shrinking the eye pupil, before the picture is
taken.
Off Never
Flash button

8 www.kodak.com/go/support
Taking pictures/videos
Using different modes
Press the Mode button, then until the LCD displays the mode that best
suits your subjects and surroundings, then press OK.
Use this mode For
Auto
General picture taking—it offers excellent image quality and ease
of use.
You can choose the best picture size and aspect ratio for your
needs—just press the Menu button and choose Picture Size.
Video
Capturing video with sound.
Audio can be heard when the video is
played on a computer or when the camera is connected to a TV
(see
page 4.)
Scene Point-and-shoot simplicity when taking pictures in practically any
situation. (See page 9.)
Mode button

Taking pictures/videos
www.kodak.com/go/support 9
Using Scene (SCN) modes
Choose a Scene mode—for great pictures in practically any situation.
1Press the Mode button, then until the LCD displays SCN, then press
OK.
2Press to view scene mode descriptions.
If the mode description turns off before you finish reading it, press OK.
3 Press OK to choose a Scene mode.
SCN mode For
Portrait Full-frame portraits of people.
Sport Action pictures.
Flower Close-ups of flowers or other small subjects in bright light.
Sunset Subjects at dusk.
Backlight Subjects that are in shadow or “backlit.”
Children Action pictures of children in bright light.
Manner/
Museum
Quiet occasions, like a wedding or lecture. Flash and sounds are off.
For best results, place the camera on a steady surface or tripod.
Beach Bright beach scenes.
Snow Bright snow scenes.
Fireworks Fireworks. For best results, place the camera on a steady surface or
tripod.
Night Portrait Reduces red eye of people in night scenes or low-light conditions.

10 www.kodak.com/go/support
Taking pictures/videos
Using shortcuts
Your camera has a clean, uncluttered interface. For quick access to the most popular
capture and review functions:
1Press the Info button.
The shortcuts appear. To hide the shortcuts again, press .
2Press to access functions like Exposure Compensation and Self-timer. (You’ll
see different functions in different modes.)
3Press to choose a setting.
Press to
show/hide
shortcuts.
Shortcuts
Taking pictures/videos
www.kodak.com/go/support 11
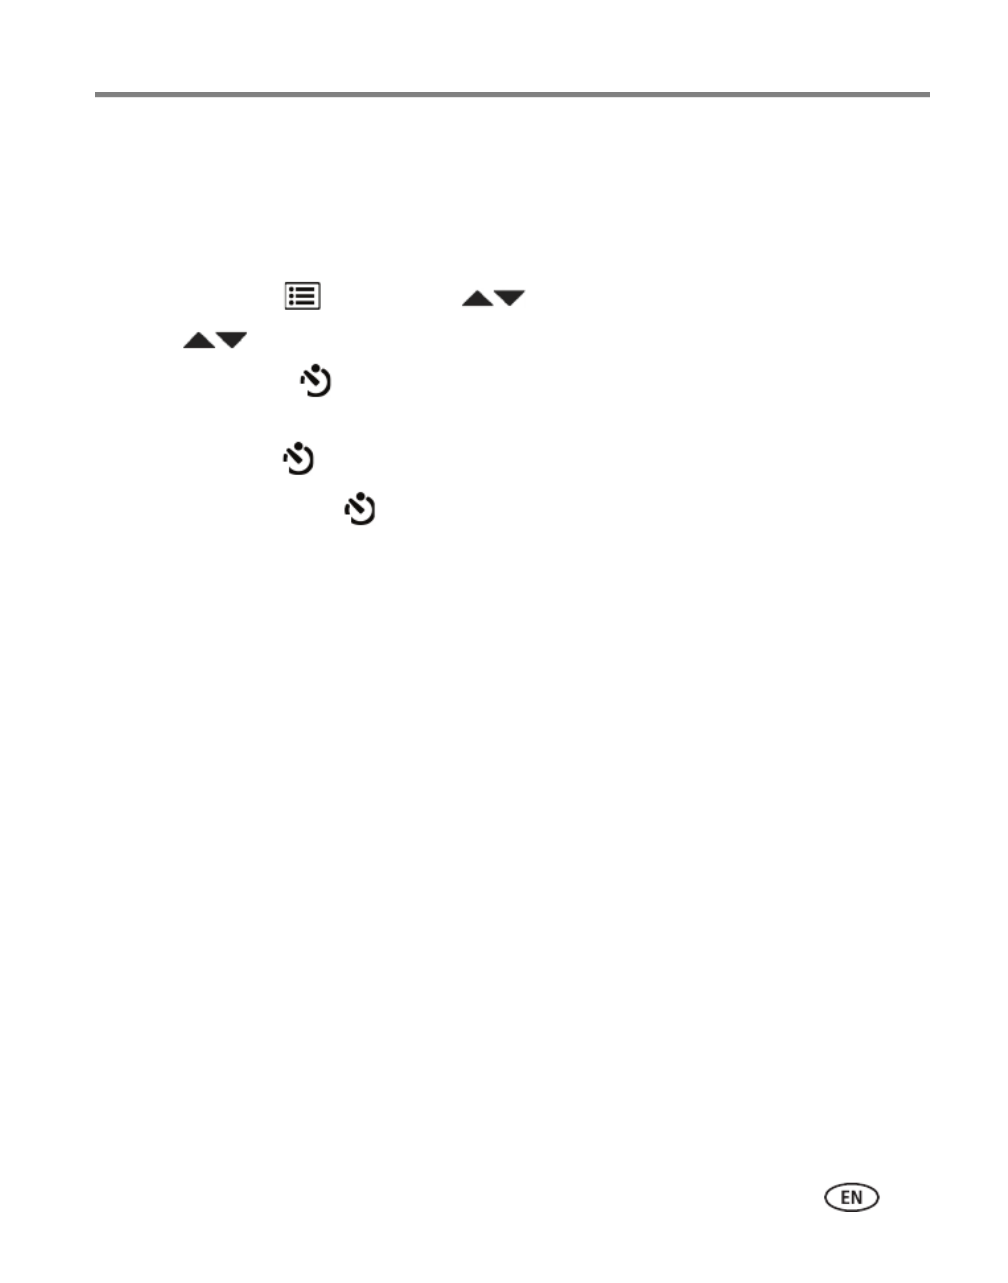
Using the self-timer
Use the self-timer when you want to be included in a picture or to ensure a steady
Shutter button press. For best results, place the camera on a tripod or steady surface.
You can turn on the self-timer using a shortcut (see page 10) or these steps:
1Press the Menu button. Press to
choose Self-timer, then press OK.
2Press to choose a Self-timer setting:
10 Seconds— A picture is taken after a 10-second delay (so you have time
to get into the scene).
2 Seconds— A picture is taken after a 2-second delay.
2 Picture Timer— The first picture is taken after a 10-second delay. A
second picture is taken 8 seconds later.
3 Compose the scene. Press the Shutter button all the way down.
The camera takes the picture/pictures after the delay.
To take a video after a 2- or 10-second delay, use the same procedure.
10
2
2x

12 www.kodak.com/go/support
3Sharing pictures/videos
Sharing through social networks
It’s never been easier to share pictures on your favorite social networking sites.
IMPORTANT:
To use the social networking features, you need to download KODAK
Software. (See page 31.)
1Press the Review button, then to find a picture.
2 Press the Share button.
If it’s your first time, a Help screen appears.
3Press to choose a social networking site, then press OK.
A check mark appears. Repeat this step to choose more sites. (You can press OK again
to remove a check mark.)
4Press to choose Done, then press OK.
The picture is displayed with the Share icon. When you transfer the picture to your
computer, it will be uploaded to the networking site(s) that you chose.
Tip: Do you upload pictures to the same sites each time?
Find a picture, then press and hold the Share button for about 1 second.
The camera applies the networking site(s) that you used previously and adds the Share icon
to the picture.

Sharing pictures/videos
www.kodak.com/go/support 13
Choose which social networking sites to display on your camera
You can show/hide networking sites on your camera so that only your favorite sites
appear.
1In Review, press the Menu button.
2Press to choose the Setup tab, then to choose Share Button Settings,
then press OK.
3Press to choose a social networking site, then press to choose Show or
Hide. Repeat this step until you have chosen Show/Hide for each social network.
4When finished, press to choose Done, then press OK.
To return to picture-taking mode, press the Review button. When you are in
Review and press the Share button, only chosen sites are shown.
Manage email addresses and KODAK PULSE Digital Frames
You can add, edit, or delete email addresses and KODAK PULSE Digital Frames on
your camera.
1In Review, press the Share button. Press to choose Manage Email
Addresses (or Manage Frames), then press OK.
2To add an email address or frame, press to choose Add Email or Add Frame,
then press OK. Use the on-screen keyboard to make the addition. See page 14.
(Example: JohnDoe@domain.com)
To edit an email address or a KODAK PULSE Digital Frame, press to choose
the address’s nickname or the frame, then press OK. Use the on-screen keyboard
to make edits.
To delete an email address or frame, choose Delete Email or Delete Frame, then
press OK. Press to choose the address or frame, then press OK so that a
check mark appears. Press to choose Delete, then press OK.
3When finished, press to choose Done, then press OK.
To return to picture-taking mode, press the Review button.

14 www.kodak.com/go/support
Sharing pictures/videos
Tagging pictures/videos with keywords
You can tag pictures/videos with a keyword to make them easy to find, later.
1Press the Review button, then to find a picture.
2Press the Menu button. Press to choose Keyword Tag, then press OK.
3Press to choose an existing keyword or New Keyword (see Using the
keyboard) to add a new one, then press OK.
4Press to add keywords to other pictures. When finished, press to
choose Done, then press OK.
To return to picture-taking mode, press the Review button.
Using the keyboard
The keyboard appears when you need it.
1Press to choose a letter, then press OK.
2When finished, press to choose OK, then press OK.

16 www.kodak.com/go/support
4Reviewing and editing
Reviewing pictures/videos
1Press the Review button.
2Press for previous/next picture/video.
■To exit, press the Review button.
■To view pictures/videos as thumbnails, press the
Wide Angle (W) button. (For more information,
see page 18.)
Playing a video
Press OK to play a video. Press OK to pause/resume.
During playback:
■Press to play at 2X speed; press again for 4X.
■Press to reverse at 2X speed; press again for 4X.
NOTE: Audio can be heard when the video is played on a computer
or when the camera is connected to a TV (see page 22).
Deleting pictures/videos
1Press the Review button.
2Press for previous/next picture/video.
3 Press the Delete button.
4 Follow the screen prompts.
NOTE: To delete protected pictures/videos, remove protection before deleting. (See page 17.)
4X 4X 1X2X 2X
Playback speed

Reviewing and editing
www.kodak.com/go/support 17
Using the undo delete picture feature
If you accidentally delete a picture, you may be able to use Undo Delete to retrieve it.
This feature is only available immediately after you delete a picture.
Protecting pictures/videos from deletion
1Press the Review button.
2Press the Menu button.
3Press to choose Protect, then press OK.
4Press to choose Protect, then press OK.
A check mark indicates that the picture/video is protected. Pressing OK again removes
the check mark. Press to protect other pictures/videos, or press
to choose
Done, then press OK.
■Press the Menu button to exit the menu.
IMPORTANT:
Your camera offers a built-in Help system. See page 35.
CAUTION:
Formatting internal memory or an SD or SDHC Card deletes all (including
protected) pictures/videos. (Formatting internal memory also deletes
email addresses and keyword tags.)

18 www.kodak.com/go/support
Reviewing and editing
Viewing pictures/videos in different ways
Magnifying a picture
1 Press Telephoto (T) to magnify 1X–8X.
2Press to view other parts of a picture.
■Press OK to return to 1X.
Viewing as thumbnails
1Press the Review button.
The camera shows the last picture/video that was taken.
2 Press the Wide Angle (W) button to view pictures/videos as thumbnails. (Press it
again to see more, smaller thumbnails.)
To view all pictures/videos, choose the All tab.
To sort by favorites, date, or keywords, press and choose the appropriate tab.
3To see a single picture/video, press to choose it. Then press the
Telephoto (T) button.
■To select multiple pictures/videos, see page 26.
■Press the Review button to exit Review.

Reviewing and editing
www.kodak.com/go/support 19
A smarter way to find and enjoy your pictures
Tag pictures with a keyword (page 14) to make them easy to find, later.
1Press the Review button.
2 Press the Wide Angle (W) button to view pictures by thumbnail (or choose View
Thumbnails shortcut).
3Press to choose the All, Date, Favorite, or Keyword tab.
4Press to choose a picture or picture stack, then press OK.
Press Telephoto (T) see pictures in a stack or to see an individual picture. Press Wide
Angle (W) to see thumbnails or picture stacks. To return to picture-taking mode, press
the Review button.
Keywords
Favorites
Date
All

Reviewing and editing
www.kodak.com/go/support 21
Creating a slide show
Use Slide Show to display your pictures/videos on the LCD. You can play all
pictures/videos, or choose pictures to include in the slide show.
Make a slide show
1Press the Review button. Select pictures (see page 26). If you select no
pictures, all pictures are shown.
2Press the Menu button, then to choose the Review tab.
3Press to choose Slide Show, then press OK.
4Press to choose Preview Slide Show, then press OK.
Each picture/video is displayed once. To interrupt the slide show, press OK.
IMPORTANT:
Your camera offers a built-in Help system. See page 35.
Play a slide show loop
When you turn on Loop, the slide show is continuously repeated.
1On the Slide Show menu, press to choose Loop, then
press OK.
2Press to choose On, then press OK.
3Press to choose Preview Slide Show, then press OK.
The slide show repeats until you press OK or until the batteries are exhausted.

22 www.kodak.com/go/support
Reviewing and editing
Displaying pictures/videos on a television
You can display pictures/videos on a television, computer monitor, or any device
equipped with a video input. To connect the camera directly to a television, use an
A/V cable (may be sold separately).
NOTE: To control the audio portion of a video, use the TV (or TV remote control) volume controls. Ensure
that the Video Out setting (NTSC or PAL) is correct (see page 29). The slide show stops if you
connect or disconnect the cable while the slide show is running. (Image quality on a television
screen may not be as good as on a computer monitor or when printed.)
Purchase accessories www.kodak.com/go/cd22accessories

24 www.kodak.com/go/support
Reviewing and editing
Editing videos
You can do incredible things with your videos.
Making a picture from a video
You can choose a single frame from a video, then make a picture suitable for a
4 x 6-inch (10 x 15 cm) print.
1Press the Review button, then to find a
video.
2Press the Menu button, then to choose the
Edit tab. Choose Make Picture, then press OK.
3 Follow the screen prompts.
A picture is created. (The original video is saved.) To
return to picture-taking mode, press the Review
button.
IMPORTANT:
Your camera offers a built-in Help system. See page 35.
Video Picture

Reviewing and editing
www.kodak.com/go/support 25
Making a video action print
From a video, you can make a 9-up picture, suitable for a 4 x 6-inch (10 x 15 cm)
print.
1Press the Review button, then to find a
video.
2Press the Menu button, then to choose the
Edit tab. Choose Action Print, then press OK.
3 Choose an option, then press OK.
Auto—The camera includes the first and last
frames, then 7 equally spaced frames.
Manual—Choose the first and last frames; the
camera chooses 7 equally spaced frames.
A 9-up picture is created. To return to picture-taking
mode, press the Review button.
Trimming a video
You can remove an unwanted start or end from a video, saving only the desired
portion.
1Press the Review button, then to find a
video.
2Press the Menu button, then to choose the
Edit tab. Choose Trim, then press OK.
3 Follow the screen prompts.
The video is trimmed. (You can save it as a new video
or replace the original.) To return to picture-taking
mode, press the Review button.
Video 9-up picture
Video Trimmed video

26 www.kodak.com/go/support
Reviewing and editing
Selecting multiple pictures/videos
Use the multi-select feature when you have two or more pictures/videos to print,
transfer, delete, etc. Multi-select is used most effectively with thumbnails, page 18.
1Press the Review button, then (and
if you’re in multi-up mode) to find a picture/video.
2 Press OK to select pictures/videos.
A check mark appears on the picture. (Press OK again
to remove a check mark.) You can now print, transfer,
delete, etc. the selected pictures.
Copying pictures/videos
You can copy pictures/videos from a card to internal memory or from internal memory
to a card.
Copy pictures/videos:
1Press the Review button, then to find a picture. (You can also use
multi-select. See Selecting multiple pictures/videos.)
2Press the Menu button, then to choose the Edit tab.
3Press to choose Copy, then press OK. Choose an option, then press OK.
NOTE: Pictures/videos are copied, not moved. To remove pictures/videos from the original location after
copying, delete them (see page 16).
IMPORTANT:
Your camera offers a built-in Help system. See page 35.
Selected
pictures

www.kodak.com/go/support 27
5Doing more with your camera
IMPORTANT:
Your camera offers a built-in Help system. To get the most from your
camera, see page 35.
Using the menu button to change settings
You can change settings to get the best results from your camera.
NOTE: Some modes offer limited settings. Some settings remain until you change them; others, until you
change modes or turn off the camera.
1Press the Menu button.
2Press to choose a tab:
■Capture/Video for the most common picture- and video-taking settings
■Setup for other camera settings
3Press to choose a setting, then press OK.
4 Choose an option, then press OK.
Using the capture tab
Settings More information
Picture Size
Choose a picture resolution.
See Camera Specifications, starting on page 40.
Self-timer
Choose Self-timer feature.
See Camera Specifications, starting on page 40.
Preset Keyword Tag
Create keyword names and
assign them to pictures/videos.
See page 14.
New Keyword
Delete Keyword

28 www.kodak.com/go/support
Doing more with your camera
Exposure Compensation
Make a picture lighter or
darker. To access this feature
with a shortcut, see page 10.
See Camera Specifications, starting on page 40.
ISO Speed
Control the camera sensitivity
to light.
See Camera Specifications, starting on page 40.
Long Time Exposure
Choose how long the shutter
stays open (normally in
low-light conditions). For best
results, place the camera on a
tripod or steady surface.
See Camera Specifications, starting on page 40.
Color Mode
Choose color tones.
Unavailable in Video and Auto
modes.
See Camera Specifications, starting on page 40.
White Balance
Choose your lighting
condition.
Auto—Automatically corrects white balance. Ideal for general
picture taking.
Daylight—For pictures in natural lighting.
Tungsten—Corrects the orange cast of incandescent light
bulbs. Ideal for indoor pictures under tungsten or halogen
lighting without flash.
Fluorescent—Corrects the green cast of fluorescent lighting.
Ideal for indoor pictures under fluorescent lighting without
flash.
Open Shade—For pictures in shade in natural lighting.
Sharpness
Control picture sharpness or
softness.
See Camera Specifications, starting on page 40.
Settings More information

Doing more with your camera
www.kodak.com/go/support 29
Video settings
IMPORTANT:
Your camera offers a built-in Help system. See page 35.
Using the Setup menu
Use Setup to customize other camera settings.
IMPORTANT:
Your camera offers a built-in Help system. See page 35.
Settings More information
Self-timer
Choose Self-timer feature.
Off
10 Seconds
2 Seconds
Settings More information
Date & Time Set date and time.
LCD Brightness
Choose LCD brightness during
picture/video capture.
High Power—Brighter LCD; uses more battery
power.
Power Save—Dimmer LCD; uses less power.
Share Button Settings
Choose what is displayed when the Share
button is pressed in Review.
Show or hide:
■Individual social networking sites
■E-mail addresses (all or none)
■KODAK Digital Frames (all or none)
Video Out
Choose the regional setting that lets you
connect the camera to a television or other
external device.
NTSC—Used in North America and Japan; most
common format.
PAL—Used in Europe and China.

30 www.kodak.com/go/support
Doing more with your camera
Image Storage
Choose a storage location for
pictures/videos.
Auto—The camera uses the card if one is in the
camera. If not, the camera uses internal memory.
Internal Memory—The camera always uses
internal memory, even if a card is installed.
Language Choose your language.
Reset Camera
Reset settings to their default.
Reset All Camera Settings—Settings revert to
their factory defaults.
Reset Startup Application—Resets camera to
startup mode to allow KODAK Software download.
Format
CAUTION:
Formatting deletes all
pictures/videos, including those
that are protected. Removing a
card during formatting may
damage the card.
Memory Card—Deletes everything on the card;
formats the card.
Cancel—Exits without making a change.
Internal Memory—Deletes everything in
internal memory including email addresses and
keyword tags; formats the internal memory.
KODAK Camera Software
View URL to download KODAK Software.
About
View camera information.
Settings More information

www.kodak.com/go/support 31
6Transferring, printing pictures
Download KODAK Software—so it’s easy to transfer and share pictures and videos.
NOTE: You can also use a card reader to transfer pictures/videos.
Download KODAK Software later www.kodak.com/go/camerasw
Get Software help www.kodak.com/go/support
To use this camera on more than one computer, use
the Reset Startup Application feature
see page 30
Turn on the camera.
3
Use the KODAK Camera
USB Cable, Micro B / 5-Pin
to connect camera to
computer. (Use only the
cable included with this
camera!)
1Turn off the camera.
After the software is
installed, follow the prompts
to transfer pictures and videos
to your computer.
2
* If the KODAK Software Downloader doesn’t run, find and launch it here:
• WINDOWS OS: in My Computer
• MAC OS: on your Desktop
Make sure the computer is connected to the
Internet. When you connect the camera to the
computer, the KODAK Software Downloader
automatically runs. Follow the prompts to
download and install KODAK Software.*

32 www.kodak.com/go/support
Transferring, printing pictures
Printing pictures
Direct printing with a KODAK All-in-One Printer
Your camera is compatible with PICTBRIDGE Technology, so you can print directly to
PICTBRIDGE enabled Printers. You need a camera, a PICTBRIDGE enabled Printer, and
a USB cable.
Connecting the camera to a KODAK All-in-One Printer
1 Turn off the camera and printer.
2 Connect the USB cable from the camera to the printer.
Printing from a KODAK All-in-One Printer
1 Turn on the printer. Turn on the camera.
The PictBridge logo is displayed, followed by the current picture and menu. (If no
pictures are found, a message is displayed.) If the menu turns off, press any button to
redisplay it.
2 Choose a printing option, then press OK.
Current Picture—Press to choose a picture.
Tagged Pictures—If your printer is capable, print pictures that you marked for
printing.
Index Print—Print thumbnails of all pictures. (This option requires one or more
sheets of paper.)
All Pictures—Print all pictures in internal memory or on a card.
Image Storage—Access Auto or Internal Memory.
NOTE: During direct printing, pictures are not permanently transferred or saved to the printer. To transfer
pictures to your computer, see page 31.
Purchase cables, accessories www.kodak.com/go/cd22accessories

Transferring, printing pictures
www.kodak.com/go/support 33
Disconnecting the camera from a KODAK All-in-One Printer
1 Turn off the camera and printer.
2 Disconnect the USB cable from the camera and the printer.
Ordering prints online
KODAK Gallery (www.kodakgallery.com) makes it easy to:
■Upload your pictures.
■Edit, enhance, and add borders to your pictures.
■Store pictures, and share them with family and friends.
■Have prints, photo greeting cards, frames, and albums delivered to your door.
Printing from an optional SD or SDHC Card
■Automatically print tagged pictures when you insert your card into a printer with
an SD/SDHC Card slot. See your printer user’s guide for details.
■Make prints at an SD/SDHC Card-capable KODAK Picture Kiosk. Go to
www.kodak.com/go/picturemaker.
■Take the card to your local photo retailer for professional printing.
Product specificaties
| Merk: | Kodak |
| Categorie: | Fotocamera |
| Model: | EasyShare CD22 |
Heb je hulp nodig?
Als je hulp nodig hebt met Kodak EasyShare CD22 stel dan hieronder een vraag en andere gebruikers zullen je antwoorden
Handleiding Fotocamera Kodak

14 December 2024
14 December 2024
14 December 2024
14 December 2024
14 December 2024
30 Juli 2024
19 Maart 2024
22 November 2022
23 Juni 2023
19 Juni 2023
Handleiding Fotocamera
- Fotocamera Braun
- Fotocamera Philips
- Fotocamera HP
- Fotocamera Sony
- Fotocamera Samsung
- Fotocamera Casio
- Fotocamera Panasonic
- Fotocamera Nikon
- Fotocamera Epson
- Fotocamera Canon
- Fotocamera Daewoo
- Fotocamera JVC
- Fotocamera Medion
- Fotocamera Olympus
- Fotocamera VTech
- Fotocamera Acer
- Fotocamera Agfa
- Fotocamera Agfaphoto
- Fotocamera Alpine
- Fotocamera Anker
- Fotocamera Argus
- Fotocamera Avaya
- Fotocamera BenQ
- Fotocamera Blaupunkt
- Fotocamera Bresser
- Fotocamera Brinno
- Fotocamera Bushnell
- Fotocamera D-Link
- Fotocamera Daitsu
- Fotocamera Denver
- Fotocamera Dorr
- Fotocamera Easypix
- Fotocamera Elmo
- Fotocamera Emerson
- Fotocamera Eufy
- Fotocamera EverFocus
- Fotocamera Ezviz
- Fotocamera Flir
- Fotocamera Fluke
- Fotocamera Foscam
- Fotocamera Fuji
- Fotocamera Fujifilm
- Fotocamera GE
- Fotocamera Gembird
- Fotocamera General Electric
- Fotocamera GoPro
- Fotocamera Hasselblad
- Fotocamera Hikvision
- Fotocamera Hitachi
- Fotocamera HOLGA
- Fotocamera Kogan
- Fotocamera Konica
- Fotocamera Konica Minolta
- Fotocamera Konig
- Fotocamera Kyocera
- Fotocamera Kyocera Yashica
- Fotocamera Laserliner
- Fotocamera Leica
- Fotocamera Leitz Focomat IIc
- Fotocamera Lenco
- Fotocamera Lenovo
- Fotocamera Lexibook
- Fotocamera Logitech
- Fotocamera Lorex
- Fotocamera Maginon
- Fotocamera Mamiya
- Fotocamera Meade
- Fotocamera Minolta
- Fotocamera Minox
- Fotocamera Moto Mods (Motorola)
- Fotocamera Nedis
- Fotocamera Nest
- Fotocamera Netgear
- Fotocamera Pentax
- Fotocamera Polaroid
- Fotocamera Powerfix
- Fotocamera Praktica
- Fotocamera Pyle
- Fotocamera Ricoh
- Fotocamera Ring
- Fotocamera Rollei
- Fotocamera Sanyo
- Fotocamera SeaLife
- Fotocamera Sigma
- Fotocamera Silvercrest
- Fotocamera Sinji
- Fotocamera SJCAM
- Fotocamera Spypoint
- Fotocamera Sygonix
- Fotocamera Technaxx
- Fotocamera TP Link
- Fotocamera Traveler
- Fotocamera Trust
- Fotocamera Velleman
- Fotocamera Viewsonic
- Fotocamera Vivitar
- Fotocamera Voigtlander
- Fotocamera Yashica
- Fotocamera ZeissIkon
- Fotocamera Joy-it
- Fotocamera Optoma
- Fotocamera Oregon Scientific
- Fotocamera Ozito
- Fotocamera Creative
- Fotocamera Zenit
- Fotocamera Cobra
- Fotocamera Celestron
- Fotocamera Levenhuk
- Fotocamera Aplic
- Fotocamera Arlo
- Fotocamera Imou
- Fotocamera SereneLife
- Fotocamera Akaso
- Fotocamera Trevi
- Fotocamera Intel
- Fotocamera Contax
- Fotocamera Scosche
- Fotocamera Swann
- Fotocamera SPC
- Fotocamera ARRI
- Fotocamera Bauhn
- Fotocamera Prixton
- Fotocamera RunCam
- Fotocamera FIMI
- Fotocamera Ansco
- Fotocamera Cosina
- Fotocamera Exakta
- Fotocamera Zorki
- Fotocamera Aida
- Fotocamera AVerMedia
- Fotocamera Lumens
- Fotocamera Dahua Technology
- Fotocamera UniView
- Fotocamera Reolink
- Fotocamera EVE
- Fotocamera Azden
- Fotocamera Marshall Electronics
- Fotocamera Ergoguys
- Fotocamera Burris
- Fotocamera Liiv360
- Fotocamera Watec
- Fotocamera Silvergear
- Fotocamera Digital Watchdog
- Fotocamera Fantasea Line
- Fotocamera Vimar
- Fotocamera Getac
- Fotocamera Speco Technologies
- Fotocamera Z CAM
- Fotocamera General
- Fotocamera Strex
- Fotocamera Berger & Schröter
- Fotocamera AViPAS
- Fotocamera Hanwha
- Fotocamera Videology
- Fotocamera InfiRay
- Fotocamera Pelco
- Fotocamera Videotec
- Fotocamera Cambo
- Fotocamera Kobian
- Fotocamera Red Digital Cinema
- Fotocamera Alfatron
- Fotocamera Aquapix
- Fotocamera BZBGear
- Fotocamera Seek Thermal
- Fotocamera Ikegami
- Fotocamera MuxLab
- Fotocamera Ikelite
- Fotocamera Adeunis
- Fotocamera Hoppstar
- Fotocamera IOptron
- Fotocamera Moultrie
- Fotocamera PatrolEyes
- Fotocamera Camouflage
- Fotocamera HuddleCamHD
- Fotocamera AquaTech
- Fotocamera PTZ Optics
- Fotocamera Linhof
- Fotocamera GoXtreme
- Fotocamera KanDao
- Fotocamera Kraken Sports
Nieuwste handleidingen voor Fotocamera

12 Maart 2025
12 Maart 2025
10 Maart 2025

25 Februari 2025

24 Februari 2025
24 Februari 2025
10 Februari 2025
10 Februari 2025
10 Februari 2025
10 Februari 2025