BEKO GN163140PTCHN Handleiding
Lees hieronder de 📖 handleiding in het Nederlandse voor BEKO GN163140PTCHN (134 pagina's) in de categorie Koelkast. Deze handleiding was nuttig voor 152 personen en werd door 2 gebruikers gemiddeld met 4.5 sterren beoordeeld
Pagina 1/134

GN163140PTCHN-GN163242XBCHN
58 6476 0000/AC 1/2
Refrigerator
User Manual
Gefrierschrank
Bedienungsanleitung
Frigorifero
Manuale utente
EN/DE/ Tİ

Dear Customer,
Please read this manual before using the product.
Thank you for choosing this product. We would like you to achieve the optimal efficiency
from this high quality product which has been manufactured with state of the art tech-
nology. To do this, carefully read this manual and any other documentation provided
before using the product and keep it as a reference.
Heed all information and warnings in the user manual. This way, you will protect yourself
and your product against the dangers that may occur.
Keep the user manual. Include this guide with the unit if you hand it over to someone
else.
The following symbols are used in the user guide:
Hazard that may result in death or injury.
NOTICE A hazard that may cause material damage to the product or its
surroundings
Important information or useful tips on operation.
Read the user manual.
A
A
SUPPLIER’S NAME MODEL IDENTIFIER (*)
INFORMATION
C
.The model information as stored in the product data base
can be reached by entering following website and searching
for your model identifier (*) found on energy label.
https://eprel.ec.europa.eu/

2 /29 EN Refrigerator / User Guide
1 Safety Instructions 3
1.1 Purpose of usage . . . . . . . . . . . . . . . . . . 3
1.2 Safety of children, vulnerable persons and
pets. . . . . . . . . . . . . . . . . . . . . . . . . . . . . . 3
1.3 Electrical safety . . . . . . . . . . . . . . . . . . . 3
1.4 Handling Safety . . . . . . . . . . . . . . . . . . . 4
1.5 Installation Safety . . . . . . . . . . . . . . . . . . 4
1.6 Operational safety . . . . . . . . . . . . . . . . . 5
1.7 Maintenance and cleaning safety . . . . . . 6
1.8HomeWhiz . . . . . . . . . . . . . . . . . . . . . . . 6
1.9 Lighting . . . . . . . . . . . . . . . . . . . . . . . . . 6
2 Environmental instructions 7
2.1 Compliance with the WEEE Directive and
Disposing of the Waste Product: . . . . . . . . 7
2.2 Compliance with RoHS Directive . . . . . . . . . . 7
2.3 Package information. . . . . . . . . . . . . . . . . . . 7
3 8Your Refrigerator
4 9Installation
4.1 The right place for installation . . . . . . . . . . . . 9
4.2 Attaching the plastic wedges. . . . . . . . . . . . 9
4.3 Adjustment of the feet. . . . . . . . . . . . . . . . . 10
4.4 Electrical connection. . . . . . . . . . . . . . . . . . 11
5 Preparation 12
5.1 What to do for energy saving . . . . . . . . . . . 12
5.2 First operation . . . . . . . . . . . . . . . . . . . . . . 12
6 Operating the Product 13
6.1 Turning off the product . . . . . . . . . . . . . . . . 13
6 Operation of the Product 14
6.2 Indicator panel . . . . . . . . . . . . . . . . . . . . . . 14
6.3 Indicator panel . . . . . . . . . . . . . . . . . . . . . . 17
6.4Deodoriser Module . . . . . . . . . . . . . . . . . . . 19
(FreshGuard) . . . . . . . . . . . . . . . . . . . . . . . . . . 19
6.5 Humidity controlled crisper (EverFresh+) . . . 20
6.6 Blue Light/HarvestFresh . . . . . . . . . . . . . . . 20
6.7 Using the water fountain . . . . . . . . . . . . . . 21
6.8 Filling the water tank of the water fountain 21
6.9 Cleaning the water tank . . . . . . . . . . . . . . . 21
6.10 Dairy (cold storage) bin. . . . . . . . . . . . . . . 23
6.11 Crisper . . . . . . . . . . . . . . . . . . . . . . . . . . 23
6.12 Ionizer . . . . . . . . . . . . . . . . . . . . . . . . . . . 23
6.13 Odour filter . . . . . . . . . . . . . . . . . . . . . . . 23
6.14 Icematic and ice storage box. . . . . . . . . . . 23
6.15 Freezing fresh food. . . . . . . . . . . . . . . . . . 24
6.16 Recommendations for storing frozen foods 24
6.17 Deep freezer details . . . . . . . . . . . . . . . . . 24
6.18 Placing the food . . . . . . . . . . . . . . . . . . . . 25
6.19 Door open alert . . . . . . . . . . . . . . . . . . . . 25
6.20 Illumination lamp . . . . . . . . . . . . . . . . . . . 25
7 Maintenance and cleaning 26
7.1 Stainless Steel External Surfaces. . . . . . . . . 26
7.2 Cleaning of the Products with Glass Doors. . 26
7.3 Preventing Odours. . . . . . . . . . . . . . . . . . . 27
7.4 Protecting Plastic Surfaces . . . . . . . . . . . . 27
7 Maintenance and cleaning 27
8 Troubleshooting 28

3 / 29 EN
Refrigerator / User Guide
1 Safety Instructions
This section includes the safety instructions nec-
essary to prevent the risk of personal injury or
material damage.
Our company shall not be held responsible for
damages that may occur if these instructions
are not observed.
Installation and repair operations shall always
be performed by Authorized Service.
Always use genuine spare parts and
accessories.
Original spare parts will be provided for 10
years, following the product purchasing date.
Do not repair or replace any part of the product
unless specified expressly in the user manual.
Do not perform any modifications on the
product.
1.1 Purpose of usage
This product is not intended for commercial
use and it shall not be used out of its intended
purpose.
This product is intended for operating interiors, such
as households or similar.
For example;
- In the staff kitchens of the stores, offices and
other working environments,
- In farm houses,
- In the units of hotels, motels or other resting
facilities that are used by the customers,
- In hostels, or similar environments,
- In catering services and similar non-retail applica-
tions.
This product shall not be used in open or enclosed
external environments such as vessels, balconies
or terraces. Exposing the product to rain, snow,
sunlight and wind may cause risk of fire.
1.2 Safety of children, vulnerable
persons and pets
This product may be used by children aged 8
years and older and persons with underdevel-
oped physical, sensory or mental capabilities or
lack of experience and knowledge if they have
been given supervision or instruction concerning
use of the appliance in a the product safe way
and the hazards involved.
Children between 3 and 8 years are allowed
to put and take out food to/from the cooler
product.
Electrical products are dangerous for children
and pets. Children and pets must not play with,
climb on, or enter the product.
Cleaning and user maintenance should not be
performed by children unless there is someone
overseeing them.
Keep the packaging materials away from chil-
dren. Risk of injury and suffocation.
Before disposing of old products that shall not
be used any more:
1.
Unplug the power cord from the mains socket.
2.
Cut the power cord and remove it from the appli-
ance together with the plug.
3.
Do not remove the racks and drawers from the
product to prevent children from getting inside the
appliance.
4.
Remove the doors.
5.
Store the product so that it shall not be tipped over.
6.
Do not allow children to play with the scrapped
product.
Do not dispose of the product by throwing it
into fire. Risk of explosion.
If there is a lock available in the product’s door,
keep the key out of children’s reach.
1.3 Electrical safety
The product shall not be plugged into the outlet
during installation, maintenance, cleaning, re-
pair, and transportation operations.
If the power the cord is damaged, it shall be
replaced by authorized service only to avoid
any risk that may occur.
Do not tuck the power cord under the product
or to the rear of the product. Do not put heavy
items on the power cord. The power cord
should not be bent, crushed, and come into
contact with any heat source.
Do not use an extension cord, multi-plug or
adaptor to operate your product.
Portable multi sockets or portable power sup-
plies may overheat and cause fire. Thus, do not
have a multi-plug behind or in the vicinity of
the product.
The plug shall be easily accessible. If this is
not possible, a mechanism that meets the

4 /29 EN Refrigerator / User Guide
Safety nstruct onsi i
electrical legislation and that disconnects all
terminals from the mains (fuse, switch, main
switch, etc.) shall be available on the electrical
installation.
Do not touch the plug with wet hands.
When unplugging the appliance, don’t hold the
power cord, but the plug.
1.4 Handling Safety
This product is heavy, do not handle it by your-
self.
Do not hold the product from its door while
handling the product.
Be careful not to damage the cooling system
and the pipes while handling the product. Do
not operate the product if the pipes are dam-
aged, and contact an authorized service.
1.5 Installation Safety
Contact the Authorized Service for the prod-
uct’s installation. To prepare the product for in-
stallation, see the information in the user guide
and make sure the electric and water utilities
are as required. If the installation is not suit-
able, call a qualified electrician and plumber to
have them make the necessary arrangements.
Otherwise, electric shock, fire, issues with the
product or injuries may occur.
Check for any damage on the product before
installing it. Do not have the product installed if
it is damaged.
Place the product on a level and hard sur-
face and balance with the adjustable legs.
Otherwise, the refrigerator may tip over and
cause injuries.
The product shall be installed in a dry and ven-
tilated environment. Do not keep carpets, rugs
or similar floor covers under the product. This
may cause risk of fire as a result of inadequate
ventilation!
Do not block or cover ventilation holes.
Otherwise, power consumption may be in-
creased and damage to your product may
occur.
Do not connect the product to supply systems
such as solar power supplies. Otherwise, dam-
age to your product may occur as a result of
the abrupt voltage fluctuations!
The more refrigerant a refrigerator contains,
the bigger its installation room shall be. In
very small rooms, a flammable gas-air mixture
may occur in case of a gas leak in the cooling
system. At least 1 m of volume is required for ³
each 8 grams of refrigerant. The amount of the
refrigerant available in your product is specified
in the Type Label.
The installation place of the product shall not
be exposed to direct sunlight and it shall not be
in the vicinity of a heat source such as stoves,
radiators, etc.
If you cannot prevent installation of the product in
the vicinity of a heat source, you shall use a suit-
able insulation plate and the minimum distance to
the heat source shall be as specified below.
- At least 30 cm away from heat sources such
as stoves, heating units and heaters, etc.,
- And at least 5 cm away from electric ovens.
Your product has the protection class of I. Plug
the product in a grounded socket that conforms
with the Voltage, Current and Frequency values
specified in the type label. The socket outlet
shall be equipped with a fuse with a rating of
10 A – 16 A. Our company shall not be respon-
sible for the damages that shall be incurred as
a result of operating the product without ensur-
ing ground and electrical connections made as
per local or national regulations.
The product’s power cable must be unplugged
during installation. Otherwise, risk of electric
shock and injury may occur!
Do not plug the product to loose, broken, dirty,
greasy sockets or sockets that has come out
their seats or sockets with a risk of water con-
tact.
Place the power cord and hoses (if available) of
the product so that they shall not cause a risk of
tripping over.
Penetration of humidity to live parts or to the
power cord may cause short circuit. Thus, do not
use the product in humid environments or in ar-
eas where water may splash (e.g. garage, laun-
dry room, etc.) If the refrigerator is wet by water
unplug it and contact an authorized service.
Do not connect your refrigerator to power sav-
ing devices. These systems are harmful for the
product.

5 / 29 EN
Refrigerator / User Guide
Safety nstruct onsi i
1.6
Operational safety
Do not use chemical solvents on the product.
These materials contain an explosion risk.
In case of a failure of the product, unplug it and
do not operate until it is repaired by the author-
ized service. There is a risk of electric shock!
Do not place a source of flame (e.g. candles,
cigarettes, etc.) on the product or in the vicinity
of it.
Do not get on the product. Risk of falling and
injury!
Do not cause damage to the pipes of the cool-
ing system using sharp and piercing tools. The
refrigerant that sprays out in case of puncturing
the gas pipes, pipe extensions or upper surface
coatings may cause irritation of skin and injuries
of the eyes.
Do not place and operate electric appliances
inside the refrigerators/deep freezer unless it is
advised by the manufacturer.
Do not jam any parts of your hands or your body
to the moving parts inside the product. Be careful
to prevent jamming of your fingers between the
refrigerator and its door. Be careful while opening
or closing the door if there are children around.
Do not put ice cream, ice cubes or frozen food to
your mouth as soon as you take them out of the
freezer. Risk of frostbite!
Do not touch the inner walls, metal parts of the
freezer or food kept inside the refrigerator with
wet hands. Risk of frostbite!
Do not place soda cans or cans and bottles that
contain fluids that may be frozen to the freezer
compartment. Cans or bottles may explode. Risk
of injury and material damage!
Do not use or place materials sensitive against
temperature such as flammable sprays, flam-
mable objects, dry ice or other chemical agents
in the vicinity of the refrigerator. Risk of fire and
explosion!
Do not store explosive materials such as aerosol
cans with flammable materials inside the prod-
uct.
Do not place cans containing fluids over the
product. Splashing of water on an electrical part
may cause the risk of an electric shock or a fire.
This product is not intended for storage and
cooling of medicines, blood plasma, laboratory
preparations or similar materials and prod-
ucts that are subject to the Medical Products
Directive.
If the product is used against its intended pur-
pose, it may cause damage to or deterioration
of the products kept inside.
If your refrigerator is equipped with blue light,
do not look at this light with optical devices.
Do not stare directly at UV LED light for a long
time. Ultraviolet rays may cause eye strain.
Do not fill the product with more food than its
capacity. Injuries or damages may occur if the
contents of the refrigerator falls when the door
is opened. Similar problems may occur when
an object is placed over the product.
Ensure that you have removed any ice or water
that may have fallen to the floor to prevent
injuries.
Change the locations of the racks/bottle racks
on the door of your refrigerator while the racks
are empty only. Danger of physical injury!
Do not place objects that may fall/tipped over
on the product. These objects may fall while
opening or closing the door and cause injuries
and/or material damages.
Do not hit or exert excessive pressure on glass
surfaces. Broken glass may cause injuries and/
or material damages.
The cooling system in your product contains
R600a refrigerant. The refrigerant type used in
the product is specified in the the type label.
This gas is flammable. Therefore, be careful
not to damage the cooling system and the
pipes while operating the product. In case of
damage to the pipes;
- do not touch the product or the power cord,
- Keep the product away from potential sources
of fire that may cause the product to catch fire.
- ventilation the area where the product is
placed. Do not use a fan.
- Contact authorized service.
If the product is damaged and you observe gas
leak, please stay away from the gas. Gas may
cause frostbite if it contacts your skin.

6 /29 EN Refrigerator / User Guide
Safety nstruct onsi i
1.7 Maintenance and cleaning
safety
Do not pull by the door handle if you shall move
the product for cleaning purposes. Handle may
cause injuries if it is pulled too hard.
Do not clean the product by spraying or pour-
ing water on the product and inside the prod-
uct. Risk of electric shock and fire.
Do not use sharp or abrasive tools to clean
the product. Do not use materials such as
household cleaning agents, detergents, gas,
gasoline, alcohol, wax, etc.
Use cleaning and maintenance agents that are
not harmful for food only inside the product.
Do not use steam or steamed cleaning materi-
als for cleaning the product and thawing the
ice inside it. Steam contacts the live areas in
your refrigerator and causes short circuit or
electric shock!
Take care to keep water away from the elec-
tronic circuits or lighting of the product.
Use a clean, dry cloth to wipe the dust or for-
eign material on the tips of the plugs. Do not
use a wet or damp piece of cloth to clean the
plug. Otherwise, risk of fire or electric shock
may occur.
1.8HomeWhiz
(May not be applicable for all models)
Follow the safety warnings even if you are
away from the product while operating the
product via HomeWhiz app. Also, pay attention
to the warnings in the app.
1.9 Lighting
(May not be applicable for all models)
Contact an authorized service when you shall
replace the LED / bulb using for lighting.

7 / 29 EN
Refrigerator / User Guide
2 Environmental instructions
2.1 Compliance with the WEEE
Directive and Disposing
of the Waste Product:
This product complies with EU WEEE Directive
(2012/19/EU). This product bears a classification
symbol for waste electrical and electronic equip-
ment (WEEE).
This symbol indicates that this product
shall not be disposed with other house-
hold wastes at the end of its service life.
Used device must be returned to offical
collection point for recycling of electrical
and electronic devices. To find these collection sys-
tems please contact to your local authorities or re-
tailer where the product was puchased. Each
household performs important role in recovering
and recycling of old appliance. Appropriate disposal
of used appliance helps prevent potential negative
consequences for the environment and human
health.
2.2 Compliance with RoHS Directive
The product you have purchased complies with EU
RoHS Directive (2011/65/EU). It does not contain
harmful and prohibited materials specified in the
Directive.
2.3 Package information
Packaging materials of the product are
manufactured from recyclable materials
in accordance with our National
Environment Regulations. Do not dis-
pose of the packaging materials together with the
domestic or other wastes. Take them to the pack-
aging material collection points designated by the
local authorities.

8 /29 EN Refrigerator / User Guide
3 Your Refrigerator
C*Optional: Figures in this user guide are schematic and may not be exactly match your product. If
product does not comprise the relevant parts, the information pertains to other models.
1- Freezer compartment
2- Cooler compartment
3- Cooler compartment door shelves
4- Egg Holder
5. Water dispenser filling tank
6. Water dispenser reservoir
7- Bottle shelf
8- Adjustable stands
9- Crispers
10- The dairy (cold storage) bin
11- Bottle shelf
12- Glass shelves
13- Fan
14- Frozen food storing compartments
15- Freezer compartment glass shelf
16- Icematic
17- Freezer compartment door shelves
2
1
*3
45
6
*7
*3
8
8
13
14
14
17
15
16
9
9
*10
*11
*12
May not be available in all models

9 / 29 EN
Refrigerator / User Guide
4 Installation
4.1 The right place for installation
A
Read the “Safety Instructions” section first!
Your product requires adequate air circulation to
function efficiently. If the product will be placed in an
alcove, remember to leave at least 5 cm clearance
between the product and the ceiling, rear wall and
the side walls.
If the product will be placed in an alcove, remember
to leave at least 5 cm clearance between the
product and the ceiling, rear wall and the side
walls. Check if the rear wall clearance protection
component is present at its location (if provided with
the product). If the component is not available, or
if it is lost or fallen, position the product so that at
least 5 cm clearance shall be left between the rear
surface of the product and the wall of the room.
The clearance at the rear is important for efficient
operation of the product.
AWARNING: Do not use extension or multi
sockets in power connection.
BWARNING: The manufacturer assumes
no responsibility for any damage caused
by the work carried out by unauthorized
persons.
BWARNING: The product's power cable
must be unplugged during installation.
Failure to do so may result in death or
serious injuries!
AWARNING: : If the door span is too
narrow for the product to pass, remove
the door and turn the product sideways; if
this does not work, contact the authorized
service.
vibration.
the heater, stove and similar sources of heat
and at least 5 cm away from electric ovens.
keep in damp environments.
function efficiently. If the product will be placed
in an alcove, remember to leave at least 5 cm
distance between the product and the ceiling
and the walls.
4.2 Attaching the plastic wedges
Use the plastic wedges in the provided with
the product to provide sufficient space for air
circulation between the product and the wall.
1.
To attach the wedges, remove the screws on
the product and use the screws provided with the
wedges.
2.
Attach 2 plastic wedges on the ventilation cover as
shown in the figure.

10 /29 EN Refrigerator / User Guide
Installation
4.3 Adjustment of the feet
If the product is not in balanced position, adjust the
front adjustable stands by rotating right or left.
In order to adjust the doors vertically,
position of the door
In order to adjust the doors horizontally,
Loosen the fixing screw at the bottom
Loosen the fixing bolt on the top
Screw the adjusting bolt (CW/CCW) on the side
according to the position of the door
Tighten the fixing bolt on the top for the final
position
Tighten the fixing screw at the bottom
Fixing nut
Fixing screw
xing nut
adjusting nut
adjusting bolt
xing bolt

11 / 29 EN
Refrigerator / User Guide
Installation
4.4 Electrical connection
A
WARNING: Do not use extension or
multi sockets in power connection.
BWARNING: Damaged power cable
must be replaced by Authorized
Service.
Our firm will not assume responsibility for any
damages due to usage without earthing and
power connection in compliance with national
regulations.
The power cable plug must be easily
accessible after installation.
C
Hot surface warning!
The side walls of your product are
equipped with cooler pipes to enhance
the cooling system. High pressure fluid
may flow through these surfaces, and
cause hot surfaces on the side walls.
This is normal and it does not require
servicing. Be careful when you contact
these areas.

12 /29 EN Refrigerator / User Guide
5 Preparation
5.1 What to do for energy saving
mehmet
AConnecting the product to electronic
energy-saving systems is harmful, as it
may damage the product.
For a freestanding appliance; ‘this refrigerating
appliance is not intended to be used as a built-
in appliance’ ;
Do not keep the refrigerator doors open for
long periods.
Do not place hot food or beverages into the
refrigerator.
Do not overfill the refrigerator; blocking the
internal air flow will reduce cooling capacity.
Depending on the product's features;
defrosting frozen foods in the cooler
compartment will ensure energy saving and
preserve food quality.
Food shall be stored using the drawers in the
cooler compartment in order to ensure energy
saving and protect food in better conditions.
Make sure the foods are not in contact with
the cooler compartment temperature sensor
described below.
energy while maintaining the freshness of your
foodstuff.
In case of multiple options are present glass
shelves must be placed so that the air outlets
at the backwall are not blocked, prefably air
outlets are remaining below the glass shelf.
This combination may help impoving air
distribution and energy efficiency.
A
Read the “Safety Instructions” section first!
5.2 First operation
Before using your refrigerator, make sure the
necessary preparations are made in line with
the instructions in "Safety and environment
instructions" and "Installation" sections.
Keep the product running without placing any
food inside for 12 hours and do not open the
door, unless absolutely necessary.
CA sound will be heard when the
compressor is engaged. It is normal to
hear sound even when the compressor is
inactive, due to the compressed liquids
and gasses in the cooling system.
CIt is normal for the front edges of the
refrigerator to be warm. These areas are
designed to warm up in order to prevent
condensation.
CFor some models, indicator panel turns
off automatically 1 minutes after the door
closes. It will be reactivated when the door
is open or any button is pressed.
Since hot and humid air will not directly
penetrate into your product when the doors are
not opened, your product will optimize itself
in conditions sufficient to protect your food.
In this energy saving function, functions and
components such as compressor, fan, heater,
defrost, lighting, display and so on will operate
according to the needs to consume minimum

13 / 29 EN
Refrigerator / User Guide
6 Operating the Product
A
Read the “Safety Instructions” section first!
Do not use any mechanical tools or any
other tools than the recommendations of the
manufacturer to speed up the thawing operation.
Do not use parts of your refrigerator such
as the door or drawers as a support or a step.
This may cause the product to trip over or its
components to be damaged.
The product shall be used for storing food
only.
Turn off the water valve if you will be away
from home (e.g. at vacation) and you will not be
using the Ice Maker or the water dispenser for a
long period of time. Otherwise, water leaks may
occur.
6.1 Turning off the product
period;
- unplug it,
- remove the food to prevent odours,
- wait until the ice is thawed,
- clean the inside and wait until it is dried.
- leave the doors open to prevent damage to internal
body plastics.

14 /29 EN Refrigerator / User Guide
6 Operation of the Product
6.2 Indicator panel
Indicator panels may vary depending on the model of your product.
Audial and visual functions of the indicator panel will assist in using the refrigerator.
C*Optional: Shown functions are optional, there may be differences of shape and location
functions found on your device’s display panel.
Read the “Safety Instructions” section first!
1.
Wireless Key
2.
Quick Freezing Key
3.
High temperature / error warning
4.
Energy Saving (Display Off) Indicator
5.
Freezing Compartment Temperature Setting
Key
6.
Cooling Compartment OFF (Vacation) Function
Key
7.
Cooling Compartment Temperature Setting
Key
8.
Key for Resetting Wireless Connection Settings
9.
Odor Removal Module Key
*May not be available in all models
*1
*8
2
345
7
6
*9

15 / 29 EN
Refrigerator / User Guide
Using the product
1. Wireless Key
This key is used to make a wireless connection with
your product via HomeWhiz mobile app.
When the key is pressed for a long period (3 seconds),
the wireless connection symbol on the display/screen
flashes slowly (with intervals of 0.5 seconds). The
home network is initialized on the product this way.
After achieving wireless connection with the product,
wireless connection symbol () illuminates
continuously.
When the initial connection is established, you may
activate/deactivate the connection with a short press
on this key. The wireless connection symbol shall flash
quickly (at 0.2 second intervals) until the connection
is established. When the connection is active, the
wireless network symbol shall light up continuously.
If the connection cannot be established for a long
period, check your connection settings and refer to the
“Troubleshooting” section provided in the user manual.
HomeWhiz application shall be used for wireless
connection. Installation steps are described on the
application during installation.
You may access the application by reading the QR
code available on the HomeWhiz label on the product.
Application is offered through App Store for IOS
devices, and through Play Store for Android devices.
Visit https://www.homewhiz.com/ for detailed
information.’
2. Quick Freezing Key
When the quick freeze key is pressed, the LED on the
key is illuminated and the quick freeze function shall
be activated. Freezing compartment temperature is set
to -27 Celcius. Press the key again to cancel function.
The quick freezing function shall be automatically
cancelled after 24 hours. To freeze a large amount of
fresh food, press the quick freeze key before placing
the food in the freezer compartment.
3. High temperature / error warning
This indicator ( ) shall be active when your
refrigerator cannot perform adequate cooling or in
case of any sensor error. “E” shall be displayed on
the Freezing Compartment temperature indicator and
figures such as 1,2,3... shall be displayed on the
cooling compartment temperature indicator. These
figures provide information to the authorized service
on the error that has occurred.
Exclamation mark may be displayed when you load
warm food to the freezing compartment or keep the
door open for a long period of time. This is not a fault,
this warning shall be removed when the food is cooled
down or when any key is pressed.
4. Energy Saving (Display Off) Indicator
Energy saving function is enabled automatically and
the energy saving symbol ( ) is displayed when
the door of the product is not opened or closed for
some period of time. When the energy saving function
is active, all symbols on the screen other than the
energy saving symbol shall be turned off. When the
energy-saving function is active, pressing any key or
opening the door will deactivate the energy-saving
function and the display signals will return to normal.
The energy-saving function is a function activated
ex-factory and cannot be cancelled.
5. Freezing Compartment Temperature Setting
Key
Temperature setting is made for cooler compartment.
Pressing this key will enable the freezer compartment
temperature to be set at
-18,-19,-20,-21,-22,-23,-
24
Celcius.
6.Cooling Compartment OFF (Vacation) Function
Key
Press the key for 3 seconds to activate the vacation
function. Vacation mode is activated and the LED
on the key is illuminated. “- -” shall be displayed on
the Cooling Compartment temperature indicator and
the cooling compartment does not actively perform
cooling. You shall not keep your food in the cooling
compartment when this function is activated. The
other compartments continue to cool according to the
set temperatures. Press the key for 3 seconds again
to cancel this function.

16 /29 EN Refrigerator / User Guide
Using the product
7. Cooling Compartment Temperature Setting
Key
Allows setting of temperature for cooler compartment.
Pressing this key will enable the cooling compartment
temperature to be set at 8,7,6,5,4,3,2 and 1 Celcius.
8. Key for Resetting Wireless Connection
Settings
To reset the wireless connection settings, press Quick
freezing ( ) and wireless connection ( ) keys
simultaneously for 3 seconds. All user information
recorded previously are removed on a product where
wireless connection settings are reset/restored to
factory defaults.
9.Odor Removal Module Key
Press this key for 3 seconds to enable/disable odor
removal feature. The LED on the key turns on when
odor removal feature is enabled. When the feature is
enabled, odor removal module works periodically.

17 / 29 EN
Refrigerator / User Guide
Using the product
1
*2
3
4
5
6
7
*8
*May not be available in all models
6.3 Indicator panel
Indicator panels may vary depending on the model of your product.
Audial and visual functions of the indicator panel will assist in using the refrigerator.
1.
High temperature / error warning
2.
Wireless Key
3.
Freezing Compartment Temperature Setting
Key
4.
Cooling Compartment Temperature Setting
Key
5.
Cooling Compartment OFF (Vacation) Function Key
6.
Key lock
7.
Quick Freezing Key
8.
Key for Resetting Wireless Connection Settings
C*Optional: Shown functions are optional, there may be differences of shape and location
functions found on your device’s display panel.

20 /29 EN Refrigerator / User Guide
Using the product
6.5 Humidity controlled
crisper (EverFresh+)
*May not be available in all models
Thanks to the humidity controlled crisper,
vegetables and fruits may be stored for a longer
period at an environment with ideal humidity
conditions. With the humidity setting system with
3 options in front of your crisper, you may control
the humidity inside the compartment as per the
food you store. We recommend you to store your
food by selecting vegetable option when you store
vegetables only, fruit option when you store fruit
only and mixed option when you store mixed food.
We recommend that the vegetables and fruits
shall not be stored in bags to improve the storage
period of the food and to better benefit from the
humidity control system. Leaving them in plastic
bags causes vegetables to rot in a short time.
We recommend that cucumbers and broccolis,
in particular, are not stored in closed bags. In
situations where contact with other vegetables is
not preferred, use packaging materials such as
paper that has a certain level of porosity in terms
of hygiene.
When placing the vegetables, place heavy and
hard vegetables at the bottom and light and soft
ones on the top, taking into account the specific
weights of vegetables.
Do not put fruits that have a high ethylene gas
production such as pear, apricot, peach and
particularly apple in the same crisper with other
vegetables and fruits. The ethylene gas coming out
of these fruits might cause other vegetables and
fruits to mature faster and rot in a shorter period
of time.
6.6 Blue Light/HarvestFresh
*May not be available in all models
For Blue light,
Vegetables and fruit stored in crispers illuminated
with blue light continue to perform photosynthesis
and retain their levels of C vitamin thanks to the
effect of the wavelength of the blue light.
For HarvestFresh,
Vegetables and fruit stored in crispers illuminated
with HarvestFresh technology retain their vitamin
levels (vitamins A and C) for a longer period thank
to the cycles of blue, green, red lights and dark
that simulate the cycle of the day.
When the door of your refrigerator is opened dur-
ing the dark period of the HarvestFresh technology
your refrigerator shall sense this automatically and
illuminate the crisper with one of the blue, green
or red lights respectively for your convenience. The
dark period shall be continued when you close the
door of your refrigerator so that it shall represent
the night period of the day cycle.

21 / 29 EN
Refrigerator / User Guide
Using the product
6.7 Using the water fountain
*May not be available in all models
C
The first few glasses of water taken from
the fountain will normally be warm.
CIf the water fountain is not used for a long
time, dispose of the first few glasses of
water to get clean water.
1. Push the arm of the water fountain with your
glass. It would be easier to push the arm with
your hand if you are using a soft plastic glass.
2. Release the arm after filling your glass with
water as you desire.
CThe amount of water flow from the
fountain depends on the pressure you
apply on the arm. Release the pressure
on the arm slightly as the water level
in your glass/container is increased to
prevent overflow. Water shall drip if you
press the arm slightly; this is normal
and it is not a malfunction.
6.8 Filling the water tank of
the water fountain
Open the lid of the water tank as shown in the
figure. Fill in pure and clean drinking water.
Close the lid.
6.9 Cleaning the water tank
Remove the water filling reservoir inside the door
shelf.
Detach by holding both sides of the door
shelf.
Hold both sides of the water tank and remove at
45° angle.
Remove and clean the water tank lid.

22 /29 EN Refrigerator / User Guide
Using the product
A
Do not fill the water tank with fruit juice,
fizzy beverages, alcoholic beverages or
any other liquids incompatible for use in
the water fountain. Using such liquids
will cause malfunction and irreparable
damage in the water fountain. Using
the fountain in this way is not within the
scope of warranty. Such certain chemicals
and additives in the beverages / liquids
may cause material damage to the water
tank.
AThe water tank and water fountain
components cannot be washed with
dishwashers.
CComponents of the water tank
and water dispenser should not be
washed in dishwasher.

23 / 29 EN
Refrigerator / User Guide
Using the product
6.10 Dairy (cold storage) bin
*May not be available in all models
“The dairy (cold storage) bin ” provides lower
temperature within the refrigerator compartment.
Use this bin to store delicatessen (salami,
sausages, dairy products and etc. ) that requires
lower storage temperature or meat, chicken or fish
products for immediate consumption. Do not store
fruits and vegetables inside this bin.
6.11 Crisper
The refrigerator's vegetable bin is designed to
keep crispers fresh by preserving humidity. For this
purpose, the overall cold air circulation is intensified
in the crisper bin. Keep fruits and vegetables in this
compartment. Keep the green-leaved crispers and
fruits separately to prolong their life.
6.12 Ionizer
*May not be available in all models
The ionizer system in the cooler compartment's
air duct serves to ionize the air. The negative
ion emissions will eliminate bacteria and other
molecules causing odour in the air.
6.13 Odour filter
*May not be available in all models
The odour filter in the cooler compartment's air
duct will prevent undesirable odour formation.
6.14 Icematic and ice storage box
*May not be available in all models
Fill the icematic with water and put in place. The
ice will be ready after approximately two hours. Do
not remove the icematic to take the ice.
Turn the buttons on the ice chambers right-hand
side by 90°; the ice will fall to the ice storage box
below. You may then remove the ice storage box
and serve the ice.
CThe ice storage box is intended for storing
ice only. Do not fill with water. Doing so
will cause it to break.
CIn products with automatic ice
machine, you might hear a sound
when pouring the ice. This sound is
normal and is not a sign of failure.

24 /29 EN Refrigerator / User Guide
Using the product
6.15 Freezing fresh food
To preserve food quality, the food items placed
in the freezer compartment must be frozen as
quickly as possible, use the rapid freezing for
this.
To freeze a large amount of fresh food, press
the rapid freeze button 24 hours before placing
the food in the freezer compartment.
Freezing the food items when fresh will extend
the storage time in the freezer compartment.
Pack the food items in air-tight packs and seal
tightly.
Make sure the food items are packed before
putting in the freezer. Use freezer holders,
tinfoil and damp-proof paper, plastic bag
or similar packaging materials instead of
traditional packaging paper.
Mark each food pack by writing the date on the
package before freezing.This will allow you to
determine the freshness of each pack every
time the freezer is opened. Keep the earlier
food items in the front to ensure they are used
first.
Frozen food items must be used immediately
after defrosting and should not be frozen again.
Do not free large quantities of food at once.
Freezer
Compartment
Setting
Cooler
Compartment
Setting
Descriptions
-18°C 4°C This is the default, recommended setting.
-20,-22 or
-24°C 4°C These settings are recommended for ambient temperatures
exceeding 30°C.
Rapid Freeze 4°C Press Rapid Freeze function 24 hours before placing the food,
the product will reset to previous settings when the process is
completed.
-18°C or colder 2°C Use these settings if you believe the cooler compartment is not cold
enough due to ambient temperature or frequently opening the door.
6.16 Recommendations for
storing frozen foods
The compartment must be set to at least -18°C.
1. Place the food items in the freezer as quickly
as possible to avoid defrosting.
2. Before freezing, check the “Expiry Date” on the
package to make sure it is not expired.
3. Make sure the food’s packaging is not
damaged.
6.17 Deep freezer details
As per the IEC 62552 standards, the freezer must
have the capacity to freeze 4,5 kg of food items at
-18°C or lower temperatures in 24 hours for each
100 litres of freezer compartment volume. Food
items can only be preserved for extended periods
at or below temperature of -18°C . You can keep
the foods fresh for months (in deep freezer at or
below temperatures of 18°C ).
The food items to be frozen must not contact
the already-frozen food inside to avoid partial
defrosting.

25 / 29 EN
Refrigerator / User Guide
Using the product
Boil the vegetables and filter the water to extend
the frozen storage time. Place the food in air-tight
packages after filtering and place in the freezer.
Bananas, tomatoes, lettuce, celery, boiled eggs,
potatoes and similar food items should not be
frozen. Freezing these food items will simply
reduce the nutritional value and food quality,
as well as possible spoiling which is harmful to
health.
6.18 Placing the food
Freezer
compartment
shelves
Various frozen goods including
meat, fish, ice cream,
vegetables etc.
Cooler
compartment
shelves
Food items inside pots, capped
plate and capped cases, eggs
(in capped case)
Cooler
compartment
door shelves
Small and packed food or
beverages
Vegetable bin Fruits and vegetables
Fresh food
compartment
Delicatessen (breakfast food,
meat products to be consumed
in short notice)
6.19 Door open alert
*May not be available in all models
An audible alert will be heard if the product's door
remains open for 1,5 minute. The audible alert will
stop when the door is closed or any button on the
display (if available) is pressed.
6.20 Illumination lamp
Interior light uses a LED type lamp. Contact the
authorized service for any problems with this lamp.
Lamp(s) used in this appliance cannot be used for
house lighting. Intended use of this lamp is to help
the user place food into the refrigerator / freezer
safely and comfortably.

26 /29 EN Refrigerator / User Guide
7 Maintenance and cleaning
B
WARNING: Read the “Safety
Instructions” section first!
.
B
WARNING: Unplug the refrigerator
before
cleaning it.
Do not use sharp or abrasive tools to clean
the product. Do not use materials such as
household cleaning agents, soap, detergents,
gas, gasoline, alcohol, wax, etc.
The dust shall be removed from the
ventilation grill on the rear of the product at least
once a year (without opening the cover). Cleaning
shall be performed with a dry cloth.
Take care to keep water away from the
lamp's cover and other electrical parts.
Clean the door with a damp cloth. Remove
all contents to remove the door and body racks.
Remove the door racks by lifting them upwards.
Clean and dry the shelves, then attach back in
place by sliding from above.
Do not use chlorinated water or cleaning
products on the exterior surface and chrome-
coated parts of the product. Chlorine will cause
rust on such metallic surfaces.
Do not use sharp and abrasive tools, soap,
house cleaning materials, detergents, gas,
gasoline, varnish and similar substances to
prevent deformation of the plastic part and
removal of prints on the part. Use warm water
and a soft cloth for cleaning, and then dry it.
On the products without a No-Frost feature,
water droplets and icing up to a thickness of a
finger may occur on the rear wall of the freezer
compartment. Do not clean, and never apply oils
or similar materials.
Use a mildly dampened micro-fiber cloth
to clean the external surface of the product.
Sponges and other types of cleaning clothes may
cause scratches.
To clean all
removable components
during the cleaning of the interior surface of
the product, wash these components with a
mild solution consisting of soap, water and
carbonate. Wash and dry thoroughly. Prevent
contact of water with illumination components
and the control panel.
ACAUTION:
Do not use vinegar, rubbing
alcohol or other alcohol based
cleaning agents on any interior
surface.
7.1 Stainless Steel External Surfaces
Use a non-abrasive stainless steel cleaning agent
and apply it with a soft lint-free cloth. To polish,
gently wipe the surface with a micro-fiber cloth
dampened with water and use dry polishing
chamois. Always follow the veins of the stainless
steel.
7.2 Cleaning of the Products
with Glass Doors
Remove the protective foil on the glasses.
There is a coating on the surface of the glasses.
This coating minimizes formation of stains and
provides easy cleaning of the stains and dirts that
have been formed. Glass that is not protected by
coating may be exposed to permanent bonding
of organic or inorganic, air and water-based
contaminants such as limestone, mineral salts,
unburned hydrocarbons, metal oxides and
silicones, which cause staining and physical
damage easily in a short period of time. Keeping
the glasses clean becomes very difficult, if not
impossible, despite the fact they are cleaned
regularly. As a result, the transparency and
appearance of the glass deteriorates. Hard and
abrasive cleaning methods and agents further
increase these defects and accelerate the process
of deterioration.
For routine cleaning processes, *non-alkaline and
non-corrosive water based cleaning products shall
be used.
In order to have a longer service life of this
coating, alkaline and corrosive substances shall
not be used during cleaning.

27 / 29 EN
Refrigerator / User Guide
A tempering process is applied to increase the
resistance of these glasses against impacts and
breakage.
As an additional safety precaution, a safety film
has been applied to the rear surface of these
glasses to prevent harm to the environment in
case it breaks.
7.3 Preventing Odours
The product is manufactured free of any
odorous materials. However, keeping the food in
inappropriate sections and improper cleaning of
internal surfaces may lead to odours.
To avoid this, clean the inside with carbonated
water every 15 days.
Keep the foods in sealed holders.
Microorganisms may spread out of unsealed
food items and cause malodour.
Do not keep expired and spoilt foods in the
refrigerator.
CTea is one of the most effective odour
removers. Place the pulp of the brewed
tea in the product inside an open container
and remove it after 12 hours at the latest.
If you keep the tea pulp inside the product
for longer than 12 hours, it will collect the
organisms that cause the odour so it can
be the source of odour itself.
7.4 Protecting Plastic Surfaces
Oil spilled on plastic surfaces may damage the
surface and must be cleaned immediately with
warm water.
7 Maintenance and cleaning

28 /29 EN Refrigerator / User Guide
8 Troubleshooting
Check this list before contacting the service. Doing
so will save you time and money. This list includes
frequent complaints that are not related to faulty
workmanship or materials. Certain features mentioned
herein may not apply to your product.
The refrigerator is not working.
The power plug is not fully settled. >>> Plug
it in to settle completely into the socket.
The fuse connected to the socket powering
the product or the main fuse is blown. >>>
Check the fuse.
Condensation on the side wall of the cooler
compartment (MULTI ZONE, COOL, CONTROL
and FLEXI ZONE).
The door is opened too frequently >>>
Take care not to open the product's door too
frequently.
The environment is too humid. >>> Do not
install the product in humid environments.
Foods containing liquids are kept in unsealed
holders. >>> Keep the foods containing liquids
in sealed holders.
The product's door is left open. >>> Do not
keep the product's door open for long periods.
The thermostat is set to a very cool
temperature. >>> Set the thermostat to an
appropriate temperature.
Compressor is not working.
In case of sudden power failure or pulling
the power plug off and putting back on, the
gas pressure in the product's cooling system
is not balanced, which triggers the compressor
thermic safeguard. The product will restart after
approximately 6 minutes. If the product does not
restart after this period, contact the service.
Defrosting is active. >>> This is normal for a
fully-automatic defrosting product. The defrosting
is carried out periodically.
The product is not plugged in. >>> Make
sure the power cord is plugged in.
The temperature setting is incorrect. >>>
Select the appropriate temperature setting.
The power is out. >>> The product will
continue to operate normally once the power is
restored.
The refrigerator's operating noise is
increasing while in use.
The product's operating performance may
vary depending on the ambient temperature
variations. This is normal and not a malfunction.
The refrigerator runs too often or for too long.

29 / 29 EN
Refrigerator / User Guide
Troubleshooting
The new product may be larger than the
previous one. Larger products will run for longer
periods.
The room temperature may be high. >>>
The product will normally run for long periods in
higher room temperature.
The product may have been recently plugged
in or a new food item is placed inside. >>>
The product will take longer to reach the set
temperature when recently plugged in or a new
food item is placed inside. This is normal.
Large quantities of hot food may have been
recently placed into the product. >>> Do not
place hot food into the product.
The doors were opened frequently or kept
open for long periods. >>> The warm air moving
inside will cause the product to run longer. Do not
open the doors too frequently.
The freezer or cooler door may be ajar. >>>
Check that the doors are fully closed.
The product may be set to temperature too
low. >>> Set the temperature to a higher degree
and wait for the product to reach the adjusted
temperature.
The cooler or freezer door washer may be
dirty, worn out, broken or not properly settled.
>>> Clean or replace the gasket. Damaged
/ torn door washer will cause the product to
run for longer periods to preserve the current
temperature.
The freezer temperature is very low, but the
cooler temperature is adequate.
The freezer compartment temperature is
set to a very low degree. >>> Set the freezer
compartment temperature to a higher degree
and check again.
The cooler temperature is very low, but the
freezer temperature is adequate.
The cooler compartment temperature is
set to a very low degree. >>> Set the freezer
compartment temperature to a higher degree
and check again.
The food items kept in cooler compartment
drawers are frozen.
The cooler compartment temperature is
set to a very low degree. >>> Set the freezer
compartment temperature to a higher degree
and check again.
The temperature in the cooler or the freezer
is too high.
The cooler compartment temperature is set
to a very high degree. >>> Temperature setting
of the cooler compartment has an effect on the
temperature in the freezer compartment. Wait
until the temperature of relevant parts reach the
sufficient level by changing the temperature of
cooler or freezer compartments.
The doors were opened frequently or kept
open for long periods. >>> Do not open the
doors too frequently.
The door may be ajar. >>> Fully close the
door.
The product may have been recently plugged
in or a new food item is placed inside. >>> This
is normal. The product will take longer to reach
the set temperature when recently plugged in or
a new food item is placed inside.
Large quantities of hot food may have been
recently placed into the product. >>> Do not
place hot food into the product.
Shaking or noise.
The ground is not level or durable. >>> If
the product is shaking when moved slowly, adjust
the stands to balance the product. Also make
sure the ground is sufficiently durable to bear the
product.
Any items placed on the product may cause
noise. >>> Remove any items placed on the
product.
The product is making noise of liquid
flowing, spraying etc.
The product's operating principles involve
liquid and gas flows. >>> This is normal and not
a malfunction.

30 /29 EN Refrigerator / User Guide
Troubleshooting
There is sound of wind blowing coming from
the product.
The product uses a fan for the cooling
process. This is normal and not a malfunction.
There is condensation on the product's
internal walls.
Hot or humid weather will increase icing
and condensation. This is normal and not a
malfunction.
The doors were opened frequently or kept
open for long periods. >>> Do not open the
doors too frequently; if open, close the door.
The door may be ajar. >>> Fully close the
door.
There is condensation on the product's
exterior or between the doors.
The ambient weather may be humid, this
is quite normal in humid weather. >>> The
condensation will dissipate when the humidity is
reduced.
The interior smells bad.
The product is not cleaned regularly. >>>
Clean the interior regularly using sponge, warm
water and carbonated water.
Certain holders and packaging materials may
cause odour. >>> Use holders and packaging
materials without free of odour.
The foods were placed in unsealed holders.
>>> Keep the foods in sealed holders. Micro-
organisms may spread out of unsealed food
items and cause malodour.
Remove any expired or spoilt foods from the
product..
The door is not closing.
Food packages may be blocking the door.
>>> Relocate any items blocking the doors.
The product is not standing in full upright
position on the ground. >>> Adjust the stands to
balance the product.
The ground is not level or durable. >>>
Make sure the ground is level and sufficiently
durable to bear the product.
The crisper is jammed.
The food items may be in contact with the
upper section of the drawer. >>> Reorganize the
food items in the drawer.
In case of a Hot Surface on the Product,
High temperature may be observed between
two doors, on the side panels and on the rear
grill area while your product is operated. This is
normal and it does not require servicing!
Fan continues to operate when the door is
opened.
Fan may continue to operate when the the
freezer door is open.
AWARNING: If the problem persists
after following the instructions in
this section, contact your vendor or
an Authorized Service. Do not try to
repair the product.

DISCLAIMER / WARNING
Some (simple) failures can be adequately handled by the end-user without
any safety issue or unsafe use arising, provided that they are carried out
within the limits and in accordance with the following instructions (see the
“Self-Repair” section).
Therefore, unless otherwise authorized in the “Self-Repair” section below,
repairs shall be addressed to registered professional repairers in order
to avoid safety issues. A registered professional repairer is a professional
repairer that has been granted access to the instructions and spare parts list
of this product by the manufacturer according to the methods described in
legislative acts pursuant to Directive 2009/125/EC.
However, only the service agent (i.e. authorized professional repairers)
that you can reach through the phone number given in the user manual/
warranty card or through your authorized dealer may provide service
under the guarantee terms. Therefore, please be advised that repairs by
professional repairers (who are not authorized by Beko) shall void the
guarantee.
Self-Repair
Self-repair can be done by the end-user with regard to the following spare
parts: door handles,door hinges, trays, baskets and door gaskets (an updated
list is also available in support.beko.com as of 1st March 2021).
Moreover, to ensure product safety and to prevent risk of serious injury, the
mentioned self-repair shall be done following the instructions in the user
manual for self-repair or which are available in support.beko.com. For your
safety, unplug the product before attempting any self-repair.

Repair and repair attempts by end-users for parts not included in such list
and/or not following the instructions in the user manuals for self-repair or
which are available in support.beko.com, might give raise to safety issues
not attributable to Beko, and will void the warranty of the product.
Therefore, it is highly recommended that end-users refrain from the
attempt to carry out repairs falling outside the mentioned list of spare parts,
contacting in such cases authorized professional repairers or registered
professional repairers. On the contrary, such attempts by end-users may
cause safety issues and damage the product and subsequently cause fire,
flood, electrocution and serious personal injury to occur.
By way of example, but not limited to, the following repairs must be
addressed to authorized professional repairers or registered professional
repairers: compressor, cooling circuit, main board,inverter board, display
board, etc.
The manufacturer/seller cannot be held liable in any case where end-users
do not comply with the above.
The spare part availability of the refrigerator that you purchased is 10 years.
During this period, original spare parts will be available to operate the
refrigerator properly
The minimum duration of guarantee of the refrigerator that you purchased is
24 months.
This product is equipped with a lighting source of the "G" energy class.
The lighting source in this product shall only be replaced by professional repairers.

Lieber Kunde,
Bitte lesen Sie dieses Handbuch, bevor Sie das Produkt verwenden.
Vielen Dank, dass Sie sich für dieses Produkt entschieden haben. Wir möchten, dass Sie
mit diesem hochwertigen Produkt, das mit modernster Technologie hergestellt wurde,
die optimale Effizienz erzielen. Lesen Sie dazu dieses Handbuch und alle anderen mit-
gelieferten Dokumentationen sorgfältig durch, bevor Sie das Produkt verwenden, und
bewahren Sie sie als Referenz auf.
Beachten Sie alle Informationen und Warnungen im Benutzerhandbuch. Auf diese Weise
schützen Sie sich und Ihr Produkt vor den Gefahren, die auftreten können.
Bewahren Sie das Benutzerhandbuch auf. Fügen Sie diese Anleitung dem Gerät bei,
wenn Sie sie an eine andere Person übergeben.
In dieser Betriebsanleitung werden folgende Symbole verwendet:
Gefahr, die zum Tod oder zu Verletzungen führen kann.
HINWEIS Eine Gefahr, die zu Materialschäden am Produkt oder seiner
Umgebung führen kann
Wichtige Informationen oder nützliche Tipps zur Bedienung.
Lesen Sie die Bedienungsanleitung.
.Die Modellinformationen, wie sie in der Produktdatenbank
gespeichert sind, können durch Eingabe der folgenden Web-
site und Suche nach Ihrer Modellkennung (*) auf dem Ener-
gieetikett erreicht werden.
https://eprel.ec.europa.eu/
A
A
SUPPLIER’S NAME MODEL IDENTIFIER (*)
INFORMATION
C

2 /32 DE Kühlschrank/ Bedienungsanleitung
1-Sicherheitsanweisungen 3
A 1.1 Bestimmungsgemäße Verwendung 3
A 1.2 - Sicherheit für Kinder,
schutzbedürftige Personen und
Haustiere . . . . . . . . . . . . . . . . . . . . . 3
A 1.3 - Elektrische Sicherheit. . . . . . . . . 4
A 1.4 - Sicherheit beim Transport . . . . . . 4
A 1.5 - Sicherheit bei der Installation . . . 4
A 1.6 - Sicherheit bei der Benutzung . . . 5
A 1.7- Sicherheit bei der Wartung und
Pflege. . . . . . . . . . . . . . . . . . . . . . . . 7
A 1.8- HomeWhiz . . . . . . . . . . . . . . . . . 7
A 1.9- Beleuchtung. . . . . . . . . . . . . . . . . . . 7
2 Umweltbedingungen 8
2.1 Einhaltung der WEEE-Richtlinie und
Entsorgung des Altgeräts: . . . . . . . . . . . . 8
2.2 Einhaltung der RoHS-Richtlinie: . . . . . . . . . 8
2.3 Information zur Verpackung . . . . . . . . . . . . 8
3 Ihr Kühlschrank 9
4 Installation 10
4.1 Der geeignete Aufstellungsort . . . . . . . . . 10
4.2 Anbringen der Kunststoffkeile. . . . . . . . . 10
4.3 Einstellung der Füße . . . . . . . . . . . . . . . . 11
4.4 Elektrischer Anschluss. . . . . . . . . . . . . . . 12
5 Vorbereitung 13
5.1 Hinweise für einen energiesparenden
Betrieb. . . . . . . . . . . . . . . . . . . . . . . . . 13
5 Vorbereitung 14
5.2 Erstbetrieb . . . . . . . . . . . . . . . . . . . . . . . 14
6 Betrieb des Produkts 15
6.1 Pausieren des Programms. . . . . . . . . . . . 15
6 Bedienung des Produkts 16
6.2 Anzeigetafel . . . . . . . . . . . . . . . . . . . . . . 16
6.3 Anzeigetafel . . . . . . . . . . . . . . . . . . . . . . 19
6.4Geruchvernichtungsmodul . . . . . . . . . . . . 21
6.5 Gemüsefach mit kontrollierter Luftfeuchtigkeit
(EverFresh+) . . . . . . . . . . . . . . . . . . . . 22
6.6 Blaues Licht/HarvestFresh . . . . . . . . . . . . 22
6.7 Verwendung des Wasserspenders. . . . . . 23
6.8 Füllen des Wassertanks des
Wasserspenders. . . . . . . . . . . . . . . . . . 23
6.9 Reinigung des Wassertanks. . . . . . . . . . . 23
6.10 Der Milchbehälter (Kühllagerung) (Diese
Funktion ist optional). . . . . . . . . . . . . . . 25
6.11Gemüsefach . . . . . . . . . . . . . . . . . . . . . 25
6.12 Ionisator. . . . . . . . . . . . . . . . . . . . . . . . 25
6.13 Geruchsfilter . . . . . . . . . . . . . . . . . . . . 25
6.14 Eismaschine und Eiswürfelbehälter . . . . 25
6.15 Einfrieren frischer Lebensmittel . . . . . . . 26
6.16 Empfehlungen für Aufbewahrung gefrorener
Lebensmittel . . . . . . . . . . . . . . . . . . . . 26
6.17 Einzelheiten zum Tiefkühler . . . . . . . . . . 26
6.18 Einlegen von Lebensmitteln . . . . . . . . . . 27
6.19 Warnton bei offener Tür . . . . . . . . . . . . . 27
6.20 Beleuchtungslampe. . . . . . . . . . . . . . . . 27
7 Wartung und Säuberung 28
7.1 Außenflächen aus Edelstahl. . . . . . . . . . . 28
7.2 Reinigung der Produkte mit Glastüren . . . 28
7.3 Gerüche verhindern . . . . . . . . . . . . . . . . 29
7.4 Schutz der Kunststoffoberflächen . . . . . . 29
7 Wartung und Säuberung 29
8 Problemlösung 30

3 / 32 DE
Kühlschrank/ Bedienungsanleitung
Dieser Abschnitt enthält Sicherheitshinweise, die
zum Schutz vor Personen- oder Sachschäden
beitragen.
Unser Unternehmen haftet nicht für Schäden,
die entstehen können, wenn diese Anweisungen
nicht befolgt werden.
Ein Installations- und Reparaturverfahren
muss immer vom Hersteller, autorisierten
Servicemitarbeiter oder einer vom Importeur
angegebenen qualifizierten Person durchgeführt
werden.
Verwenden Sie nur Originalteile und
Zubehör.
Reparieren oder ersetzen Sie keine Teile
des Produkts, es sei denn, dies ist ausdrücklich in
der Bedienungsanleitung angegeben.
Nehmen Sie keine technischen
Änderungen am Produkt vor.
1.1 Bestimmungsgemäße
Verwendung
Dieses Produkt ist nicht für den gewerblichen
Gebrauch geeignet und darf nicht außerhalb
seines Verwendungszwecks verwendet werden.
Dieses Produkt ist für den Einsatz in Häusern und
Innenräumen konzipiert.
Zum Beispiel:
- Personalküchen in Geschäften, Büros und
anderen Arbeitsumgebungen,
- Bauernhäuser,
- Bereiche, die von Kunden in Hotels, Motels
und anderen Arten von Unterkünften genutzt
werden,
- Bed & Breakfast Hotels, Pensionen,
- Catering und ähnliche Anwendungen außerhalb
des Einzelhandels.
Dieses Produkt darf nicht im Freien mit oder
ohne Zelt wie Booten, Balkonen oder Terrassen
verwendet werden. Setzen Sie das Produkt weder
Regen noch Schnee, Sonne oder Wind aus.
Es besteht Brandgefahr!
1.2 - Sicherheit für
Kinder, schutzbedürftige
Personen und Haustiere
Dieses Produkt kann von Kindern ab 8 Jahren
und von Personen mit eingeschränkten
körperlichen, sensorischen oder geistigen
Fähigkeiten oder ohne Erfahrung und Wissen
verwendet werden, sofern sie in Bezug auf
die sichere Verwendung des Produkts und die
damit verbundenen Risiken beaufsichtigt oder
geschult werden
Kinder im Alter von 3 bis 8 Jahren dürfen
Kühlgeräte be- und entladen.
Elektrische Produkte sind gefährlich für Kinder
und Haustiere. Kinder und Haustiere dürfen
nicht mit dem Produkt spielen, klettern oder es
betreten.
Reinigung und Benutzerwartung sollten nicht
von Kindern durchgeführt werden, es sei denn,
sie werden von jemandem beaufsichtigt.
Halten Sie Verpackungsmaterialien von
Kindern fern. Es besteht Verletzungs- und
Erstickungsgefahr!
Vor der Entsorgung des alten oder veralteten
Produkts:
1.
Ziehen Sie den Stecker aus der Steckdose.
2.
Schneiden Sie das Netzkabel ab und ziehen Sie es
zusammen mit dem Stecker aus dem Gerät
3.
Entfernen Sie nicht die Regale oder Schubladen,
damit Kinder das Produkt nur schwer betreten
können.
4.
Entfernen Sie die Türen.
5.
Bewahren Sie das Produkt so auf, dass es nicht
umkippt.
6.
Lassen Sie Kinder nicht mit dem alten Produkt
spielen.
Werfen Sie das Gerät niemals zur Entsorgung
ins Feuer. Es besteht Explosionsgefahr!
1-Sicherheitsanweisungen

4 /32 DE Kühlschrank/ Bedienungsanleitung
S cherhe tsh nwe sei i i i
Wenn sich an der Tür des Produkts ein Schloss
befindet, sollte der Schlüssel außerhalb der
Reichweite von Kindern aufbewahrt werden.
1.3 - Elektrische Sicherheit
Das Produkt muss während der Installation,
Wartung, Reinigung, Reparatur und des
Transports vom Stromnetz getrennt werden.
Wenn das Netzkabel beschädigt ist, muss
es von einer vom Hersteller, autorisierten
Servicemitarbeiter oder Importeur
angegebenen qualifizierten Person ersetzt
werden, um mögliche Gefahren zu vermeiden.
Drücken Sie das Netzkabel nicht unter oder
hinter das Produkt. Stellen Sie keine schwere
Gegenstände auf das Netzkabel. Das Netzkabel
darf nicht übermäßig gebogen, eingeklemmt
oder mit einer Wärmequelle in Kontakt
gebracht werden.
Verwenden Sie keine Verlängerungskabel,
Mehrfachbuchsen oder Adapter, um das
Produkt zu betreiben.
Tragbare Mehrfachsteckdosen oder tragbare
Stromquellen können überhitzen und einen
Brand verursachen. Bewahren Sie daher keine
Mehrfachsteckdosen hinter oder in der Nähe
des Produkts auf.
Der Stecker muss leicht zugänglich sein.
Ist dies nicht möglich, muss die elektrische
Installation, an die das Produkt angeschlossen
ist, ein Gerät (z. B. eine Sicherung, einen
Schalter, einen Leistungsschalter usw.)
enthalten, das den elektrischen Vorschriften
entspricht und alle Pole vom Netz trennt.
Berühren Sie den Netzstecker nicht mit nassen
Händen.
Entfernen Sie den Stecker aus der Steckdose,
indem Sie den Stecker und nicht das Kabel
greifen.
1.4 - Sicherheit beim Transport
Produkt ist schwer; Bewegen Sie es nicht
alleine.
Halten Sie die Tür nicht fest, wenn Sie das
Produkt bewegen.
Achten Sie darauf, das Kühlsystem oder die
Rohrleitungen während des Transports nicht
zu beschädigen. Wenn die Rohrleitungen
beschädigt sind, betreiben Sie das Produkt
nicht und wenden Sie sich an den autorisierten
Kundendienst.
1.5 - Sicherheit bei
der Installation
Wenden Sie sich zur Installation des
Produkts an den autorisierten Kundendienst.
Um das Produkt einsatzbereit zu machen,
überprüfen Sie die Informationen in der
Bedienungsanleitung, um sicherzustellen, dass
die Strom- und Wasserinstallationen geeignet
sind. Wenn dies nicht der Fall ist, wenden
Sie sich an einen qualifizierten Elektriker
und Installateur, um die erforderlichen
Vorkehrungen zu treffen. Andernfalls besteht
die Gefahr eines Stromschlags, eines Brandes,
von Problemen mit dem Produkt oder von
Verletzungen!
Überprüfen Sie vor der Installation, ob das
Produkt Mängel aufweist. Wenn das Produkt
beschädigt ist, lassen Sie es nicht installieren.
Stellen Sie das Produkt auf eine saubere,
flache und feste Oberfläche und balancieren
Sie es mit verstellbaren Füßen aus. Andernfalls
kann das Produkt umkippen und Verletzungen
verursachen.
Der Installationsort muss trocken und gut
belüftet sein. Legen Sie keine Teppiche
oder ähnliche Bezüge unter das Produkt.
Unzureichende Belüftung verursacht
Brandgefahr!
Belüftungsöffnungen nicht abdecken
oder blockieren. Andernfalls steigt der
Stromverbrauch und Ihr Produkt kann
beschädigt werden.
Das Produkt darf nicht an Versorgungssysteme
wie Solarstromversorgungen angeschlossen
werden. Andernfalls kann Ihr Produkt durch
plötzliche Spannungsänderungen beschädigt
werden!
Je mehr Kältemittel ein Kühlschrank enthält,
desto größer muss der Installationsort sein.
Wenn der Installationsort zu klein ist, sammeln
sich bei Kältemittelleckagen im Kühlsystem
brennbares Kältemittel und Luftgemisch an. Der
erforderliche Platz für jeweils 8 g Kältemittel
beträgt mindestens 1 m . Die Menge an ³
Kältemittel in Ihrem Produkt ist auf dem

5 / 32 DE
Kühlschrank/ Bedienungsanleitung
S cherhe tsh nwe sei i i i
Typenschild angegeben.
Das Produkt darf nicht an Orten installiert
werden, die direktem Sonnenlicht ausgesetzt
sind, und darf nicht von Wärmequellen wie
Kochfeldern, Heizkörpern usw. ferngehalten
werden.
Wenn es unvermeidlich ist, das Produkt in der
Nähe einer Wärmequelle zu installieren, muss
dazwischen eine geeignete Isolierplatte eingesetzt
werden und die folgenden Mindestabstände zur
Wärmequelle müssen eingehalten werden:
- Mindestens 30 cm von Wärmequellen wie
Kochfeldern, Öfen, Heizgeräten oder Heizöfen
entfernt;
- Mindestens 5 cm von Elektroöfen entfernt.
Die Schutzklasse Ihres Produkts ist Typ I.
Stecken Sie das Produkt in eine geerdete
Steckdose, die den auf dem Typenschild des
Produkts angegebenen Spannungs-, Strom-
und Frequenzwerten entspricht. Die Steckdose
muss mit einem 10 A - 16 A Leistungsschalter
ausgestattet sein. Unser Unternehmen haftet
nicht für Schäden, die entstehen, wenn
das Produkt ohne Erdung und elektrischen
Anschluss gemäß den örtlichen und nationalen
Vorschriften verwendet wird.
Das Produkt darf während der Installation
nicht eingesteckt werden. Andernfalls besteht
die Gefahr eines Stromschlags und von
Verletzungen!
Stecken Sie das Produkt nicht in Steckdosen,
die lose, verrutscht, zerbrochen, verschmutzt,
fettig sind oder es besteht die Gefahr des
Kontakts mit Wasser.
Verlegen Sie das Netzkabel und die Schläuche
(falls vorhanden) des Produkts so, dass keine
Stolpergefahr besteht.
Wenn die stromführenden Teile oder das
Netzkabel Feuchtigkeit ausgesetzt werden,
kann dies zu einem Kurzschluss führen.
Installieren Sie das Produkt daher nicht an
Orten wie Garagen oder Waschküchen, an
denen die Luftfeuchtigkeit hoch ist oder Wasser
spritzen kann. Wenn der Kühlschrank nass
wird, ziehen Sie den Netzstecker und rufen Sie
den autorisierten Kundendienst an.
Schließen Sie Ihren Kühlschrank niemals an
Energiespargeräte an. Solche Systeme sind
schädlich für Ihr Produkt.
1.6 - Sicherheit bei
der Benutzung
Verwenden Sie niemals chemische
Lösungsmittel für das Produkt. Es besteht
Explosionsgefahr!
Wenn das Produkt fehlerhaft funktioniert,
ziehen Sie den Netzstecker und benutzen
Sie es erst, wenn es vom autorisierten
Kundendienst repariert wurde. Es besteht die
Gefahr eines Stromschlags!
Stellen Sie keine Flammenquellen (brennende
Kerzen, Zigaretten usw.) auf oder in der Nähe
des Produkts auf.
Nicht auf das Gerät klettern. Es besteht Sturz-
und Verletzungsgefahr!
Beschädigen Sie die Rohre des
Kühlsystems nicht mit scharfen oder
eindringenden Gegenständen. Das
Kältemittel, das beim Durchstechen der
Kältemittelleitungen, Rohrverlängerungen
oder Oberflächenbeschichtungen austreten
kann, verursacht Hautreizungen und
Augenverletzungen.
Stellen Sie elektrische Geräte nicht in den
Kühlschrank / Tiefkühlschrank, es sei denn,
dies wird vom Hersteller empfohlen.
Achten Sie darauf, dass Sie Ihre Hände oder
andere Körperteile nicht in den beweglichen
Teilen des Kühlschranks einklemmen. Achten
Sie darauf, dass Sie Ihre Finger nicht zwischen
Tür und Kühlschrank drücken. Seien Sie
vorsichtig beim Öffnen und Schließen der Tür,
insbesondere wenn Kinder in der Nähe sind.
Essen Sie niemals Eis, Eiswürfel oder
Tiefkühlkost direkt nach dem Herausnehmen
aus dem Kühlschrank. Es besteht
Erfrierungsgefahr!
Wenn Ihre Hände nass sind, berühren Sie
nicht die Innenwände oder Metallteile des
Gefrierschranks oder die darin gelagerten
Lebensmittel. Es besteht Erfrierungsgefahr!
Stellen Sie keine Dosen oder Flaschen
mit kohlensäurehaltigen Getränken oder
gefrierbaren Flüssigkeiten in das Gefrierfach.
Dosen und Flaschen können platzen. Es
besteht die Gefahr von Verletzungen und
Sachschäden!

6 /32 DE Kühlschrank/ Bedienungsanleitung
S cherhe tsh nwe sei i i i
Stellen oder verwenden Sie keine brennbaren
Sprays, brennbaren Materialien, Trockeneis,
chemische Substanzen oder ähnliche
wärmeempfindliche Materialien in der Nähe
des Kühlschranks. Es besteht Brand- und
Explosionsgefahr!
Lagern Sie keine explosiven Materialien, die
brennbaren Materialien, wie Aerosoldosen
enthalten, in Ihrem Produkt.
Stellen Sie keine mit Flüssigkeit gefüllten
Behälter auf das Produkt. Das Spritzen von
Wasser auf ein elektrisches Teil kann einen
elektrischen Schlag oder die Brandgefahr
verursachen.
Dieses Produkt ist nicht zur Aufbewahrung von
Arzneimitteln, Blutplasma, Laborpräparaten
oder ähnlichen medizinischen Substanzen und
Produkten bestimmt, die der Richtlinie über
Medizinprodukte unterliegen.
Die Verwendung des Produkts gegen den
beabsichtigten Zweck kann dazu führen,
dass sich die darin gelagerten Produkte
verschlechtern oder verderben.
Wenn Ihr Kühlschrank mit blauem Licht
ausgestattet ist, betrachten Sie dieses Licht
nicht mit optischen Geräten. Starren Sie
die UV-LED-Lampe nicht lange direkt an.
Ultraviolettes Licht kann die Augen belasten.
Das Gerät nicht überlasten. Gegenstände
im Kühlschrank können beim Öffnen der Tür
herunterfallen und Verletzungen oder Schäden
verursachen. Ähnliche Probleme können
auftreten, wenn ein Gegenstand auf das
Produkt gelegt wird.
Stellen Sie zur Vermeidung von Verletzungen
sicher, dass Sie das gesamte Eis und Wasser
gereinigt haben, das möglicherweise auf den
Boden gefallen oder gespritzt ist.
Ändern Sie die Position der Regale /
Flaschenhalter an der Tür Ihres Kühlschranks
nur, wenn sie leer sind. Es besteht
Verletzungsgefahr!
Stellen Sie keine Gegenstände auf das Produkt,
die herunterfallen oder umkippen können.
Solche Gegenstände können beim Öffnen der
Tür herunterfallen und Verletzungen und / oder
Sachschäden verursachen.
Schlagen Sie nicht auf Glasoberflächen und
üben Sie keine übermäßige Kraft auf diese aus.
Glasscherben können zu Verletzungen und /
oder Materialschäden führen.
Das Kühlsystem Ihres Produkts enthält
Kältemittel R600a: Die Art des im Produkt
verwendeten Kältemittels ist auf dem
Typenschild angegeben. Dieses Kältemittel
ist brennbar. Achten Sie daher darauf, das
Kühlsystem oder die Rohrleitungen während
des Betriebs nicht zu beschädigen. Wenn die
Rohrleitung beschädigt ist:
- Berühren Sie nicht das Produkt oder das
Netzkabel.
- Halten Sie potenzielle Brandquellen fern, die
zur Entzündung führen können.
- Lüften Sie den Bereich, in dem sich das
Produkt befindet. Keine Lüfter verwenden.
- Rufen Sie den autorisierten Kundendienst an.
Wenn das Produkt beschädigt ist und
Kältemittel austritt, halten Sie sich bitte
vom Kältemittel fern. Kältemittel kann bei
Hautkontakt Erfrierungen verursachen.
1.7- Sicherheit bei der
Wartung und Pflege
Ziehen Sie nicht am Türgriff, wenn Sie
das Produkt zu Reinigungszwecken
bewegen müssen. Der Griff kann brechen
und Verletzungen verursachen, wenn Sie
übermäßige Kraft auf ihn ausüben.
Sprühen oder gießen Sie zu
Reinigungszwecken kein Wasser auf oder
in das Produkt. Es besteht Brand- und
Stromschlaggefahr!
Verwenden Sie zum Reinigen des Produkts
keine scharfen oder abrasiven Werkzeuge.
Verwenden Sie keine Haushaltsreiniger,
Reinigungsmittel, Gas, Benzin, Verdünner,
Alkohol, Firnis usw.
Verwenden Sie im Produkt nur Reinigungs- und
Wartungsprodukte, die für Lebensmittel nicht
schädlich sind.
Verwenden Sie niemals Dampf oder
dampfunterstützte Reinigungsmittel, um das

8 /32 DE Kühlschrank/ Bedienungsanleitung
2 Umweltbedingungen
2.1 Einhaltung der WEEE-Richtlinie
und Entsorgung des Altgeräts:
Diese Gerät entspricht der WEEE-Richtlinie
(2012/19/EU). Dieses Gerät trägt das
Klassifizierungssymbol für Elektro- und Elektronik-
Altgeräte (WEEE).
Dieses Symbol gibt an, dass dieses
Produkt am Ende seiner Lebensdauer
nicht zusammen mit dem normalen
Hausmüll entsorgt werden darf. Das ge-
brauchte Gerät muss zur
Wiederverwertung von elektrischen und elektroni-
schen Geräten an die offizielle Sammelstelle zu-
rückgegeben werden. Um diese Sammelsysteme
zu finden, wenden Sie sich bitte an Ihre örtlichen
Behörden oder Händler, bei denen das Produkt ge-
kauft wurde. Jedes Haushalt spielt eine wichtige
Rolle bei der Rückgewinnung und dem Recycling
von Altgeräten. Eine ordnungsgemäße Entsorgung
gebrauchter Geräte trägt dazu bei, mögliche nega-
tive Folgen für die Umwelt und die menschliche
Gesundheit zu vermeiden.
2.2 Einhaltung der RoHS-Richtlinie:
Das von Ihnen gekaufte Gerät entspricht der RoHS-
Richtlinie der EU (2011/65/EU). Es enthält keinerlei
Materialien, die gemäß der Richtlinie als schädlich
oder verboten gelten.
2.3 Information zur Verpackung
Das Verpackungsmaterial für dieses
Erzeugnis wurde aus Recyclingstoffen
gemäß unseren nationalen
Umweltschutzvorschriften hergestellt.
Entsorgen Sie das Verpackungsmaterial nicht mit
dem Hausmüll oder anderen Abfällen. Bringen Sie
es zu einer von den örtlichen Behörden eingerich-
teten Sammelstelle für Verpackungsmaterial.

9 / 32 DE
Kühlschrank/ Bedienungsanleitung
3 Ihr Kühlschrank
C*Optional: Die Abbildungen in dieser Bedienungsanleitung sind schematisch und stimmen
möglicherweise nicht genau mit Ihrem Produkt überein. Wenn Ihr Produkt nicht die relevanten Tei
enthält, beziehen sich die Informationen auf andere Modelle.
1- Gefrierfach
2- Frischefach
3- Türeinschübe im Frischefach
4- Eierhalter
5- Wasserspender Füllbehälter
6- Wasserspenderbehälter
7- Flaschenablage
8- Stellfüße
9- Gemüsefächer
10- Der Milchbehälter (Kühllagerung)
11- Flaschenablage
12- Glaseinschübe
13- Lüfter
14- Tiefkühlfächer
15- Glaszwischenboden für Gefrierschrankfach
16- Icematic
17- Türeinschübe im Gefrierfach
2
1
*3
45
6
*7
*3
8
8
13
14
14
17
15
16
9
9
*10
*11
*12
Möglicherweise nicht in allen Modellen
verfügbar

10 /32 DE Kühlschrank/ Bedienungsanleitung
4 Installation
4.1 Der geeignete Aufstellungsort
A
Lesen Sie zuerst den Abschnitt
„Sicherheitshinweise“!
Ihr Produkt benötigt eine ausreichende Luftzirkulation,
um effizient zu funktionieren. Wenn das Produkt in eine
Nische gestellt wird, denken Sie daran, mindestens 5
cm Abstand zwischen dem Produkt und der Decke, der
Rückwand und den Seitenwänden zu lassen.
Wenn das Produkt in eine Nische gestellt wird, denken
Sie daran, mindestens 5 cm Abstand zwischen dem
Produkt und der Decke, der Rückwand und den
Seitenwänden zu lassen. Prüfen Sie, ob die Rückwand-
Abstandsschutzkomponente an ihrem Standort
vorhanden ist (falls mit dem Produkt geliefert). Wenn
die Komponente nicht verfügbar ist oder verloren
geht oder heruntergefallen ist, positionieren Sie das
Produkt so, dass zwischen der Rückseite des Produkts
und der Wand des Raums mindestens 5 cm Abstand
verbleiben. Der Freiraum an der Rückseite ist wichtig
für den effizienten Betrieb des Produkts.
AWARNUNG: Verwenden Sie für
den Anschluss an des Stromnetz
keine Verlängerungskabel oder
Mehrfachsteckdosen.
BWARNUNG: Der Hersteller haftet nicht für
alle Schäden, die entstehen, wenn diese
Arbeiten von nicht dazu befugten Personen
aufgeführt werden.
BWARNUNG: Während der Aufstellung
muss der Gerätenetzstecker gezogen sein.
Andernfalls besteht ein ernsthaftes Risiko
für schwere Verletzungen mit Todesfolge.
A
WARNUNG: : Sollte die Eingangsöffnung
am Aufstellungsort zu schmal für das
Gerät sein, bauen Sie die Gerätetür ab
und drehen Sie das Gerät auf die Seite.
Wenden Sie sich an den zuständigen
Kundendienst, wenn sich das Problem so
nicht lösen lässt.
Stellen Sie das Gerät auf eine ebene Fläche, um
Vibrationen zu vermeiden.
Heizung, Herd und ähnlichen Wärmequellen und
mindestens 5 cm von Elektroöfen entfernt auf.
Sonnenlicht aus und bewahren Sie es nicht in
feuchten Umgebungen auf.
Luftzirkulation, um effizient zu funktionieren. Wenn
das Produkt in eine Nische gestellt wird, denken
Sie daran, mindestens 5 cm Abstand zwischen dem
Produkt und der Decke und den Wänden zu lassen.
4.2 Anbringen der Kunststoffkeile
Verwenden Sie die mit dem Gerät gelieferten
Kunststoffkeile, um einen ausreichenden Abstand
für die Luftzirkulation zwischen dem Gerät und der
Wand herzustellen.
1.
Um die Keile zu befestigen, entfernen Sie die
Schrauben an den jeweiligen Gerätestellen und
verwenden die mit den Kunststoffkeilen gelieferten
Schrauben.
2.
Befestigen Sie 2 Kunststoffkeile an der
Lüftungsabdeckung, so wie in der Abbildung
dargestellt.

11 / 32 DE
Kühlschrank/ Bedienungsanleitung
Installation
4.3 Einstellung der Füße
Wenn das Gerät sind nicht in einer
ausbalancierten Position befinden sollte, richten
Sie es entsprechend auf, indem Sie die Stellfüße
entweder rechts- oder linksherum drehen.
Um die Türen vertikal auszurichten,
Unterseite.
Position der Tür einschrauben
Endposition an
Um die Türen horizontal auszurichten,
Lösen Sie die Befestigungsmutter an der
Unterseite
Lösen Sie die Befestigungsmutter, auf der
Oberseite
Einstellschraube (CW/CCW) entsprechend der
Position der Tür einschrauben
Ziehen Sie die Befestigungsmutter für die
Endposition an
Ziehen Sie die Befestigungsmutter an der
Unterseite an
adjusting bolt
Einstellschraube
Befestigungsmutter
Befestigungsmutter
Einstellmutter
Fixing nut
Fixing screw
Befestigungsmutter
Befestigungsschraube

12 /32 DE Kühlschrank/ Bedienungsanleitung
Installation
4.4 Elektrischer Anschluss
A
WARNUNG: Verwenden Sie für
den Anschluss an des Stromnetz
keine Verlängerungskabel oder
Mehrfachsteckdosen.
BWARNUNG: Ein beschädigtes
Kabel darf nur vom autorisierten
Kundendienst ausgetauscht werden.
Unser Unternehmen übernimmt keine Haftung
für alle Schäden aufgrund einer Nutzung ohne
Erdung oder eines Stromanschlusses, der nicht
den örtlichen Vorschriften genügt.
Das Netzkabel muss nach der Aufstellung gut
zugänglich sein.
C
Warnung vor heißer Oberfläche!
Die Seitenwände Ihres Produkts
sind mit Kühlerrohren ausgestattet,
um das Kühlsystem zu verbessern.
Hochdruckflüssigkeit kann durch
diese Oberflächen fließen und heiße
Oberflächen an den Seitenwänden
verursachen. Dies ist normal und
erfordert keine Wartung. Seien Sie
vorsichtig, wenn Sie diese Bereiche
kontaktieren.

13 / 32 DE
Kühlschrank/ Bedienungsanleitung
5 Vorbereitung
5.1 Hinweise für einen
energiesparenden Betrieb
mehmet
ADer Anschluss des Produkts an
elektronische Energiesparsysteme ist
schädlich, da er das Produkt beschädigen
kann.
Für ein freistehendes Gerät; ‚Dieses Kühlgerät
ist nicht für die Verwendung als Einbaugerät
vorgesehen‘ ;
Lassen Sie die Kühlschranktür nicht über längere
Zeit hinweg offen.
Stellen Sie keine heißen Speisen oder Getränke
in den Kühlschrank.
Überfüllen Sie den Kühlschrank nicht. Ein
Blockieren der inneren Luftzirkulation verringert
die Kühlleistung.
Abhängig von den Eigenschaften des jeweiligen
Modells kann das Auftauen von Tiefkühlware im
Frischefach Energie sparen und die Qualität der
auftauenden Lebensmittel bewahren.
Lebensmittel sind in den Schubladen im Kühlfach
aufzubewahren, um Energie zu sparen und
Lebensmittel unter besseren Bedingungen zu
schützen.
Achten Sie darauf, dass die Lebensmittel nicht
mit dem unten beschriebenen Temperatursensor
des Frischefachs in Berührung kommen.
Da heiße und feuchte Luft nicht direkt in Ihr
Produkt eindringt, wenn die Türen nicht geöffnet
werden, optimiert sich Ihr Produkt unter
Bedingungen, die zum Schutz Ihrer Lebensmittel
ausreichen. Bei dieser Energiesparfunktion
funktionieren Funktionen und Komponenten
wie Kompressor, Lüfter, Heizung, Abtauung,
Beleuchtung, Anzeige usw. entsprechend
dem Bedarf an minimalem Energieverbrauch
bei gleichzeitiger Wahrung der Frische Ihres
Lebensmittels.
Wenn mehrere Optionen vorhanden sind,
müssen Glasregale so platziert werden, dass die
Luftauslässe an der Rückwand nicht blockiert
werden. Vorzugsweise verbleiben Luftauslässe
unter dem Glasregal. Diese Kombination kann
dazu beitragen, die Luftverteilung und die
Energieeffizienz zu verbessern.
A
Lesen Sie zuerst den Abschnitt
„Sicherheitshinweise“!

14 /32 DE Kühlschrank/ Bedienungsanleitung
5.2 Erstbetrieb
Bevor Sie den Kühlschrank das erste Mal verwenden,
achten Sie darauf, alle Vorbereitungen gemäß dieser
Bedienungsanleitung, insbesondere wie in den
Abschnitten „Wichtige Hinweise zur Sicherheit und
zum Umweltschutz“ und „Aufstellung“ beschrieben,
durchzuführen.
Lassen Sie das leere Gerät mindesten 12 lang
laufen und öffnen Sie dabei nicht Tür, sofern es
nicht absolut notwendig sein sollte.
CWenn der Kompressor sich einschaltet, ist
ein Geräusch zu hören. Dieses Geräusch
ist vollkommen normal und aufgrund der
komprimierten Flüssigkeiten und Gase
im Kühlkreislauf gelegentlich auch bei
inaktiven Kompressor zu vernehmen.
CEs ist normal, dass die vorderen Ränder
des Kühlschranks warm sind. Diese sind
so gestaltet, dass sie erwärmen, um
Kondensation zu vermeiden.
CBei einigen Modellen schaltet sich
die Anzeigetafel 1 Minuten nach dem
Schließen der Tür automatisch aus. Sie
wird wieder aktiviert, wenn die Tür offen ist
oder eine beliebige Taste gedrückt wird.
5 Vorbereitung

15 / 32 DE
Kühlschrank/ Bedienungsanleitung
6 Betrieb des Produkts
A
Lesen Sie zuerst den Abschnitt
„Sicherheitshinweise“!
Verwenden Sie keine mechanischen
Werkzeuge oder andere Werkzeuge als
die Empfehlungen des Herstellers, um den
Auftauvorgang zu beschleunigen.
Nutzen Sie Teile des Kühlschranks, wie
z.B. die Tür oder die Schubladen nicht als
Unterstützung oder als Trittbrett. Dies kann dazu
führen, dass das Produkt umkippt oder seine
Komponenten beschädigt werden.
Das Gerät darf nur zur Aufbewahrung von
Lebensmitteln verwendet werden.
Schalten Sie das Wasserventil aus, wenn
Sie nicht zu Hause sind (z.B. im Urlaub) und
die Eismaschine oder den Wasserspender
längere Zeit nicht benutzen. Andernfalls können
Wasserlecks auftreten.
6.1Produkt ausschalten
sollen;
- Trennen Sie es vom Stecker,
- Entfernen Sie die Lebensmittel, um Gerüche zu
vermeiden.
- Warten bis das Eis aufgetaut ist,
- Reinigen Sie das Innere und warten Sie, bis es
getrocknet ist.
- Lassen Sie die Türen offen, um Schäden an
Kunststoffinnenkörpern zu vermeiden.

16 /32 DE Kühlschrank/ Bedienungsanleitung
6 Bedienung des Produkts
6.2 Anzeigetafel
Die Anzeigetafeln können je nach Gerätemodell variieren.
Die audioellen und visuellen Funktionen der Anzeigetafel erleichtert Ihnen die Nutzung des Kühlschranks.
C*Optional: Die angezeigten Funktionen sind optional. Die Funktionen auf dem Anzeigefeld
Ihres Produkts können sich in Form und Position unterscheiden.
Lesen Sie zuerst den Abschnitt „Sicherheitshinweise“!
1.
Kabellose Taste
2.
Schnellgefriertaste
3.
Hochtemperatur-/Fehlerwarnung
4.
Energiesparanzeige (Anzeige aus)
5.
Temperatureinstellungstaste für das Gefrierfach
6.
Funktionstaste Kühlfach AUS (Urlaub)
7.
Temperatureinstellungstaste für das Gefrierfach
8.
Taste zum Zurücksetzen der Einstellungen für die
kabellose Verbindung
9.
Modultaste zur Geruchsentfernung
*Möglicherweise nicht in allen Modellen verfügbar
*1
*8
2
345
7
6
*9

17 / 32 DE
Kühlschrank/ Bedienungsanleitung
Nutzung des Gerätes
1. Kabellose Taste
Dieser Schlüssel wird verwendet um über die mobile
HomeWhiz-App eine drahtlose Verbindung mit Ihrem
Produkt herzustellen.
Wenn die Taste längere Zeit (3 Sekunden) gedrückt
wird, blinkt das Symbol für die drahtlose Verbindung
auf dem Display/Bildschirm langsam (in Intervallen
von 0,5 Sekunden). Das Heimnetzwerk wird auf diese
Weise auf dem Produkt initialisiert.
Nach dem Herstellen einer drahtlosen Verbindung mit
dem Produkt leuchtet das Symbol für die drahtlose
Verbindung ( ) kontinuierlich auf.
Wenn die erste Verbindung hergestellt ist, können Sie
die Verbindung durch kurzes Drücken dieser Taste
aktivieren/deaktivieren. Das Symbol für die drahtlose
Verbindung blinkt in kurzen Abständen (von 0,2
Sekunden), bis die Verbindung hergestellt ist. Wenn
die Verbindung aktiv ist, leuchtet das Symbol für das
drahtlose Netzwerk kontinuierlich auf.
Wenn die Verbindung über einen längeren Zeitraum
nicht hergestellt werden kann, überprüfen Sie Ihre
Verbindungseinstellungen und lesen Sie den Abschnitt
„Fehlerbehebung“ im Benutzerhandbuch.
Die HomeWhiz-Anwendung soll für die drahtlose
Verbindung verwendet werden. Installationsschritte
werden in der Anwendung während der Installation
beschrieben.
Sie können auf die Anwendung zugreifen, indem Sie
den QR-Code lesen, der auf dem HomeWhiz-Etikett
des Produkts verfügbar ist. Die Anwendung wird über
den App Store für iOS-Geräte und über den Play Store
für Android-Geräte angeboten.
Besuchen Sie https://www.homewhiz.com/ für
detaillierte Informationen.„
2. Schnellgefriertaste
Wenn die Schnellgefriertaste gedrückt wird, leuchtet
die LED auf der Taste und die Schnellgefrierfunktion
muss aktiviert werden. Die Temperatur des
Gefrierfachs ist auf -27 Grad Celsius eingestellt.
Drücken Sie die Taste erneut, um die Funktion
abzubrechen. Die Schnellgefrierfunktion wird nach 24
Stunden automatisch abgebrochen. Um eine große
Menge an frischen Lebensmitteln einzufrieren, drücken
Sie die Schnellgefriertaste, bevor Sie die Lebensmittel
in das Gefrierfach legen.
3. Hochtemperatur-/Fehlerwarnung
Diese Anzeige ( ) muss aktiv sein, wenn Ihr
Kühlschrank keine ausreichende Kühlung durchführen
kann oder wenn ein Sensorfehler vorliegt. „E“ muss
auf der Temperaturanzeige des Gefrierfachs und
Zahlen wie 1,2,3… auf der Temperaturanzeige des
Kühlfachs angezeigt werden. Diese Zahlen geben dem
autorisierten Dienst Auskunft über den aufgetretenen
Fehler.
Das Ausrufezeichen kann angezeigt werden, wenn
Sie warme Lebensmittel in das Gefrierfach laden oder
die Tür längere Zeit offen halten. Dies ist kein Fehler.
Diese Warnung wird erlischen, wenn die Lebensmittel
abgekühlt sind oder wenn eine Taste gedrückt wird.
4. Energiesparanzeige (Anzeige aus)
Die Energiesparfunktion wird automatisch aktiviert
und das Energiesparsymbol wird angezeigt,
wenn die Tür des Produkts längere Zeit nicht
geöffnet oder geschlossen wird. ( ) Wenn die
Energiesparfunktion aktiv ist, müssen alle Symbole
auf dem Bildschirm außer dem Energiesparsymbol
deaktiviert sein. Wenn Sie bei aktivierter
Energiesparfunktion eine andere Taste drücken oder
die Tür öffnen, stellt sich diese Funktion aus und
die Symbole auf der Anzeige leuchten wieder auf.
Die Energiesparfunktion ist eine ab Werk aktivierte
Funktion und kann nicht abgebrochen werden.
5. Temperatureinstellungstaste für das
Gefrierfach
Die Temperatureinstellung erfolgt für das Kühlfach.
Durch das Drücken dieser Taste wird die Einstellung
der Gefrierfachtemperatur auf
-18, -19, -20, -21,
-22, -23, -24
Grad Celsius möglich.
6.Funktionstaste Kühlfach AUS (Urlaub)
Drücken Sie die Taste 3 Sekunden lang, um die
Urlaubsfunktion zu aktivieren. Der Urlaubsmodus
wird aktiviert und die LED an der Taste leuchtet. Auf
der Temperaturanzeige des Kühlraums muss „- -“
angezeigt werden, und der Kühlraum führt keine
aktive Kühlung durch. Sie dürfen Ihre Lebensmittel

18 /32 DE Kühlschrank/ Bedienungsanleitung
Nutzung des Gerätes
nicht im Kühlfach aufbewahren, wenn diese Funktion
aktiviert ist. Die anderen Fächer kühlen entsprechend
den eingestellten Temperaturen weiter ab. Drücken
Sie die Taste erneut 3 Sekunden lang, um diese
Funktion abzubrechen.
7. Temperatureinstellungstaste für das
Gefrierfach
Ermöglicht die Einstellung der Temperatur für das
Kühlfach. Durch das Drücken dieser Taste wird die
Einstellung der Gefrierfachtemperatur auf 8, 7, 6, 5,
4, 3, 2 und 1 Grad Celsius möglich.
8. Taste zum Zurücksetzen der Einstellungen für
die kabellose Verbindung
Um die Einstellungen für die drahtlose Verbindung
zurückzusetzen, drücken Sie gleichzeitig 3 Sekunden
lang die Tasten Schnellgefrieren ( ) und drahtlose
Verbindung ( ). Alle zuvor aufgezeichneten
Benutzerinformationen werden auf einem Produkt
entfernt, bei dem die Einstellungen für die drahtlose
Verbindung auf die Werkseinstellungen zurückgesetzt/
wiederhergestellt werden.
9.Modultaste zur Geruchsentfernung
Drücken Sie diese Taste 3 Sekunden lang, um
die Geruchsentfernungsfunktion zu aktivieren/
deaktivieren. Die LED an der Taste leuchtet auf,
wenn die Geruchsentfernungsfunktion aktiviert
ist. Wenn die Funktion aktiviert ist, wird das
Geruchsentfernungsmodul regelmäßig betrieben.

19 / 32 DE
Kühlschrank/ Bedienungsanleitung
Nutzung des Gerätes
1
*2
3
4
5
6
7
*8
*Möglicherweise nicht in allen Modellen verfügbar
6.3 Anzeigetafel
Die Anzeigetafeln können je nach Gerätemodell variieren.
Die audioellen und visuellen Funktionen der Anzeigetafel erleichtert Ihnen die Nutzung des
Kühlschranks.
1.
Hochtemperatur-/Fehlerwarnung
2.
Kabellose Taste
3.
Temperatureinstellungstaste für das Gefrierfach
4.
Temperatureinstellungstaste für das Gefrierfach
5.
Funktionstaste Kühlfach AUS (Urlaub)
6.
Tastensperre
7.
Schnellgefriertaste
8.
Taste zum Zurücksetzen der Einstellungen für die
kabellose Verbindung
C*Optional: Die angezeigten Funktionen sind optional. Die Funktionen auf dem Anzeigefeld
Ihres Produkts können sich in Form und Position unterscheiden.

20 /32 DE Kühlschrank/ Bedienungsanleitung
Nutzung des Gerätes
1. Hochtemperatur-/Fehlerwarnung
Diese Anzeige ( ) muss aktiv sein, wenn Ihr
Kühlschrank keine ausreichende Kühlung durchführen
kann oder wenn ein Sensorfehler vorliegt. „E“ muss
auf der Temperaturanzeige des Gefrierfachs und
Zahlen wie 1,2,3… auf der Temperaturanzeige des
Kühlfachs angezeigt werden. Diese Zahlen geben dem
autorisierten Dienst Auskunft über den aufgetretenen
Fehler.
Das Ausrufezeichen kann angezeigt werden, wenn
Sie warme Lebensmittel in das Gefrierfach laden oder
die Tür längere Zeit offen halten. Dies ist kein Fehler.
Diese Warnung wird erlischen, wenn die Lebensmittel
abgekühlt sind oder wenn eine Taste gedrückt wird.
2. Kabellose Taste
Dieser Schlüssel wird verwendet um über die mobile
HomeWhiz-App eine drahtlose Verbindung mit Ihrem
Produkt herzustellen.
Wenn die Taste längere Zeit (3 Sekunden) gedrückt
wird, blinkt das Symbol für die drahtlose Verbindung
auf dem Display/Bildschirm langsam (in Intervallen
von 0,5 Sekunden). Das Heimnetzwerk wird auf diese
Weise auf dem Produkt initialisiert.
Nach dem Herstellen einer drahtlosen Verbindung mit
dem Produkt leuchtet das Symbol für die drahtlose
Verbindung ( ) kontinuierlich auf.
Wenn die erste Verbindung hergestellt ist, können Sie
die Verbindung durch kurzes Drücken dieser Taste
aktivieren/deaktivieren. Das Symbol für die drahtlose
Verbindung blinkt in kurzen Abständen (von 0,2
Sekunden), bis die Verbindung hergestellt ist. Wenn
die Verbindung aktiv ist, leuchtet das Symbol für das
drahtlose Netzwerk kontinuierlich auf.
Wenn die Verbindung über einen längeren Zeitraum
nicht hergestellt werden kann, überprüfen Sie Ihre
Verbindungseinstellungen und lesen Sie den Abschnitt
„Fehlerbehebung“ im Benutzerhandbuch.
Die HomeWhiz-Anwendung soll für die drahtlose
Verbindung verwendet werden. Installationsschritte
werden in der Anwendung während der Installation
beschrieben.
Sie können auf die Anwendung zugreifen, indem Sie
den QR-Code lesen, der auf dem HomeWhiz-Etikett
des Produkts verfügbar ist. Die Anwendung wird über
den App Store für iOS-Geräte und über den Play Store
für Android-Geräte angeboten.
Besuchen Sie https://www.homewhiz.com/ für
detaillierte Informationen.„
3. Temperatureinstellungstaste für das
Gefrierfach
Die Temperatureinstellung erfolgt für das Kühlfach.
Durch das Drücken dieser Taste wird die Einstellung
der Gefrierfachtemperatur auf
-18, -19, -20, -21,
-22, -23, -24
Grad Celsius möglich.
4. Temperatureinstellungstaste für das
Gefrierfach
Ermöglicht die Einstellung der Temperatur für das
Kühlfach. Durch das Drücken dieser Taste wird die
Einstellung der Gefrierfachtemperatur auf 8, 7, 6, 5,
4, 3, 2 und 1 Grad Celsius möglich.
5.Funktionstaste Kühlfach AUS (Urlaub)
Drücken Sie die Taste 3 Sekunden lang, um die
Urlaubsfunktion zu aktivieren. Der Urlaubsmodus ist
aktiviert und das Urlaubssymbol leuchtet auf, auf
der Temperaturanzeige des Kühlraums muss „- -“
angezeigt werden, und der Kühlraum führt keine
aktive Kühlung durch. Sie dürfen Ihre Lebensmittel
nicht im Kühlfach aufbewahren, wenn diese Funktion
aktiviert ist. Die anderen Fächer kühlen entsprechend
den eingestellten Temperaturen weiter ab. Drücken
Sie die Taste erneut 3 Sekunden lang, um diese
Funktion abzubrechen. Der Urlaubsmodus wird
aktiviert und das Urlaubssymbol leuchtet auf.
6.Tastensperre
Wenn die Tastensperrtaste ( ) 3 Sekunden lang
gedrückt wird, wird die Tastensperre aktiviert und und
das Tastensperrsymbol leuchtet auf. Drücken Sie die
Taste erneut 3 Sekunden lang, um die Tastensperre
abzubrechen.
Sie können die Tastensperrtastenfunktion
verwenden, wenn Sie verhindern möchten, dass die
Temperatureinstellung des Kühlschranks geändert
werden kann.

21 / 32 DE
Kühlschrank/ Bedienungsanleitung
Nutzung des Gerätes
7. Schnellgefriertaste
Wenn die Schnellgefriertaste gedrückt wird,
leuchtet das Schnellgefriersymbol auf und die
Schnellgefrierfunktion muss aktiviert werden. Die
Temperatur des Gefrierfachs ist auf -27 Grad Celsius
eingestellt. Drücken Sie die Taste erneut, um die
Funktion abzubrechen. Die Schnellgefrierfunktion wird
nach 24 Stunden automatisch abgebrochen. Um eine
große Menge an frischen Lebensmitteln einzufrieren,
drücken Sie die Schnellgefriertaste, bevor Sie die
Lebensmittel in das Gefrierfach legen.
8. Taste zum Zurücksetzen der Einstellungen für
die kabellose Verbindung
Um die Einstellungen für die drahtlose Verbindung
zurückzusetzen, drücken Sie gleichzeitig 3 Sekunden
lang die Tasten Schnellgefrieren ( ) und drahtlose
Verbindung ( ). Alle zuvor aufgezeichneten
Benutzerinformationen werden auf einem Produkt
entfernt, bei dem die Einstellungen für die drahtlose
Verbindung auf die Werkseinstellungen zurückgesetzt/
wiederhergestellt werden.
6.4Geruchvernichtungsmodul
(FreshGuard)
(Diese Funktion ist optional)
DasGeruchvernichtungsmodul beseitigt schlechte
Gerüche in Ihrem Kühlschrank noch bevor sie in
die Lebensmittel eindringen können. Dank dieses
an der Decke des Fachs für frische Lebensmittel
angebrachten Moduls werden unangenehme
Gerüche abgeführt, indem die Luft aktiv zum
Geruchsfilter geleitet wird. Anschließend wird
die vom Filter gereinigte Luft wieder in das Fach
für frische Lebensmittel zurückgeleitet. Auf
diese Weise werden während der Lagerung von
Lebensmitteln entstehende unerwünschte Gerüche
beseitigt, bevor sie in die Lebensmittel eindringen.
Dies wird durch das Gebläse, die LED und den im
Modul integrierten Geruchsfilter erzielt.
Wenn Sie das Desodorierungsmodul verwenden
möchten, aktivieren Sie es bitte über die
Anzeigetaste.

22 /32 DE Kühlschrank/ Bedienungsanleitung
Nutzung des Gerätes
6.5 Gemüsefach mit kontrollierter
Luftfeuchtigkeit (EverFresh+)
(Optional)
Dank des Gemüsefachs mit kontrollierter
Luftfeuchtigkeit können Gemüse und
Obst in einer Umgebung mit idealen
Feuchtigkeitsbedingungen länger gelagert
werden. Mit dem Feuchtigkeitseinstellsystem mit
3 Optionen vor Ihrem Gemüsefach können Sie die
Luftfeuchtigkeit im Fach gemäß den von Ihnen
gelagerten Lebensmitteln steuern. Wir empfehlen
Ihnen, Ihre Lebensmittel zu lagern, indem Sie die
Gemüseoption auswählen, wenn Sie nur Gemüse
lagern und die Obstoption, wenn Sie nur Obst
lagern, und die gemischte Option, wenn Sie
gemischte Lebensmittel lagern.
Wir empfehlen, Gemüse und Obst nicht in Tüten
zu lagern, um die Lagerzeit der Lebensmittel zu
verbessern und das Feuchtigkeitskontrollsystem
besser zu nutzen. Wenn Sie sie in Plastiktüten
lassen, verrottet das Gemüse in kurzer Zeit. Wir
empfehlen, insbesondere Gurken und Brokkolis
nicht in geschlossenen Tüten aufzubewahren.
Verwenden Sie in Situationen, in denen der
Kontakt mit anderem Gemüse nicht bevorzugt
wird, Verpackungsmaterialien wie Papier mit einer
bestimmten Porosität in Bezug auf die Hygiene.
Wenn Sie das Gemüse platzieren, legen Sie
schweres und hartes Gemüse unten und leichtes
und weiches oben, wobei Sie das spezifische
Gewicht des Gemüses berücksichtigen.
Legen Sie Früchte mit einer hohen
Ethylengasproduktion wie Birne, Aprikose,
Pfirsich und insbesondere Apfel nicht mit
anderen Gemüse- und Obstsorten in das gleiche
Gemüsefach. Das aus diesen Früchten austretende
Ethylengas kann dazu führen, dass anderes
Gemüse und Obst schneller reift und in kürzerer
Zeit verrottet.
6.6 Blaues Licht/HarvestFresh
(Optional)
Für blaues Licht,
Gemüse und Obst, die in mit blauem Licht
beleuchteten Gemüsefächern gelagert werden,
führen weiterhin eine Photosynthese durch und
behalten dank des Einflusses der Wellenlänge des
blauen Lichts ihren C-Vitamin-Spiegel.
Für HarvestFresh,
Gemüse und Obst, die in mit HarvestFresh-
Technologie beleuchteten Gemüsefächern gelagert
werden, behalten dank der Zyklen von blauem,
grünem, rotem Licht und Dunkelheit, die den
Tageszyklus simulieren, ihren Vitaminspiegel
(Vitamin A und C) für einen längeren Zeitraum.
Wenn die Tür Ihres Kühlschranks während der
Dunkelperiode der HarvestFresh-Technologie
geöffnet wird, erkennt Ihr Kühlschrank dies auto-
matisch und beleuchtet das Gemüsefach jeweils
für Ihre Zweckmäßigkeit mit einem der blauen,
grünen oder roten Lichter. Die Dunkelperiode wird
fortgesetzt, wenn Sie die Tür Ihres Kühlschranks
so schließen, dass sie die Nachtperiode des
Tageszyklus darstellt.

23 / 32 DE
Kühlschrank/ Bedienungsanleitung
Nutzung des Gerätes
6.7 Verwendung des
Wasserspenders
(Diese Funktion ist optional)
CDas Wasser in ersten Gläsern aus dem
Wasserspender ist normalerweise warm.
CWenn der Wasserspender für eine längere
Zeit nicht genutzt wurde, gießen Sie die
ersten Gläser Wasser weg, um sauberes
Wasser zu erhalten.
1. Drücken Sie den Arm des Wasserspenders
mit Ihrem Glas. Es ist einfacher, den Arm mit
der Hand zu drücken, wenn Sie ein weiches
Plastikglas verwenden.
2. Lassen Sie den Arm los, nachdem Sie Ihr Glas
nach Belieben mit Wasser gefüllt haben.
CDie Menge des Wasserflusses aus dem
Spender hängt vom Druck ab, den Sie
auf den Arm ausüben. Lassen Sie den
Druck auf den Arm leicht ab, wenn der
Wasserstand in Ihrem Glas/Behälter
erhöht wird, um ein Überlaufen zu
verhindern. Wenn Sie leicht auf den
Arm drücken, wird Wasser tropfen.
Dies ist normal und keine Fehlfunktion.
6.8 Füllen des Wassertanks
des Wasserspenders
Öffnen Sie den Deckel des Wassertanks wie in
der Abbildung gezeigt. Gießen Sie reines und
sauberes Trinkwasser hinein. Schließen Sie den
Deckel.
6.9 Reinigung des Wassertanks
Nehmen Sie das Wassertankgehäuse in Inneren
der Türeinlassung heraus.
Lösen Sie es ab, indem Sie beide Seiten der Tür-
einlassung halten.
Halten Sie beide Seiten des Wassertanks in einem
Winkel von 45° und nehmen Sie an.
Nehmen Sie den Wassertankdeckel zum Reinigen
ab.

24 /32 DE Kühlschrank/ Bedienungsanleitung
Nutzung des Gerätes
A
Füllen Sie in den Wassertank niemals mit
Fruchtsaft, Sprudelgetränken, Spirituosen
oder anderen, nicht für die Verwendung
in einem Wasserspender geeigneten
Flüssigkeiten. Die Verwendung dieser
Flüssigkeiten führt zu Funktionsausfällen
und nicht reparablen Schäden am
Wasserspender. Eine derartige Nutzung
des Wasserspenders fällt nicht unter die
Garantie. Bestimmte Stoffe und Zusätze
in den Getränken / Flüssigkeiten kann zu
Materialschäden am Wassertank führen.
ADer Wassertank und die Komponenten
des Wasserspenders dürfen nicht im
Geschirrspüler gewaschen werden.
CDie Komponenten des Wassertanks
und des Wasserspenders dürfen
nicht im Geschirrspüler gewaschen
werden.

25 / 32 DE
Kühlschrank/ Bedienungsanleitung
Nutzung des Gerätes
6.10 Der Milchbehälter (Kühllagerung)
(Diese Funktion ist optional)
Der Milchbehälter (Kühllagerung)“ sorgt für eine
niedrigere Temperatur im Kühlschrankfach.
Verwenden Sie diesen Behälter, um Delikatessen
(Salami, Würstchen, Milchprodukte usw.)
aufzubewahren, die eine niedrigere Lagertemperatur
erfordern, oder Fleisch-, Hühner- oder Fischprodukte
für den sofortigen Verzehr. Bewahren Sie kein Obst
und Gemüse in diesem Behälter auf.
6.11Gemüsefach
Der Gemüsebehälter im Kühlschrank hält das
Gemüsefach frisch, indem die Feuchtigkeit
erhalten bleibt. Für diesen Zweck ist die Zirkulation
der Kaltluft im Gemüsefach intensiver. Lagern
Sie Obst oder Gemüse in diesem Fach. Lagern
grünblättriges Gemüse getrennt von Früchten, um
deren Leben zu verlängern.
6.12 Ionisator
(Diese Funktion ist optional)
Das Ionisatorsystem in der Luftzufuhrleitung des
Frischefachs dient zur Ionisierung der Luft. Die
Emission negativer Ion beseitigt Bakterien und
andere Geruch verursachende Moleküle in der Luft.
6.13 Geruchsfilter
(Diese Funktion ist optional)
Der Geruchsfilter in der Luftzufuhrleitung
des Frischefachs verhindert die Entstehung
unangenehmer Gerüche.
6.14 Eismaschine und
Eiswürfelbehälter
(Diese Funktion ist optional)
Füllen Sie die Eismaschine mit Wasser und
stellen Sie diese an ihren Platz. Das Eis sollte
nach ca. zwei Stunden fertig sein. Nehmen Sie
die Eismaschine nicht heraus, um an das Eis zu
gelangen.
Drehen Sie den Regler auf dem Eisfach rechts um
90°; das Eis fällt dann in den Eiswürfelbehälter
unten. Sie können dann den Eiswürfelbehälter
herausnehmen und das Eis servieren.
CDer Eiswürfelbehälter ist nur zur
Aufbewahrung von Eis gedacht. Er
darf nicht mit Wasser gefüllt werden.
Andernfalls könnte er zerbrechen.
CBei Produkten mit automatischer
Eismaschine ist beim Spenden des
Eises möglicherweise ein Geräusch zu
hören. Dieser Ton ist normal und kein
Anzeichen für einen Fehler.

26 /32 DE Kühlschrank/ Bedienungsanleitung
Nutzung des Gerätes
6.15 Einfrieren frischer Lebensmittel
Um Lebensmittel in guter Qualität aufzubewahren,
müssen die in das Gefrierfach gelegten
Produkte so schnell wie möglich mit Hilfe der
Schnellgefrierfunktion tiefgekühlt werden
Um eine große Menge frischer Lebensmittel
einzufrieren, drücken Sie 24 Stunden vor dem
Einlegen der Lebensmittel in das Gefrierfach die
Schnellgefriertaste.
Das Einfrieren von möglichst frischen
Lebensmitteln verlängert den möglichen
Aufbewahrungszeitraum im Gefrierfach.
Verpacken Sie die Lebensmittel dazu in luftdichte
Verpackungen und verschließen Sie diese fest.
Achten Sie darauf, dass die Lebensmittel
gut verpackt sind, bevor Sie diese in das
Gefriergerät legen. Verwenden Sie für das
Gefriergerät geeignete Behältnisse, Alufolie,
feuchtigkeitsbeständiges Papier, Kunststofftüten
oder vergleichbares Verpackungsmaterial, nicht
jedoch das traditionelle Packpapier.
Markieren Sie jede Lebensmittelverpackung,
indem Sie vor dem Einfrieren das Datum auf
die Verpackung schreiben, damit Sie bei jedem
Öffnen des Gefrierschranks die Frische der
Verpackung feststellen können. Bewahren Sie
ältere Portionen im vorderen Bereich auf, damit
diese zuerst verbraucht werden.
Tiefgefrorene Lebensmittel müssen unmittelbar
nach dem Auftauen verzehrt werden, und dürfen
nicht noch einmal tiefgefroren werden.
Frieren Sie nicht zu große Mengen auf einmal
ein.
Gefrierfacheinstellung Frischefacheinstellung
Beschreibungen
-18°C 4°C Das ist die standardmäßige, empfohlende Einstellung
-20,-22 oder -24°C 4°C Diese Einstellungen werden für Umgebungstemperaturen
empfohlen, die 30°C überschreiten.
Schnellgefrieren 4°C
Drücken Sie die Schnellgefrierfunktion 24 Stunden vor
dem Einlegen des Lebensmittels, das Produkt wird auf die
vorherigen Einstellungen zurückgesetzt, wenn der Prozess
abgeschlossen ist.
-18°C oder kälter 2°C
Verwenden Sie diese Einstellungen, wenn Sie
überzeugt sind, dass das Frischefach, aufgrund der
Umgebungstemperatem oder dem Öffnen der Tür nicht kalt
genug sind.
6.16 Empfehlungen für Aufbewahrung
gefrorener Lebensmittel
Das Fach muss auf mindestens -18°C eingestellt
sein.
1. Stellen Sie die Lebensmittel so schnell
wie möglich in den Gefrierschrank, um ein
Auftauen zu vermeiden.
2. Überprüfen Sie vor dem Einfrieren das
„Verfallsdatum“ auf der Verpackung, um
sicherzustellen, dass es nicht abgelaufen ist.
3. Stellen Sie sicher, dass die Verpackung des
Lebensmittels nicht beschädigt ist.
6.17 Einzelheiten zum Tiefkühler
Gemäß den IEC 62552-Standards muss das
Gefriergerät über eine Kapazität zum Einfrieren
von 4,5 kg an Lebensmitteln bei Temperaturen
von -18°C oder niedriger in 24 Stunden pro
jeweils 100 Liter an Gefrierfachvolumen verfügen.
Lebensmittel können über eine längere Zeit hinweg
nur bei Temperaturen von weniger als -18°C
gelagert werden. Sie können die Lebensmittel
über Monate frisch halten (im Tiefkühlgerät bei
Temperaturen von oder niedriger als -18°C Grad).

27 / 32 DE
Kühlschrank/ Bedienungsanleitung
Nutzung des Gerätes
Die einzufrierenden Lebensmittel dürfen nicht
mit bereits tiefgekühlten Produkten in Berührung
kommen, um ein teilweises Auftauen zu
verhindern.
Blanchieren Sie das Gemüse und gießen Sie das
Wasser ab, um die Lagerzeit bei Tiefkühlung zu
verlängern. Legen Sie das Gefriergut nach dem
Abgießen in luftdichte Verpackungen und dann
in das Gerriergerät. Bananen, Tomaten. Salat,
Sellerie, gekochte Eier, Kartoffeln und vergleichbare
Lebensmittel dürfen nicht eingepackt werden. Ein
Einfrieren solcher Lebensmittel verringert lediglich
den Nährwert und die Lebensmittelqualität und
führt zu rascherem Verderben, und damit zu
ernsten Gesundheitsschänden führen.
6.18 Einlegen von Lebensmitteln
Gefrierfacheinschübe
Verschiedenes
Gefriergut,
einschließlich von
Fleisch, Fisch,
Eiscreme, Gemüse usw.
Frischefacheinschübe
Lebensmittel in Töpfen,
Behältern mit Deckeln
und Verschlusskappen,
sowie Eier
(geschlossenen
Gefaßen)
Türeinschübe im
Frischefach
In kleinen Verpackungen
befindliche Lebensmittel
oder Geträke..
Gemüsefach Obst und Gemüse
Fach für frische
Lebensmittel
Feinkostprodukte
(Brotaufstriche,
Fleischprodukte für den
raschen Verbrauch)
6.19 Warnton bei offener Tür
(Diese Funktion ist optional)
Ein Signalton ertönt, wenn die Gerätetür für
länger als 1,5 Minute geöffnet ist. Der Signalton
verstummt, wenn die Tür geschlossen oder eine
beliebige Taste auf der Anzeige (sofern vorhanden)
.wird
6.20 Beleuchtungslampe
Als Innenlampen werden LED-Leuchten verwendet.
Kontaktieren Sie bei Problemen mit dem Geräts
mit dieser Lampe den zuständigen Kundendienst.
Die in diesem Gerät verwendeten Lampen können
nicht für die Hausbeleuchtung verwendet werden.
Die beabsichtigte Verwendung dieser Lampe soll
dem Benutzer helfen, Lebensmittel sicher und
bequem in den Kühl- / Gefrierschrank zu stellen.

30 /32 DE Kühlschrank/ Bedienungsanleitung
8 Problemlösung
Bitte arbeiten Sie diese Liste durch, bevor Sie sich an den Kundendienst wenden. Das kann Ihnen Zeit und
Geld sparen. Diese Liste enthält häufig aufgetretene Probleme, die nicht auf Material- oder Verarbeitungsfehler
zurückzuführen sind. Nicht alle hier beschriebenen Funktionen sind bei jedem Modell verfügbar.
Der Kühlschrank schaltet sich nicht ein.
Möglicherweise ist er nicht richtig angeschlossen.
>>> Schließen Sie das Gerät richtig an.
Die entsprechende Haussicherung ist
herausgesprungen oder durchgebrannt. >>>
Prüfen Sie die Sicherung.
Kondensation an den Seitenwänden des
Kühlbereiches (Multizone, Kühlkontrolle und
FlexiZone).
Die Tür wurde häufig geöffnet/geschlossen. >>>
Verzichten Sie auf häufiges Öffnen/Schließen der
Kühlschranktür.
Die Umgebung könnte zu feucht sein. >>>
Installieren Sie das Kühlschrank nicht an sehr
feuchten Orten.
Lebensmittel mit hohem Feuchtigkeitsgehalt
wurden in Behältern ohne Deckel in den
Kühlschrank gegeben. >>> Geben Sie
Lebensmittel mit hohem Feuchtigkeitsgehalt nicht
in offenen Behältern in den Kühlschrank.
Die Kühlschranktür steht offen. >>> Halten Sie
die Kühlschranktüren nur möglichst kurz geöffnet.
Das Thermostat wurde auf eine sehr niedrige
Temperatur eingestellt. >>> Stellen Sie das
Thermostat auf einen geeigneten Wert ein.
Der Kompressor arbeitet nicht.
Eine Schutzschaltung stoppt den Kompressor
bei kurzzeitigen Unterbrechungen der
Stromversorgung und wenn das Gerät zu oft
und schnell ein- und ausgeschaltet wird, um
eine Überdruck des Kühlmittels im System zu
vermeiden. Der Kühlschrank beginnt nach etwa
sechs Minuten wieder zu arbeiten. Bitte wenden
Sie sich an den autorisierten Kundendienst, falls
Ihr Kühlschrank nach Ablauf dieser Zeit nicht
wieder zu arbeiten beginnt.
Das Kühlgerät wird abgetaut. >>> Dies ist
bei einem Kühlschrank mit vollautomatischem
Abtauen völlig normal. Das Gerät wird regelmäßig
abgetaut.
Der Kühlschrank ist nicht angeschlossen. >>>
Achten Sie darauf, dass der Stecker in die
Steckdose passt.
Die Temperatureinstellungen stimmen nicht. >>>
Wählen Sie den richtigen Temperaturwert.
Es liegt ein Stromausfall vor. >>> Der
Kühlschrank setzt seinen Betrieb fort, wenn die
Stromversorgung wiederhergestellt ist.
Das Betriebsgeräusch nimmt zu, wenn der
Kühlschrank arbeitet.
Das Leistungsverhalten des Kühlgerätes kann sich
je nach Umgebungstemperatur ändern. Dies ist
völlig normal und keine Fehlfunktion.
Der Kühlschrank arbeitet sehr intensiv oder über
eine sehr lange Zeit.
Ihr neues Gerät ist vielleicht etwas größer als sein
Vorgänger. Große Kühlgeräte arbeiten oft längere
Zeit.
Die Umgebungstemperatur ist eventuell sehr hoch.
>>> Bei hohen Umgebungstemperaturen arbeitet
das Gerät etwas länger.
Der Kühlschrank wurde erst vor Kurzem in Betrieb
genommen oder mit Lebensmitteln gefüllt. >>>
Wenn das Gerät erst vor Kurzem in Betrieb
genommen oder mit Lebensmitteln gefüllt wurde,
dauert es etwas länger, bis die eingestellte
Temperatur erreicht ist. Dies ist völlig normal.
Kurz zuvor wurden größere Mengen warmer
Speisen in den Kühlschrank gestellt. >>> Geben
Sie keine warmen oder gar heißen Speisen in den
Kühlschrank.
Die Türen wurden häufig geöffnet oder
längere Zeit nicht richtig geschlossen. >>>
Der Kühlschrank muss länger arbeiten, weil
warme Luft in den Innenraum eingedrungen ist.
Vermeiden Sie häufiges Öffnen der Türen.
Die Tür des Kühl- oder Tiefkühlbereichs war nur
angelehnt. >>> Vergewissern Sie sich, dass die
Türen richtig geschlossen wurden.
Die Kühlschranktemperatur ist sehr
niedrig eingestellt. >>> Stellen Sie die
Kühlschranktemperatur höher ein. Warten Sie
dann ab, bis diese Temperatur erreicht ist.
Die Türdichtungen von Kühl- oder Gefrierbereich
sind verschmutzt, verschlissen, beschädigt oder
sitzen nicht richtig. >>> Reinigen oder ersetzen
Sie die Dichtung. Beschädigte oder defekte
Dichtungen führen dazu, dass der Kühlschrank
länger arbeiten muss, um die Temperatur halten
zu können.
Die Temperatur im Kühlbereich ist angemessen,
während Temperatur im Tiefkühlbereich sehr
niedrig ist.
Die Tiefkühlbereichtemperatur ist sehr niedrig
eingestellt. >>> Tiefkühlbereichtemperatur höher
einstellen, Temperatur nach einer Weile prüfen.

31 / 32 DE
Kühlschrank/ Bedienungsanleitung
Fehlerbehebung
Die Temperatur im Tiefkühlbereich ist
angemessen, während die Temperatur im
Kühlbereich sehr niedrig ist.
Die Kühltemperatur ist sehr niedrig eingestellt.
>>> Stellen Sie die Kühltemperatur wärmer ein,
prüfen Sie die Temperatur nach einer Weile.
Im Kühlbereich gelagerte Lebensmittel frieren
ein.
Die Kühlbereichtemperatur ist sehr hoch
eingestellt. >>> Kühlbereichtemperatur niedriger
einstellen, Temperatur nach einer Weile prüfen.
Die Temperatur im Kühl- oder Tiefkühlbereich ist
sehr hoch.
Die Kühlbereichtemperatur ist sehr hoch
eingestellt. >>> Die Kühlbereichtemperatur wirkt
sich auf die Temperatur des Tiefkühlbereichs aus.
Stellen Sie den Kühl- oder Tiefkühlbereich auf eine
geeignete Temperatur ein.
Türen wurden häufig geöffnet oder längere Zeit
nicht richtig geschlossen. >>> Verzichten Sie auf
häufiges Öffnen der Türen.
Die Tür wurde eventuell nicht richtig geschlossen.
>>> Tür richtig schließen.
Der Kühlschrank wurde erst vor Kurzem in Betrieb
genommen oder mit Lebensmitteln gefüllt. >>>
Dies ist normal. Wenn das Gerät erst vor Kurzem
in Betrieb genommen oder mit Lebensmitteln
gefüllt wurde, dauert es etwas länger, bis die
eingestellte Temperatur erreicht ist.
Kurz zuvor wurden größere Mengen warmer
Speisen in den Kühlschrank gestellt. >>> Geben
Sie keine warmen oder gar heißen Speisen in den
Kühlschrank.
Vibrationen oder Betriebsgeräusche.
Der Boden ist nicht stabil oder gerade. >>> Falls
der Kühlschrank bei Bewegung leicht wackelt,
richten Sie ihn mit den Füßen aus. Achten Sie
darauf, dass der Boden eben ist und das Gewicht
des Kühlschranks problemlos tragen kann.
Gegenstände, die auf dem Kühlschrank abgestellt
wurden, können Geräusche verursachen. >>>
Nehmen Sie die Gegenstände herunter.
Fließ- oder Spritzgeräusche sind zu hören.
Aus technischen Gründen bewegen sich
Flüssigkeiten und Gase innerhalb des Gerätes.
>>> Dies ist völlig normal und keine Fehlfunktion.
Der Kühlschrank pfeift.
Im Inneren befinden sich Gebläse zum Kühlen
des Gerätes. Dies ist völlig normal und keine
Fehlfunktion.
Feuchtigkeit an den Kühlschrankinnenflächen.
Bei heißen und feuchten Wetterlagen treten
verstärkt Eisbildung und Kondensation auf. Dies ist
völlig normal und keine Fehlfunktion.
Türen wurden häufig geöffnet oder längere Zeit
nicht richtig geschlossen. >>> Verzichten Sie
auf häufiges Öffnen der Türen. Schließen Sie die
Türen, falls sie offen sind.
Eine Tür wurde eventuell nicht richtig geschlossen.
>>> Tür richtig schließen.
Feuchtigkeit sammelt sich an der Außenseite
des Kühlschranks oder an den Türen an.
Hohe Luftfeuchtigkeit. Dies ist bei feuchtem
Wetter völlig normal. >>> Die Kondensation
verschwindet, wenn der Feuchtigkeitsgehalt
abnimmt.
Externer Feuchtigkeitsniederschlag im Bereich
zwischen den beiden Türen des Kühlschranks,
wenn das Gerät selten benutzt wird. Dies ist
völlig normal. Der Feuchtigkeitsniederschlag
verschwindet bei häufiger Verwendung.
Unangenehmer Geruch im Kühlschrank.
Das Gerät wurde nicht regelmäßig gereinigt.
Reinigen Sie das Innere des Kühlschranks mit
einem Schwamm, den Sie mit lauwarmem oder
kohlensäurehaltigem Wasser angefeuchtet haben.
Einige Behälter oder Verpackungsmaterialien
können Gerüche verursachen. >>> Andere
Behälter und Verpackungsmaterialien bzw.
Produkte anderer Hersteller verwenden.
Lebensmittel wurden in Behältern ohne Deckel
in den Kühlschrank gegeben. >>> Lebensmittel
in geschlossenen Behältern aufbewahren.
Mikroorganismen aus Behältern ohne Deckel
können unangenehme Gerüche verursachen.
Nehmen Sie abgelaufene oder verdorbene
Lebensmittel aus dem Kühlschrank.
Die Tür kann nicht geschlossen werden.
Lebensmittelpackungen verhindern ein
vollständiges Schließen der Tür. >>> Entfernen
Sie die Verpackungen, welche die Tür blockieren.
Der Kühlschrank hat keinen stabilen Stand. >>>
Passen Sie die Kühlschrankfüße so an, dass der
Kühlschrank in Waage ist.
Der Boden ist nicht eben oder nicht stabil genug.
>>> Achten Sie darauf, dass der Boden eben ist
und das Gewicht des Kühlschranks problemlos
tragen kann.
Das Gemüsefach klemmt.
Lebensmittel könnten die obere Wand des
Gemüsefachs berühren. >>> Verteilen Sie die
Lebensmittel im Gemüsefach anders.

32 /32 DE Kühlschrank/ Bedienungsanleitung
Fehlerbehebung
Wenn die Geräteoberfläche heiß ist.
Die Bereiche zwischen den beiden Türen, an den
Seitenflächen und hinten am Grill können im
Betrieb sehr heiß werden. Dies ist völlig normal
und weist nicht auf eine Fehlfunktion hin.
Gebläse läuft weiter, wenn die Tür geöffnet
wird.
Es ist normal, dass das Gebläse weiterläuft, wenn
die Tür des Tiefkühlbereichs geöffnet wird.
AWARNUNG: Falls sich ein Problem
nicht mit den Hinweisen in diesem
Abschnitt lösen lassen sollte,
wenden Sie sich bitte an Ihren
Händler oder an den autorisierten
Kundendienst. Versuchen Sie niemals,
ein fehlerhaftes Produkt selbst zu
reparieren.
HAFTUNGSAUSSCHLUSS / WARNUNG
Einige (einfache) Fehler können vom Endbenutzer angemessen behandelt werden, ohne dass
Sicherheitsprobleme oder unsichere Verwendung auftreten, sofern sie innerhalb der Grenzen und gemäß
den folgenden Anweisungen ausgeführt werden (siehe Abschnitt „Selbstreparatur“).
Sofern im Abschnitt „Selbstreparatur“ unten nichts anderes autorisiert ist, sind Reparaturen an
registrierte professionelle Reparaturtechniker zu richten, um Sicherheitsprobleme zu vermeiden. Ein
registrierter professioneller Reparaturbetrieb ist ein professioneller Reparaturtechniker, dem vom
Hersteller Zugang zu den Anweisungen und der Ersatzteilliste dieses Produkts gemäß den in den
Rechtsakten entsprechend der Richtlinie 2009/125/EG beschriebenen Methoden gewährt wurde.
Allerdings kann nur der Dienstleister (d.h. autorisierte professionelle Reparaturtechniker),
den Sie über die in der Bedienungsanleitung/Garantiekarte angegebene Telefonnummer
oder über Ihren autorisierten Händler erreichen können, einen Service gemäß den
Garantiebedingungen anbieten. Bitte beachten Sie daher, dass Reparaturen durch
professionelle Reparaturtechniker (die nicht von Bekoautorisiert sind) zum Erlischen der
Garantie führen.
Selbstreparatur
Die Selbstreparatur kann vom Endbenutzer in Bezug auf folgende Ersatzteile durchgeführt werden:
Dichtungen, Filter, Türscharniere, Körbe, Propeller, Kunststoffzubehör usw. (eine aktualisierte Liste ist ab
dem 1. März 2021 ebenfalls in support.beko.com verfügbar).
Um die Produktsicherheit zu gewährleisten und das Risiko schwerer Verletzungen zu vermeiden, muss
die erwähnte Selbstreparatur gemäß den Anweisungen im Benutzerhandbuch zur Selbstreparatur
durchgeführt werden, die unter support.beko.com verfügbar sind. Ziehen Sie zu Ihrer Sicherheit den
Stecker aus der Steckdose, bevor Sie eine Selbstreparatur durchführen.
Reparatur- und Reparaturversuche von Endbenutzern für Teile, die nicht in dieser Liste enthalten
sind und/oder die Anweisungen in den Benutzerhandbüchern zur Selbstreparatur nicht befolgen
oder die auf support.beko.com verfügbar sind, können zu Sicherheitsproblemen führen, die nicht auf
Bekozurückzuführen sind, und führt zum Erlöschen der Garantie des Produkts.

Deshalb wird dringend empfohlen, dass Endbenutzer nicht versuchen, Reparaturen
durchzuführen, die außerhalb der genannten Ersatzteilliste liegen, und sich in solchen Fällen an
autorisierte professionelle Reparaturtechniker oder registrierte professionelle Reparaturtechniker
wenden. Ansonsten können solche Versuche von Endbenutzern Sicherheitsprobleme verursachen
und das Produkt beschädigen und anschließend Brand, Überschwemmungen, Stromschläge und
schwere Personenschäden verursachen.
Beispielsweise müssen, ohne darauf beschränkt zu sein, die folgenden Reparaturen an
autorisierte
professionelle Reparaturtechniker oder registrierte professionelle Reparaturtechniker gerichtet
werden: Kompressor, Kühlkreislauf, Hauptplatine,Wechselrichterplatine, Anzeigetafel usw.
Der Hersteller/Verkäufer kann in keinem Fall haftbar gemacht werden, in dem Endbenutzer die
oben genannten Bestimmungen nicht einhalten.
Die Ersatzteilverfügbarkeit des von Ihnen gekauften Kühlschrank beträgt 10 Jahre.
Während dieser Zeit stehen Originalersatzteile zur Verfügung, um den Kühlschrank
ordnungsgemäß zu betreiben.
Die Mindestgarantiedauer für den von Ihnen gekauften Kühlschrank beträgt 24 Monate.
Dieses Produkt ist mit einer Lichtquelle der Energieklasse „G“ ausgestattet.
Die Lichtquelle in diesem Produkt darf nur von professionellen Reparaturtechnikern ersetzt werden.
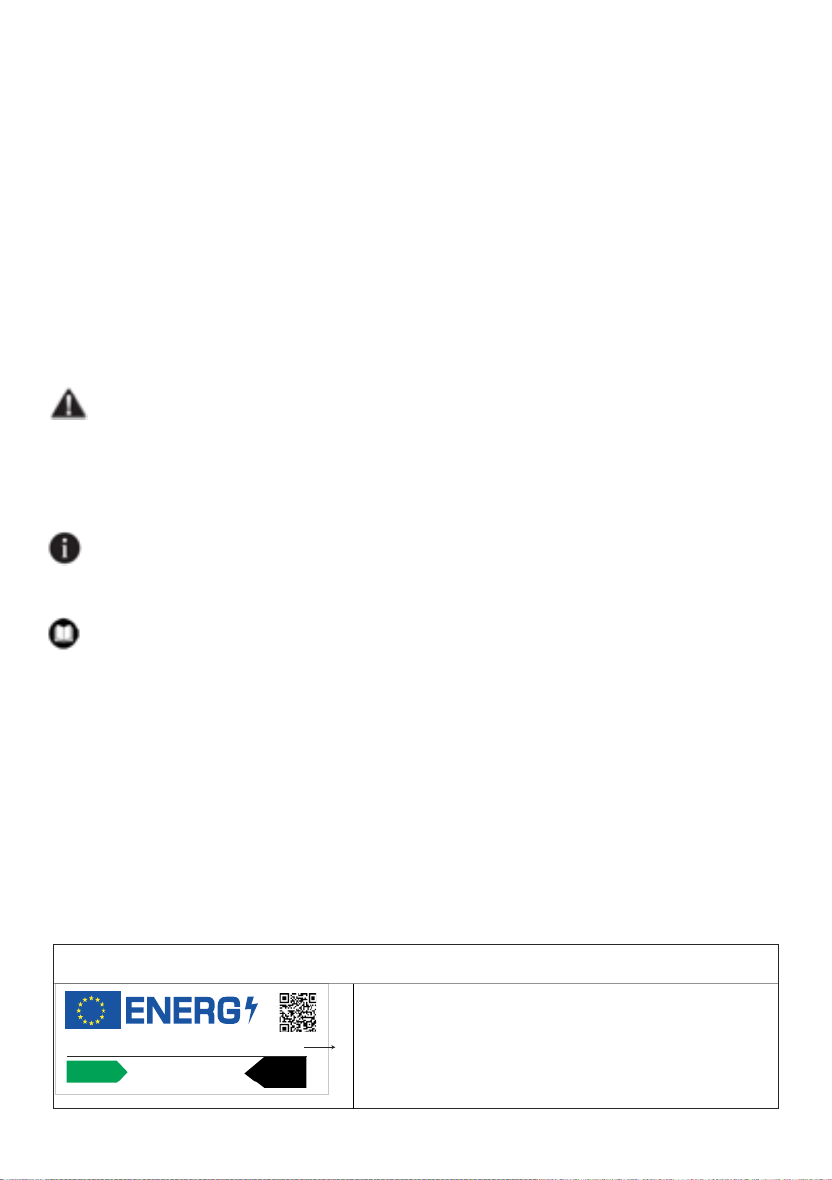
Gentile Cliente,
Cortesemente leggi il presente manuale prima di iniziare ad usare il prodotto.
Ti ringraziamo per aver scelto questo prodotto. Vorremmo che il prodotto, che è stato
realizzato con la tecnologia più avanzata, ti possa offrire l’efficienza ottimale. Per questo,
prima di utilizzare il prodotto leggi attentamente questo manuale e qualsiasi altra docu-
mentazione fornita e conservali per riferimenti futuri.
Presta particolare attenzione alle informazioni e alle avvertenze contenute nel manuale
utente. In questo modo proteggerai te stesso e il tuo prodotto da possibili pericoli.
Conserva il manuale utente. Se dovessi consegnare il prodotto a qualcun altro, non di-
menticare di includere questa guida.
Nella guida utente sono utilizzati i seguenti simboli:
Pericolo che potrebbe causare morte o lesioni.
AVVISO Un pericolo che potrebbe causare danni materiali al prodotto o
all'ambiente circostante
Informazioni importanti o suggerimenti utili relativamente al funzionamen-
to.
Leggi il manuale utente.
.Le informazioni sul modello memorizzate nella banca dati
dei prodotti possono essere consultate sul seguente sito
web, cercando l'identificativo del modello (*) presente sull'et-
ichetta energetica.
https://eprel.ec.europa.eu/
A
A
SUPPLIER’S NAME MODEL IDENTIFIER (*)
INFORMATION
C

2 /32 IT Frigorifero/Manuale dell'Utente
1 Istruzioni di sicurezza 3
1.1 Uso preposto . . . . . . . . . . . . . . . . . . . 3
1.2 - Sicurezza per bambini, persone
diversamente abili e animali domestici . . . 3
1.3 - Sicurezza elettrica . . . . . . . . . . . . . . 4
1.4 - Sicurezza nel trasporto. . . . . . . . . . . 4
1.5 - Sicurezza nell’installazione . . . . . . . . 4
1.6- Sicurezza nelle operazioni . . . . . . . . . 5
1.7- Sicurezza nella manutenzione e pulizia 6
1.8- HomeWhiz . . . . . . . . . . . . . . . . . . . . 6
1.9- Illuminazione . . . . . . . . . . . . . . . . . . 6
2 Istruzioni relative all’ambiente 7
2.1 Conformità con le normative WEEE e sullo
smaltimento dei prodotti di scarico: . . . . . 7
2.2 Conformità con la direttiva RoHS . . . . . . . . 7
2.3 Informazioni sull'imballaggio . . . . . . . . . . . 7
3 Il frigorifero 8
4 Installazione 9
4.1 Luogo idoneo per l'installazione . . . . . . . . 9
4.2 Fissaggio dei cunei in plastica . . . . . . . . . 9
4.3 Regolazione dei piedini . . . . . . . . . . . . . . 10
4.4 Collegamento elettrico. . . . . . . . . . . . . . . 11
5 Preparazione 12
5.1 Cosa fare per risparmiare energia . . . . . . 12
5.2. Funzionamento iniziale . . . . . . . . . . . . . . 13
5 Preparazione 13
6 Funzionamento del prodotto 14
6.1 Spegnimento del prodotto . . . . . . . . . . . . 14
6 Funzionamento del prodotto 15
6.2 Pannello indicatore . . . . . . . . . . . . . . . . . 15
6.3 Pannello indicatore . . . . . . . . . . . . . . . . . 18
6.4Modulo deodorizzatore . . . . . . . . . . . . . . . 20
(FreshGuard). . . . . . . . . . . . . . . . . . . . . . . . . 20
6.5 Cassetto frutta e verdura a umidità controllata
(SempreFresco+) . . . . . . . . . . . . . . . . . 21
6.6 Luce blu/HarvestFresh. . . . . . . . . . . . . . . 21
6.7 Utilizzo dell’erogatore dell’acqua . . . . . . . 22
6.8 Riempimento del serbatoio dell’erogatore
dell’acqua . . . . . . . . . . . . . . . . . . . . . . 22
6.9 Pulizia del serbatoio dell'acqua . . . . . . . . 22
6.10 Cestello prodotti caseari (cella frigorifera)
fornisce . . . . . . . . . . . . . . . . . . . . . . . . 24
6.11 Scomparto verdura . . . . . . . . . . . . . . . . 24
6.12 Ionizzatore . . . . . . . . . . . . . . . . . . . . . . 24
6.13 Filtro odori . . . . . . . . . . . . . . . . . . . . . . 24
6.14 Macchina del ghiaccio e scatola di stoccaggio
del ghiaccio . . . . . . . . . . . . . . . . . . . . . 24
6.15 Congelamento di alimenti freschi . . . . . . 25
6.16 Consigli per conservare alimenti surgelati 25
6.17 Dettagli congelatore . . . . . . . . . . . . . . . 25
6.18 Posizionamento degli alimenti . . . . . . . . 26
6.19 Avviso di porta aperta . . . . . . . . . . . . . . 26
6.20 Lampada di illuminazione . . . . . . . . . . . 26
7 Manutenzione e pulizia 27
7.1 Superfici esterne in acciaio inossidabile . . 27
7.2 Pulizia dei prodotti con porte in vetro . . . . 27
7 Manutenzione e pulizia 28
7.3. Prevenzione dei cattivi odori . . . . . . . . . . 28
7.4 Protezione delle superfici in plastica . . . . 28

4 /32 IT Frigorifero/Manuale dell'Utente
Istruz on d s curezzai i i i
5.
Tenere il prodotto in modo che non si ribalti.
6.
Non permettere ai bambini di giocare con il
vecchio prodotto.
Non gettare mai il prodotto nel fuoco per
smaltirlo. Rischio di esplosione!
Se sulla porta del prodotto è presente una
serratura, la chiave deve essere tenuta fuori
dalla portata dei bambini.
1.3 - Sicurezza elettrica
Il prodotto deve essere scollegato durante
le procedure di installazione, manutenzione,
pulizia, riparazione e spostamento.
Se il cavo di alimentazione è danneggiato, deve
essere sostituito da una persona qualificata
e specificata dal produttore, dal servizio
assistenza autorizzato o da un importatore, al
fine di evitare potenziali pericoli.
Non schiacciare il cavo di alimentazione sotto
o dietro il prodotto. Non appoggiare oggetti
pesanti sul cavo di alimentazione. Il cavo
di alimentazione non deve essere piegato
eccessivamente, non deve essere schiacciato
e non deve venire a contatto con una qualsiasi
fonte di calore.
Non utilizzare prolunghe, multiple o adattatori
per far funzionare il prodotto.
Le multiple o le fonti di alimentazione portatili
possono surriscaldarsi e causare incendi.
Pertanto, non tenere le multiple dietro o vicino
al prodotto.
La spina deve essere facilmente accessibile.
Nel caso non sia possibile, l'impianto elettrico
a cui è collegato il prodotto deve contenere un
dispositivo (come un fusibile, un interruttore,
un salvavita, ecc.) che sia conforme alle norme
elettriche e che scolleghi tutti i poli dalla rete.
Non toccare la spina di alimentazione con le
mani bagnate.
Togliere la spina dalla presa, afferrando la
spina e non il cavo.
1.4 - Sicurezza nel trasporto
Il prodotto è pesante, non spostarlo da soli.
Non tenerne lo sportello, quando si sposta il
prodotto.
Fare attenzione a non danneggiare il sistema
di raffreddamento o le tubazioni durante il
trasporto. Se le tubazioni sono danneggiate,
non accendere il prodotto e contattare il servizio
di assistenza autorizzato.
1.5 - Sicurezza nell’installazione
Contattare il servizio di assistenza autorizzato
per l'installazione del prodotto. Per rendere
il prodotto pronto per l'utilizzo, consultare le
informazioni contenute nel manuale d'uso,
per assicurarsi che gli impianti elettrici e idrici
siano adatti. In caso contrario, chiamare un
elettricista e un idraulico qualificati, per ottenere
le necessarie disposizioni. Se non ci si rivolge a
un aiuto professionale, vi è il rischio di scosse
elettriche, incendi, problemi con il prodotto o
lesioni!
Prima dell'installazione, controllare se il prodott
presenta difetti. Se il prodotto è danneggiato,
non farlo installare.
Posizionare il prodotto su una superficie pulita,
piana e solida e bilanciarlo con piedini regolabil
In caso contrario, il prodotto potrebbe ribaltarsi
e causare lesioni.
Il luogo di installazione deve essere asciutto e
ben ventilato. Non collocare tappeti, moquette
o rivestimenti simili sotto al prodotto. Una
ventilazione insufficiente è rischio di incendio!
Non coprire o bloccare le aperture adibite alla
ventilazione. In caso contrario, il consumo di
energia elettrica aumenta e il prodotto potrebbe
danneggiarsi.
Il prodotto non deve essere collegato a sistemi
di alimentazione come alimentatori solari. In
caso contrario, il prodotto potrebbe danneggiars
a causa di improvvisi cambiamenti di tensione!
Più refrigerante contiene un frigorifero, più
grande deve essere il luogo di installazione. Se i
luogo scelto per l’installazione è troppo piccolo
il refrigerante infiammabile e la miscela di aria s
accumulano in caso di perdite di refrigerante ne
sistema di raffreddamento. Lo spazio necessario
per ogni 8 gr di refrigerante è di almeno 1
m . La quantità di refrigerante nel prodotto è ³
indicata sulla targhetta di identificazione.
Il prodotto non deve essere installato in luoghi
esposti alla luce diretta del sole e deve essere
tenuto lontano da fonti di calore come piani
cottura, radiatori, ecc.

5 / 32 IT
Frigorifero/Manuale dell'Utente
Istruz on d s curezzai i i i
Se si deve installare il prodotto in prossimità di una
fonte di calore, è necessario utilizzare un'adeguata
piastra di isolamento e mantenere le seguenti
distanze minime dalla fonte di calore:
- Almeno 30 cm di distanza da fonti di calore
come piani di cottura, forni, radiatori o stufe,
- Minimo 5 cm di distanza dai forni elettrici.
La classe di protezione del prodotto è di tipo
I. Inserire il prodotto in una presa con messa
a terra che sia conforme ai valori di tensione,
corrente e frequenza indicati sulla targhetta
del prodotto. La presa deve essere dotata di
un interruttore automatico da 10 A - 16 A.
La nostra azienda non sarà responsabile per
eventuali danni che si verificheranno qualora il
prodotto venga utilizzato senza messa a terra
e collegamento elettrico in conformità con le
normative locali e nazionali.
Il prodotto non deve essere collegato alla
rete elettrica durante l'installazione. In caso
contrario, sussiste il rischio di scosse elettriche
e di lesioni!
Non inserire il prodotto in prese che siano
allentate, smontate, rotte, sporche, grasse o
che presentino il rischio di entrare in contatto
con l'acqua.
Posizionare il cavo di alimentazione e i tubi
flessibili (se presenti) del prodotto in modo che
non causino il rischio di inciamparvi dentro.
L'esposizione all'umidità delle parti sotto
tensione o del cavo di alimentazione può
causare un corto circuito. Pertanto, non
installare il prodotto in luoghi come garage o
lavanderie, dove l'umidità è elevata o l'acqua
può schizzare. Se il frigorifero si bagna
d’acqua, scollegarlo e chiamare il servizio di
assistenza autorizzato.
Non collegare mai il frigorifero a dispositivi di
risparmio energetico. Tali sistemi sono dannosi
per il prodotto.
1.6- Sicurezza nelle operazioni
Non utilizzare mai solventi chimici sul prodotto.
Rischio di esplosione!
In caso di malfunzionamento del prodotto,
scollegarlo e non utilizzarlo, fino a quando
non viene riparato dal servizio di assistenza
autorizzato. Rischio di scosse elettriche!
Non collocare fonti di fiamma (candele accese,
sigarette, ecc.) sul prodotto o nelle sue
vicinanze.
Non salire sul prodotto. Rischio di caduta e di
ferite!
Non danneggiare i tubi del sistema di
raffreddamento con oggetti appuntiti o affilati.
Il refrigerante che potrebbe fuoriuscire quando
i tubi del refrigerante, le prolunghe dei tubi
o i rivestimenti superficiali vengono perforati
provoca irritazioni cutanee e lesioni agli occhi.
A meno che non sia raccomandato dal
produttore, non collocare o utilizzare dispositivi
elettrici all'interno del frigorifero/congelatore.
Fare attenzione a non incastrare le mani o
qualsiasi altra parte del corpo nelle parti mobili
all'interno del frigorifero. Fare attenzione a non
schiacciare le dita tra lo sportello e il frigorifero.
Fare attenzione nell’aprire e chiudere lo
sportello, in particolare in presenza di bambini.
Non mangiare mai gelati, cubetti di ghiaccio
o cibi surgelati subito dopo averli tolti dal
frigorifero. Rischio di congelamento!
Se si hanno le mani bagnate, non toccare le
pareti interne o le parti metalliche del freezer
o gli alimenti in esso conservati. Rischio di
congelamento!
Non collocare nel congelatore barattoli o
bottiglie che contengono bevande gassate o
liquidi che possano congelarsi. Lattine e bottiglie
possono scoppiare. Rischio di lesioni e danni
materiali!
Non collocare o utilizzare spray infiammabili,
materiali infiammabili, ghiaccio secco, sostanze
chimiche o materiali simili sensibili al calore
vicino al frigorifero. Rischio di incendio e di
esplosione!
Non conservare nel prodotto materiali esplosivi
che contengono materiali infiammabili, come le
bombolette spray.
Non collocare sul prodotto contenitori pieni
di liquido. Gli spruzzi d'acqua su una parte
elettrica possono causare scosse elettriche o
generare un incendio.
Questo prodotto non è destinato alla
conservazione di medicinali, plasma sanguigno,
preparati di laboratorio o sostanze mediche
simili e prodotti soggetti alla direttiva sui prodotti
medici.

6 /32 IT Frigorifero/Manuale dell'Utente
Istruz on d s curezzai i i i
L'uso del prodotto diversamente da quanto
preposto può causare il deterioramento o la
scadenza dei prodotti conservati al suo interno.
Se il frigorifero è dotato di luce blu, non
guardare la luce con strumenti ottici. Non
fissare direttamente la lampada UV LED per
lungo tempo. La luce ultravioletta può causare
affaticamento agli occhi.
Non sovraccaricare il prodotto. Gli oggetti nel
frigorifero possono cadere quando si apre lo
sportello, causando lesioni o danni. Problemi
simili possono verificarsi se un qualsiasi oggetto
viene posizionato sul prodotto.
Per evitare lesioni, assicurarsi di aver pulito
tutto il ghiaccio e l'acqua che potrebbero essere
caduti o schizzati sul pavimento.
Modificate la posizione dei ripiani/portabottiglie
sullo sportello del frigorifero solo da vuoti.
Rischio di lesioni!
Non collocare oggetti che possono cadere/
ribaltarsi sul prodotto. Tali oggetti possono
cadere quando lo sportello è aperto e causare
lesioni e/o danni materiali.
Non colpire o esercitare una forza eccessiva
sulle superfici in vetro. Il vetro rotto può causare
lesioni e/o danni materiali.
Il sistema di raffreddamento del prodotto
contiene refrigerante R600a: Il tipo di
refrigerante utilizzato nel prodotto è indicato
sulla targhetta di identificazione. Questo
refrigerante è infiammabile. Pertanto, fare
attenzione a non danneggiare il sistema di
raffreddamento o le tubazioni mentre il prodotto
è in uso. Se le tubazioni sono danneggiate:
- Non toccare il prodotto o il cavo di
alimentazione,
- Tenere lontano da potenziali fonti infiammabili,
che possono far incendiare il prodotto.
- Ventilare l'area in cui si trova il prodotto. Non
utilizzare ventilatori.
- Contattare il servizio di assistenza autorizzato.
Se il prodotto è danneggiato e si nota una
perdita di refrigerante, stare lontani dal
refrigerante. Il refrigerante può causare
congelamento in caso di contatto con la pelle.
1.7- Sicurezza nella
manutenzione e pulizia
Non tirare la maniglia dello sportello se è
necessario spostare il prodotto per la pulizia.
La maniglia può rompersi e causare lesioni, se
si esercita una forza eccessiva su di essa.
Non spruzzare o versare acqua sopra o
all'interno del prodotto durante la pulizia.
Rischio di incendio e di scosse elettriche!
Non utilizzare utensili affilati o abrasivi per la
pulizia del prodotto. Non utilizzare prodotti per
la pulizia della casa, detersivi, gas, benzina,
diluente, alcool, vernici, ecc.
Utilizzare all'interno dell’elettrodomestico solo
prodotti per la pulizia e la manutenzione che
non siano nocivi per gli alimenti.
Non utilizzare mai detergenti a vapore per
pulire o sbrinare il prodotto. Il vapore entra
a contatto con le parti sotto tensione del
frigorifero, causando cortocircuiti o scosse
elettriche!
Assicurarsi che non entri acqua nei
circuiti elettronici o negli elementi preposti
all’illuminazione del prodotto.
Utilizzare un panno pulito e asciutto per pulire
i materiali estranei o la polvere sui perni della
spina. Non utilizzare un panno umido o bagnato
per pulire la spina. Rischio di incendio e di
scosse elettriche!
1.8- HomeWhiz
Se si utilizza il prodotto tramite l'app
HomeWhiz, è necessario osservare le
avvertenze di sicurezza anche quando si
è lontani dal prodotto. È inoltre necessario
seguire le avvertenze nell'app.
1.9- Illuminazione
Contattare il servizio di assistenza autorizzato
ove sia necessario sostituire il LED/la
lampadina utilizzata per l'illuminazione.

8 /32 IT Frigorifero/Manuale dell'Utente
3 Il frigorifero
C*Opzionale: Le figure in questo manuale utente sono schematiche, e potrebbero non corrispondere
esattamente al prodotto. Qualora il prodotto non contenga le parti descritte, l'informazione riguarda altri
modelli.
1-
Scomparto congelatore
2-
Scomparto raffreddatore
3-
Ripiani della porta dello scomparto raffreddatore
4-
Scomparto uova
5-
Riempimento del serbatoio dell'erogatore di acqua
6-
Serbatoio dell’erogatore di acqua
7-
Ripiano per bottiglie
8-
Supporti regolabili
9-
Cassetto frutta e verdura
10- Cestello prodotti caseari (cella frigorifera)
fornisce
11-
Ripiano per bottiglie
12-
Ripiani in vetro
13-
Ventola
14-
Scomparti per la conservazione di alimenti congelati
15-
Ripiano in vetro scomparto congelatore
16-
Macchina del ghiaccio
17-
Ripiani della porta dello scomparto congelatore
2
1
*3
45
6
*7
*3
8
8
13
14
14
17
15
16
9
9
*10
*11
*12
Non disponibile con tutti i modelli

9 / 32 IT
Frigorifero/Manuale dell'Utente
4 Installazione
4.1 Luogo idoneo per l'installazione
A
Leggere prima la sezione "Istruzioni di
sicurezza"!
Il prodotto necessita di adeguata ventilazione per
un funzionamento efficiente. Se in prodotto viene
collocato in una alcova, lasciare almeno 5 cm di
spazio tra il prodotto, il soffitto, i muri laterali e il
muro retrostante.
Se in prodotto viene collocato in una alcova, lasciare
almeno 5 cm di spazio tra il prodotto, il soffitto, i
muri laterali e il muro retrostante. Controllare se il
componente di protezione della parete posteriore
è presente e nel suo alloggio (se fornito con il
prodotto). Se il componente non è disponibile, o se è
stato smarrito o è caduto, posizionare il prodotto in
modo tale da lasciare almeno 5 cm di spazio libero
tra il retro del prodotto e le pareti del locale. Lo
spazio libero nella parte posteriore è importante per
il funzionamento efficiente del prodotto.
AAVVERTENZA: Non usare prolunghe o
multi prese per il collegamento elettrico.
BAVVERTENZA: Il produttore non si
assume nessuna responsabilità per gli
eventuali danni causati dagli interventi
eseguiti da personale non autorizzato.
B
AVVERTENZA: Durante l’installazione,
il cavo di alimentazione del prodotto deve
essere scollegato. Il mancato rispetto di
queste istruzioni potrebbe provocare morte
o altre gravi lesioni!
A
AVVERTENZA: : Qualora la porta sia
troppo stretta per consentire il passaggio
del prodotto, togliere la porta e ruotarla;
qualora ciò non funzioni, contattare il
servizio autorizzato.
per evitare vibrazioni.
termosifone, dalla stufa e da altre fonti di
calore e ad almeno 5 cm da eventuali forni
elettrici.
conservare in ambienti umidi.
adeguata per funzionare con efficacia. Qualora
il prodotto venga posizionato in un padiglione
estivo, ricordare di lasciare una distanza di
almeno 5 cm fra il prodotto, il soffitto, e le
pareti.
4.2 Fissaggio dei cunei in plastica
Servirsi dei cunei in plastica forniti in dotazione
con il prodotto per garantire una circolazione d'aria
sufficiente fra il prodotto e la parete.
1.
Per fissare i cunei, rimuovere le viti sul prodotto e
usare le viti fornite in dotazione con i cunei.
2.
Fissare 2 cunei in plastica sul coperchio della
ventilazione, come indicato nella figura.

10 /32 IT Frigorifero/Manuale dell'Utente
Installazione
4.3 Regolazione dei piedini
Qualora il prodotto non sia in equilibrio, regolare i
supporti anteriori regolabili, ruotandoli verso destra
o verso sinistra.
Per regolare le porte in verticale:
parte inferiore
alla posizione della porta
Per regolare le porte in orizzontale:
Allentare la vite di fissaggio che si trova sulla
parte inferiore
Allentare la vite di fissaggio che si trova sulla
parte superiore
Avvitare il bullone di regolazione (CW/CCW) sul
lato in base alla posizione della porta
Serrare il bullone di fissaggio sulla parte
superiore per la posizione finale
Serrare la vite di fissaggio che si trova sulla
parte inferiore
Fixing nut
Fixing screw
adjusting bolt
Bullone di regolazione
Bullone di fissaggio
Dado di fissaggio
Dado di regolazione
Dado di fissaggio
Vite di fissaggio

12 /32 IT Frigorifero/Manuale dell'Utente
5 Preparazione
5.1 Cosa fare per
risparmiare energia
mehmet
ACollegare il prodotto a sistemi di
risparmio energetico elettronici potrebbe
danneggiare il prodotto.
Per apparecchiature indipendenti; questo
apparecchio refrigerante non è destinato
ad essere utilizzato come l’apparecchiatura
indipendente;
Non tenere aperte a lungo le porte del
frigorifero.
Non mettere alimenti caldi o bevande
direttamente dentro al frigorifero.
Non riempire eccessivamente il frigorifero; il
blocco del flusso d'aria interno ne ridurrà la
capacità di raffreddamento.
A seconda delle caratteristiche del prodotto,
lo scongelamento degli alimenti surgelati nello
scomparto raffreddatore garantirà un risparmio
energetico preservando al tempo stesso la
qualità degli alimenti.
Per garantire il risparmio energetico e tenere
sempre gli alimenti nelle condizioni migliori, gli
alimenti devono essere conservati utilizzando i
cassetti dello scomparto raffreddatore.
Accertarsi che gli alimenti non siano in contatto
con il sensore di temperatura dello scomparto
raffreddatore di seguito descritto.
L'aria calda e umida, non penetrando
direttamente nel prodotto quando le porte
non sono aperte, permetterà al prodotto di
ottimizzare la funzione di protezione degli
alimenti. In questa funzione di risparmio
energetico, funzioni e componenti come il
compressore, la ventola, il riscaldatore, lo
sbrinamento, l'illuminazione, il display, etc.
funzioneranno in base alle esigenze per
consumare energia minima mantenendo la
freschezza del cibo.
Nel caso siano presenti più opzioni, i ripiani
in vetro devono essere posizionati in modo
che le prese d'aria sulla parete posteriore
non siano bloccate, preferibilmente le prese
d'aria restano sotto il ripiano in vetro. Questa
combinazione può aiutare a migliorare la
distribuzione dell'aria e l'efficienza energetica.
A
Leggere prima la sezione "Istruzioni di
sicurezza"!

14 /32 IT Frigorifero/Manuale dell'Utente
6 Funzionamento del prodotto
A
Leggere prima la sezione "Istruzioni di
sicurezza"!
Per accelerare le operazioni di
scongelamento, non utilizzare attrezzi meccanici
o altri utensili diversi da quelli raccomandati dal
produttore.
Non utilizzare mai parti del frigorifero, come
la porta o i cassetti, come supporto o come
gradini. Ciò potrebbe causare il ribaltamento
del prodotto o il danneggiamento dei suoi
componenti.
Il prodotto dovrebbe essere usato
unicamente per la conservazione di alimenti.
Spegnere la valvola dell'acqua se si è lontani
da casa (ad esempio in vacanza) e non si utilizza
la macchinetta per il ghiaccio o l’erogatore
d'acqua per un lungo periodo di tempo. In caso
contrario, potrebbero verificarsi perdite d'acqua.
6.1 Spegnimento del prodotto
- staccare la spina,
- rimuovere il cibo per evitare cattivi odori,
- aspettare che il ghiaccio sia scongelato,
- pulire l'interno e aspettare che si asciughi,
- lasciare le porte aperte per evitare danni alla
plastica del corpo interno.

15 / 32 IT
Frigorifero/Manuale dell'Utente
6 Funzionamento del prodotto
6.2 Pannello indicatore
I pannelli indicatori potrebbero variare a seconda del modello del prodotto.
Le funzioni audio e video dei pannelli indicatori assisteranno l’utente in fase di utilizzo del frigorifero.
C*Opzionale: Le funzioni visualizzate sono opzionali, ci potrebbero essere delle differenze di
forma e posizione nelle funzioni trovate sul pannello display del proprio dispositivo.
Leggere prima la sezione "Istruzioni di sicurezza"!
1.
Tasto wireless
2.
Tasto di congelamento rapido
3.
Temperatura elevata / avvertenza errore
4.
Indicatore della funzione di risparmio energetico (display off)
5.
Tasto di impostazione della temperatura dello scomparto
congelatore
6.
Tasto funzione dello scomparto raffreddatore OFF (Vacanza)
7.
Tasto di impostazione della temperatura dello scomparto
raffreddatore
8.
Tasto per il ripristino delle impostazioni della connessione
wireless
9.
Tasto Modulo Rimozione dei Cattivi Odori
*Non disponibile con tutti i modelli
*1
*8
2
345
7
6
*9

17 / 32 IT
Frigorifero/Manuale dell'Utente
Uso del prodotto
6. Tasto funzione dello scomparto raffreddatore
OFF (Vacanza)
Per attivare la funzione vacanza premere il tasto per
3 secondi. La modalità vacanza è attivata e il LED sul
tasto è illuminato. Sull'indicatore della temperatura
dello scomparto di raffreddamento (raffreddatore) sarà
visualizzato “- -” e quindi non eseguirà attivamente il
raffreddamento. Quando questa funzione è attivata,
nello scomparto di raffreddamento non dovranno
conservarsi alimenti. Gli altri scomparti continueranno
a raffreddare in base alla temperatura impostata. Per
annullare questa funzione, premere il tasto di nuovo
per 3 secondi.
7. Tasto di impostazione della temperatura dello
scomparto raffreddatore
Per lo scomparto raffreddatore è disponibile
l’impostazione della temperatura. La pressione di
questo tasto abiliterà l’impostazione della temperatura
dello scomparto raffreddatore a 8,7,6,5,4,3 , 2 e 1
grado Celsius.
8. Tasto per il ripristino delle impostazioni della
connessione wireless
Per ripristinare le impostazioni della connessione
wireless, premere contemporaneamente i tasti
Congelamento rapido ( ) e connessione wireless
( ) per 3 secondi. Tutte le informazioni dell'utente
registrate in precedenza vengono annullate e le
impostazioni della connessione wireless vengono
ripristinate/resettate ai valori predefiniti di fabbrica.
9.Tasto Modulo Rimozione dei Cattivi Odori
Premere questo tasto per 3 secondi per attivare/
disattivare la funzione di rimozione dei cattivi odori.
Il LED sul tasto si accende quando la funzione
di rimozione dei cattivi odori è attiva. Quando la
funzione è attivata, il modulo di rimozione dei
cattivi odori funziona a intervalli periodici.

18 /32 IT Frigorifero/Manuale dell'Utente
Uso del prodotto
1
*2
3
4
5
6
7
*8
*Non disponibile con tutti i modelli
6.3 Pannello indicatore
I pannelli indicatori potrebbero variare a seconda del modello del prodotto.
Le funzioni audio e video dei pannelli indicatori assisteranno l’utente in fase di utilizzo del frigorifero.
1.
Temperatura elevata / avvertenza errore
2.
Tasto wireless
3.
Tasto di impostazione della temperatura dello scomparto
congelatore
4.
Tasto di impostazione della temperatura dello scomparto
raffreddatore
5.
Tasto funzione dello scomparto raffreddatore OFF (Vacanza)
6.
Blocco tasti
7.
Tasto di congelamento rapido
8.
Tasto per il ripristino delle impostazioni della connessione
wireless
C*Opzionale: Le funzioni visualizzate sono opzionali, ci potrebbero essere delle differenze di
forma e posizione nelle funzioni trovate sul pannello display del proprio dispositivo.

19 / 32 IT
Frigorifero/Manuale dell'Utente
Uso del prodotto
1. Temperatura elevata / avvertenza errore
Questo indicatore ( ) sarà attivo quando
il frigorifero non è in grado di eseguire un
raffreddamento adeguato o in caso di errore del
sensore. La lettera "E" deve essere visualizzata
sull'indicatore della temperatura dello scomparto di
congelamento e cifre come 1,2,3... dovranno essere
visualizzate sull'indicatore della temperatura dello
scomparto di raffreddamento. Queste cifre forniscono
informazioni al servizio autorizzato sull'errore
verificatosi.
Quando si carica cibo caldo nello scomparto di
congelamento o si tiene aperta la porta per un lungo
periodo di tempo potrebbe visualizzarsi un punto
esclamativo. Non si tratta di un guasto, questa
avvertenza dovrà essere rimossa quando il cibo viene
raffreddato o quando viene premuto un tasto qualsiasi.
2. Tasto wireless
Questo tasto viene utilizzato per effettuare una
connessione wireless con il proprio prodotto tramite
l'applicazione mobile HomeWhiz.
Quando si preme il tasto per un lungo periodo
(3 secondi), sul display/schermo il simbolo di
connessione wireless lampeggia lentamente (con
intervalli di 0,5 secondi). A questo punto sul prodotto
viene visualizzata la rete domestica.
Dopo aver raggiunto la connessione wireless con il
prodotto, il simbolo di connessione wireless ( ) si
illumina continuamente (fisso).
Una volta stabilita la connessione iniziale, è possibile
attivare/disattivare la connessione con una breve
pressione di questo tasto. Il simbolo della connessione
wireless lampeggerà brevemente (a intervalli di 0,2
sec.) fino a quando non viene stabilita la connessione.
Quando la connessione è attiva, il simbolo della
connessione wireless resterà accesa in maniera
continua (fisso).
Se la connessione non può essere stabilita per un
lungo periodo di tempo, controllare le impostazioni per
la connessione e consultare la sezione "Risoluzione dei
problemi" del manuale utente.
Per la connessione wireless dovrà essere utilizzata
l’applicazione HomeWhiz. Le varie fasi di installazione
sono descritte sull'applicazione durante l'installazione.
È possibile accedere all'applicazione leggendo il
codice QR disponibile sull'etichetta HomeWhiz del
prodotto. L'applicazione è offerta attraverso App
Store per i dispositivi IOS e attraverso Play Store per i
dispositivi Android.
Visitare il sito https://www.homewhiz.com/ per
informazioni dettagliate.
3. Tasto di impostazione della temperatura dello
scomparto congelatore
Per lo scomparto raffreddatore è disponibile
l’impostazione della temperatura. La pressione di
questo tasto abiliterà l’impostazione della temperatura
dello scomparto congelatore a
-18,-19,-20,-21
,-22,-23,-24 gradi
Celsius.
4. Tasto di impostazione della temperatura dello
scomparto raffreddatore
Per lo scomparto raffreddatore è disponibile
l’impostazione della temperatura. La pressione di
questo tasto abiliterà l’impostazione della temperatura
dello scomparto raffreddatore a 8,7,6,5,4,3 , 2 e 1
grado Celsius.
5. Tasto funzione dello scomparto raffreddatore
OFF (Vacanza)
Per attivare la funzione vacanza premere il tasto per
3 secondi. La modalità vacanza è attivata e l'icona
vacanza si accende, sull'indicatore della temperatura
dello scomparto di raffreddamento (raffreddatore) sarà
visualizzato “- -” e quindi non eseguirà attivamente il
raffreddamento. Quando questa funzione è attivata,
nello scomparto di raffreddamento non dovranno
conservarsi alimenti. Gli altri scomparti continueranno
a raffreddare in base alla temperatura impostata. Per
annullare questa funzione, premere il tasto di nuovo
per 3 secondi.La modalità vacanza è attivata e l'icona
vacanza si accende.
6. Blocco tasti
Quando si preme il tasto di blocco tasti ( ) per 3
secondi, il blocco tasti si attiva e il simbolo di blocco si
illumina. Per disattivare il blocco tasti premere il tasto
per 3 secondi.

20 /32 IT Frigorifero/Manuale dell'Utente
Uso del prodotto
È possibile utilizzare la funzione di blocco tasti quando
si desidera evitare modifiche all'impostazione della
temperatura del frigorifero.
7. Tasto di congelamento rapido
Quando si preme il tasto di congelamento rapido, il
simbolo del congelamento rapido si illumina e si attiva
la funzione di congelamento rapido. La temperatura
dello scomparto congelamento è impostata a -27
gradi Celsius. Per annullare la funzione premere
nuovamente il tasto. La funzione di congelamento
rapido sarà automaticamente annullata dopo 24 ore.
Per congelare grandi quantitativi di alimenti freschi,
premere il tasto di congelamento rapido prima di
collocare gli alimenti all'interno dello scomparto
congelatore.
8. Tasto per il ripristino delle impostazioni della
connessione wireless
Per ripristinare le impostazioni della connessione
wireless, premere contemporaneamente i tasti
Congelamento rapido ( ) e connessione wireless
( ) per 3 secondi. Tutte le informazioni dell'utente
registrate in precedenza vengono annullate e le
impostazioni della connessione wireless vengono
ripristinate/resettate ai valori predefiniti di fabbrica.
6.4Modulo deodorizzatore
(FreshGuard)
(Questa funzione è opzionale)
Il modulo deodorizzatore elimina in un istante i
cattivi odori dal frigorifero prima che penetrino
nelle superfici. Grazie a questo modulo, il quale
viene collocato sul soffitto dello scomparto per
alimenti freschi, i cattivi odori si dissolvono mentre
l’aria viene fatta passare attivamente sul filtro
anti-odore, quindi l’aria che è stata purificata dal
filtro viene reimmessa nello scomparto per alimenti
freschi. In questo modo, gli odori indesiderati che
potrebbero sprigionarsi durante la conservazione
degli alimenti nel frigorifero vengono eliminati
prima che possano penetrare nelle superfici.
Ciò si ottiene grazie alla ventola, al LED e al filtro
anti-odore integrato all’interno del modulo. Quando
si desidera utilizzare il modulo deodorante, attivarlo
dal pulsante indicatore.

21 / 32 IT
Frigorifero/Manuale dell'Utente
Uso del prodotto
6.5 Cassetto frutta e verdura
a umidità controllata
(SempreFresco+)
(Optional)
Grazie al cassetto ad umidità controllata, frutta e
verdura possono essere conservate più a lungo
in un ambiente con condizioni ideali di umidità. Il
sistema di impostazione dell'umidità con 3 opzioni
di fronte al cassetto permette di controllare il livello
di umidità all'interno dello scomparto a seconda
degli alimenti che si conservano. Consigliamo di
conservare i propri alimenti selezionando l'opzione
verdura quando si conservano solo verdure,
l'opzione frutta quando si conserva solo frutta e
l'opzione mista quando si conservano alimenti
misti.
Per migliorare il periodo di conservazione degli
alimenti e per beneficiare al massimo del sistema
di controllo dell'umidità, consigliamo di non
conservare la verdura e la frutta in sacchetti.
Lasciare quel tipo di alimenti in sacchetti di
plastica farà marcire le verdure in breve tempo.
Consigliamo di non conservare i cetrioli e i
broccoletti, in particolare, in sacchetti chiusi.
In situazioni in cui è preferibile non mettere in
contatto diversi tipi di verdure, utilizzare materiali
da imballaggio come la carta che abbia un certo
grado di porosità in termini di igiene.
Quando si posizionano le verdure, sistemare quelle
pesanti e dure in basso e quelle leggere e morbide
in alto, tenendo conto del loro perso specifico.
Non mettere la frutta che ha un'alta produzione
di gas etilene come la pera, l'albicocca, la pesca
e in particolare la mela nello stesso cassetto con
altre verdure e frutti. Il gas etilene che fuoriesce da
questi frutti potrebbe far maturare più velocemente
altri ortaggi e frutti e farli marcire in un periodo di
tempo più breve.
6.6 Luce blu/HarvestFresh
(Optional)
Per la Luce blu,
Le verdure e la frutta conservate nei cassetti
illuminati con luce blu continuano a svolgere la
fotosintesi e a mantenere i loro livelli di vitamina
C, grazie all'effetto della lunghezza d'onda della
luce blu.
Per HarvestFresh,
Le verdure e la frutta conservate in cassetti illumi-
nati con la tecnologia HarvestFresh conservano i
loro livelli di vitamine (vitamine A e C) per un perio-
do più lungo grazie ai cicli di luci blu, verdi, rosse e
scure che simulano il ciclo della giornata.
Quando la porta del frigorifero viene aperta duran-
te il periodo di buio della tecnologia HarvestFresh,
il frigorifero lo percepirà automaticamente e
illuminerà il cassetto con una delle luci blu, verdi o
rosse a seconda della situazione. Il periodo di buio
continua quando si chiude la porta del frigorifero in
modo che rappresenti il periodo notturno del ciclo
diurno.

22 /32 IT Frigorifero/Manuale dell'Utente
Uso del prodotto
6.7 Utilizzo dell’erogatore dell’acqua
(Questa funzione è opzionale)
C
I primi bicchieri di acqua presi
dall’erogatore saranno di norma tiepidi.
CSe l’erogatore dell’acqua non viene usato
a lungo, non bere i primi bicchieri per poi
ottenere acqua pulita.
1. Spingere il braccio dell’erogatore d’acqua con il
bicchiere. Se si utilizza un bicchiere di plastica
morbida, la pressione con la mano del braccio
risulta più facile.
CLa quantità di acqua che esce
dall’erogatore dipende dalla pressione
che si esercita sul braccio. Per
evitare il traboccamento, rilasciare
leggermente la pressione sul braccio
quando il livello dell'acqua nel
bicchiere/contenitore aumenta. Se si
preme leggermente il braccio l’acqua
gocciolerà; questo è normale e non è
indice di malfunzionamento.
2. Dopo aver riempito il bicchiere d'acqua come si
desidera, rilasciare il braccio.
6.8 Riempimento del serbatoio
dell’erogatore dell’acqua
Aprire il coperchio del serbatoio dell'acqua come
mostrato in figura. Riempire con acqua potabile
pura e limpida. Chiudere il coperchio.
6.9 Pulizia del serbatoio dell'acqua
Rimuovere il serbatoio di riempimento dell’acqua
all’interno del ripiano della porta.
Staccare tenendo entrambi i lati del ripiano
della porta.
Tenere entrambi i lati del serbatoio dell'acqua e
rimuovere a un angolo di 45°.
Rimuovere e pulire il coperchio del serbatoio
dell'acqua.

23 / 32 IT
Frigorifero/Manuale dell'Utente
Uso del prodotto
A
Non riempire il serbatoio dell'acqua con
succo di frutta, bevande gassate, bevande
alcoliche o altri liquidi incompatibili con
l'uso dell’erogatore dell’acqua. L'uso
di questi liquidi potrebbe provocare
anomalie di funzionamento oltre che
danni irreparabili all’erogatore dell’acqua.
L'uso dell’erogatore secondo questa
modalità non rientra nell'ambito di
copertura della garanzia. Alcuni prodotti
chimici e additivi all'interno di bevande /
liquidi possono causare danni materiali al
serbatoio dell'acqua.
ALe componenti del serbatoio dell'acqua
e dell’erogatore dell’acqua non possono
essere lavate in lavastoviglie.
CLe componenti del serbatoio
dell'acqua e dell’erogatore
non possono essere lavate in
lavastoviglie.

24 /32 IT Frigorifero/Manuale dell'Utente
Uso del prodotto
6.10 Cestello prodotti caseari
(cella frigorifera) fornisce
(Questa funzione è opzionale)
Il “Cestello prodotti caseari (cella frigorifera)
fornisce una temperatura più bassa all'interno
dello scomparto frigorifero. Utilizzare questo
cestello per conservare i prodotti di gastronomia
(salumi, salsicce, latticini, ecc.) che richiedono una
temperatura di conservazione più bassa oppure
carne, pollo o pesce per il consumo immediato.
Non conservare frutta e verdura all'interno di
questo contenitore.
6.11 Scomparto verdura
Il cassetto verdura del frigorifero è stato pensato
per tenere fresche le verdure conservando al
tempo stesso l'umidità. A tal fine, la circolazione
complessiva dell'aria è intensificata all'interno del
cassetto frutta e verdura. Consigliamo di tenere
frutta e verdura all'interno di questo scomparto.
Tenere le verdure con foglie verdi e i frutti in
cassetti separati, al fine di prolungarne la durata.
6.12 Ionizzatore
(Questa funzione è opzionale)
Il sistema ionizzatore all'interno del tubo dell'aria
dello scomparto del frigorifero serve per ionizzare
l'aria. Le emissioni di ioni negativi elimineranno i
batteri e le altre molecole che causano cattivi odori
nell'aria.
6.13 Filtro odori
(Questa funzione è opzionale)
Il filtro odori nel tubo dell'aria dello scomparto del
frigorifero evita la formazione di cattivi odori.
6.14 Macchina del ghiaccio e scatola
di stoccaggio del ghiaccio
(Questa funzione è opzionale)
Riempire la macchina del ghiaccio con acqua e
posizionare. Il ghiaccio sarà pronto all'incirca dopo
due ore. Non rimuovere la macchina del ghiaccio
per prendere il ghiaccio.
Ruotare di 90° in senso orario i pulsanti delle
camere del ghiaccio (lato destro); il ghiaccio cadrà
nella scatola di stoccaggio del ghiaccio più sotto.
Sarà poi possibile rimuovere la scatola di stoccag-
gio del ghiaccio e servire il ghiaccio stesso.
CIl contenitore del ghiaccio è stato pensato
unicamente per contenere ghiaccio. No
riempire con acqua. Questa operazione
potrebbe provocarne la rottura.
CNei prodotti con macchina per il
ghiaccio automatica, si può sentire il
rumore quando si versa il ghiaccio.
Questo rumore è normale e non è un
segno di guasto.

25 / 32 IT
Frigorifero/Manuale dell'Utente
Uso del prodotto
6.15 Congelamento di alimenti freschi
Per conservare la qualità degli alimenti, i cibi
posizionati nello scomparto congelatore devono
essere congelati quanto più velocemente
possibile, servendosi a tal fine della funzione di
congelamento rapido.
Per congelare grandi quantitativi di alimenti
freschi, premere il pulsante di congelamento
rapido 24 ore, prima di collocare gli alimenti
all'interno dello scomparto congelatore.
Congelando gli alimenti freschi sarà possibile
allungarne il tempo di conservazione all'interno
dello scomparto congelatore.
Confezionare i cibi in sacchetti ermetici e
chiudere saldamente.
Accertarsi che gli alimenti siano confezionati
prima di inserirli all'interno del congelatore
Servirsi di contenitori per il congelatore,
pellicola e carta anti-umidità, sacchetti di
plastica o altri materiali da confezionamento
simili anziché della normale carta per
confezionamento.
Segnare su ogni confezione di alimenti la
data del congelamento. Questo permetterà di
determinare la freschezza di ogni confezione
ogni volta che il freezer viene aperto. Tenere i
cibi più vecchi davanti, di modo che vengano
consumati prima.
Gli alimenti congelati vanno usati
immediatamente dopo essere stati scongelati e
non dovrebbero essere congelati una seconda
volta.
Non congelare grandi quantità di cibo in una
sola volta.
Impostazione
dello
scomparto
congelatore
Impostazione
dello
scomparto
frigorifero
Descrizioni
-18°C 4°C Questa è l'impostazione predefinita consigliata.
-20,-22 o -24
°C 4°C Queste impostazioni sono consigliate quando la temperatura
ambiente supera i 30°C.
Congelamento
rapido 4°C
Selezionare la funzione congelamento rapido 24ore prima di inserire
il cibo; il prodotto tornerà alle impostazioni precedenti quando il
processo viene completato.
-18°C o
inferiore 2°C
Usare queste impostazioni se si ritiene che lo scomparto del
congelatore non sia sufficientemente freddo, a causa della
temperatura ambiente, o a causa delle frequenti aperture della
porta.
6.16 Consigli per conservare
alimenti surgelati
Lo scomparto deve essere impostato a una
temperatura minima di -18°C.
1. Collocare gli alimenti all'interno del congelatore
quanto più rapidamente possibile per evitare
che si scongelino.
2. Prima del congelamento, verificare la "data di
scadenza" sulla confezione per accertarsi del
fatto che il prodotto non sia scaduto.
3. Accertarsi che la confezione dell'alimento non
sia danneggiata.
6.17 Dettagli congelatore
Conformemente agli standard IEC 62552, Il
congelatore deve avere la capacità di consolare
4,5 chili di alimenti a una temperatura di -18°C
o inferiore, in 24 ore, per ogni 100 l di volume di
scomparto di congelamento. Gli alimenti possono
essere preservati solo per lunghi periodi di tempo
a temperature uguali o inferiori a -18°. Sarà
possibile conservare gli alimenti freschi per mesi,
all'interno del congelatore a temperature uguali o
inferiori a -18°).

26 /32 IT Frigorifero/Manuale dell'Utente
Uso del prodotto
Per evitare uno scongelamento parziale, gli
alimenti da congelare non devono entrare in
contatto con gli altri alimenti già congelati
all'interno del congelatore.
Bollire le verdure e filtrare l'acqua per estendere il
tempo di conservazione del congelato. Collocare gli
alimenti in sacchetti ermetici, dopo aver eseguito
il filtraggio e il posizionamento all'interno del
congelatore. Banane, pomodori, lattuga, sedano,
uova bollite, patate e altri alimenti simili non
dovrebbero essere congelati. Congelando questi
alimenti se ne ridurrà il valore nutrizionale e la
qualità alimentare; i prodotti si potrebbero inoltre
rovinare, il che causa problemi a livello di salute.
6.18 Posizionamento degli alimenti
Ripiani dello
scomparto
congelatore
Vari alimenti congelati quali ad
esempio carne, pesce, gelato,
verdura, eccetera.
Ripiani dello
scomparto
raffreddatore
Alimenti all'interno di pentole,
vassoi e contenitori, uova
(all'interno di una confezione
chiusa)
Ripiani della
porta dello
scomparto
raffreddatore
Piccoli alimenti o bevande
Cassetto per
verdura Frutta e verdura
Scomparto
alimenti
freschi
Prodotti gastronomici, ad
esempio colazione, carne da
consumare a breve
6.19 Avviso di porta aperta
(Questa funzione è opzionale)
Se la porta del prodotto rimane aperta per 1,5
minuto verrà emesso un allarme udibile. L'allarme
udibile si fermerà quando la porta viene chiusa
oppure quando viene premuto qualsiasi pulsante
sul display, ove disponibile.
6.20 Lampada di illuminazione
La luce interna si serve di una lampadina LED.
Contattare il servizio autorizzato per eventuali
problemi con questa lampada.
La lampada o le lampade utilizzate in questa
apparecchiatura non possono essere utilizzate per
l'illuminazione della casa. L'uso previsto di questa
lampada è quello di aiutare l'utente a mettere il
cibo nel frigorifero/congelatore in modo sicuro e
confortevole.

27 / 32 IT
Frigorifero/Manuale dell'Utente
7 Manutenzione e pulizia
B
AVVERTENZA: Leggere anzitutto la
sezione "Istruzioni di sicurezza”!
B
AVVERTENZA: Prima di procedere con
la pulizia, scollegare il frigorifero.
Non utilizzare utensili affilati o abrasivi per
pulire il prodotto. Non utilizzare materiali come
detergenti domestici, sapone, detersivi, gas,
benzina alcool, cera, ecc.
La polvere deve essere rimossa dalla griglia
di ventilazione sul retro del prodotto almeno
una volta all'anno (senza aprire il coperchio).
La pulizia deve essere effettuata con un panno
asciutto.
Fare attenzione a tenere lontana l'acqua dalla
copertura delle lampade e dalle altre componenti
elettriche.
Pulire la porta servendosi di un panno umido.
Per rimuovere la porta e i vari ripiani, rimuovere
prima tutto il contenuto. Rimuovere i ripiani della
porta sollevandoli verso l'alto. Pulire e asciugare
i ripiani, poi fissare nuovamente in posizione
facendo scorrere da sopra.
Non usare acqua con cloro o prodotti
detergenti sulla superficie esterna e sulle
componenti rivestite in cromo. Il cloro provoca
ruggine su queste superfici metalliche.
Per evitare la deformazione della parte in
plastica e rimuovere le impronte, non utilizzare
utensili affilati e abrasivi, sapone, materiali per
la pulizia della casa, detergenti, gas, benzina,
vernice e sostanze simili. Per pulire, usare acqua
tiepida e un panno morbido, quindi asciugare.
Sui prodotti senza la funzione No-Frost, sulla
parete posteriore dello scomparto congelatore
potrebbero formarsi goccioline d'acqua e ghiaccio
fino allo spessore di un dito. Non pulirla; non
applicare mai olio o sostanze simili.
Per pulire la superficie esterna del prodotto
utilizzare un panno in micro-fibra leggermente
inumidito. Spugne e altri tipi di panni per la pulizia
potrebbero graffiare la superficie.
Per pulire tutti i componenti rimovibili
durante la pulizia della superficie interna
del prodotto, lavare questi componenti con
una soluzione delicata composta da sapone,
acqua e carbonato. Risciacquare e asciugare
completamente. Evitare il contatto dell'acqua
con i componenti dell'illuminazione e con il
pannello di controllo.
A
ATTENZIONE:
Non utilizzare aceto, alcool o
altri detergenti a base di alcool
su nessuna delle superfici
interne.
7.1 Superfici esterne in
acciaio inossidabile
Utilizzare un detergente non abrasivo per
acciaio inossidabile e applicarlo con un panno
morbido privo di pelucchi. Per lucidare, strofinare
delicatamente la superficie con un panno in micro-
fibra inumidito con acqua e utilizzare una pelle di
camoscio per lucidare a secco. Seguire sempre le
venature in acciaio inossidabile.
7.2 Pulizia dei prodotti con
porte in vetro
Rimuovere la pellicola di protezione sui vetri.
Sulla superficie in vetro è presente un rivestimento.
Questo rivestimento riduce al minimo la formazione
di macchie e consente una facile pulizia delle
macchie stesse e della sporcizia formatasi. I vetri
non protetti da un rivestimento potrebbero essere
esposti in breve tempo ad agenti inquinanti organici
o inorganici, atmosferici o derivanti dall'acqua,
come calcare, sali minerali, idrocarburi incombusti,
ossidi metallici e siliconi, che provocano facili
macchie e danni fisici. Nonostante vengano puliti
regolarmente, mantenere puliti i vetri è molto
difficile, se non impossibile. Di conseguenza, la
trasparenza e il bell’aspetto del vetro si riducono.
I metodi e gli agenti di pulizia duri e abrasivi
aumentano ulteriormente questi difetti e accelerano
il processo di deterioramento.

28 /32 IT Frigorifero/Manuale dell'Utente
Per i processi di pulizia di routine, devono essere
utilizzati prodotti di pulizia non alcalini e non
corrosivi a base di acqua*.
Per ottenere una maggiore durata di questo
rivestimento, durante la pulizia non devono essere
utilizzate sostanze alcaline e corrosive.
Per aumentare la resistenza di questi vetri contro
gli urti e le rotture viene applicato un processo di
tempra.
Come ulteriore precauzione di sicurezza, sulla
superficie posteriore di questi vetri è stata
applicato un film di sicurezza per evitare danni
all'ambiente in caso di rottura.
7.3. Prevenzione dei cattivi odori
Il prodotto è stato realizzato con materiali che non
emettono cattivi odori. Il posizionamento degli
alimenti in sezioni non adeguate e la pulizia delle
superfici interne effettuata in modo non corretto
potrebbe provocare cattivi odori.
A tal fine consigliamo di pulire l'interno con acqua
gassata ogni 15 giorni.
Tenere gli alimenti in contenitori sigillati.
I microrganismi potrebbero fuoriuscire dagli
alimenti non sigillati causando così cattivi odori.
Non conservare alimenti scaduti e marci
all'interno del frigorifero.
CIl tè è uno delle sostanze più efficaci per
eliminare gli odori. Mettere la polpa del
tè preparato nel prodotto all'interno di un
contenitore aperto e toglierla dopo 12 ore
al massimo. La polpa del tè conservata
all'interno del prodotto per più di 12 ore
assorbirà gli organismi responsabili dei
cattivi odori.
7.4 Protezione delle
superfici in plastica
L'olio rovesciato sulle superfici in plastica potrebbe
danneggiare la superficie, e deve essere pulito
immediatamente servendosi di acqua tiepida.
7 Manutenzione e pulizia

29 / 32 IT
Frigorifero/Manuale dell'Utente
8 Guida alla risoluzione dei problemi
Controllare questo elenco prima di contattare il
servizio clienti. Questa operazione vi consentirà
di risparmiare soldi. Questo elenco contiene
le lamentele più frequenti che non riguardano
problemi a livello di manodopera o materiali.
Alcune funzioni qui indicate potrebbero non essere
valide per il prodotto in questione.
Il frigorifero non funziona.
La presa di corrente non è stata inserita
correttamente. >>> Spingerla fino a inserirla
completamente nella presa.
Il fusibile collegato alla presa che alimenta il
prodotto, oppure il fusibile principale, è bruciato.
>>> Controllare il fusibile.
Condensa sulla parete laterale dello
scomparto raffreddatore (MULTI ZONE, COOL,
CONTROL e FLEXI ZONE).
La porta viene aperta troppo spesso >>> Fare
attenzione a non aprire troppo frequentemente la
porta del prodotto.
L'ambiente è troppo umido. >>> Non installare
il prodotto in ambienti umidi.
Gli alimenti contenenti liquidi sono conservati
in contenitori non sigillati. >>> Tenere gli alimenti
contenenti liquidi in contenitori sigillati.
La porta del prodotto viene lasciata aperta. >>>
Non tenere aperte a lungo le porte del frigorifero.
Il termostato è impostato su una temperatura
troppo bassa. >>> Impostare il termostato su
una temperatura adeguata.
Il compressore non funziona.
In caso di improvviso black out, o nel caso in cui
la spina venga tolta e poi reinserita, la pressione del
gas nel sistema di raffreddamento del prodotto non
è equilibrata, il che fa scattare la protezione termica
del compressore. Il prodotto si riavvierà dopo circa 6
minuti. Qualora il prodotto non si riavvii dopo questo
periodo, contattare l'assistenza.
La modalità di scongelamento è attiva. >>> Si
tratta di una condizione normale per un frigorifero con
funzione di sbrinamento completamente automatica. Lo
sbrinamento avviene a intervalli periodici.
Il prodotto non è collegato. >>> Verificare che il
cavo di alimentazione sia collegato.
L'impostazione della temperatura è sbagliata. >>>
Selezionare l'impostazione di temperatura adeguata.
Non c'è corrente. >>> Il prodotto continuerà a
funzionare normalmente quando verrà ripristinata la
corrente elettrica.
Il rumore di funzionamento del frigorifero
aumenta col passare del tempo.
Le prestazioni del prodotto potrebbero variare
a seconda delle variazioni della temperatura
ambiente. Ciò è normale e non è un'anomalia di
funzionamento.
Il frigorifero funziona troppo spesso o troppo
a lungo.

30 /32 IT Frigorifero/Manuale dell'Utente
Guida alla risoluzione dei problemi
Il nuovo prodotto potrebbe essere più grande di
quello precedente. I prodotti più grandi funzioneranno
più a lungo.
La temperatura della stanza potrebbe essere
alta. >>> Il prodotto funzionerà normalmente per
lunghi periodi di tempo con temperature ambiente
superiori.
Il prodotto potrebbe essere stato di recente
collegato alla corrente, oppure al suo interno
potrebbero essere stati recentemente aggiunti vari
alimenti. >>> Al prodotto servirà più tempo per
raggiungere la temperatura impostata, se collegato
di recente, oppure nel caso in cui siano stati collocati
nuovi alimenti al suo interno. Ciò è normale.
Forse di recente sono state introdotte nel
frigorifero grandi quantità di alimenti caldi. >>>
Non mettere alimenti caldi direttamente dentro al
frigorifero.
Le porte sono state aperte frequentemente
o tenute aperte a lungo. >>> L'aria calda che si
muove all'interno provocherà un funzionamento più
prolungato. Non aprire le porte con troppa frequenza.
Le porte del congelatore o del raffreddatore
potrebbero essere socchiuse. >>> Controllare che le
porte siano totalmente chiuse.
Il prodotto potrebbe essere impostato su una
temperatura troppo bassa. >>> Impostare la
temperatura su un livello più alto e attendere che il
prodotto raggiunga la temperatura desiderata.
La rondella della porta del raffreddatore o del
congelatore potrebbe essere sporca, usurata, rotta
o non correttamente configurata. >>> Pulire o
sostituire la guarnizione. Le rondelle consumate e
usurate faranno funzionare il prodotto più a lungo per
conservare la temperatura attuale.
La temperatura del congelatore è molto
bassa, ma la temperatura del raffreddatore è
corretta.
La temperatura dello scomparto congelatore
è impostata su un livello molto basso. >>>
Impostare la temperatura dello scomparto
congelatore su un livello più alto, quindi eseguire
un controllo.
La temperatura del raffreddatore è molto
bassa, ma la temperatura del congelatore è
corretta.
Impostare la temperatura dello scomparto
raffreddatore su un livello più alto, quindi
eseguire un controllo. >>> Impostare la
temperatura dello scomparto congelatore su un
livello più alto, quindi eseguire un controllo.
Gli alimenti conservati nei cassetti dello
scomparto raffreddatore sono congelati.
Impostare la temperatura dello scomparto
raffreddatore su un livello più alto, quindi
eseguire un controllo. >>> Impostare la
temperatura dello scomparto congelatore su un
livello più alto, quindi eseguire un controllo.
La temperatura nello scomparto
raffreddatore e congelatore è troppo alta.
La temperatura dello scomparto raffreddatore
è impostata su un livello molto alto. >>>
L'impostazione della temperatura dello scomparto
raffreddatore ha un effetto sulla temperatura
dello scomparto congelatore. Attendere che la
temperatura delle parti interessate raggiunga il
livello sufficiente modificando la temperatura degli
scomparti del raffreddatore o del congelatore.
Le porte sono state aperte frequentemente o
tenute aperte a lungo. >>> Non aprire le porte con
troppa frequenza.
La porta potrebbe essere socchiusa. >>>
Chiudere completamente la porta.
Il prodotto potrebbe essere stato di recente
collegato alla corrente, oppure al suo interno
potrebbero essere stati recentemente aggiunti vari
alimenti. >>> Non si tratta di un'anomalia. >>>
Al prodotto servirà più tempo per raggiungere la
temperatura impostata, se collegato di recente,
oppure nel caso in cui siano stati collocati nuovi
alimenti al suo interno.
Forse di recente sono state introdotte nel
frigorifero grandi quantità di alimenti caldi. >>>
Non mettere alimenti caldi direttamente dentro al
frigorifero.
Vibrazioni o rumore.

31 / 32 IT
Frigorifero/Manuale dell'Utente
Guida alla risoluzione dei problemi
Il pavimento non è piano o resistente. >>>
Se il prodotto vibra, quando viene spostato
lentamente, regolare i supporti per equilibrare
il prodotto. Verificare inoltre che la superficie
di appoggio sia sufficientemente resistente per
supportarne il peso.
Gli eventuali oggetti collocati sul prodotto
potrebbero causare rumori. >>> Togliere gli
eventuali elementi collocati sul prodotto.
Il prodotto emette rumori, come ad esempio
liquido che scorre, spruzzo, eccetera
I principi operativi del prodotto prevedono
flussi di liquido e di gas. >>> Ciò è normale e
non è un'anomalia di funzionamento.
C'è un rumore, simile a un soffio, che
proviene dal prodotto.
Il prodotto si serve di una ventola per il
processo di raffreddamento. Ciò è normale e non
è un'anomalia di funzionamento.
Si è formata condensa sulle pareti interne del
prodotto.
Le temperature calde o umide aumenteranno
la formazione di ghiaccio e la condensa. Ciò è
normale e non è un'anomalia di funzionamento.
Le porte sono state aperte frequentemente
o tenute aperte a lungo. >>> Non aprire le
porte con troppa frequenza; se la porta è aperta,
chiuderla.
La porta potrebbe essere socchiusa. >>>
Chiudere completamente la porta.
Si è formata condensa sulla superficie
esterna del prodotto o fra le porte.
Le condizioni ambientali potrebbero essere
umide, e ciò è normale. >>> La condensa si
dissiperà alla riduzione dell'umidità.
L'interno emette cattivi odori.
Il prodotto non è stato pulito regolarmente.
>>> Pulire la superficie interna a intervalli regolari
servendosi di spugna, acqua tiepida, e acqua gassata.
Alcuni supporti e materiali da confezionamento
potrebbero causare cattivi odori. >>> Servirsi di
supporti confezionamento che non emettano cattivi
odori.
Gli alimenti sono stati collocati in supporti non
sigillati. >>> Tenere gli alimenti in contenitori sigillati.
I microrganismi potrebbero fuoriuscire dagli alimenti
non sigillati causando così cattivi odori.
Rimuovere gli eventuali alimenti scaduti o rovinati
dal prodotto.
La porta non si chiude correttamente.
Le confezioni degli alimenti potrebbero
bloccare la porta. >>> Trovare una nuova
posizione per gli alimenti che bloccano le porte.
Il prodotto non è in posizione verticale,
appoggiato per terra. >>> Regolare i supporti per
l'equilibrio del prodotto.
Il pavimento non è piano o resistente. >>>
Verificare inoltre che la superficie di appoggio sia
sufficientemente resistente per supportarne il peso.
Il cassetto frutta e verdura è inceppato.
Gli alimenti potrebbero entrare in contatto
con la sezione superiore del cassetto. >>> Ri-
organizzare gli alimenti nel cassetto.
In caso di Superficie Calda sul Prodotto,
Mentre il prodotto è in funzione, potrebbero
generarsi temperature elevate tra le due porte,
sui pannelli laterali e sulla griglia posteriore.
Ciò è normale e non richiede interventi di
manutenzione!
La ventola continua a funzionare quando la
porta è aperta.
La ventola potrebbe continuare a funzionare
quando lo sportello del congelatore è aperto.
AAVVERTENZA: Qualora il problema
persista dopo aver seguito le
istruzioni contenute in questa
selezione, contattare il proprio
fornitore oppure un Servizio
Autorizzato. Evitare in ogni caso di
riparare il prodotto.

DISCLAIMER / AVVERTENZE
Alcuni guasti (semplici) possono essere adeguatamente gestiti dall'utente finale senza che
sorgano problemi di sicurezza o utilizzi non sicuri, a condizione che vengano eseguiti entro i limiti
e in conformità con le seguenti istruzioni (vedere la sezione "Riparazione fai da te").
Pertanto, salvo diversa autorizzazione nella sezione di seguito "Riparazione fai da te", le riparazioni
devono essere indirizzate a manutentori professionisti registrati al fine di evitare problemi di
sicurezza. Un manutentore professionista registrato è un manutentore professionista a cui è
stato concesso l'accesso alle istruzioni e all'elenco dei pezzi di ricambio di questo prodotto dal
produttore secondo le modalità descritte negli atti legislativi ai sensi della Direttiva 2009/125/CE.
Tuttavia, solo l'agente dell'assistenza (ovvero i manutentori professionisti autorizzati)
che è possibile contattare tramite il numero di telefono indicato nel manuale dell'utente
/ scheda di garanzia o tramite il rivenditore autorizzato che può fornire assistenza in
base ai termini di garanzia. Pertanto, si prega di notare che le riparazioni da parte di
manutentori professionisti (non autorizzati da Beko) invaliderà la garanzia.
Riparazione fai da te
La riparazione fai da te può essere eseguita dall'utente finale per quanto riguarda i seguenti pezzi
di ricambio: maniglie delle porte, cerniere delle porte, vassoi, cestelli e guarnizioni delle porte (un
elenco aggiornato è disponibile anche su support.beko.com dal 1° marzo 2021)
Inoltre, per garantire la sicurezza del prodotto e per prevenire il rischio di lesioni gravi, la suddetta
riparazione fai da te deve essere eseguita seguendo le istruzioni nel manuale utente per la
riparazione fai da te o disponibili in support.beko.com Per la propria sicurezza, scollegare il
prodotto prima di tentare qualsiasi riparazione fai da te.
Tentativi di riparazione e riparazione da parte degli utenti finali per parti non incluse in tale elenco
e/o che non seguono le istruzioni nei manuali utente per la riparazione fai da te o che sono
disponibili in support.beko.com, potrebbe dar luogo a problemi di sicurezza non imputabili a Bekoe
invaliderà la garanzia del prodotto.
Pertanto, si raccomanda vivamente agli utenti finali di astenersi dal tentativo di eseguire
riparazioni che non rientrano nell'elenco dei pezzi di ricambio menzionato, contattando in tali casi
manutentori professionisti autorizzati o manutentori professionisti registrati. Altrimenti, tali tentativi
da parte degli utenti finali possono causare problemi di sicurezza e danneggiare il prodotto e
conseguentemente causare incendi, inondazioni, elettrocuzione e gravi lesioni personali.
A titolo esemplificativo, ma non esaustivo, le seguenti riparazioni devono essere indirizzate ai
manutentori professionisti autorizzati o manutentori professionisti registrati: compressore, circuito
frigorifero, scheda principale, scheda inverter, scheda display ecc.
Il produttore/venditore non può essere ritenuto responsabile in ogni caso in cui gli utenti finali non
rispettano quanto sopra.

La disponibilità dei pezzi di ricambio frigorifero che hai acquistato è di 10 anni.
Durante questo periodo saranno disponibili ricambi originali per il corretto funzionamento
frigorifero.
La durata minima della garanzia del frigorifero acquistato è di 24 mesi.
Questo prodotto è dotato di una sorgente di illuminazione con classe energetica "G".
La sorgente di illuminazione nel prodotto dovrà essere sostituita solo da professionisti nel campo
della riparazione.

GN163140PTCHN-GN163242XBCHN
58 6476 0000/AC 2/2
Réfrigérateur
Manuel d’utilisation
FR

2 /32 FR Réfrigérateur/Manuel d'utilisation
1. Consignes de sécurité 3
1.1 Utilisation prévue. . . . . . . . . . . . . 3
1.2 - Sécurité des enfants, des
personnes vulnérables et des animaux
domestiques. . . . . . . . . . . . . . . . . . . . . . 3
1.3 - Sécurité électrique . . . . . . . . . . 4
1.4 - Sécurité des transports . . . . . . . 4
1.5 - Sécurité d'installation . . . . . . . . 4
1.6- Sécurité opérationnelle. . . . . . . . 5
1.7- Sécurité de maintenance et de
nettoyage. . . . . . . . . . . . . . . . . . . . . . . . 6
1.8- HomeWhiz . . . . . . . . . . . . . . . . . . . . 7
1.9- Éclairage. . . . . . . . . . . . . . . . . . . . . . 7
2 Instructions environnementales 8
2.1Conformité avec la Directive WEEE et Mise au
rebut des appareils usagés . . . . . . . . . . 8:
2.2 Conformité avec la Directive RoHS . . . . . . . 8
2.3 Informations sur l'emballage . . . . . . . . . . . 8
3 Votre réfrigérateur 9
4 Installation 10
4.1 Le bon endroit pour l'installation . . . . . . . 10
4.2 Fixation des cales en plastique . . . . . . . . 10
4.3 Ajustement des pieds . . . . . . . . . . . . . . . 11
4.4. Raccordement électrique . . . . . . . . . . . . 12
5 Préparation 13
5.1 Comment économiser l'énergie . . . . . . . 13
5 Préparation 14
5.2 Première opération . . . . . . . . . . . . . . . . . 14
6 Fonctionnement de l’appareil 15
6.1 Éteindre le produit. . . . . . . . . . . . . . . . . . 15
6 Fonctionnement du produit 16
6.2 Panneau indicateur . . . . . . . . . . . . . . . . . 16
6.3 Panneau indicateur . . . . . . . . . . . . . . . . . 19
6.4 Module de désodorisation . . . . . . . . . . . . 21
6.5 Bac à légumes à humidité contrôlée
(EverFresh+) . . . . . . . . . . . . . . . . . . . . 22
6.6 Lumière bleue/HarvestFresh . . . . . . . . . . 22
6.7 Utilisation de la fontaine à eau . . . . . . . . 23
6.8 Remplir le réservoir de la fontaine d'eau . 23
6.9 Nettoyage du réservoir d'eau . . . . . . . . . . 23
6.10 Le compartiment des produits laitiers
(entrepôt frigorifique) . . . . . . . . . . . . . . 25
6.11 Bac à légumes . . . . . . . . . . . . . . . . . . . 25
6.12 Ioniseur . . . . . . . . . . . . . . . . . . . . . . . . 25
6.13 Filtre anti-odeurs . . . . . . . . . . . . . . . . . 25
6.14 Machine à glaçons Icematic et bac à
glaçons . . . . . . . . . . . . . . . . . . . . . . . . 25
6.15 Congélation des aliments frais . . . . . . . . 26
6.16 Recommandations relatives à la conservation
des aliments congelés. . . . . . . . . . . . . . 26
6.17 Informations relatives au congélateur . . . 26
6.18 Disposition des aliments . . . . . . . . . . . . 27
6.19 Alerte de porte ouverte . . . . . . . . . . . . . 27
6.20 Lampe d'éclairage . . . . . . . . . . . . . . . . 27

3 / 32 FR
Réfrigérateur/Manuel d'utilisation
Cette section contient des consignes de
sécurité qui vous aideront à vous protéger
contre les risques de dommages corporels ou
matériels.
Notre société n'est pas responsable des
dommages qui peuvent survenir lorsque ces
instructions ne sont pas suivies.
Les opérations d'installation et de
réparation sont toujours effectuées par le
fabricant, un agent de service agréé ou une
personne qualifiée désignée par l'importateur.
N'utilisez que des pièces et accessoires
d'origine.
Les pièces de rechange d'origine seront
fournies pendant 10 ans, à compter de la date
d'achat du produit.
Ne pas réparer ou remplacer une partie
du produit, sauf si cela est expressément spécifié
dans le manuel d'utilisation.
N'apportez aucune modification
technique au produit.
1.1 Utilisation prévue
Le présent produit ne peut être utilisé à des
fins commerciales et ne doit pas être utilisé
hors de son usage prévu.
Le présent produit est destiné à être utilisé dans
les maisons et les lieux intérieurs.
Par exemple :
- Cuisines du personnel dans les magasins,
bureaux et autres environnements de travail,
- Exploitations agricoles,
- Zones utilisées par les clients dans les hôtels,
motels et autres types d'hébergement,
- Hôtels de type lit & petit déjeuner, pensionnats,
- Applications telles que la restauration et la vente
au détail.
Il faut éviter d'utiliser ce produit à l'extérieur avec
ou sans tente au-dessus, par exemple sur les
bateaux, les balcons ou les terrasses. Il ne faut pas
exposer le produit à la pluie, à la neige, au soleil ou
au vent.
Le risque d'incendie est bien présent !
1.2 - Sécurité des enfants,
des personnes vulnérables et
des animaux domestiques
Cet appareil peut être utilisé par des enfants
âgés d’au moins 8 ans et par des personnes
ayant des capacités physiques, sensorielles ou
mentales réduites ou dénuées d’expérience
ou de connaissance, s’ils (si elles) sont
correctement surveillé(es) ou si des instructions
relatives à l’utilisation de l’appareil en toute
sécurité leur ont été données et si les risques
encourus ont été appréhendés. Les enfants ne
doivent pas jouer avec l’appareil. Le nettoyage
et l’entretien par l’usager de doivent pas être
effectués par des enfants sans surveillance.
Les produits électriques sont dangereux pour
les enfants et les animaux domestiques. Les
enfants et les animaux ne doivent pas jouer
avec, grimper ou entrer dans le produit.
Le nettoyage et l'entretien des utilisateurs sont
interdits aux enfants, sauf s'ils sont surveillés
par quelqu'un.
Gardez les matériaux d'emballage hors de
portée des enfants. Le risque de blessure et
d'étouffement est bien présent !
Avant de se débarrasser du produit ancien ou
obsolète :
1.
Débranchez le produit en le saisissant par la fiche.
2.
Coupez le câble d'alimentation et retirez-le de
l'appareil avec sa fiche
3.
Ne retirez pas les étagères ou les tiroirs afin qu'il
soit plus difficile pour les enfants d'entrer dans le
produit.
1. Consignes de sécurité
Product specificaties
| Merk: | BEKO |
| Categorie: | Koelkast |
| Model: | GN163140PTCHN |
| Apparaatplaatsing: | Vrijstaand |
| Soort bediening: | Touch |
| Kleur van het product: | Roestvrijstaal |
| Ingebouwd display: | Ja |
| Gewicht: | 98200 g |
| Breedte: | 910 mm |
| Diepte: | 705 mm |
| Hoogte: | 1790 mm |
| Ijsmaker: | Ja |
| Geluidsniveau: | 38 dB |
| Energie-efficiëntieklasse: | E |
| Jaarlijks energieverbruik: | 327 kWu |
| Gewicht verpakking: | 108000 g |
| Breedte verpakking: | 980 mm |
| Diepte verpakking: | 780 mm |
| Hoogte verpakking: | 1910 mm |
| Nettocapaciteit vriezer: | 212 l |
| Vriescapaciteit: | 13 kg/24u |
| Nettocapaciteit koelkast: | 368 l |
| No Frost (koelkast): | Ja |
| Koelkast binnenverlichting: | Ja |
| Soort lamp: | LED |
| Aantal planken koelkast: | 6 |
| Aantal groente lades: | 2 |
| Vriezer positie: | Ernaast |
| No Frost (vriezer): | Ja |
| Bewaartijd bij stroomuitval: | 9 uur |
| Snelvriesfunctie: | Ja |
| Aantal planken vriezer: | 6 |
| Vakantie functie: | Ja |
| Totale nettocapaciteit: | 580 l |
| Eierenrekje: | Ja |
| Totale brutocapaciteit: | 640 l |
| Plankmateriaal: | Glas |
| Koelkastdeurvakken: | 5 |
| Deur open alarm: | Ja |
| Stroomgebruik per dag: | 0.49 kWh/24u |
| Minimum operationele temperatuur: | 10 °C |
| Maximale temperatuur (in bedrijf): | 43 °C |
| Klimaatklasse: | SN-T |
| Geluidsemissieklasse: | C |
| Inverter technologie: | Ja |
| Locatie van display: | Op de deur |
| Vriezer interieurverlichting: | Ja |
| Instelbare thermostaat: | Ja |
| Totale hoogte: | 1790 mm |
| Bruto gewicht: | 108000 g |
| Vriezerdeurvakken: | 4 |
| Vriezer aantal groentelades: | 2 |
| Aantal deuren vriezer: | 1 |
| Productontwerp: | Amerikaanse deur |
| AC-ingangsspanning: | 220 - 240 V |
| AC-ingangsfrequentie: | 50 Hz |
| Type beeldscherm: | LED |
| Energie-efficiëntieschaal: | A tot G |
| Verzonken handgreep(en): | Ja |
| Ijsblokjeshouder: | Ja |
Heb je hulp nodig?
Als je hulp nodig hebt met BEKO GN163140PTCHN stel dan hieronder een vraag en andere gebruikers zullen je antwoorden
Handleiding Koelkast BEKO

27 Februari 2025
19 Februari 2025
3 Februari 2025
14 Januari 2025
14 Januari 2025
14 Januari 2025
14 Januari 2025
20 December 2024
20 December 2024
16 December 2024
Handleiding Koelkast
- Koelkast Electrolux
- Koelkast Bosch
- Koelkast Philips
- Koelkast IKEA
- Koelkast Candy
- Koelkast Samsung
- Koelkast Delonghi
- Koelkast Indesit
- Koelkast Panasonic
- Koelkast LG
- Koelkast AEG
- Koelkast ATAG
- Koelkast AEG Electrolux
- Koelkast Bauknecht
- Koelkast Daewoo
- Koelkast Etna
- Koelkast Garmin
- Koelkast Grundig
- Koelkast Honeywell
- Koelkast Inventum
- Koelkast Kenwood
- Koelkast Liebherr
- Koelkast Miele
- Koelkast Medion
- Koelkast Quigg
- Koelkast Siemens
- Koelkast Toshiba
- Koelkast Unold
- Koelkast Whirlpool
- Koelkast Yamaha
- Koelkast Zanussi
- Koelkast Zanker
- Koelkast Hoover
- Koelkast Adler
- Koelkast Airlux
- Koelkast Akai
- Koelkast Aldi
- Koelkast Amana
- Koelkast Amica
- Koelkast Arcelik
- Koelkast Arctic Air
- Koelkast Ardo
- Koelkast Ariston
- Koelkast Asko
- Koelkast Avanti
- Koelkast Avintage
- Koelkast Balay
- Koelkast Bartscher
- Koelkast Baumatic
- Koelkast Belling
- Koelkast Bellini
- Koelkast Bertazzoni
- Koelkast Bifinett
- Koelkast Blaupunkt
- Koelkast Blaze
- Koelkast Blomberg
- Koelkast Blucher
- Koelkast Bluesky
- Koelkast Bomann
- Koelkast Bompani
- Koelkast Boretti
- Koelkast Brandt
- Koelkast Daikin
- Koelkast De Dietrich
- Koelkast Defy
- Koelkast Denver
- Koelkast Dimplex
- Koelkast Dometic
- Koelkast Domo
- Koelkast Dunavox
- Koelkast Edesa
- Koelkast Edgestar
- Koelkast Edy
- Koelkast Electra
- Koelkast Elektra Bregenz
- Koelkast Elica
- Koelkast Emerio
- Koelkast Engel
- Koelkast ETA
- Koelkast Eurotech
- Koelkast Everglades
- Koelkast Exquisit
- Koelkast Fagor
- Koelkast FAURE
- Koelkast Finlux
- Koelkast Fisher And Paykel
- Koelkast Fisher Paykel
- Koelkast Franke
- Koelkast Friac
- Koelkast Frigidaire
- Koelkast Frilec
- Koelkast G3 Ferrari
- Koelkast Gaggenau
- Koelkast Galanz
- Koelkast Gardenline
- Koelkast Gastro-Cool
- Koelkast GE
- Koelkast Gecko
- Koelkast General Electric
- Koelkast Gorenje
- Koelkast Gourmetmaxx
- Koelkast Gram
- Koelkast Gys
- Koelkast H.Koenig
- Koelkast Haier
- Koelkast Hansa
- Koelkast Hanseatic
- Koelkast Hisense
- Koelkast Hitachi
- Koelkast Hotpoint
- Koelkast Hotpoint-Ariston
- Koelkast Husqvarna
- Koelkast Hyundai
- Koelkast Iberna
- Koelkast Ideal
- Koelkast Igloo
- Koelkast Ignis
- Koelkast Ilve
- Koelkast Insignia
- Koelkast Kalorik
- Koelkast Kelvinator
- Koelkast Kenmore
- Koelkast KitchenAid
- Koelkast Klarstein
- Koelkast Koenic
- Koelkast Kogan
- Koelkast Kuppersbusch
- Koelkast La Germania
- Koelkast Lavorwash
- Koelkast Leisure
- Koelkast Leonard
- Koelkast Livoo
- Koelkast Logik
- Koelkast Luxor
- Koelkast Lynx
- Koelkast M-System
- Koelkast Magic Chef
- Koelkast Manta
- Koelkast Marshall
- Koelkast Marynen
- Koelkast Matrix
- Koelkast Maytag
- Koelkast Meireles
- Koelkast Melissa
- Koelkast Mercury
- Koelkast Mestic
- Koelkast Midea
- Koelkast Mitsubishi
- Koelkast Moa
- Koelkast Mobicool
- Koelkast Moulinex
- Koelkast MPM
- Koelkast Nabo
- Koelkast Napoleon
- Koelkast Nedis
- Koelkast Neff
- Koelkast New Pol
- Koelkast Newpol
- Koelkast Nordland
- Koelkast Nordmende
- Koelkast Novy
- Koelkast Pelgrim
- Koelkast Perel
- Koelkast Philco
- Koelkast PKM
- Koelkast Polar
- Koelkast Prima
- Koelkast Primo
- Koelkast Princess
- Koelkast Privileg
- Koelkast ProfiCook
- Koelkast Progress
- Koelkast Proline
- Koelkast Pyle
- Koelkast Rangemaster
- Koelkast RCA
- Koelkast Rex
- Koelkast Rhino
- Koelkast Rosieres
- Koelkast Russell Hobbs
- Koelkast Salora
- Koelkast Salton
- Koelkast Sanyo
- Koelkast Saro
- Koelkast Sauber
- Koelkast Scancool
- Koelkast Scandomestic
- Koelkast Schaub Lorenz
- Koelkast Schneider
- Koelkast Scholtes
- Koelkast Severin
- Koelkast Sharp
- Koelkast Silvercrest
- Koelkast Silverline
- Koelkast Smeg
- Koelkast Sogo
- Koelkast SPT
- Koelkast Steel Cucine
- Koelkast Stirling
- Koelkast Stoves
- Koelkast Sub-Zero
- Koelkast Sunny
- Koelkast Swan
- Koelkast TCL
- Koelkast Techwood
- Koelkast Tecnolux
- Koelkast Teka
- Koelkast Telefunken
- Koelkast Thermador
- Koelkast Thetford
- Koelkast Thomson
- Koelkast Thorens
- Koelkast Tomado
- Koelkast Tristar
- Koelkast United
- Koelkast Upo
- Koelkast V-Zug
- Koelkast Vestel
- Koelkast Vestfrost
- Koelkast Viking
- Koelkast Vintec
- Koelkast Vivax
- Koelkast Waeco
- Koelkast Westinghouse
- Koelkast White Knight
- Koelkast WhiteLine
- Koelkast Whynter
- Koelkast WLA
- Koelkast Wolkenstein
- Koelkast Worx
- Koelkast Jocca
- Koelkast Jocel
- Koelkast Junker
- Koelkast Juno
- Koelkast Juno-electrolux
- Koelkast OK
- Koelkast Omega
- Koelkast ONYX
- Koelkast Oranier
- Koelkast Changhong
- Koelkast Becken
- Koelkast Camry
- Koelkast Caso
- Koelkast Concept
- Koelkast Continental Edison
- Koelkast Cuisinart
- Koelkast ECG
- Koelkast Elba
- Koelkast Essentiel B
- Koelkast Guzzanti
- Koelkast Heinner
- Koelkast Khind
- Koelkast Optimum
- Koelkast Orbegozo
- Koelkast Palsonic
- Koelkast Pitsos
- Koelkast Profilo
- Koelkast Trisa
- Koelkast Vox
- Koelkast True
- Koelkast Kunft
- Koelkast Americana
- Koelkast Arthur Martin
- Koelkast Aspes
- Koelkast AYA
- Koelkast Brandy Best
- Koelkast Bush
- Koelkast Caple
- Koelkast Castor
- Koelkast CDA
- Koelkast Comfee
- Koelkast Constructa
- Koelkast Corberó
- Koelkast Costway
- Koelkast Crosley
- Koelkast Cylinda
- Koelkast Dacor
- Koelkast Danby
- Koelkast Electrolux-Rex
- Koelkast Equator
- Koelkast Esatto
- Koelkast Euromaid
- Koelkast Flavel
- Koelkast Freggia
- Koelkast Goddess
- Koelkast Helkama
- Koelkast High One
- Koelkast Icecool
- Koelkast IFB
- Koelkast Infiniton
- Koelkast Jenn-Air
- Koelkast John Lewis
- Koelkast Kaiser
- Koelkast Kernau
- Koelkast Koldfront
- Koelkast Limit
- Koelkast Listo
- Koelkast Monogram
- Koelkast Nevir
- Koelkast New World
- Koelkast Orima
- Koelkast Parmco
- Koelkast Respekta
- Koelkast Summit
- Koelkast Svan
- Koelkast Thor
- Koelkast Tisira
- Koelkast Tricity Bendix
- Koelkast Valberg
- Koelkast Viva
- Koelkast Zerowatt
- Koelkast Ardes
- Koelkast Eldom
- Koelkast GOTIE
- Koelkast Premium
- Koelkast Haeger
- Koelkast Zenith
- Koelkast Marvel
- Koelkast Artusi
- Koelkast BeefEater
- Koelkast Gasmate
- Koelkast Chefman
- Koelkast DCG
- Koelkast Kubo
- Koelkast Smart Brand
- Koelkast Royal Catering
- Koelkast Mora
- Koelkast CombiSteel
- Koelkast Osprey
- Koelkast Cata
- Koelkast Climadiff
- Koelkast Lamona
- Koelkast U-Line
- Koelkast Zephyr
- Koelkast Veripart
- Koelkast Mabe
- Koelkast SIBIR
- Koelkast Carpigiani
- Koelkast Foster
- Koelkast Arthur Martin-Electrolux
- Koelkast Curtiss
- Koelkast Godrej
- Koelkast Milectric
- Koelkast Orava
- Koelkast Rommer
- Koelkast Sangiorgio
- Koelkast Signature
- Koelkast Cecotec
- Koelkast BlueStar
- Koelkast Cobal
- Koelkast Cookology
- Koelkast Nodor
- Koelkast MBM
- Koelkast Benavent
- Koelkast Furrion
- Koelkast Sheffield
- Koelkast Paulmann
- Koelkast Accucold
- Koelkast Acros
- Koelkast Chiq
- Koelkast Fridgemaster
- Koelkast Gamko
- Koelkast Husky
- Koelkast Lec
- Koelkast Waltham
- Koelkast Carrefour Home
- Koelkast Norpole
- Koelkast Hoshizaki
- Koelkast Simfer
- Koelkast SEIKI
- Koelkast Traulsen
- Koelkast Avantco
- Koelkast Airflo
- Koelkast Lec Medical
- Koelkast Richome
- Koelkast Unic Line
- Koelkast Winia
- Koelkast Berg
- Koelkast CaterCool
- Koelkast Ariston Thermo
- Koelkast Element
- Koelkast Glem Gas
- Koelkast Coyote
- Koelkast Hestan
- Koelkast Heller
- Koelkast AVEA
- Koelkast Turbo Air
- Koelkast EvaKool
- Koelkast Uniprodo
- Koelkast Vinata
- Koelkast Maxx Cold
- Koelkast Wells
- Koelkast NewAir
- Koelkast Kucht
- Koelkast Norlake
- Koelkast Merax
- Koelkast Snaigė
- Koelkast Romo
- Koelkast Sam Cook
- Koelkast Consul
- Koelkast Silhouette
- Koelkast ColdTech
- Koelkast Magic Cool
- Koelkast JennAir
- Koelkast LERAN
- Koelkast Le Chai
- Koelkast IOMABE
- Koelkast APW Wyott
- Koelkast Kolpak
- Koelkast Hatco
- Koelkast Fulgor Milano
- Koelkast Les Petits Champs
- Koelkast Bushman
- Koelkast Master-Bilt
- Koelkast Hydra Kool
- Koelkast Linarie
- Koelkast XO
- Koelkast Arktic
- Koelkast Nemco
- Koelkast Beverage-Air
- Koelkast Vedette
- Koelkast Delfield
- Koelkast Alto-Shaam
- Koelkast Robinhood
- Koelkast Federal
- Koelkast NEO Tools
- Koelkast Structural Concepts
- Koelkast LeCavist
- Koelkast Sôlt
- Koelkast Avallon
- Koelkast Emperor's Select
- Koelkast Ravanson
- Koelkast Wine Klima
- Koelkast Marbor
- Koelkast Create
- Koelkast Hiberg
- Koelkast Koolatron
- Koelkast Cosmo
- Koelkast Adventure Kings
- Koelkast Lemair
- Koelkast Pando
- Koelkast Coldtainer
- Koelkast Orien
- Koelkast Enofrigo
- Koelkast BSK
- Koelkast Techfrost
- Koelkast Irinox
- Koelkast DCS
- Koelkast Azure
- Koelkast Germanica
- Koelkast Bromic
- Koelkast Kuhla
- Koelkast Adora
- Koelkast Brastemp
- Koelkast Haden
- Koelkast FrigeluX
- Koelkast Perlick
- Koelkast Sedona
- Koelkast Atosa
- Koelkast Cool Head
- Koelkast Gladiator
- Koelkast Coca-Cola
- Koelkast Vinotemp
- Koelkast Euro Appliances
- Koelkast Fhiaba
- Koelkast Triomph
- Koelkast Schmick
- Koelkast Dellware
- Koelkast InAlto
- Koelkast HABAU
- Koelkast Cooluli
- Koelkast Electroline
- Koelkast Tuscany
- Koelkast Café
- Koelkast TESLA Electronics
- Koelkast Brass Monkey
- Koelkast Wisberg
- Koelkast Premium Levella
- Koelkast DAYA
- Koelkast Kalamazoo
- Koelkast Yolco
- Koelkast Aconatic
- Koelkast Kluge
- Koelkast Hoover-Grepa
- Koelkast HomeCraft
- Koelkast Eqtemp
- Koelkast Landmark
- Koelkast Miller Lite
- Koelkast Lanbo
- Koelkast Corona
- Koelkast Coors Light
- Koelkast Momcube
Nieuwste handleidingen voor Koelkast

28 Maart 2025
28 Maart 2025
28 Maart 2025
28 Maart 2025
28 Maart 2025
28 Maart 2025

28 Maart 2025
28 Maart 2025
28 Maart 2025
28 Maart 2025