AVM FRITZ!Box Fon WLAN 7113 Handleiding
Lees hieronder de 📖 handleiding in het Nederlandse voor AVM FRITZ!Box Fon WLAN 7113 (122 pagina's) in de categorie Router. Deze handleiding was nuttig voor 221 personen en werd door 2 gebruikers gemiddeld met 4.5 sterren beoordeeld
Pagina 1/122

Installation,
Configuration
and Operation
FRITZ!Box
Fon 5113

FRITZ!Box Fon WLAN 7113 2
Legal Notice
Legal Notice
FRITZ!Box Fon WLAN 7113
This documentation and the software it describes are protected by copyright. AVM grants the non-
exclusive right to use the software, which is supplied exclusively in what is known as object code
format. The licensee may create only one copy of the software, which may be used exclusively for
backup use.
AVM reserves all rights that are not expressly granted to the licensee. Without previous approval
in writing, and except for in cases permitted by law, it is particularly prohibited to
copy, propagate or in any other manner make this documentation or this software publicly ac-
cessible, or
process, disassemble, reverse engineer, translate, decompile or in any other manner open
the software and subsequently copy, propagate or make the software publicly accessible in
any other manner.
Please consult the “License.txt” file on the product CD included in the package for specifics about
the licensing conditions.
This documentation and software have been produced with all due care and checked for correct-
ness in accordance with the best available technology. AVM GmbH disclaims all liability and war-
ranties, whether express or implied, relating to the AVM product’s quality, performance or suitabi-
lity for any given purpose which deviates from the performance specifications contained in the
product description. The licensee bears all risk in regard to hazards and impairments of quality
which may arise in connection with the use of this product.
AVM will not be liable for damages arising directly or indirectly from the use of the manual or the
software, nor for incidental or consequential damages, except in case of intent or gross negli-
gence. AVM expressly disclaims all liability for the loss of or damage to hardware or software or
data as a result of direct or indirect errors or destruction and for any costs (including connection
charges) related to the documentation and the software and due to incorrect installations not per-
formed by AVM itself.
The information in this manual and the software are subject to change without notice for the pur-
pose of technical improvement.
We offer a manufacturer’s warranty for this original product. The conditions of this warranty are
contained in the “Warranty.pdf” file in the “Info” folder on the product CD included with delivery.
© AVM GmbH 2009 – 2010. All rights reserved. Documentation release 07/2010
AVM in the Internet: www.avm.de/en
Unless otherwise indicated, all trademarks mentioned are legally protected trademarks owned by
AVM. This includes product names and logos in particular. Microsoft, Windows and the Windows
logo are trademarks owned by Microsoft Corporation in the USA and/or other countries. Bluetooth
is a trademark of Bluetooth SIG, Inc. licensed to AVM GmbH. All other product and company
names are trademarks of their respective owners.
AVM Audiovisuelles Marketing
und Computersysteme GmbH
Alt-Moabit 95
D 10559 Berlin
AVM Computersysteme
Vertriebs GmbH
Alt-Moabit 95
D 10559 Berlin

FRITZ!Box Fon WLAN 7270 3
Table of Contents
Symbols and Highlighting . . . . . . . . . . . . . . . . . . . . . . . . . 6
I CONNECTING AND OPERATION . . . . . . . . . . . . . . . . . . . . . . 7
1 Security and Handling. . . . . . . . . . . . . . . . . . . . . . . . . . . . . 7
2 FRITZ!Box Fon WLAN 7113 . . . . . . . . . . . . . . . . . . . . . . . . . 9
2.1 Package Contents . . . . . . . . . . . . . . . . . . . . . . . . . . . . . . . . . . . . . . . . . 10
2.2 Operation Requirements . . . . . . . . . . . . . . . . . . . . . . . . . . . . . . . . . . . 11
3 Connection . . . . . . . . . . . . . . . . . . . . . . . . . . . . . . . . . . . . 12
3.1 Launching Operation . . . . . . . . . . . . . . . . . . . . . . . . . . . . . . . . . . . . . . 12
3.2 Connecting to Electrical Power . . . . . . . . . . . . . . . . . . . . . . . . . . . . . . 13
3.3 Connecting to the Computer . . . . . . . . . . . . . . . . . . . . . . . . . . . . . . . . 14
3.4 Connecting Computers to the LAN Port . . . . . . . . . . . . . . . . . . . . . . . . 15
3.5 Connecting Computer(s) Wirelessly via WLAN . . . . . . . . . . . . . . . . . . 17
3.6 Connecting DSL and the Telephone Line. . . . . . . . . . . . . . . . . . . . . . . 20
3.7 Connecting with the Analog Telephone Line. . . . . . . . . . . . . . . . . . . . 21
3.8 Connecting Telephone, Fax, or Answering Machine . . . . . . . . . . . . . . 22
4 Opening the User Interface. . . . . . . . . . . . . . . . . . . . . . . . 23
4.1 Password Protection. . . . . . . . . . . . . . . . . . . . . . . . . . . . . . . . . . . . . . . 23
4.2 Save Settings . . . . . . . . . . . . . . . . . . . . . . . . . . . . . . . . . . . . . . . . . . . . 24
5 Internet Connections. . . . . . . . . . . . . . . . . . . . . . . . . . . . . 25
5.1 Configuring the Internet Connection Using the Wizard . . . . . . . . . . . 25
5.2 Configuring the Internet Connection Manually . . . . . . . . . . . . . . . . . . 25
5.3 Surfing the Net . . . . . . . . . . . . . . . . . . . . . . . . . . . . . . . . . . . . . . . . . . . 26
6 Telephone Connections . . . . . . . . . . . . . . . . . . . . . . . . . . 27
6.1 Entering your Phone Numbers . . . . . . . . . . . . . . . . . . . . . . . . . . . . . . . 27
6.2 Setting Up Telephony Devices . . . . . . . . . . . . . . . . . . . . . . . . . . . . . . . 28
6.3 Telephony Functions. . . . . . . . . . . . . . . . . . . . . . . . . . . . . . . . . . . . . . . 30

FRITZ!Box Fon WLAN 7270 4
7 Configuration and Operation on the Telephone . . . . . . . 32
7.1 Instructions for Operation at the Telephone. . . . . . . . . . . . . . . . . . . . 33
7.2 Audible Signals. . . . . . . . . . . . . . . . . . . . . . . . . . . . . . . . . . . . . . . . . . . 34
7.3 Configuring on the Telephone . . . . . . . . . . . . . . . . . . . . . . . . . . . . . . . 35
7.4 Operation at the Telephone . . . . . . . . . . . . . . . . . . . . . . . . . . . . . . . . . 42
8 Troubleshooting . . . . . . . . . . . . . . . . . . . . . . . . . . . . . . . . 53
8.1 Errors Opening the User Interface . . . . . . . . . . . . . . . . . . . . . . . . . . . . 53
8.2 The WLAN Adapter Cannot Find FRITZ!Box . . . . . . . . . . . . . . . . . . . . . 59
8.3 WLAN Connection Is Not Established . . . . . . . . . . . . . . . . . . . . . . . . . 61
8.4 Obtaining an IP Address Automatically. . . . . . . . . . . . . . . . . . . . . . . . 64
9 Uninstalling the FRITZ!Box . . . . . . . . . . . . . . . . . . . . . . . . 69
II PRODUCT DETAILS AND USEFUL INFORMATION . . . . . . . . 70
1 Product Details . . . . . . . . . . . . . . . . . . . . . . . . . . . . . . . . . 70
1.1 Cable . . . . . . . . . . . . . . . . . . . . . . . . . . . . . . . . . . . . . . . . . . . . . . . . . . . 70
1.2 LEDs. . . . . . . . . . . . . . . . . . . . . . . . . . . . . . . . . . . . . . . . . . . . . . . . . . . . 72
1.3 WLAN Button. . . . . . . . . . . . . . . . . . . . . . . . . . . . . . . . . . . . . . . . . . . . . 72
1.4 Technical Specifications . . . . . . . . . . . . . . . . . . . . . . . . . . . . . . . . . . . 73
1.5 Declaration of CE Conformity . . . . . . . . . . . . . . . . . . . . . . . . . . . . . . . . 75
1.6 Disposal . . . . . . . . . . . . . . . . . . . . . . . . . . . . . . . . . . . . . . . . . . . . . . . . 76
2 More about WLAN . . . . . . . . . . . . . . . . . . . . . . . . . . . . . . . 77
2.1 Standards . . . . . . . . . . . . . . . . . . . . . . . . . . . . . . . . . . . . . . . . . . . . . . . 77
2.2 Security . . . . . . . . . . . . . . . . . . . . . . . . . . . . . . . . . . . . . . . . . . . . . . . . . 79
2.3 Frequency Ranges. . . . . . . . . . . . . . . . . . . . . . . . . . . . . . . . . . . . . . . . . 82
2.4 Increasing the WLAN Range Using WDS . . . . . . . . . . . . . . . . . . . . . . . 83

FRITZ!Box Fon WLAN 7270 5
3 More about Networks . . . . . . . . . . . . . . . . . . . . . . . . . . . . 89
3.1 Network Overview. . . . . . . . . . . . . . . . . . . . . . . . . . . . . . . . . . . . . . . . . 89
3.2 IP Settings . . . . . . . . . . . . . . . . . . . . . . . . . . . . . . . . . . . . . . . . . . . . . . . 90
3.3 UPnP Settings . . . . . . . . . . . . . . . . . . . . . . . . . . . . . . . . . . . . . . . . . . . . 90
3.4 IP Address . . . . . . . . . . . . . . . . . . . . . . . . . . . . . . . . . . . . . . . . . . . . . . . 91
3.5 DHCP Server . . . . . . . . . . . . . . . . . . . . . . . . . . . . . . . . . . . . . . . . . . . . . 92
3.6 Subnetwork. . . . . . . . . . . . . . . . . . . . . . . . . . . . . . . . . . . . . . . . . . . . . . 93
3.7 Changing the Network Settings . . . . . . . . . . . . . . . . . . . . . . . . . . . . . . 94
4 More about Internet Telephony . . . . . . . . . . . . . . . . . . . . 96
4.1 Telephony Scenarios . . . . . . . . . . . . . . . . . . . . . . . . . . . . . . . . . . . . . . 96
4.2 Bandwidth Management . . . . . . . . . . . . . . . . . . . . . . . . . . . . . . . . . . . 97
5 More Functions . . . . . . . . . . . . . . . . . . . . . . . . . . . . . . . . . 98
5.1 Night Service. . . . . . . . . . . . . . . . . . . . . . . . . . . . . . . . . . . . . . . . . . . . . 98
5.2 Alarm . . . . . . . . . . . . . . . . . . . . . . . . . . . . . . . . . . . . . . . . . . . . . . . . . . . 99
6 Customer Service Guide . . . . . . . . . . . . . . . . . . . . . . . . . 100
6.1 Documentation . . . . . . . . . . . . . . . . . . . . . . . . . . . . . . . . . . . . . . . . . . 100
6.2 information in the Internet. . . . . . . . . . . . . . . . . . . . . . . . . . . . . . . . . 101
6.3 Updates and Software . . . . . . . . . . . . . . . . . . . . . . . . . . . . . . . . . . . . 101
6.4 Support from the Service Team . . . . . . . . . . . . . . . . . . . . . . . . . . . . . 102
Glossary . . . . . . . . . . . . . . . . . . . . . . . . . . . . . . . . . . . . . . 104
Index . . . . . . . . . . . . . . . . . . . . . . . . . . . . . . . . . . . . . . . . 119
FRITZ!Box Fon WLAN 71130 6
Symbols and Highlighting
Symbols and Highlighting
The following sections present explanations about the symbols and
highlighting used in this manual.
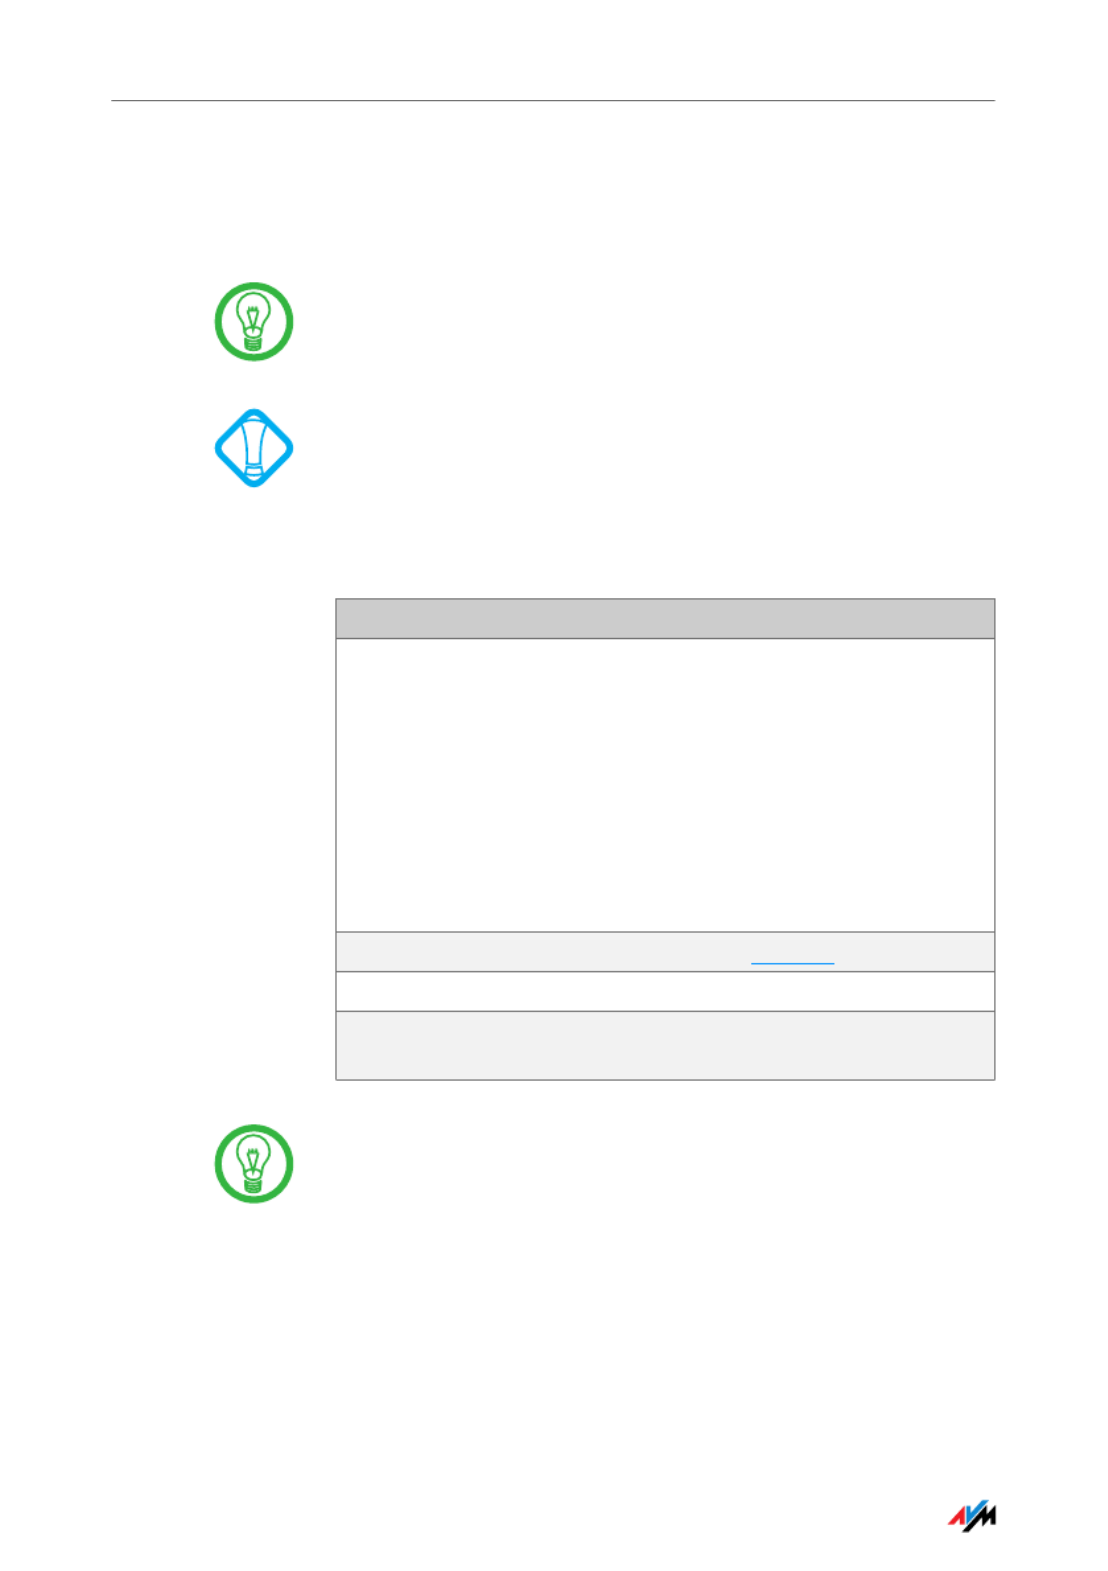
The table below explains the highlighting used in this
manual.
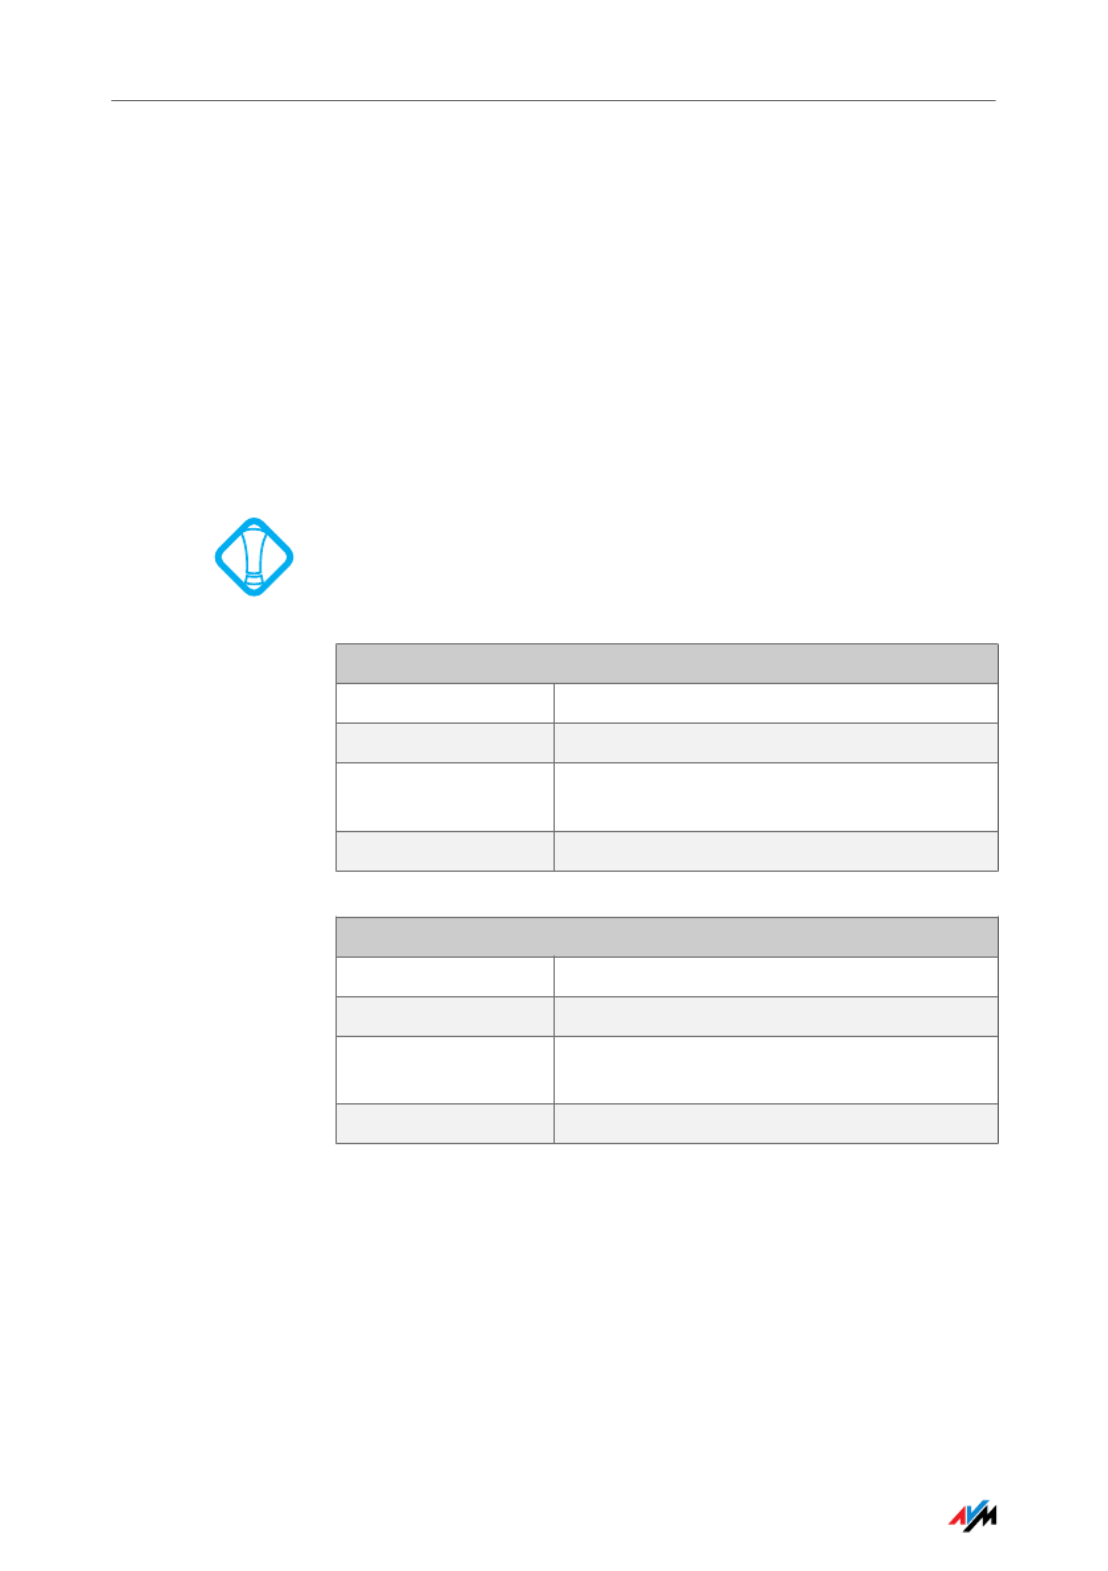
This symbol indicates useful hints to assist you in work-
ing with the FRITZ!Box.
This symbol indicates important instructions that must be
observed to avoid malfunctions.
Highlighting Function Examples
Quotation marks Keys
Buttons
Settings pages
Menus
Commands
File paths
File names
“F1” key
“Help”
“Advanced”
“Edit/Paste”
“Copy”
“C:/My Documents”
“Documentation”
Underlined text Text input fritz.box
Pointed brackets Joker <MSN>
Bold Emphasis Do not click the but-
ton...
For detailed information about the numerals and function
keys used in the manual, see the section “Operation at
the Telephone” on page 42.

Security and Handling
FRITZ!Box Fon WLAN 71130 7
I CONNECTING AND OPERATION
1 Security and Handling
What to Watch out for
Safety Instructions When working with the FRITZ!Box Fon WLAN 71130, ob-
serve the following security instructions in order to protect
yourself and the FRITZ!Box from harm.
Do not install the FRITZ!Box during an electrical
storm.
Disconnect FRITZ!Box from the power supply during
electrical storms.
Never let liquids get inside the FRITZ!Box. Otherwise,
electric shocks or short circuits may result.
The FRITZ!Box is intended for indoor use only.
Do not open the FRITZ!Box housing. The device con-
tains hazardous components and should only be
opened by authorized repair technicians.
Handling the
FRITZ!Box
You can either place FRITZ!Box on a horizontal surface or
mount it on a wall. Please note the following:
Place or hang the FRITZ!Box in a dry location that is
free of dust and protected from direct sunlight.
Do not place the FRITZ!Box on excessively heat-sensi-
tive surfaces, as the base of the device can heat up
during normal operation.
Make sure that the ventilation slits are unobstructed.
For this reason the FRITZ!Box should not be placed on
a carpet or on upholstered furniture. The ventilation
slits provide for air cooling of the FRITZ!Box.
When connecting FRITZ!Box to your computer using
the network, remember to take the length of the ca-
ble into account.

FRITZ!Box Fon WLAN 71130 8
Security and Handling
If you would like to establish wireless connections
between the FRITZ!Box and the computer, position
the device at a central location.
Make sure to keep sufficient distance from potential
sources of interference like microwave devices or
electric devices with large metal housings.
For detailed information about the symbols, numerals
and function keys used in the manual, see the sections
“Symbols and Highlighting” on page 6 and “Instructions
for Operation at the Telephone” on page 33.

FRITZ!Box Fon WLAN 7113
FRITZ!Box Fon WLAN 7113 9
2 FRITZ!Box Fon WLAN 7113
An Overview
The FRITZ!Box is a DSL modem that connects your computers directly
with your DSL line. Each connected computer can establish an Internet
connection over the FRITZ!Box. As a WLAN access point, FRITZ!Box of-
fers you the possibility of connecting your computer to the DSL line
wirelessly.
The FRITZ!Box is a Private Branch Exchange (PBX) for making telephone
calls via the Internet and the fixed-line network.
Possibilities for connecting FRITZ!Box
PBX Two analog telephones, fax machines and answering ma-
chines can be connected to FRITZ!Box to take advantage of
the features of ISDN.
Connecting
Computers
A computer can be connected directly to FRITZ!Box’s LAN
port.
You can also connect a network hub or switch to the LAN
ports so that even more computers can be connected to
FRITZ!Box.
WLAN Access Point The FRITZ!Box is a WLAN access point. All computers
equipped with a WLAN adapter can be wirelessly connect-
ed to the FRITZ!Box.
FON FON 1 2FON FON 1 2
A D SL l i n e
wi t h t e l e p h o n e l in e
Analog phone, fax Computer, game console,
network
Notebook, computer,
PDA

FRITZ!Box Fon WLAN 7113 10
Package Contents
Local Network All of the computers connected with the FRITZ!Box consti-
tute a network and can share access to any files released
for file sharing.
Internet All of the computers connected to the FRITZ!Box can ac-
cess the Internet.
The FRITZ!Box works as a DSL router, making the Internet
connection available to all connected computers. All con-
nected computers can then use the Internet connection at
the same time.
Firewall The FRITZ!Box is equipped with an integrated firewall. The
integrated firewall protects your network from attacks
from the Internet as long as the FRITZ!Box is operated as a
router.
Network Devices Other network devices can also be connected to the net-
work port of the FRITZ!Box, for instance game consoles.
Operating Systems
Supported
The FRITZ!Box can be connected to computers with Win-
dows operating systems, the Linux operating system or
Apple computers with the Mac OS X operating system.
2.1 Package Contents
The following is included in the FRITZ!Box Fon WLAN 7113
package:
FRITZ!Box Fon WLAN 7113
one power supply unit with a cable for connection to
the power mains
one DSL/telephone cable for connecting the
FRITZ!Box to your DSL line
one network cable for connection to a computer or a
network
one FRITZ!Box CD with
–Installation Help
–documentation for all enclosed AVM components
one quick guide

Operation Requirements
FRITZ!Box Fon WLAN 7113 11
2.2 Operation Requirements
In order to operate the FRITZ!Box, you must have the fol-
lowing:
a Web browser that supports Java script (for instance,
Internet Explorer version 6.0 or higher, or Firefox
version 1.5 or higher)
Internet connection:
–DSL line, ITU G.992.1 standard Annex A,
ITU G.992.3 standard Annex A, ITU G.992.5 stan-
dard Annex A
–or a cable line with cable modem
–or another Internet connection
for connection via WLAN:
computer with a WLAN adapter compliant with
IEEE 802.11n draft 2.0, IEEE 802.11g, or IEEE 802.11b,
for example a FRITZ!WLAN USB Stick
for connection via network cable:
computer with a network port (network adapter
standard Ethernet 10/100 Base-T)
for fixed-line telephony:
one analog telephone line

FRITZ!Box Fon WLAN 7113 12
Connection
3 Connection
Connecting FRITZ!Box
This chapter contains instructions on the following topics:
Launching FRITZ!Box Operation
Connecting FRITZ!Box to electrical power
Connecting one or several computers to the FRITZ!Box
connecting FRITZ!Box to DSL.
Connecting FRITZ!Box to the Analog Telephone Line
Connecting analog terminal devices to the FRITZ!Box
3.1 Launching Operation
Using the Installation Help on the CD
On computers with Windows operating systems you can
use the Installation Help on the FRITZ!Box CD. The Installa-
tion Help presents instructions on the screen, guiding you
through the steps required to launch operation of the
FRITZ!Box.
1. Insert the FRITZ!Box CD in the CD-ROM drive of your
computer.
The Installation Help starts automatically.
2. Follow the instructions in the Installation Help to pre-
pare the FRITZ!Box for operation.
At the conclusion of the Installation Help, you will be rout-
ed directly to the FRITZ!Box user interface.
Please see the instructions about setting up the
FRITZ!Box in section “Security and Handling” on page 7.
We recommend using the Installation Help on the
FRITZ!Box CD when launching operation of the FRITZ!Box
for the first time.

Launching Operation without the Installation Help CD
FRITZ!Box Fon WLAN 7113 13
Launching Operation without the Installation Help CD
If you do not want to use the Installation Help on the
FRITZ!Box CD, then work through the instructions below in
the recommended order:
1. Mounting FRITZ!Box; see the section “Security and
Handling” from page 7.
2. Connecting FRITZ!Box to the power supply; see the
section “Connecting to Electrical Power” on page 13.
3. Connecting FRITZ!Box to the computer(s); see the
section “Connecting to the Computer” on page 14.
4. Connecting FRITZ!Box to DSL; see section “Connect-
ing DSL and the Telephone Line” from page 20.
5. If you want to make telephone calls with the fixed-
line network using FRITZ!Box: see the section “Con-
necting with the Analog Telephone Line” on page 21.
6. If you want to make telephone calls and fax using the
FRITZ!Box over the Internet and/or the fixed-line net-
work, connect your analog equipment to the
FRITZ!Box: See the section “Connecting Telephone,
Fax, or Answering Machine” on page 22.
3.2 Connecting to Electrical Power
Connecting to the power supply

FRITZ!Box Fon WLAN 7113 14
Connecting to the Computer
Connecting Set aside the power supply unit out of the FRITZ!Box
package.
1. Connect the power supply unit to the socket on the
FRITZ!Box labeled “Power”.
2. Plug the other end into an AC power outlet.
The green “Power/DSL” LED will light up after a few sec-
onds to indicate that the device is ready for operation.
3.3 Connecting to the Computer
If you would like to surf the web using the FRITZ!Box or to
open the FRITZ!Box user interface, then you must connect
a computer with the FRITZ!Box.
A computer can be connected with the FRITZ!Box in two
different ways:
via a LAN port
wirelessly via WLAN
Properties Note the following when connecting computers to the
FRITZ!Box:
One computer can be connected to the FRITZ!Box by
only one of these means.
At the network port of the FRITZ!Box, a computer can
be connected directly or via a hub/switch.
Using WLAN you can connect multiple computers wi-
th the FRITZ!Box at the same time.
The way a computer is connected to the FRITZ!Box is
the same regardless of the operating system on the
computer.
All of the computers connected with the FRITZ!Box
constitute a network.

Connecting Computers to the LAN Port
FRITZ!Box Fon WLAN 7113 15
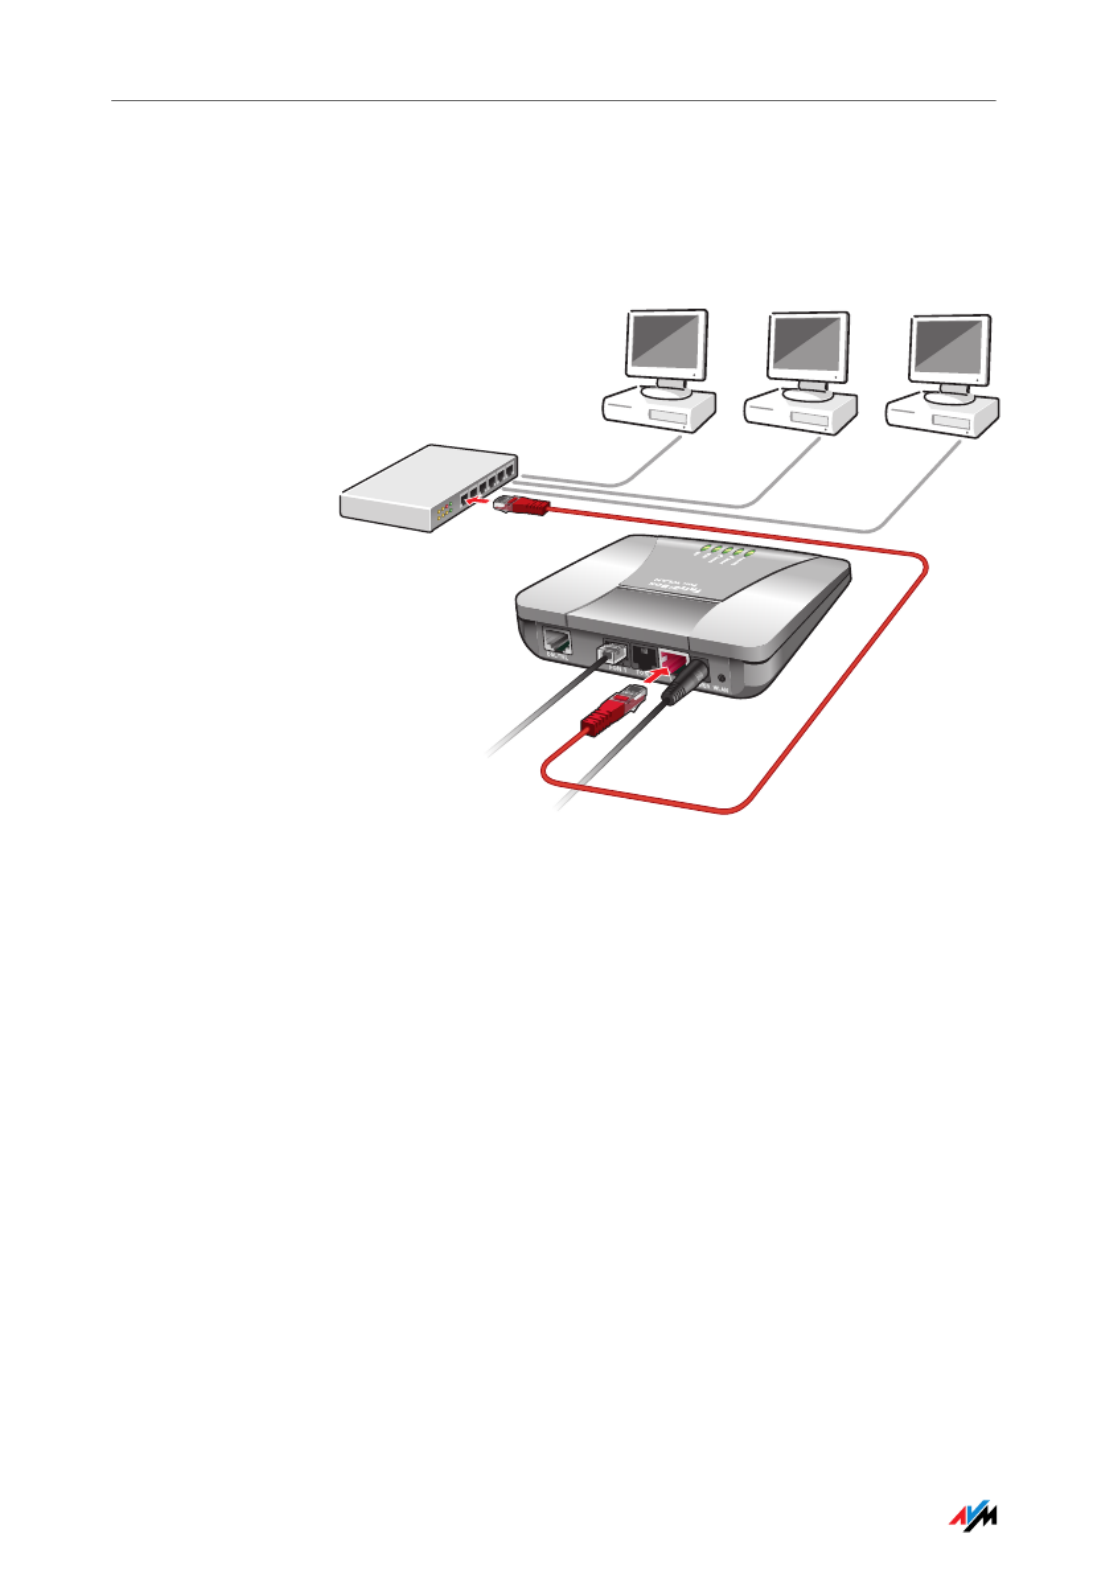
3.4 Connecting Computers to the LAN Port
If you would like to connect a computer to the LAN port of
the FRITZ!Box, make sure the computer is equipped with a
LAN port (network adapter). A LAN port is usually desig-
nated by the icon at left or labeled “LAN”.
Connecting a computer to a LAN port on the FRITZ!Box
Connecting Set aside the network cable (red) from the FRITZ!Box
package.
1. Switch on your computer.
2. If you work with a Linux operating system, use YaST
to configure your network card with the setting
“DHCP”, if this setting is not already configured.
3. Insert one end of the LAN cable to the computer’s
network adapter.
4. Connect the other end of the network cable to one of
the sockets on FRITZ!Box labeled ”LAN”.
Now the FRITZ!Box and computer are connected to each
other.
FRITZ!Box Fon WLAN 7113 16
Connecting a Network Hub or Switch
Connecting a Network Hub or Switch
You can connect a network hub or switch to the LAN port if
you would like to connect multiple computers to the
FRITZ!Box via LAN.
Connecting FRITZ!Box to a network hub
Connecting Set aside the network cable (red) from the FRITZ!Box
package.
1. Connect one end of the LAN cable to the uplink port
of the network hub or switch.
2. Connect the other end of the cable to the socket on
the FRITZ!Box labeled LAN.
The FRITZ!Box and network hub are now connected with
each other.

Connecting Computer(s) Wirelessly via WLAN
FRITZ!Box Fon WLAN 7113 17
3.5 Connecting Computer(s) Wirelessly via WLAN
Using WLAN you can connect one or multiple computers
with the FRITZ!Box wirelessly.
The wireless WLAN connection is independent of the operat-
ing system used. Each computer to be connected to the
FRITZ!Box via WLAN must support WLAN, by means of a com-
patible WLAN adapter, for instance the FRITZ!WLAN USB
Stick.
Presettings in the FRITZ!Box
The FRITZ!Box is delivered with preset values for WLAN se-
curity. These values must also be entered on the computer
with the WLAN adapter in order to be able to establish a
successful WLAN connection.
The following values are configured in the FRITZ!Box facto-
ry settings:
For more information on WLAN, see the section “More
about WLAN” from page 77.
Setting Preset Value
SSID (name of the radio
network)
FRITZ!Box Fon WLAN 7113
Encryption methods WPA (TKIP) and WPA2 (AES-
CCMP)
Encryption WPA PSK
Key The key is printed on the
sticker attached to the base of
the device.
Network mode Infrastructure

FRITZ!Box Fon WLAN 7113 18
Connect Using a WLAN Adapter
Connect Using a WLAN Adapter
You can connect computers with the FRITZ!Box wirelessly
as soon as you have installed a WLAN adapter and config-
ured WLAN software.
Installing 1. Switch on your computer.
2. Install a WLAN adapter, for instance the FRITZ!WLAN
USB Stick, on your computer along with the appropri-
ate software. Please take note of the instructions in
the documentation of the adapter.
Once installation has been completed, you generally have
software available to control your WLAN connections. In
the Windows operating systems you can open the user in-
terface of the WLAN software by clicking an icon in the
taskbar (specific to each manufacturer) or from the start
menu.
Alternatively, you can use the WLAN software supplied wi-
th the operating system to establish a WLAN connection to
the FRITZ!Box.
Establishing a
Connection
This description uses the values given in the section
“Presettings in the FRITZ!Box” on page 17.
If you would like to establish a WLAN connection using
these preset values, then your WLAN adapter must
support the WPA encryption procedure.
1. Start the WLAN software.
2. Select the SSID (WLAN radio network) “FRITZ!Box Fon
WLAN 7113” in the user interface.
If the radio network is not displayed, follow the
instructions in the section “The WLAN Adapter
Cannot Find FRITZ!Box” from page 59.
3. Set “Infrastructure” as the network mode.
4. Select “WPA PSK” as encryption or authentication.
5. Enter the preset key in the “Network Key” field. The
key is printed on the sticker on the base of your
FRITZ!Box.

Connect Using a WLAN Adapter
FRITZ!Box Fon WLAN 7113 19
Sticker with sample values
6. Confirm your entries using the relevant button in the
user interface (for instance, “OK” or “Connect”).
The WLAN connection is established.
7. Now read the security instructions in the section “Se-
curity” from page 79.
Further WLAN settings can be configured in the user inter-
face of your FRITZ!Box. See the section “Opening the User
Interface” on page 23 for instructions on how to open the
interface.
WLAN Adapter Does
Not Support WPA
If your WLAN adapter does not support the WPA security
mechanism, you must change the WLAN settings in the
FRITZ!Box to WEP.
Proceed as follows to change the encryption method:
1. Connect the FRITZ!Box and the computer using the
network cable (see the section “Connecting Comput-
ers to the LAN Port” from page 15).
2. Start a web browser.
3. Enter fritz.box in the address field.
The FRITZ!Box user interface opens.
From today’s perspective, WEP encryption does not offer
adequate protection. Contact the manufacturer of your
WLAN adapter for an update that makes the adapter able
to support WPA. We strongly advise against using WEP for
encryption in the long term!
FRITZ!Box Fon WLAN 7113 20
Connecting DSL and the Telephone Line
4. In the “WLAN / WLAN Security” menu, select WEP en-
cryption and enter the network key you have chosen.
5. Click the “Apply” button.
A window is displayed with the WLAN security settings.
Print out the page by clicking “Print Page”. The data in the
printout will be needed for the WLAN configuration of your
WLAN adapter.
6. Close the user interface.
7. Remove the network cable connecting the computer
and the FRITZ!Box.
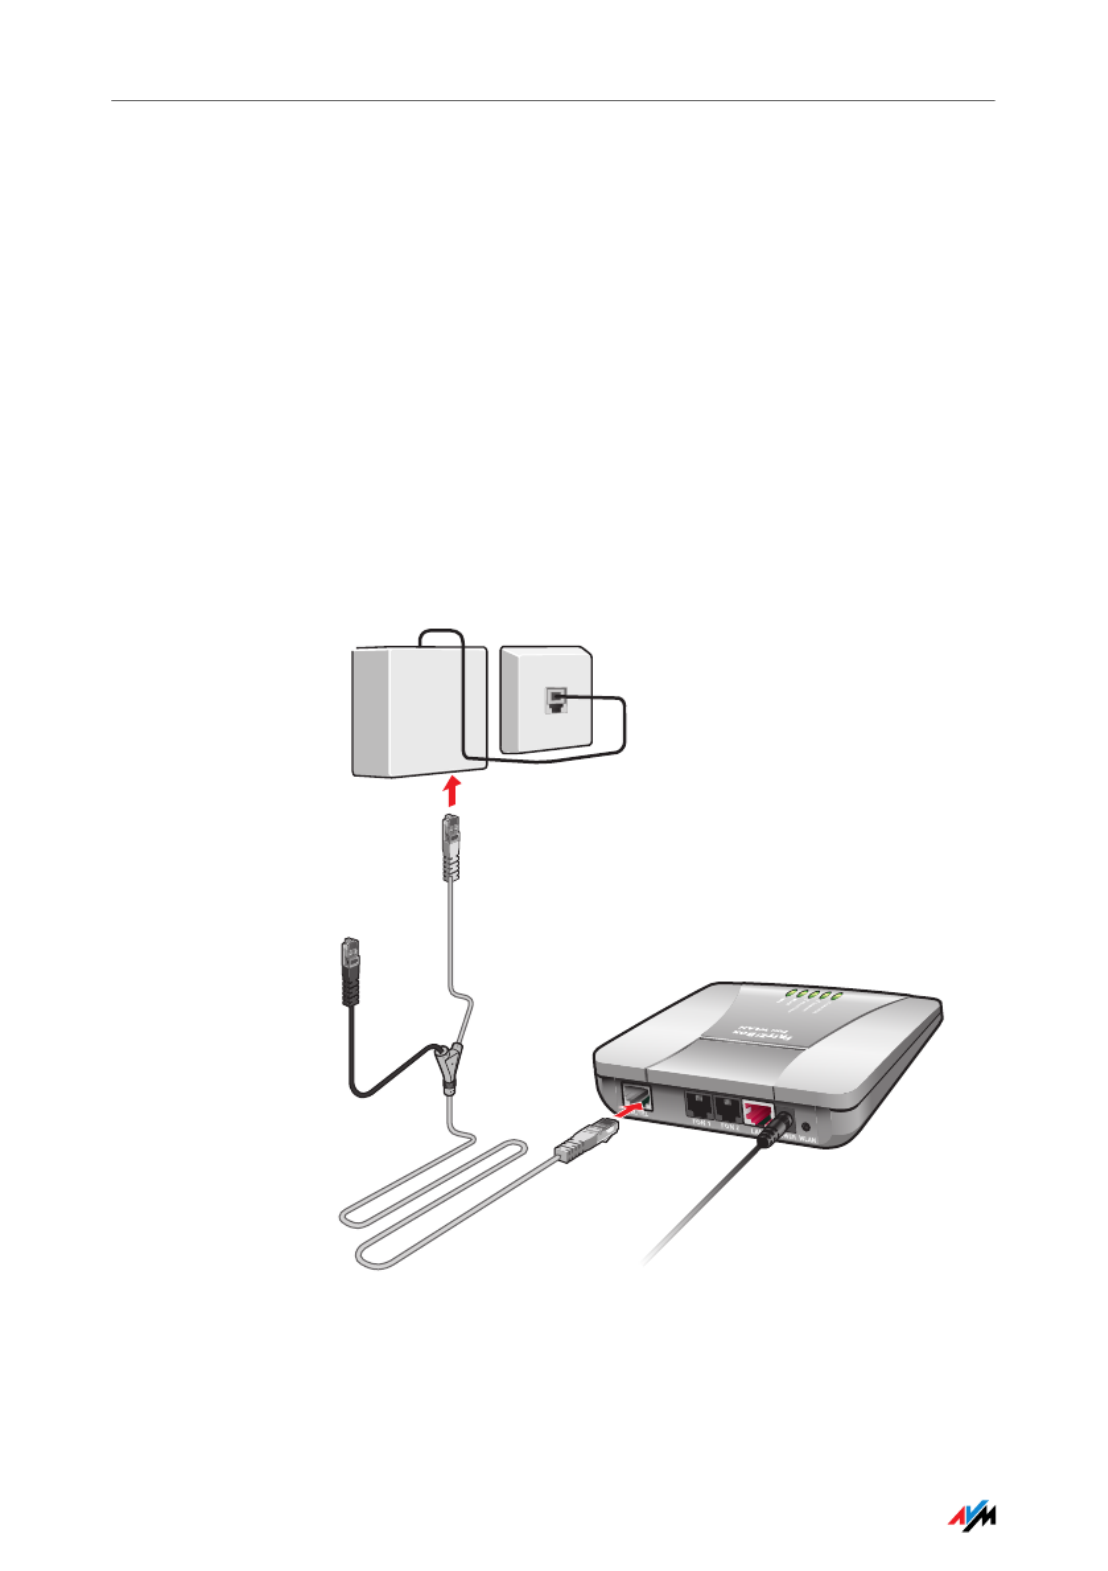
3.6 Connecting DSL and the Telephone Line
Connecting to the DSL splitter
Connecting If you have a DSL line and a telephone line, then connect
the FRITZ!Box using the DSL/telephone cable (gray-black).

Connecting with the Analog Telephone Line
FRITZ!Box Fon WLAN 7113 21
1. Connect the longer of the two gray ends of the cable
to the port labeled “DSL/TEL”.
2. Then connect the shorter, gray end of the cable to the
socket on the DSL splitter labeled “DSL”.
The green “Power” LED stops flashing after a short time
and remains lit to signalize that FRITZ!Box is ready for In-
ternet connections over DSL.
3.7 Connecting with the Analog Telephone Line
Your telephone line is either an analog line or an ISDN
line.
If you have an analog telephone line, read here about how
to connect the FRITZ!Box with the analog telephone line.
Connecting to the analog telephone line via the DSL splitter
The black branch of the Y-shaped cable is for connec-
tion to the telephone line (see the sectionspage 21).
FRITZ!Box Fon WLAN 7113 22
Connecting Telephone, Fax, or Answering Machine
Connecting Set aside the Y-shaped cable (gray-black) delivered in the
package. This cable is a combined DSL/telephone cable.
1. Connect the longer gray end of the cable to the sock-
et on the FRITZ!Box labeled “DSL/TEL”.
2. Then insert the black plug into the appropriate jack
of your DSL splitter.
Now the FRITZ!Box and the analog telephone line are con-
nected.
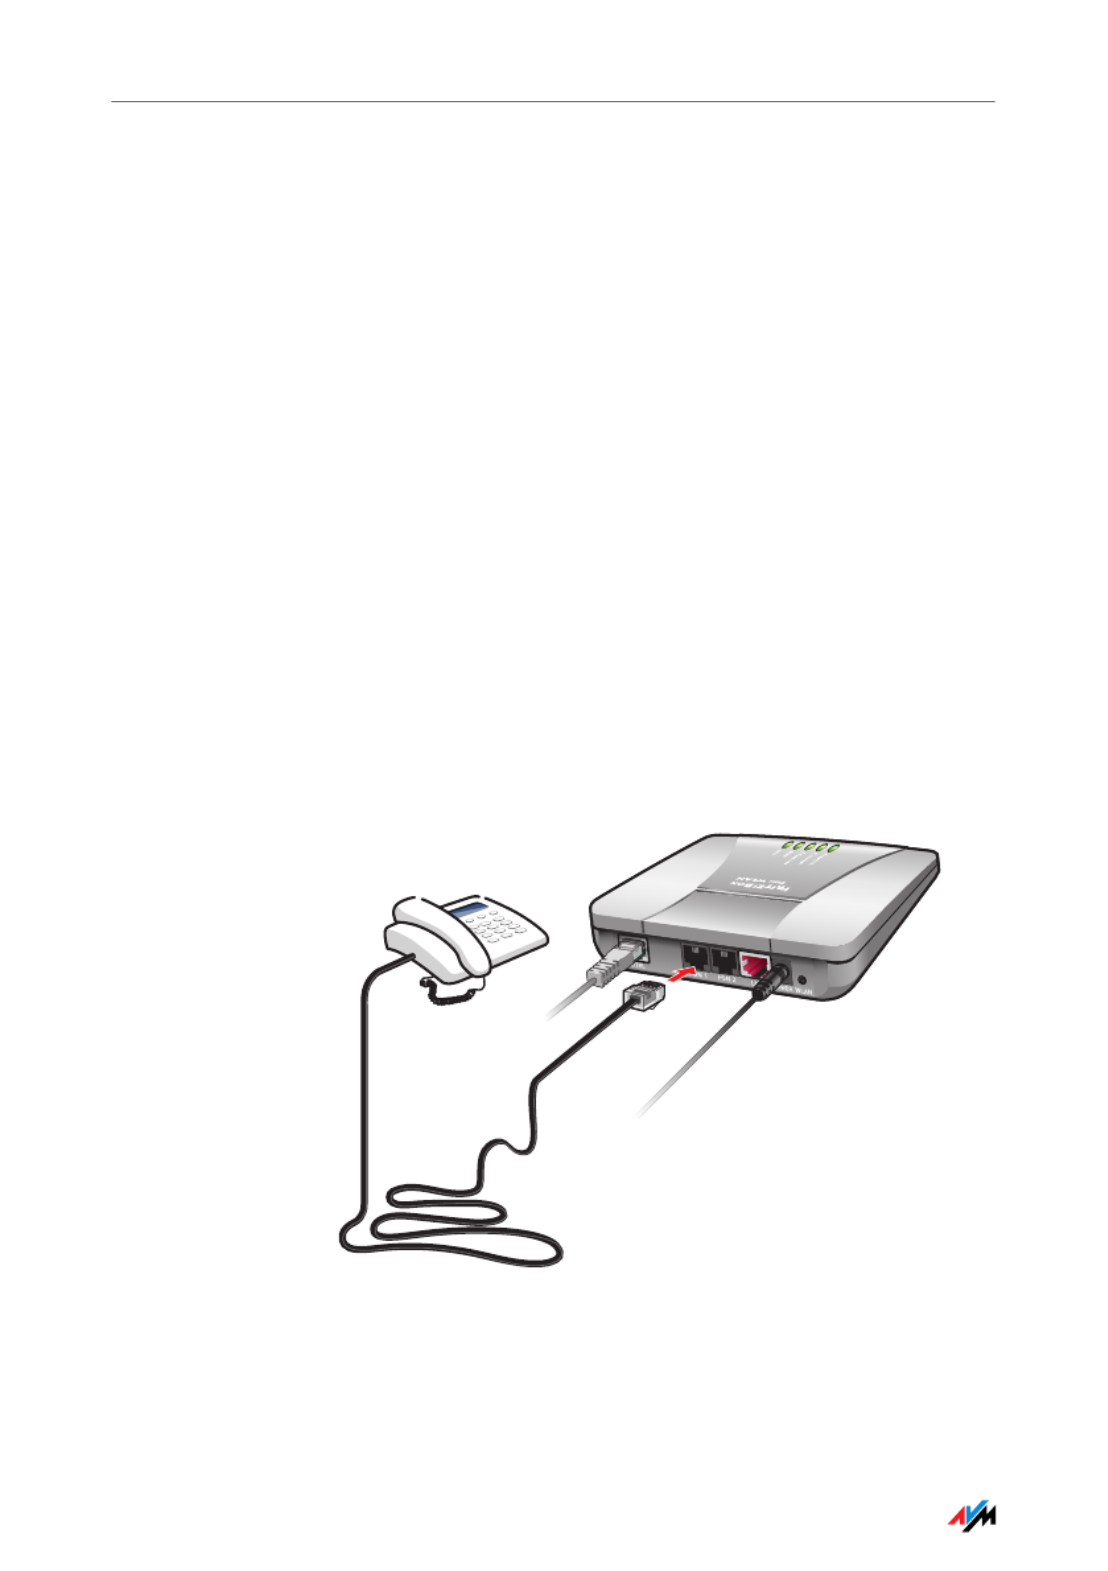
3.8 Connecting Telephone, Fax, or Answering Machine
The FRITZ!Box provides Internet and/or fixed-line telepho-
ny for analog terminal devices.
You can connect two analog terminal devices like tele-
phones, fax machine or answering machine to the
FRITZ!Box.
Analog devices with RJ11 plugs are connected to the RJ11
sockets“FON 1” and “FON 2”. These two sockets are locat-
ed on the back panel of the FRITZ!Box.
Connecting an analog telephone to an RJ11 jack
Now your analog device is connected with the FRITZ!Box.

Opening the User Interface
FRITZ!Box Fon WLAN 7113 23
4 Opening the User Interface
fritz.box
The FRITZ!Box has a user interface that can be used in a web browser.
The user interface presents information about the FRITZ!Box product,
terminals and connections. This is where you configure all of the set-
tings for operating the FRITZ!Box.
The user interface can be opened from any computer con-
nected with the FRITZ!Box. The settings you configure are
saved in the FRITZ!Box.
Starting 1. Start a web browser on your computer.
2. Enter “fritz.box” in the address line of the browser.
The “fritz.box” address entry in the address field of an Internet
browser
The FRITZ!Box user interface opens.
4.1 Password Protection
Use the password protection set up for the user interface
to protect your settings and all information in the
FRITZ!Box from unauthorized access.
Here is how to set up the password protection in the
FRITZ!Box:
1. Open the FRITZ!Box user interface.
2. Select “Advanced Settings / System / FRITZ!Box
Password” in the FRITZ!Box Settings” area.
3. Enable password protection and enter a password.
4. Save your settings by clicking “Apply”.
If the user interface does not open, please see the in-
structions in the section “Errors Opening the User Inter-
face” on page 53.

FRITZ!Box Fon WLAN 7113 24
Save Settings
Be sure to use a password you can remember easily. If you
forget the password, the only way to access the FRITZ!Box
is to restore the factory settings. All settings made during
operation will be overwritten. Then you can open the user
interface again in order to reconfigure your settings or re-
store the settings you saved during previous operation.
4.2 Save Settings
The settings you made in the FRITZ!Box can be saved as a
file on your computer. This file contains all user-defined
settings, including the account information for the Inter-
net and telephony connections. This settings file can be
loaded back into your FRITZ!Box at any time.
The FRITZ!Box features a Wizard to accompany you step by
step through the process of saving and restoring your set-
tings.

Internet Connections
FRITZ!Box Fon WLAN 7113 25
5 Internet Connections
Setting Up Internet Connections
In order to allow Internet access with the FRITZ!Box, you must first con-
figure the Internet connection in the FRITZ!Box user interface.
The FRITZ!Box can be operated directly at the DSL line. Alternatively, it
can be connected to a cable modem, a DSL modem, or a DSL router, or
integrated into an existing network.
If no DSL line is available, the Internet connection can be established
over the mobile telephone network using a USB modem.
5.1 Configuring the Internet Connection Using the Wizard
If the FRITZ!Box is connected directly to the DSL line, the
account information from your Internet Service Provider is
required to configure the Internet connection in the
FRITZ!Box.
Use the Wizard to configure the Internet connection:
1. Open the FRITZ!Box user interface.
2. In the “Settings” area, please select the “Wizards”
menu.
3. Click the “Configure Internet Connection” Wizard and
follow the instructions.
Once configuration has been completed, all of the com-
puters connected with the FRITZ!Box can be used to surf
the Internet without any further settings required.
5.2 Configuring the Internet Connection Manually
Changes to the Internet connection settings can be made
in the FRITZ!Box user interface.
Proceed as follows:
1. Open the FRITZ!Box user interface.
2. Select the “Advanced Settings” menu in the “Set-
tings” area.
3. Select “Internet / Account Information”.

FRITZ!Box Fon WLAN 7113 26
Surfing the Net
4. Select the setting “Use one Internet connection for
all computers (router)” if this setting is not already
configured.
5. Enter in these fields the Internet account information
you received from your Internet Service Provider. Take
advantage of the Help available in the FRITZ!Box user
interface for more information and instructions.
6. As a final step, click “Apply”.
If the FRITZ!Box is connected to a cable modem, a DSL mo-
dem or a router, or integrated into an existing network,
you must also configure your Internet connection as de-
scribed above. To do so, enable the expert view in the
“System / Expert Mode” menu.
5.3 Surfing the Net
Once you have set up the Internet connection in your
FRITZ!Box, you can surf the Internet with any computer
connected to the FRITZ!Box.
1. Start a web browser on your computer.
2. Enter in the address field the URL of the Internet page
you would like to visit, for instance
“http://www.avm.de/en”.

Telephone Connections
FRITZ!Box Fon WLAN 7113 27
6 Telephone Connections
Configuring FRITZ!Box for Telephony
Using the FRITZ!Box you can make telephone calls via the Internet and
the fixed-line network.
Once you have connected the FRITZ!Box as described in the chapter
“Connection” from page 12, you can configure the FRITZ!Box for making
telephone calls.
The configuration is performed in two consecutive steps:
entering your phone numbers
configuring the connected telephony equipment
6.1 Entering your Phone Numbers
The “Enter Your Phone Numbers” Wizard supports you in
performing the following tasks:
entering Internet telephone numbers
entering fixed-line telephone numbers
changing numbers already entered
deleting entered numbers
In the “Settings“ area of the FRITZ!Box user interface
there are various Wizards for the configuration of your
FRITZ!Box. We recommend using these step-by-step in-
structions.
If you used the Basic Configuration Wizard after connect-
ing your FRITZ!Box and entered numbers then, these num-
bers are already entered in your FRITZ!Box. In this case
you can start right away with the configuration of the con-
nected telephony devices.

FRITZ!Box Fon WLAN 7113 28
Entering New Internet Telephone Numbers
Entering New Internet Telephone Numbers
In order to be able to make calls via the Internet with the
FRITZ!Box, you will need an Internet telephone number
from an Internet telephony carrier. Enter the Internet tele-
phone number in the FRITZ!Box.
You can enter multiple Internet numbers in the FRITZ!Box.
The Internet numbers can be from one or from multiple dif-
ferent Internet telephony providers.
Entering Fixed-line Numbers
In order to make calls via the analog fixed-line network wi-
th the FRITZ!Box, enter your telephone numbers in the
FRITZ!Box.
6.2 Setting Up Telephony Devices
For the configuration of telephony equipment, the “Con-
figure Telephony Devices” Wizard is available in the
FRITZ!Box.
Telephony Devices Supported
The following telephony devices are supported by the
FRITZ!Box:
Telephones
–analog telephones
–analog telephones with an integrated answering
machine
Answering machine
If you have connected an analog answering machine
(to the “FON 1” or “FON 2” jack, for instance), config-
ure it as an answering machine.
Fax machines
The FRITZ!Box supports:
–analog fax machines
–analog fax-telephone combinations

Settings for Telephony Devices
FRITZ!Box Fon WLAN 7113 29
Settings for Telephony Devices
Telephony equipment like telephones, faxes and answer-
ing machines can be connected to the FRITZ!Box. The “Con-
figure Telephony Devices” Wizard can assist you in config-
uring the necessary settings for all telephony devices.
Devices Connected to
the FRITZ!Box
Telephone
–kind of connection used to connect the telephone
with the FRITZ!Box
–internal name for the telephone
–number used to conduct outgoing calls: With this
entry you specify whether outgoing calls should
be conducted via the Internet or the fixed-line net-
work.
–Call acceptance: Specify here whether the tele-
phone should react to all calls or only to calls for
certain telephone numbers.
Fax machine
–Kind of connection used to connect the fax
machine with the FRITZ!Box
–internal name for the fax machine
–Number used to send faxes: This entry defines
whether outgoing faxes are sent via the Internet
or the fixed-line network.
–Call acceptance: Here you define the numbers to
which the fax machine should react.
Answering machine
–Kind of connection used to connect the answering
machine with the FRITZ!Box.
–internal name for the answering machine
–Call acceptance: Enter here whether the answer-
ing machine should react to all calls or only to
calls for certain numbers.

FRITZ!Box Fon WLAN 7113 30
Telephony Functions
6.3 Telephony Functions
Call List
The Call List displays outgoing calls and sent faxes, in-
coming calls and faxes, as well as incoming calls in ab-
sence.
If the number of a caller or someone called is entered in
the Telephone Book, the Call List will display the name
from the Telephone Book.
The Call List can be saved as a file.
Menu The Call List is found in the “Settings / Advanced Set-
tings” area, in the “Telephony / Calls” section.
Telephone Book
A Telephone Book is at your disposal in the FRITZ!Box.
Menu The “Telephone Book” is found in the “Settings / Advan-
ced Settings” area, in the “Telephony” menu.
Block Calls
The telephone number block of the FRITZ!Box offers you
the following options:
Numbers and number ranges can be blocked for out-
going calls
From the FRITZ!Box no outgoing calls to a blocked
number range are possible. In this manner you can
block connections to certain mobile networks, for in-
stance.
blocking telephone numbers for incoming calls
For incoming calls you can block certain numbers to
avoid receiving calls from unwanted callers.
More functions and settings options for telephony are
available in the “Settings / Advanced Settings” area, in
the “Telephony” menu.

Alarm
FRITZ!Box Fon WLAN 7113 31
Menu The command for blocking calls is located in the “Settings
/ Advanced Settings” area, in the “Telephony / Calls”
menu.
Alarm
With the alarm function you can use the telephones con-
nected to the FRITZ!Box as alarm clocks.
You can specify several different times for the alarm
to go off.
An individual telephone can be selected for the alarm
function.
Menu The “Alarm” function is located in the “Settings / Advan-
ced Settings” area, in the “Telephony” menu.
Dialing Rules
Dialing rules specify when calls are conducted on the
fixed-line network, and when they take place over the In-
ternet.
All connections to number ranges for which a dialing rule
has been defined are established using the specified con-
nection type.
Menu The “Dialing Rules” menu is located in the “Settings / Ad-
vanced Settings / Telephony” area.

FRITZ!Box Fon WLAN 7113 32
Configuration and Operation on the Telephone
7 Configuration and Operation on the Telephone
FRITZ!Box Keypad Sequences
Many of the FRITZ!Box functions and features can be con-
figured and used over a telephone connected to a
FRITZ!Box extension. Only tone-dialing (dual-tone multi-
frequency = DTMF) telephones can be used in configura-
tion and operation. Pulse dialing telephones are not suit-
able.
Acknowledgment
Tone
Entries input on the telephone are confirmed with ac-
knowledgement tones (see also “Audible Signals” on
page 34):
Entries made correctly are confirmed with a positive
acknowledgement tone (a single tone of one second
in length).
If the entry was not successful, because of an incor-
rect key sequence, for instance, you hear a negative
acknowledgment tone (an intermittent tone broken
into intervals of about 0.25 seconds).
The telephone network features can be used only if they
are supported by your telephone network carrier and en-
abled on your telephone line.

Instructions for Operation at the Telephone
FRITZ!Box Fon WLAN 7113 33
7.1 Instructions for Operation at the Telephone
The table explains the symbols used in this chapter:
MDial a number.
NPick up the handset.
OHang up the handset.
PTalk.
DThree-party conference call
QWait for the acknowledgement tone.
KYou hear the ring tone.
<Ext.> Enter an extension number (Ext.).
In the place of the abbreviation <Ext.> used
here, enter the number 1 2, or a higher
number, corresponding to the extension
you would like to configure.
<MSN> Enter an ISDN number (MSN).
In place of the abbreviation <MSN> used
here, enter the complete MSN desired, wit-
hout any dialing prefix.
<DNo> Enter an external telephone number (desti-
nation number).
In the place of the abbreviation <DNo>, en-
ter the complete number of the external
line.
<DNo./Ext.> Enter the external telephone number (des-
tination number) or extension number
(Ext.) to which your calls are to be diverted.
FRITZ!Box Fon WLAN 7113 34
Audible Signals
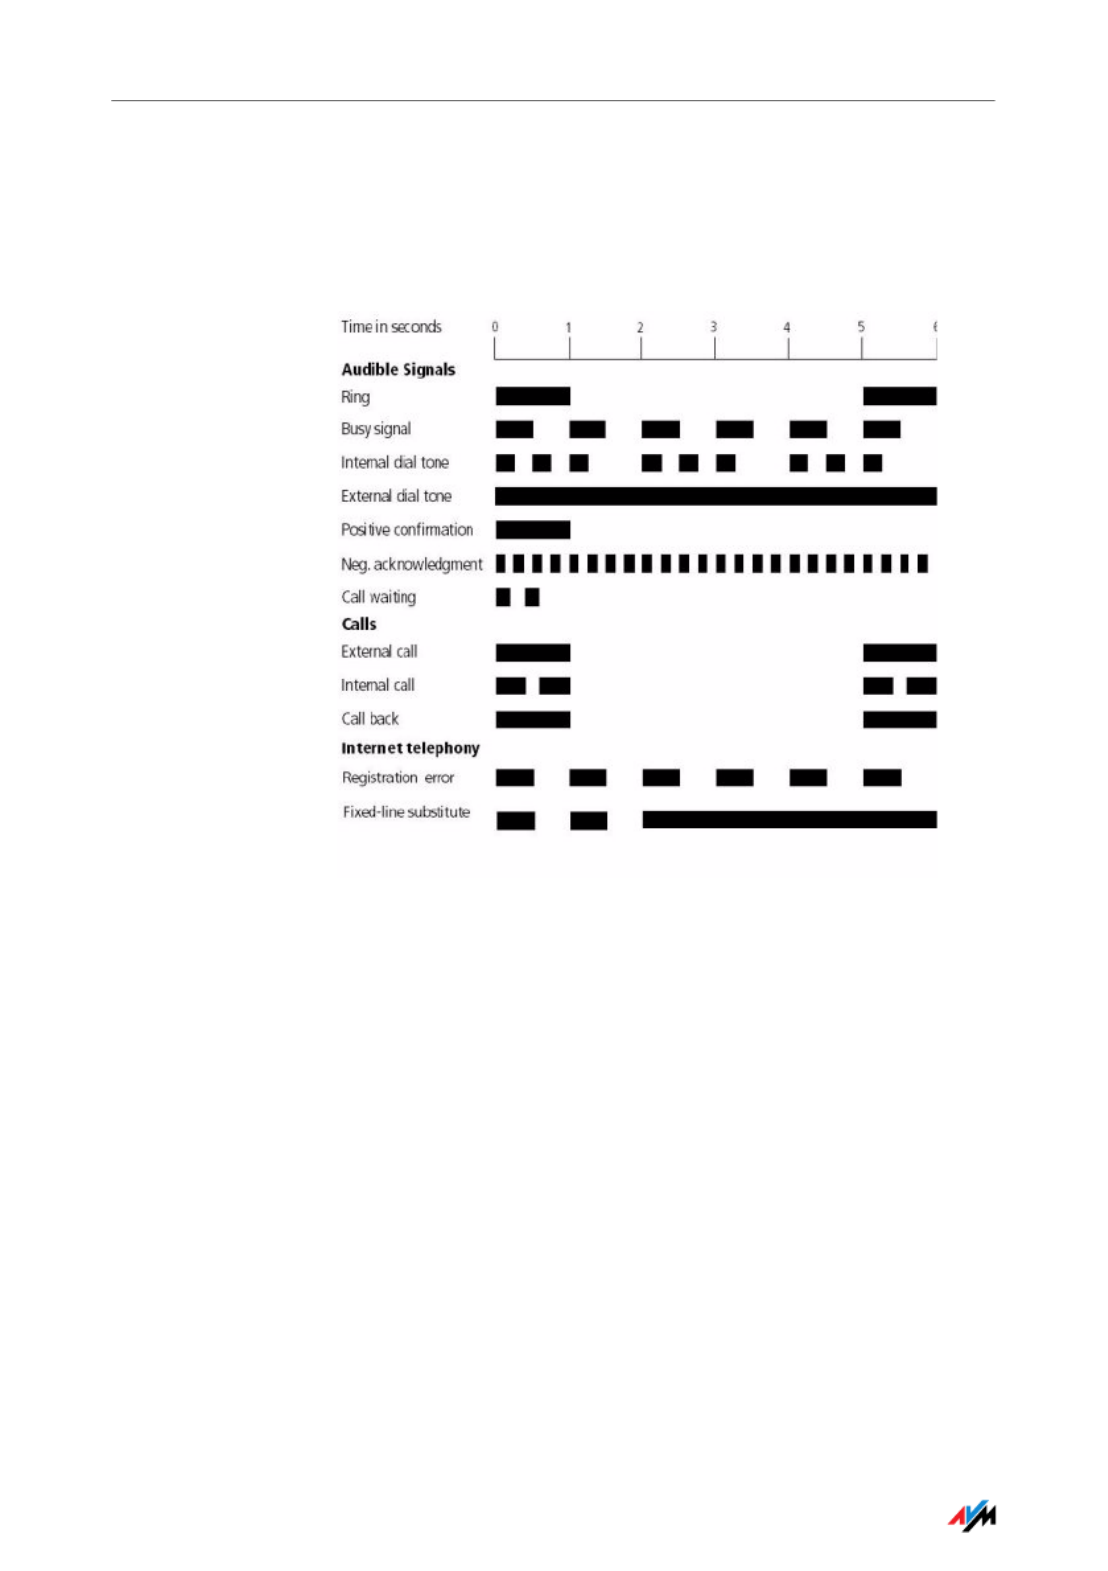
7.2 Audible Signals
The following diagram illustrates the duration and inter-
vals of the various audio signals and ring tones of the tele-
phones connected to the FRITZ!Box Fon WLAN 7113.
Audio signals and ring tones of the connected telephones

Configuring on the Telephone
FRITZ!Box Fon WLAN 7113 35
7.3 Configuring on the Telephone
Saving New Settings
In this section, saving refers to all current settings made in
the FRITZ!Box. It is not necessary to save the configuration
immediately after every change. You may first configure all
of your settings as desired, and then save them perma-
nently.
Restoring Factory Settings
The FRITZ!Box can be reset to its condition upon delivery
by restoring factory settings.
After restoring factory settings, the FRITZ!Box is restarted.
Permanent saving cannot be reversed. However, you can
change the settings by using new commands or restore
the FRITZ!Box to its factory settings.
Saving Permanently
NPick up the handset.
r91ss Save all settings permanently by dialing the
sequence shown at left.
OHang up the handset.
All settings you made in the FRITZ!Box—including the con-
figured Internet connection—are deleted when the factory
settings are restored.
Restoring Factory Settings
r991s159
01590s
resets the FRITZ!Box to its condition upon
delivery

FRITZ!Box Fon WLAN 7113 36
Enabling/Disabling WLAN
Enabling/Disabling WLAN
The WLAN function can be switched on and off using the
telephone keypad. This is especially convenient when the
WLAN function has been switched off. Simply use your
telephone to turn it back on. This means that the WLAN
function can be enabled without having use a wired con-
nection to open the user interface.
Do Not Disturb
You can enable a Do Not Disturb function for any tele-
phone connected to FRITZ!Box in the user interface. When
Do Not Disturb is enabled, the telephone will not ring. In
configuring this function you can choose between en-
abling the function immediately and selecting a specific
time period.
Immediately When Do Not Disturb is enabled immediately, no incoming
calls will be signaled at the specified extension. The Do
Not Disturb setting will remain enabled until it is disabled.
Period Alternatively, you can enter a Do Not Disturb period during
which the telephone will not ring. At the extension for
which a Do Not Disturb period is to be configured, define
the period during which the phone should not ring and
save your entries. Then enable Do Not Disturb. Do Not Dis-
turb then automatically will be switched on daily at the
time entered in the “Start” field and switched off again at
the time defined in the “End” field.
Example: Do Not Disturb should be configured from 20:00
p.m. until 07:00 a.m. daily. Enter the value “2000” for
<Start> and “0700” for <End>.
Enabling and Disabling WLAN
r96s1s enables the WLAN function
r96s0s disables the WLAN function
Enabling Do Not Disturb Effective Immediately
r81<Ext.>s0s immediately enables Do Not Disturb for
the extension entered as <Ext.>

Alarm
FRITZ!Box Fon WLAN 7113 37
Disabling the
Function
Both kinds of Do Not Disturb settings can be disabled by
means of a keypad sequence.
Alarm
The FRITZ!Box includes an alarm function. The alarm can
be configured individually for each connected telephone.
First enter on the telephone the time at which you would
like to be awakened and save this entry. Then enable the
alarm function.
Example: The telephone should ring at 07:00 a.m. Enter
the value “0700” as the <Time> and save this setting.
Enabling Do Not Disturb for a Prescribed Period
r80 s<Ext.>
<Start>s<End>s
defines the period for Do Not Disturb at
extension <Ext.>
r91ss saves the settings
r81<Ext.>s6s enables Do Not Disturb for the defined
period
Disabling Do Not Disturb
r81<Ext.>s6s disables Do Not Disturb for extension
<Ext.>
Configuring the Alarm for a Telephone
r881s s<time>
<Ext.>s
defines for the extension <Ext.> the
time at which the telephone should
ring
r91ss saves the settings
Enabling/disabling the Alarm Function
r881ss enables the alarm function for all ex-
tensions on which a time was set
r881r disables the alarm function for all ex-
tensions
FRITZ!Box Fon WLAN 7113 38
Call Waiting
Call Waiting
Call waiting can be switched on or off for each extension.
Some older terminal equipment connected to extensions
may misinterpret the call waiting signal. This is especially
true of fax machines and modems. If communication er-
rors occur, you should disable call waiting for fax and mo-
dem extensions.
See section “Waiting Calls” on page 44 for information
about how to accept a call while another connection is ac-
tive.
When Call Waiting is enabled, modem and fax connec-
tions may be interrupted.
Enabling Call Waiting
NPick up the handset.
r2 <Ext.> s0s Dial the sequence shown at left.
r91ss Save your settings if desired by dialing the
sequence shown at left.
OHang up the handset.
Disabling Call Waiting
NPick up the handset.
r2 <Ext.> s1s Dial the sequence shown at left.
r91ss Save your settings if desired by dialing the
sequence shown at left.
OHang up the handset.

Suppressing Caller ID for Outgoing Calls (CLIR)
FRITZ!Box Fon WLAN 7113 39
Suppressing Caller ID for Outgoing Calls (CLIR)
The CLIR (Calling Line Identification Restriction) function
prevents your telephone number being displayed on the
other party’s phone during outgoing calls.
The CLIR function is disabled in the factory settings. You
have the option of enabling this function permanently and
then disabling it again. CLIR can also be used for
individual connections. When CLIR is permanently en-
abled, this setting is saved for the extension and always
enabled for outgoing connections.
If you would like to conduct only certain calls with the Call-
er ID suppressed, prefix the number dialed with a keypad
sequence. This enables CLIR only for the current connec-
tion.
Enabling CLIR Permanently
NPick up the handset.
r51<Ext.>s1s Dial the sequence shown at left.
r91ss Save your settings if desired by dial-
ing the sequence shown at left.
OHang up the handset.
Disabling CLIR Permanently
NPick up the handset.
r51<Ext.>s0s Dial the sequence shown at left.
r91ss Save your settings if desired by dial-
ing the sequence shown at left.
OHang up the handset.
CLIR on a Case-by-Case Basis
NPick up the handset.
s31r Dial the sequence shown at left. Now
you hear the external dial tone.
MDial the number you want to call.

FRITZ!Box Fon WLAN 7113 40
Displaying the Incoming Caller ID (CLIP)
Displaying the Incoming Caller ID (CLIP)
The CLIP (Calling Line Identification Presentation) function
makes the number of callers –external and internal– visi-
ble on your telephone display.
The CLIP function is enabled in the factory settings. This
function can be permanently disabled and enabled again.
Disabling Automatic Outside Dialing
The FRITZ!Box offers the possibility of disabling automatic
outside dialing. This means that you will receive an inter-
nal dialing tone when you lift the handset at the corre-
sponding extension. This makes sense at any extension
which is used to make many internal calls, for instance,
between the extensions of the FRITZ!Box. When automatic
outside dialing is disabled, for an external call the 0
must be dialed before the telephone number.
This feature is only effective if your telephone supports
CLIP.
Enabling Display of Incoming Caller ID (CLIP)
NPick up the handset.
r50<Ext.>s1s Dial the sequence shown at left.
r91ss Save your settings if desired by dialing
the sequence shown at left.
OHang up the handset.
Disabling Display of Incoming Caller ID (CLIP)
NPick up the handset.
r50<Ext.>s0s Dial the sequence shown at left.
r91ss Save your settings if desired by dialing
the sequence shown at left.
OHang up the handset.

FRITZ!Box Fon WLAN 7113 42
Operation at the Telephone
7.4 Operation at the Telephone
This section describes how you can use the FRITZ!Box fea-
tures via your telephone keypad.
Shortening the Dialing Procedure
The FRITZ!Box automatically recognizes when a number
has been entered, but not until a few seconds after the fi-
nal digits are entered.
You have the possibility of shortening the dialing proce-
dure by closing your entry with the r key.
Selecting the Outgoing Number and the Type of
Connection
For outgoing connections you can specify the kind of con-
nection to be used for the next dialing procedure. For this
entry you can use settings already made, or circumvent
the settings currently configured. In this case the dialing
rules are suspended for the given dialing procedure.
By entering precisely which Internet telephony account
should be used it is possible to have the dialing proce-
dure conducted via a certain Internet telephone number,
even though this number was never previously configured
for the extension used.
Shortening the Dialing Procedure
<number> rindicates that a number has been dialed
to shorten the dialing procedure

Making Internal Calls
FRITZ!Box Fon WLAN 7113 43
Making Internal Calls
All calls conducted between telephones connected to the
FRITZ!Box, be they analog or ISDN/DECT phones, are inter-
nal telephone calls. These calls are free of charge.
Selecting the Outgoing Number and the Type of Connection
s111r
<Phone number>
dials up this connection using the fixed line
s12r
<Phone number>
establishes a connection for this dialing pro-
cedure using the first Internet telephone
number
s12<P>restablishes an Internet telephony connec-
tion via the specified Internet telephone
number. For <P> enter the position of the In-
ternet telephone number in the List of Inter-
net Telephone Numbers.
Dialing Internal Calls with Automatic Outside Dialing
NPick up the handset. You can hear the exter-
nal dial tone immediately, since the exten-
sion is set for automatic outside dialing.
ss<Ext.> If you would like to make an internal call to
one of the extensions, dial ss, followed by
the number of the extension, for instance 1
or 2.
Dialing Internal Calls without Automatic Outside Dialing
NPick up the handset. You hear the internal di-
al tone.
<Ext.> Dial the desired extension number. for in-
stance 1 or 2.
FRITZ!Box Fon WLAN 7113 44
Group Call
Group Call
Place a group call to call all other extensions at the same
time. Your call is connected with whichever extension an-
swers first.
Picking up a Call from the Answering Machine
Use this function to pick up incoming calls on your tele-
phone that already have been taken by the answering ma-
chine.
Waiting Calls
When the “Call Waiting” feature is enabled and you are con-
ducting a call, you will be notified as soon as an external call
arrives on your your line. This call will be signaled by an
acoustic signal in the handset. You can accept the connec-
tion with the new caller within 30 seconds. If you ignore the
signal, the waiting call is rejected after 30 seconds.
For instructions on how to turn the Call Waiting function
on and off, see the section “Call Waiting” on page 38.
Group Call
NPick up the handset.
ss9 Dial the keypad sequences listed here to call all
free extensions.
Picking up a Call
NPick up the handset.
s09 Dial the sequence shown at left.
PThe call is now connected to your extension. You
are now connected to the caller.

FRITZ!Box Fon WLAN 7113 46
Three-Party Conference Call
Three-Party Conference Call
FRITZ!Box allows you to hold telephone conferences with
two other people at once. Two external and one internal
party, or two internal and one external party can conduct a
conference call with each other.
Ending Hold
OThe caller on hold hangs up. You can continue
talking on the active connection.
R1 You end the active connection by dialing the se-
quence shown at left and return to the conversa-
tion with Caller 1.
O
K
Call
P
You can also return to the call on hold by hang-
ing up the handset: this ends the currently ac-
tive connection. In this case the phone rings as
soon as you hang up. Pick up the handset again
to return to the last call that was on hold.

Three-Party Conference Call
FRITZ!Box Fon WLAN 7113 47
Conducting a Three-Party Conference Call
NPick up the handset.
MDial the external number of the first party. Talk.
RPress the Hold button.
MTo establish a second call, simply dial ss plus
the desired extension number for an internal
call, or the desired external number.
You can now conduct a second conversation
while your first call is on hold.
R3 Dial the sequence shown at left to begin a three-
party conference call.
DNow all three participants can confer together. If
either of the other two parties hangs up, your
connection with the remaining participant re-
mains active.
OYou can end the three-party call by hanging up
the handset.
R2 You can also switch from the three-party call
back to the original two-party connection. Dial
the sequence shown at left. This ends the three-
party conference. The connection that was active
last before you initiated the three-party confer-
ence is now active again. The other call is on
hold. You can alternate between the two connec-
tions by dialing the same sequence again.
FRITZ!Box Fon WLAN 7113 48
Consultation / Hold
Consultation / Hold
The Consultation/Hold feature allows you to place an ex-
isting call on hold. You then may consult with someone
else at your workplace or dial a second call. The party on
hold does not hear the second conversation. Once you
have finished the consultation, you can return to the origi-
nal connection.
Consultation / Hold
Call 1
P
You are talking to Caller 1.
RPress the Hold button. Caller 1 is now on
hold and you can consult someone else.
MTo establish a second call, simply dial
ss plus the desired extension number
for an internal call, or the desired external
number.
Call 2
P
If the call is answered, you can consult on
this line. The original caller is still on hold.
RIf the number you dialed is busy or the call
is not answered, press the Hold button
again to return to Caller 1.
R1 To switch back to Caller 1 after talking on
the second connection, dial the sequence
shown at left. Caller 1 is now active again.
If you return to Caller 1 by pressing the Hold button, the
connection to Caller 2 is not cleared down until Caller 2
hangs up.
Ending Consultation
Call 1
P
You can also return to Caller 1 by hanging up
the handset: this ends the connection to
Caller 2. In this case, your telephone rings as
soon as you hang up. Pick up the handset to
return to Caller 1 again.
OHang up the handset to end the connection.

Transferring Calls
FRITZ!Box Fon WLAN 7113 49
Transferring Calls
The “Call Transfer” function allows you to transfer a con-
nection from one of FRITZ!Box’s extension to another.
Explicit Call Transfer (ECT)
Use the “Explicit Call Transfer” function to connect two ex-
ternal parties with each other while one connection is ac-
tive and the other is on hold. Then you can end your own
connection while the other two parties continue their con-
versation.
Transferring Calls
Call 1
P
You are talking to Caller 1.
RPress the Hold button. Caller 1 is now on
hold.
ss<Ext.> To establish a connection to Caller 2, dial the
star key twice and then her or his extension
number.
Call 2
P
You can now talk with the other Caller 2.
OTo transfer the Caller 1 to Caller 2, simply
hang up the handset.
Explicit Transfer of One Active and One Held Connection
NPick up the handset.
MDial the external number of the first party. Talk.
RPress the Hold button.
MDial the number for your second external call. You
can now conduct a second conversation while your
first call is on hold.

FRITZ!Box Fon WLAN 7113 50
Explicit Call Transfer (ECT)
To clear your connection while allowing the external
parties to continue the call, connect the parties with
each other.
R4 Dial the sequence shown at left. The connection on
hold and the active connection are connected with
each other. The external parties continue the call
while you clear the connection.
OHang up the handset.
Explicit Call Transfer from a Three-party Conference Call
NPick up the handset.
MDial the external number of the first party. Talk.
RPress the Hold button.
MDial the number for your second external call. You
can now conduct a second conversation while your
first call is on hold.
R3 Dial the sequence shown at left to begin a three-par-
ty conference call.
DNow all three participants can confer together. If eit-
her of the other two parties hangs up, your connec-
tion with the remaining participant remains active.
To clear your connections while allowing the exter-
nal parties to continue the call, connect the parties
with each other.
R2 You can also switch from the three-party call back to
the original two-party connection. Dial the sequence
shown at left. This ends the three-party conference.
The connection that was active last before you initi-
ated the three-party conference is now active again.
The second external call is on hold. You can alter-
nate between the two connections by dialing the
same sequence again.
R4 Dial the sequence shown at left. The connection on
hold and the active connection are connected with
each other. The external parties continue the call
while you clear the connection.
OHang up the handset.
Explicit Transfer of One Active and One Held Connection

Room Monitoring (Baby Monitor)
FRITZ!Box Fon WLAN 7113 51
Room Monitoring (Baby Monitor)
The following key combination enables the function for
monitoring the sound level in a room. First enter the vol-
ume level (a value between 1 and 8). Enter a telephone
number. Do not hang up the handset! When the volume in
the room reaches the specified level, the number you en-
tered will be dialed. When the telephone rings and you
pick up the handset, you will be connected with the tele-
phone on which you enabled the room monitoring func-
tion.
Dial the number of the extension to listen in at an exten-
sion with room monitoring activated.
After initiating a room monitoring phone call, the PBX can-
not generate a new call until at least one minute has
lapsed.
You can disable the function by simply hanging up the
handset of the telephone at which you enabled it.
When using this feature, it is advisable to activate the
speaker phone function.
Enabling Room Monitoring
NPick up the handset or activate the speaker
phone function of your telephone.
s4
<level>
s
<number>
r
Dial the sequence shown at left. For <Level>,
enter a number between 1 (the most sensi-
tive sound level) and 8. For <Number>, enter
the number to be called. This may be the
number of another internal extension, a 9
for an internal group call, or any external
number desired.
QWait for the acknowledgement tone. The ba-
by monitoring phone function is now en-
abled.
Do not hang up the handset!

FRITZ!Box Fon WLAN 7113 52
Using Keypad Messages
Using Keypad Messages
The Keypad function allows you to control services and
features on the telephone line by entering characters and
strings on the telephone keypad.
These keyboard entries are called keypad messages. Ask
your telephone carrier for the specific keypad messages to
access ISDN features.
Entering Keypad Sequences on an Extension with Automatic
Outside Dialing
NPick up the handset.
sr<Seq> Dial the sequence shown at left. <Seq> stands for
the keypad sequence you received from your
telephone carrier.
Entering Keypad Sequences on an Extension without
Automatic Outside Dialing
NPick up the handset.
0sr<Seq> Dial the sequence shown at left. <Seq> stands for
the keypad sequence you received from your
telephone carrier.

FRITZ!Box Fon WLAN 7113 54
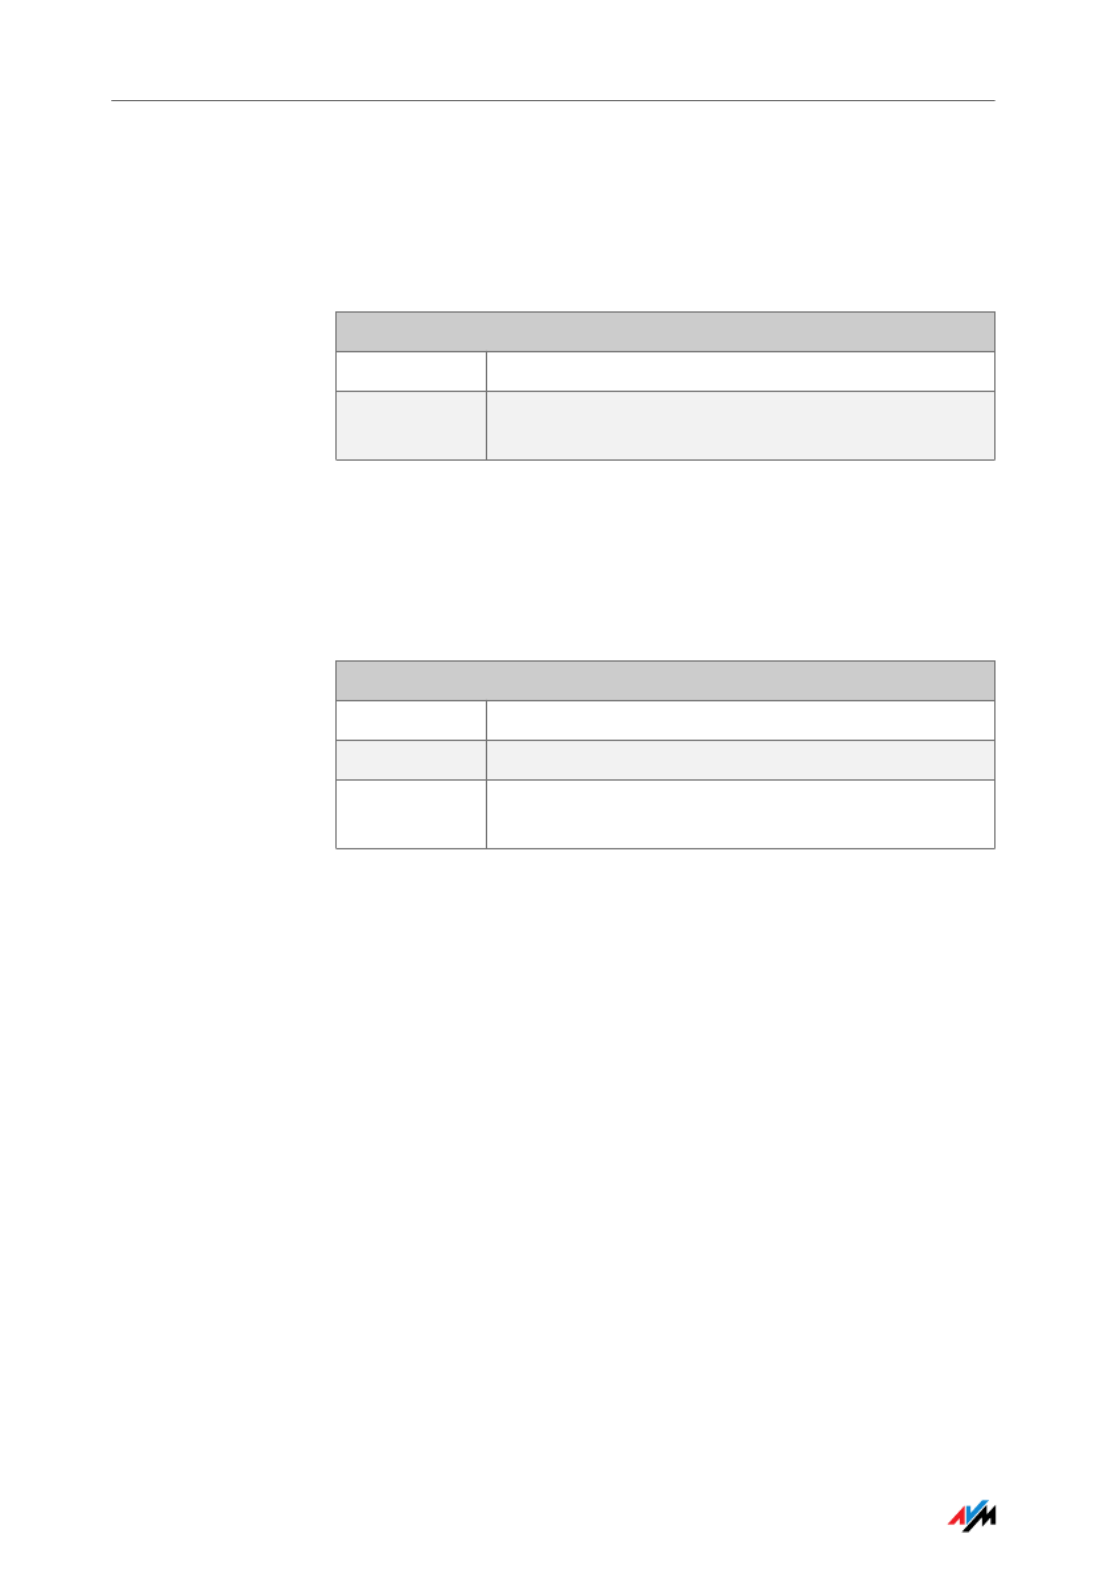
Checking the Cable Connections
Checking the Cable Connections
The user interface of the FRITZ!Box does not appear in the
window of your web browser.
The cable connections are not secure.
Make sure that all cable connections are plugged in se-
curely.
Checking Name Resolution
The user interface of the FRITZ!Box cannot be opened by
entering fritz.box.
The name resolution of the FRITZ!Box does not work.
1. In the web browser, enter the following IP address in
place of fritz.box:
192.168.178.1
2. If the user interface cannot be reached via this ad-
dress, check the settings configured for your network
adapter as described in section “Obtaining an IP Ad-
dress Automatically” from page 64.
Possible Cause
Remedy
Possible Cause
Remedy

Checking the IP Address
FRITZ!Box Fon WLAN 7113 55
Checking the IP Address
The user interface of the FRITZ!Box cannot be reached at
the address fritz.box nor at 192.168.178.1.
The IP address set on the connected computer is inappli-
cable.
Set the network adapter to DHCP so that the IP address
can be obtained via the DHCP server of the FRITZ!Box. Ad-
just the settings to those described in the section “Ob-
taining an IP Address Automatically” from page 64.
Disabling Dial-Up Connections
The user interface is not opened; a window for a dial-up
connection appears instead.
The browser must use the network connection between
the computer and FRITZ!Box when the user interface is
opened. For this the automatic establishment of a Dial-Up
Networking connection must be disabled.
You can disable the automatic attempt to establish a Dial-
Up Networking connection. The following example ex-
plains how to check the settings of Internet Explorer 6:
1. Select the “Connections” settings page under “Tools
/ Internet Options...”.
2. In the “Dial-up and Virtual Private Network settings”
section, enable the option “Never dial a connection”.
3. As a final step, click “OK”.
Possible Cause
Remedy
Possible Cause
Remedy

FRITZ!Box Fon WLAN 7113 56
Disabling Online Operation
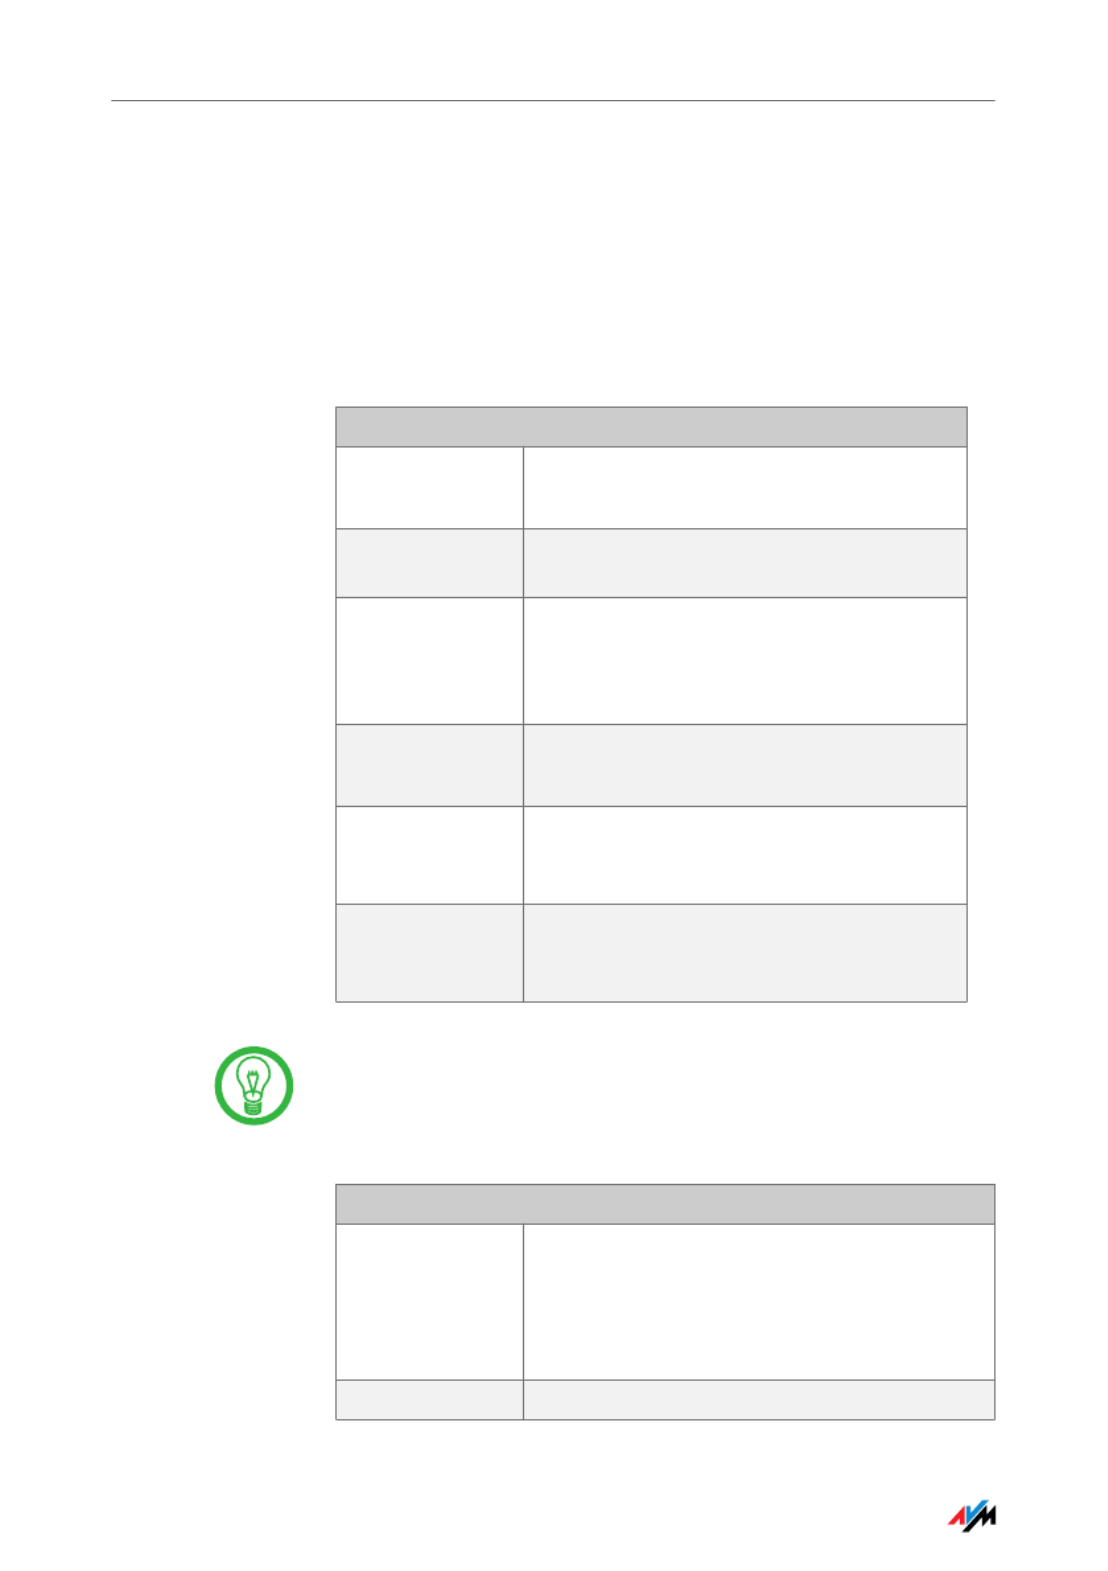
Disabling Online Operation
The user interface does not appear in the window of your
web browser.
The web browser is set for offline operation.
Configure the web browser for online operation. Using the
example of Internet Explorer 6:
1. Open the “File” menu.
2. If a checkmark is displayed in front of “Work Offline”,
click this line.
The checkmark will be removed and Internet Explorer will
switch to online operation.
Checking the Proxy Settings
The user interface does not appear in the window of your
web browser.
The proxy settings of the web browser prevent the user in-
terface from being opened.
Enter the DNS name and the IP address of the FRITZ!Box as
an exception in the proxy settings of the web browser.
1. Select the “Connections” settings page under
“Tools / Internet Options...”.
2. Click the “LAN Settings...” button in the “Local Area
Network (LAN) settings” area, and in the next win-
dow, click the “Advanced...” button in the “Proxy
server” area.
3. Under “Exceptions” enter: “fritz.box; 192.168.178.1;
169.254.1.1” and click “OK”.
Possible Cause
Remedy
Possible Cause
Remedy

Checking the CGI Settings
FRITZ!Box Fon WLAN 7113 57
Checking the CGI Settings
The user interface does not appear in the window of your
web browser.
The execution of CGI scripts is disabled in the web brows-
er.
Configure the web browser so that the execution of scripts
is allowed in the user interface. Using the example of the
Internet Explorer 6:
1. Select “Tools / Internet Options... / Security”.
2. If the “Default Level” button is not available for selec-
tion, the “Medium” security level is already config-
ured, which means that CGI scripts can be executed
in the Internet browser.
3. Proceed as follows if the “Default Level” button is
available for selection:
4. Select the “Local Intranet” icon and click the “Si-
tes...” button.
5. In the next window, click the “Advanced...” button
and enter in the “Add this Web site to the zone:”
field:
fritz.box
6. Disable the option “Require server verification
(https:) for all sites in this zone”.
Possible Cause
Remedy
FRITZ!Box Fon WLAN 7113 58
Checking the Security Software
Checking the Security Software
The user interface cannot be displayed in the web
browser.
Security software is blocking access to the user interface.
Security software like firewalls can prevent access to the
user interface of the FRITZ!Box. Configure exceptions for
the FRITZ!Box in all of the enabled security software.
Opening the User Interface of the FRITZ!Box
The FRITZ!Box is equipped with a fixed IP address that
cannot be changed. FRITZ!Box always can be reached at
this IP address. This fixed IP address is:
Proceed as follows to open the FRITZ!Box user interface
using this IP address:
1. Connect the FRITZ!Box to the computer using the net-
work cable (yellow). See the section “Connecting
Computers to the LAN Port” from page 15 for more in-
formation.
2. Make sure that the computer obtains its IP address
automatically. You can check this setting in the com-
puter’s IP settings (see section “Obtaining an IP Ad-
dress Automatically” from page 64).
3. Restart your computer.
Possible Cause
Remedy
If you would like to exit security software to test access to
the FRITZ!Box, remove the DSL cable first! After testing,
first start the security software before reinserting the DSL
cable and connecting to the Internet!
Fixed IP Address 169.254.1.1

The WLAN Adapter Cannot Find FRITZ!Box
FRITZ!Box Fon WLAN 7113 59
4. Start your Internet browser and enter FRITZ!Box's
fixed IP address:
169.254.1.1
The FRITZ!Box user interface opens.
8.2 The WLAN Adapter Cannot Find FRITZ!Box
If the “FRITZ!Box Fon WLAN 7113” radio network is not
found by the WLAN adapter of a computer, work through
the following steps to find the source of the error and re-
solve it.
Enabling the WLAN Adapter
The WLAN adapter cannot find a wireless network.
The WLAN adapter is not ready for operation.
Make sure that the WLAN adapter is ready for operation.
Some of the WLAN adapters installed in notebooks must
be activated by flipping a switch on the notebook.
Once you have reached the FRITZ!Box user interface
again, you should check the FRITZ!Box settings and cor-
rect them if necessary.
Possible Cause
Remedy
For questions on the WLAN adapter of your computer,
please contact the manufacturer.

FRITZ!Box Fon WLAN 7113 60
Enabling WLAN
Enabling WLAN
The wireless network of the FRITZ!Box is not found by the
WLAN adapter.
WLAN is not enabled in the FRITZ!Box. If the “WLAN” LED
on the FRITZ!Box is not lit up or is flashing, this means that
WLAN is not enabled.
Press the WLAN switch on the FRITZ!Box. The “WLAN” LED
begins flashing and then lights constantly. This means
that the WLAN function is enabled.
Announcing the Name of the Radio Network
The WLAN Adapter cannot find the wireless network of the
FRITZ!Box.
The name of the wireless network of the FRITZ!Box is con-
cealed.
Enable the setting “Announce name of the radio network
(SSID)” is enabled in the WLAN settings of the FRITZ!Box.
1. Connect the FRITZ!Box to a computer using a network
cable. Proceed as described in the section “Connect-
ing Computers to the LAN Port” on page 15.
2. Start a web browser.
3. Enter fritz.box in the address field.
4. Select the “Settings” menu.
5. Select the “Advanced Settings / WLAN / Radio Set-
tings” menu and enable the setting “Announce name
of the radio network (SSID)”.
Possible Cause
Remedy
Possible Cause
Remedy

WLAN Connection Is Not Established
FRITZ!Box Fon WLAN 7113 61
6. Click the “Apply” button.
7. Remove the network cable and try again to establish
a connection via WLAN.
8.3 WLAN Connection Is Not Established
Comparing the Security Settings for WLAN
Make sure that the WLAN security settings registered in
the FRITZ!Box agree with the security settings of the WLAN
adapter.
Here is how to view the WLAN security settings of the
FRITZ!Box and print them out.
1. Connect the FRITZ!Box to a computer using a network
cable. Proceed as described in the section “Connect-
ing Computers to the LAN Port” from page 15.
2. Start a web browser.
3. Enter fritz.box in the address field.
4. Select the “Settings” menu.
5. Select the “Advanced Settings / WLAN / Security”
menu.
6. Click the “Apply” button.
A window is displayed with the WLAN security
settings. Print out this page by clicking the “Print
Page” button at the upper left of the page.
7. Remove the network cable and check the configura-
tion of the WLAN adapter in the printout. Try again to
establish a connection.

FRITZ!Box Fon WLAN 7113 62
Testing the WLAN Connection Without Security Settings
Testing the WLAN Connection Without Security
Settings
Disable the WLAN security settings to test whether a WLAN
connection between the FRITZ!Box and the WLAN adapter
is possible at all.
1. Connect the FRITZ!Box to a computer using a network
cable. Proceed as described in the section “Connect-
ing Computers to the LAN Port” from page 15.
2. Open the user interface in a web browser. Proceed as
described in the section “Opening the User Inter-
face” on page 23.
3. In the “Advanced Settings / WLAN / Security” menu
and select “Enable Access without Encryption”. As a
final step, click “Apply”.
4. Remove the network cable and try again to establish
a connection.
If the attempt to connect to the WLAN using the non-en-
crypted connection is not successful either, check the in-
stallation of the WLAN adapter and contact the manufac-
turer of the WLAN adapter if necessary.
Enable WLAN encryption again after completing the tests.
Follow the steps listed above and then enable the kind of
encryption that was previously configured.
This non-secured condition should be used only for
testing, to find out whether a WLAN connection is
possible at all.

Installing the Patch for WPA2 with Microsoft WLAN Service
FRITZ!Box Fon WLAN 7113 63
Installing the Patch for WPA2 with Microsoft WLAN
Service
The WLAN connection to FRITZ!Box cannot be established
using the Microsoft WLAN Service (WZC) in Windows XP
with Service Pack 2.
The required Microsoft patch for WPA2 (IEEE 802.11i) may
not be not installed.
Support for WPA2 in Microsoft WLAN service was not avail-
able until the current patch for Windows XP with Service
Pack 2. Install the current patch from Microsoft:
support.microsoft.com/kb/917021/EN-US
Alternatively, you can install Service Pack 3 instead.
Ruling Out Interference Cause by Other Wireless
Networks
If there are other devices in the immediate vicinity of your
FRITZ!Box that use the 2.4-GHz band, simultaneous use of
frequencies can result in mutual interference (for exam-
ple, fluctuations or interrupted connections). Disruptions
can also be caused by other WLAN access points, or by
Bluetooth devices, garage door openers or wireless AV
bridges. In this case, please test a different radio channel
for your FRITZ!Box.
1. Connect the FRITZ!Box to a computer using a network
cable. Proceed as described in the section “Connect-
ing Computers to the LAN Port” from page 15.
2. Start a web browser.
3. Enter fritz.box in the address field.
4. Select the “Settings” menu.
5. Open the “Advanced Settings / WLAN / Radio Set-
tings” menu.
Possible Cause
Remedy

FRITZ!Box Fon WLAN 7113 64
Obtaining an IP Address Automatically
6. Select a different radio channel from the “Select ra-
dio channel” list.
7. Click the “Apply” button.
8. Remove the network cable and check whether inter-
ference continues to occur.
8.4 Obtaining an IP Address Automatically
The FRITZ!Box is equipped with its own DHCP server. This
means that the connected computers obtain their IP ad-
dresses from the FRITZ!Box. The connected computers
must be configured such that they can receive their IP ad-
dresses automatically. The steps for checking and adjust-
ing this option differ among the operating systems. See
the relevant section for your operating system.
Obtaining an IP Address Automatically in
Windows Vista
1. Click the “Start” button in the task bar and select
“Control Panel / Network and Sharing Center”.
2. From the “Tasks”, select “Manage network connec-
tions”.
3. In the “LAN or High-Speed Internet” area, select the
LAN connection between your computer and the
FRITZ!Box. Click the right mouse button and select
“Properties”.
4. If the “User Account Control” window is displayed,
click “Continue” in this window.
5. Under “This connection uses the following items”,
select the “Internet Protocol Version 4 (TCP/IPv4)”
entry and click “Properties”.
6. Enable the options “Obtain an IP address automatical-
ly” and “Obtain DNS server address automatically”.
If FRITZ!Box is operated in a network, no other DHCP serv-
er may be activated in this network. If you need to operate
a DHCP server, please disable the DHCP feature in the
“Advanced System Settings”.

Obtaining an IP Address Automatically in Windows XP
FRITZ!Box Fon WLAN 7113 65
Properties of the Internet protocol (TCP/IP)
7. Confirm your selection by clicking “OK”.
If necessary, repeat steps 5 through 7 for the
“Internet Protocol Version 6 (TCP/IPv6)” as well.
The computer now receives an IP address from the
FRITZ!Box.
Obtaining an IP Address Automatically in
Windows XP
1. Go to “start / Control Panel / Network and Internet
Connections / Network Connections” and double-
click the LAN connection icon of the network adapter
connected to the FRITZ!Box.
2. Click the “Properties” button.
3. Select “Internet Protocol (TCP/IP)” in the list of items
used in this network connection and click “Properties”.
4. Enable the options “Obtain an IP address automatical-
ly” and “Obtain DNS server address automatically”.

FRITZ!Box Fon WLAN 7113 66
Obtaining an IP Address Automatically in Windows 2000
Properties of the Internet protocol (TCP/IP)
5. Confirm your selection by clicking “OK”.
The computer now receives an IP address from the
FRITZ!Box.
Obtaining an IP Address Automatically in
Windows 2000
1. Select “Start / Settings / Control Panel / Network and
Dial-up Connections”.
2. Double-click to select the Local Area Network con-
nection of the network adapter bound to the
FRITZ!Box.
3. Click the “Properties” button.
4. Double-click to select “Internet Protocol (TCP/IP)” in
the list of network components.
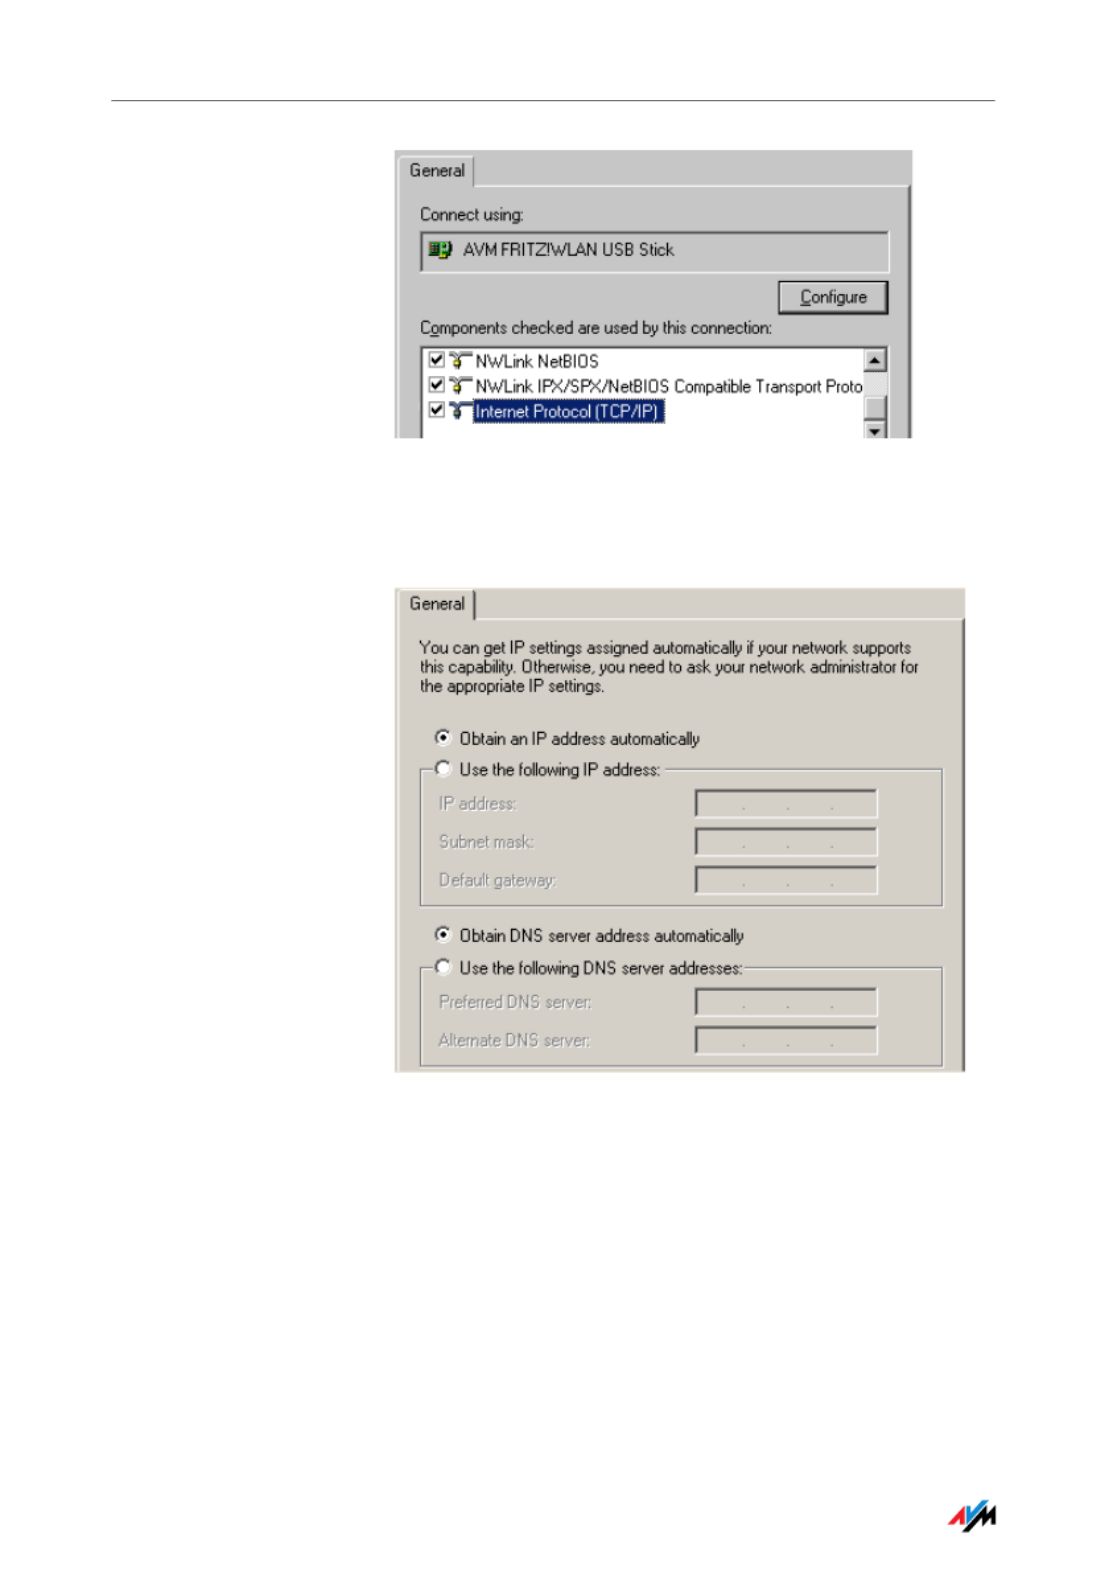
Obtaining an IP Address Automatically in Windows 2000
FRITZ!Box Fon WLAN 7113 67
Properties of the LAN connection of a network adapter
5. Enable the options “Obtain an IP address automatical-
ly” and “Obtain DNS server address automatically”.
Properties of the Internet protocol (TCP/IP)
6. Confirm your selection by clicking “OK”.
The computer now receives an IP address from the
FRITZ!Box.

Uninstalling the FRITZ!Box
FRITZ!Box Fon WLAN 7113 69
9 Uninstalling the FRITZ!Box
Removing Program Entries
This chapter describes how to remove the FRITZ!Box from the computer
and uninstall the corresponding software.
Disconnecting the FRITZ!Box from the Computer
LAN Port If the computer is connected to one of the LAN ports on
the FRITZ!Box, simply remove the network cable.
If the computer is connected to the FRITZ!Box via a net-
work hub or switch, remove the network cable between
the FRITZ!Box and the network hub or switch.
WLAN If the computer is connected to the FRITZ!Box wirelessly
via WLAN, deactivate the WLAN connection to the
FRITZ!Box in the software of the WLAN adapter or the
WLAN module.

FRITZ!Box Fon WLAN 7113 70
Product Details
II PRODUCT DETAILS AND USEFUL INFORMATION
1 Product Details
FRITZ!Box Fon WLAN 7113
This chapter provides you with product details on FRITZ!Box Fon
WLAN 7113. You receive information on the LEDs, the audible signals,
cables and adapters, technical data and further details.
1.1 Cable
See the information in the following section on the indi-
vidual cables and sockets on the FRITZ!Box Fon
WLAN 7113.
DSL/Telephone Cable
The DSL/telephone cable is a special combined cable de-
veloped by AVM to connect the FRITZ!Box Fon WLAN 7113
to the DSL splitter and the ISDN NT or analog telephone
line.
If you need a longer cable, you can extend one or multiple
ends of the combined cable using RJ45 double couplings.
Which ends of the cable you extend depends on the spa-
tial conditions at your location.
You will need the following components to extend the
length of one or more ends of your DSL/telephone cable:
1 standard network cable
1 standard RJ45 CAT5 double coupling
Both components are available from specialized vendors.
If you need to extend the cable by splicing a standard net-
work cable, AVM recommends a final length of no more
than 10 meters.
Remember that the quality of the line may be decrease as
the distance from the central switching station increases.

Network Cable
FRITZ!Box Fon WLAN 7113 71
Network Cable
The FRITZ!Box Fon WLAN 7113 network cable is a standard
Ethernet cable. If you need a replacement cable, a longer
cable or an extension, use a standard STP-type (Shielded
Twisted Pair, 1:1) CAT5 Ethernet cable. To extend the cable
you will also need a standard CAT5 double coupling link to
RJ45. You can use either straight cable or cross-link cable.
All components are available from specialized vendors.
AVM recommends using a network cable no more than
100 meters long.
Additional network cable is required if you would like to
use the FRITZ!Box Fon WLAN 7113 network port.

FRITZ!Box Fon WLAN 7113 72
LEDs
1.2 LEDs
Five LEDs are built into the top of the FRITZ!Box Fon
WLAN 7113, which flash or light up to display various con-
nection statuses.
1.3 WLAN Button
The FRITZ!Box is equipped with a WLAN switch on its rear
panel.
The WLAN button can be used to enable and disable
WLAN.
LED Status Meaning
Power/DSL lights up FRITZ!Box on standby
the device has electrical power and the DSL line is
ready for operation
flashes the device has electrical power
the connection to DSL is being established or has
been interrupted
Internet lights up a telephone connection to the Internet is active
flashes there are messages in your mailbox (this function must
be supported by your telephony carrier)
Fixed Line lights up a telephone connection via the telephone line is active
flashes there are messages in your mailbox (this function must
be supported by your telephony carrier)
WLAN lights up the WLAN function is enabled
flashes the WLAN function is being enabled or disabled
INFO lights up a telephone connection between two Internet
telephony subscribers is active; the call is free of
charge (this function must be supported by your
Internet telephony provider)
signals an event that can be configured freely by the
user
flashes updating the firmware
signals an event that can be configured freely by the
user

Technical Specifications
FRITZ!Box Fon WLAN 7113 73
1.4 Technical Specifications
Ports and Interfaces
DSL/Telephone port
–DSL modem in accordance with the standard
ITU G.992.1 Annex A, ITU G.992.3 Annex A
(ADSL2), ITU G.992.5 Annex A (ADSL2+),
ITU G.994.1 (G.hs)
–telephone port for connecting to the analog
network
two a/b ports for connecting two extensions via RJ11
sockets
one LAN port over RJ45 socket(standard Ethernet,
10/100 base-T)
WLAN
WLAN access point with support for radio networks in
accordance with IEEE 802.11b (11 Mbit/s) and
IEEE 802.11g (54 Mbit/s). The IEEE 802.11g++ stan-
dard is also supported and can be used when a com-
patible WLAN adapter is installed.
Router Function
DSL router
DHCP server
Firewall with IP masquerading/NAT
User Interface and Display
Settings and status messages via a web browser on a
connected computer
Five LEDs indicate the condition of the device

FRITZ!Box Fon WLAN 7113 74
Physical Specifications
Physical Specifications
Dimensions (w x h x d) approx. 123 x 125 x 31 mm
Supply voltage: 230 V / 50 Hz
Maximum power consumption: 8.5 W
Average power consumption: 5-7 W
Firmware can be updated
Conform to CE standards
Ambient conditions
–Operating temperature: 0° C – +40° C
–Storage temperature: -20° C – +70° C
–relative humidity (operation): 10 % – 90 %
–relative humidity (idle): 5 % – 95 %

Declaration of CE Conformity
FRITZ!Box Fon WLAN 7113 75
1.5 Declaration of CE Conformity
The
manufacturer
AVM GmbH
Alt-Moabit 95
D-10559 Berlin
herewith declares that the product
FRITZ!Box Fon WLAN 7113
Type: ADSL-WLAN Router
complies with the following directives:
1999/5/EC R&TTE Directive: Radio Equipment and
Telecommunications Terminal Equipment
2004/108/EC EMC Directive: Electromagnetic Compatibility
73/23/EEC Low Voltage Directive:Electrical equipment designed
for use within certain voltage limits
2005/32/EC EU directive: Ecodesign Requirements for Energy-using
Products
The following norms were consulted to assess conformity:
- EN 60950-1:2006
- CTR 3/1998.06.17
- ITU-T G.992.1
- ITU-T G.992.2
- ITU-T G.992.3
- ITU-T G.992.4
- ITU-T G.992.5
- ITU-T G.994.1
- EN 301 489-1 V1.8.1 (2008)
- EN 301 489-17 V1.3.2 (2008)
- EN 55024/9.98 + A1/10.01 +
A2/01.03
- EN 300 328 V1.6.1 (11.2004)
- ETSI ETR 328 (1996-11)
- ETSI TS 101 388 V1.4.1 (2007-08)
The CE symbol confirms that this product conforms with the above
mentioned norms and regulations.
Berlin, 2009-03-24 Peter Faxel, Technical Director
Indication of Countries
The radio technology of this device is designed for use in all countries
of the European Union and in Switzerland, Norway and Iceland. In
France only indoor operation is permitted.

FRITZ!Box Fon WLAN 7113 76
Disposal
1.6 Disposal
Electrical and electronic equipment must be disposed of
separately from household waste.
Labeling of electrical and electronic scrap
In accordance with European regulations, the FRITZ!Box
Fon WLAN 7113, as well as all devices and electronic com-
ponents contained in the FRITZ!Box Fon WLAN 7113 pack-
age may not be disposed with household waste. Please
bring these to your local collection points for disposal.

More about WLAN
FRITZ!Box Fon WLAN 7113 77
2 More about WLAN
WLAN (Wireless Local Area Network) is a radio technology that allows
networks and access to the Internet to be provided without cable con-
nections. This allows multiple users to share one wireless Internet con-
nection.
2.1 Standards
The WLAN standards IEEE 802.11a, IEEE 802.11b,
IEEE 802.11g and IEEE 802.11n (on the basis of the pre-
liminary draft 2.0 of the standard) and IEEE 802.11i were
developed by the Institute of Electrical and Electronic En-
gineers (IEEE).
The standards IEEE 802.11a, IEEE 802.11b, IEEE 802.11g
and IEEE 802.11n define the transmission rate within a
wireless LAN. The IEEE 802.11i standard is a security stan-
dard.
Standards for the Throughput Rate
Data Throughput The FRITZ!Box supports your choice of the standards
IEEE 802.11b, IEEE 802.11g and the proprietary standard
IEEE 802.11g++. WLAN adapters based on one or more of
the standards listed can be used for WLAN connections
with the FRITZ!Box.
If you use a FRITZ!WLAN USB Stick from AVM as a WLAN
adapter with the FRITZ!Box, you can also establish WLAN
connections using the IEEE 802.11g++ standard.
The throughputs listed differentiate between gross and
net transmission rates. The net speed describes the trans-
mission rate of the user data.
Connection
type
Gross data throughput
up to
Net data throughput up
to
802.11b 11 Mbit/s 5 Mbit/s
802.11g 54 Mbit/s 25 Mbit/s
802.11g++ 125 Mbit/s 35 Mbit/s

FRITZ!Box Fon WLAN 7113 78
The Standard for Security
Range The range within a WLAN is highly dependent on the fol-
lowing factors:
the WLAN adapter used
the structural conditions
the amount of radio traffic on the same frequency
band. Other WLAN networks, microwave ovens or
Bluetooth transmitters (mobile telephones) may be
active.
IEEE 802.11b With a maximum throughput rate of 11 Mbit/s, this is the
oldest standard for radio networks. Older WLAN adapters
of the first generation can communicate with the
FRITZ!Box using 802.11b. However, if the WLAN adapter
supports newer standards such as 802.11g, the latest
standard should be used.
IEEE 802.11g This is currently the most common WLAN standard. It com-
municates with a maximum of 54 Mbit/s gross in the 2.4-
GHz frequency range (ISM) and guarantees broad compat-
ibility with many WLAN devices.
IEEE 802.11g++ The FRITZ!Box also supports the high-speed mode
802.11g++. The transmission rate within a wireless LAN
can be increased with this extension to as high as
125 Mbit/s gross and 35 Mbit/s net when the remote site
is connected to a WLAN access point compatible with this
mode (an FRITZ!WLAN USB Stick AVM, for example).
The Standard for Security
IEEE 802.11i The WPA2 security mechanism is defined in the
IEEE 802.11i standard. WPA2 is an extension of the famil-
iar security mechanism WPA (Wi-Fi Protected Access).
The main feature of the extension of WPA to WPA2 is the
AES-CCMP encryption process.

Security
FRITZ!Box Fon WLAN 7113 79
FRITZ!Box supports the AES encryption procedure as part of
the WPA2 mechanism, and the TKIP encryption procedure as
part of the WPA mechanism. This means that the FRITZ!Box
can be used in combination with any WLAN adapters that al-
so support WPA2 with AES or WPA with TKIP.
2.2 Security
Security is of utmost importance within radio networks.
Therefore it is important that no unauthorized users can
register in a WLAN to use its Internet access or shared net-
work resources.
FRITZ!Box includes settings on various levels that contrib-
ute to the security of your WLAN and thus to the security of
your computers.
Encryption
The most important security setting is encryption. The
FRITZ!Box supports the security mechanisms WEP (Wired
Equivalent Privacy), WPA (Wi-Fi Protected Access) and
WPA2 as follows:
Mechanism Encryption
WPA TKIP (Temporary Key Integrity Protocol)
WPA2 TKIP
AES-CCMP
based on the extremely secure AES
(Advanced Encryption Standard)
procedure. CCM (Counter with CBC-MAC)
defines how the AES procedure is applied
to WLAN packets.
Radio signals can also be received outside of office or res-
idential spaces and abused for criminal purposes.

FRITZ!Box Fon WLAN 7113 80
Encryption
As part of the WEP mechanism a static key is deter-
mined to serve for the encryption of the user data.
Enter the key in the WLAN Security settings of the
FRITZ!Box. All of the WLAN adapters in your wireless
network must also use this key.
The WPA and WPA2 mechanisms provide for authen-
tication while the connection is being established.
For this a WPA password must be defined.
When WPA is selected, the TKIP encryption method is
used to encrypt the user data. In WPA2 the AES-CCMP
encryption method is used.
The encryption method you configure here must also
be supported by your WLAN adapter.
The user data are encrypted using an automatically
generated key. This key is regenerated at regular in-
tervals.
The WPA password used may be 8 to 63 characters in
length. For increased security, however, the pass-
word should be at least 20 characters long. Use nu-
merals, letters and special characters and combine
capitals and lower-case letters.
Default Setting In the FRITZ!Box a WPA encryption with the TKIP encryption
method is preconfigured.
Recommendation If your WLAN adapter supports an encryption method that
is more secure than the one preconfigured in the
FRITZ!Box, you should select the more secure encryption
method in your FRITZ!Box.
To configure the best security settings possible with
FRITZ!Box and your WLAN adapter, please note the
following recommendations:
It is advisable to change the preconfigured WLAN key as
soon as possible. Changes to the settings can be config-
ured on the FRITZ!Box user interface.

FRITZ!Box Fon WLAN 7113 82
Frequency Ranges
2.3 Frequency Ranges
WLAN uses the frequency range around 2.4 GHz in the ISM
band or, alternatively, the frequency range at 5 GHz.
You can use both frequency ranges with the FRITZ!Box.
2.4-GHz frequency
Band
In the 2.4-GHz frequency band WLAN works in the same
range as Bluetooth, microwave equipment and various
other devices like radio-controlled toys, garage-door
openers and video bridges. This means that interference
may occur within WLANs operated in the vicinity of such
devices. Generallythis has adverse effects on the trans-
mission rate, including aborted connections.
In the 2.4-GHz frequency range the European regulation
authorities have designated 13 channels for WLAN. One
channel has a bandwidth of 20 MHz.
A channel can have a bandwidth of 20 MHz (throughput
up to 130 Mbit/s) or 40 MHz (throughput of up to
300 Mbit/s).
Channels located directly next to each other in the 2.4-
GHz band may overlap and result in mutual interference.
For instance, if several WLANs are operated close to each
other in the 2.4-GHz frequency range with a bandwidth of
20 MHz, a distance of at least five channels should be left
empty between each two channels used. This means that
if channel 1 is selected for one WLAN, the channels 6
through 13 can be selected for a second WLAN. This main-
tains the minimum distance between channels.
WLAN Autochannel With the WLAN Autochannel function, the FRITZ!Box auto-
matically searches for the channel subject to the least in-
terference. Should problems with interference persist de-
spite this function, try to identify the source of interfer-
ence and switch it off manually.
Additional tips on interference in the WLAN radio network
are presented in the section “Ruling Out Interference
Cause by Other Wireless Networks” from page 63.
Product specificaties
| Merk: | AVM |
| Categorie: | Router |
| Model: | FRITZ!Box Fon WLAN 7113 |
| Kleur van het product: | Rood |
| Gewicht: | 100 g |
| Stemcodecs: | G.711 |
| Ethernet LAN: | Ja |
| Snelstartgids: | Ja |
| Inclusief AC-adapter: | Ja |
| Aantal Ethernet LAN (RJ-45)-poorten: | 1 |
| Aansluiting voor netstroomadapter: | Ja |
| Plug and play: | Ja |
| RJ-11 ports kwantiteit: | 1 |
| Netwerkstandaard: | IEEE 802.11b, IEEE 802.11g, IEEE 802.3 |
| Ondersteunde beveiligingsalgoritmen: | 256-bit WEP, WPA-AES, WPA2 |
| Upgraden van firmware mogelijk: | Ja |
| Web-gebaseerd management: | Ja |
| Ondersteunde WLAN data-overdrachtsnelheden: | 125 Mbit/s |
| Reset button: | Nee |
| Frequentiebereik: | 2.4 GHz |
| Netwerkfuncties: | Ethernet, Fast Ethernet |
| xDSL-verbinding: | Ja |
| MAC adres filtering: | Ja |
| Filtratie: | Ja |
| Firewall: | Ja |
| DHCP server: | Ja |
| Quality of Service (QoS): | Ja |
| DHCP client: | Ja |
| Power over Ethernet (PoE): | Nee |
| Max. overdrachtssnelheid: | 0.1 Gbit/s |
| Afmetingen (B x D x H): | 123 x 125 x 31 mm |
| DMZ support: | Ja |
| Full duplex: | Ja |
| VoIP protocollen: | SIP |
| Beheerprotocollen: | TR069 |
| Stroomverbruik (typisch): | 6 W |
| DSL-specificatie: | ADSL, ADSL2+ |
| System event log: | Ja |
| ISDN-aansluiting: | Nee |
| ADSL: | Ja |
Heb je hulp nodig?
Als je hulp nodig hebt met AVM FRITZ!Box Fon WLAN 7113 stel dan hieronder een vraag en andere gebruikers zullen je antwoorden
Handleiding Router AVM

9 December 2024
6 December 2024
27 Augustus 2023
6 Augustus 2023
6 Augustus 2023
6 Augustus 2023
6 Augustus 2023
6 Augustus 2023
6 Augustus 2023
AVM fritz box fon wlan 7170 1 1 for germany only Handleiding
6 Augustus 2023Handleiding Router
- Router Bosch
- Router HP
- Router Samsung
- Router Xiaomi
- Router Huawei
- Router Asus
- Router AEG
- Router DeWalt
- Router Motorola
- Router Medion
- Router Nokia
- Router Siemens
- Router Topcom
- Router UPC
- Router VTech
- Router Acer
- Router Actiontec
- Router Airlive
- Router Alcatel
- Router Alfa
- Router Allied Telesis
- Router Allnet
- Router Anker
- Router Apple
- Router Arcadyan
- Router Arris
- Router Barco
- Router Beafon
- Router Belkin
- Router BenQ
- Router Billion
- Router BT
- Router Buffalo
- Router D-Link
- Router Davolink
- Router Dell
- Router Devolo
- Router Digi
- Router Digiconnect
- Router Digitus
- Router Draytek
- Router Edimax
- Router Einhell
- Router Eminent
- Router Engenius
- Router Envivo
- Router Ezviz
- Router Festool
- Router Foscam
- Router Gembird
- Router Gigabyte
- Router Google
- Router Gude
- Router Hama
- Router Hercules
- Router Hikoki
- Router Hikvision
- Router Hitachi
- Router Holzmann
- Router ICIDU
- Router Kathrein
- Router Kogan
- Router Konig
- Router KPN
- Router Kyocera
- Router Lancom
- Router Leoxsys
- Router LevelOne
- Router Linksys
- Router Logilink
- Router Makita
- Router Manhattan
- Router Media-tech
- Router Mercku
- Router Metabo
- Router Mikrotik
- Router Milwaukee
- Router MSI
- Router Nec
- Router Nest
- Router Netgear
- Router Netis
- Router Patton
- Router PENTAGRAM
- Router Phicomm
- Router Powerplus
- Router Proximus
- Router QNAP
- Router Razer
- Router Renkforce
- Router Roland
- Router Sagem
- Router Sagemcom
- Router Schneider
- Router Sigma
- Router Silverline
- Router Sitecom
- Router Skil
- Router SMC
- Router Sonos
- Router Strong
- Router Sweex
- Router Synology
- Router T-com
- Router T-Mobile
- Router TCL
- Router Technicolor
- Router Tele 2
- Router Telstra
- Router Teltonika
- Router Tenda
- Router Thomson
- Router Thrustmaster
- Router Toolcraft
- Router TP Link
- Router Trendnet
- Router Trust
- Router Ubee
- Router United Telecom
- Router Verizon
- Router Vivanco
- Router Vodafone
- Router Western Digital
- Router Wisetiger
- Router Zebra
- Router Zolid
- Router Zoom
- Router ZTE
- Router ZyXEL
- Router Jung
- Router On Networks
- Router Clas Ohlson
- Router Black And Decker
- Router Rosewill
- Router Peak
- Router Ubiquiti Networks
- Router Conceptronic
- Router Cotech
- Router Atlona
- Router Hamlet
- Router Porter-Cable
- Router Techly
- Router SIIG
- Router 7inova
- Router AT&T
- Router Evolution
- Router Nilox
- Router Approx
- Router Milan
- Router Cisco
- Router Gefen
- Router 3Com
- Router Amped Wireless
- Router Comtrend
- Router CradlePoint
- Router Dovado
- Router Juniper
- Router Planet
- Router Intellinet
- Router Predator
- Router I-Tec
- Router NetComm
- Router Lindy
- Router IOGEAR
- Router Black Box
- Router IFM
- Router Totolink
- Router AJA
- Router Dahua Technology
- Router Mercusys
- Router Aruba
- Router Kasda
- Router Marshall Electronics
- Router Blackmagic Design
- Router ATen
- Router RGBlink
- Router RAVPower
- Router Hawking Technologies
- Router Kopul
- Router Nexxt
- Router Kraun
- Router LTS
- Router StarTech.com
- Router SPL
- Router Advantech
- Router Moxa
- Router Smart-AVI
- Router Eero
- Router Xantech
- Router Kramer
- Router KanexPro
- Router Intelix
- Router Blustream
- Router ModeCom
- Router Vimar
- Router Ocean Matrix
- Router Sixnet
- Router AVPro Edge
- Router Cudy
- Router F-Secure
- Router Digicom
- Router Sabrent
- Router AVMATRIX
- Router Readynet
- Router OneAccess
- Router Accelerated
- Router Nexaira
- Router FSR
- Router Alfatron
- Router Key Digital
- Router Cambium Networks
- Router Avenview
- Router BZBGear
- Router WyreStorm
- Router Rocstor
- Router Ruckus Wireless
- Router Mach Power
- Router MuxLab
- Router StarIink
- Router EXSYS
- Router Premiertek
- Router Bea-fon
- Router GL.iNet
- Router A-NeuVideo
- Router Shinybow
- Router Edgewater
- Router Atlantis Land
- Router Lantronix
- Router Lumantek
- Router Keenetic
- Router Starlink
- Router Keewifi
- Router Milesight
- Router PulseAudio
- Router Comprehensive
- Router Digitalinx
- Router Luxul
- Router DVDO
- Router Silentwind
- Router Keezel
- Router VigilLink
- Router Digital Forecast
Nieuwste handleidingen voor Router
25 Februari 2025
20 Februari 2025
20 Februari 2025
20 Februari 2025
20 Februari 2025

20 Februari 2025

19 Februari 2025
12 Februari 2025
12 Februari 2025
10 Februari 2025